
Subscribe to Our Youtube Channel
Related Manuals for Everlasting MULTILAB


Summary of Contents for Everlasting MULTILAB
- Page 1 Manuale d’uso e manutenzione Use and maintenance manual ARMADIO REFRIGERATO REFRIGERATED CABINET MULTILAB Rev.6-20 Matricola / Serial number...
- Page 2 CE e confrontarla con la tabella di seguito riportata: Serie Temperatura MULTILAB +18°C / -25°C L’armadio frigorifero è conforme alle direttive Europee come riportato in dettaglio nell’allegato “Dichiarazione CE di conformità”...
- Page 3 ITALIANO Di seguito sono elencate le principali norme di sicurezza generali: - Non utilizzare o inserire apparecchi elettrici all’interno dei comparti refrigerati se non del tipo consigliato dal produttore - Non toccare l’armadio frigorifero avendo mani o piedi umidi o bagnati - Non usare l’armadio frigorifero a piedi nudi - Non inserire cacciaviti od altro tra le protezioni o le parti in movimento - Non tirare il cavo di alimentazione per scollegare l’armadio frigorifero dalla rete di alimentazione...
-
Page 4: Capitolo 2 Pulizia Del Frigorifero
ITALIANO CAPITOLO 2 PULIZIA DEL FRIGORIFERO Poiché nell’armadio frigorifero vanno conservati dei prodotti alimentari è necessaria l’operazione di pulizia ai fini dell’igiene e della tutela della salute. La pulizia dell’armadio frigorifero è già stata effettuata in fabbrica. Si suggerisce tuttavia di effettuare un ulteriore lavaggio delle parti interne prima dell’uso, assicurandosi che il cavo di alimentazione sia scollegato. -
Page 5: Capitolo 4 Manutenzione Preventiva
ITALIANO CAPITOLO 3 VERIFICHE PERIODICHE DA ESEGUIRE Di seguito vengono elencati i punti o i gruppi dell’armadio frigorifero che necessitano di verifiche periodiche: - integrità ed efficienza delle guarnizioni delle porte - integrità delle griglie a contatto con gli alimenti - integrità... - Page 6 ITALIANO CAPITOLO 6 DIAGNOSTICA Nel caso si verificassero malfunzionamenti o anomalie, verificare la tabella sotto riportata prima di sollecitare l’intervento di un tecnico. DESCRIZIONE GUASTO POSSIBILI CAUSE RIMEDIO l’armadio frigorifero non si accende manca tensione elettrica verificare spina, presa, fusibili, linea altro contattare assistenza tecnica il gruppo frigorifero non parte...
- Page 7 ITALIANO Di seguito vengono elencate le misure adottate per la protezione contro altri rischi: - energia elettrica: L’armadio frigorifero è stato progettato, costruito ed equipaggiato in modo da prevenire i rischi elettrici, nel rispetto della normativa specifica vigente - rumore: L’armadio frigorifero è stato progettato e costruito in modo tale che i rischi dovuti all’emissione di rumore siano ridotti al livello minimo 8.1 dispositivi di sicurezza adottati E’...
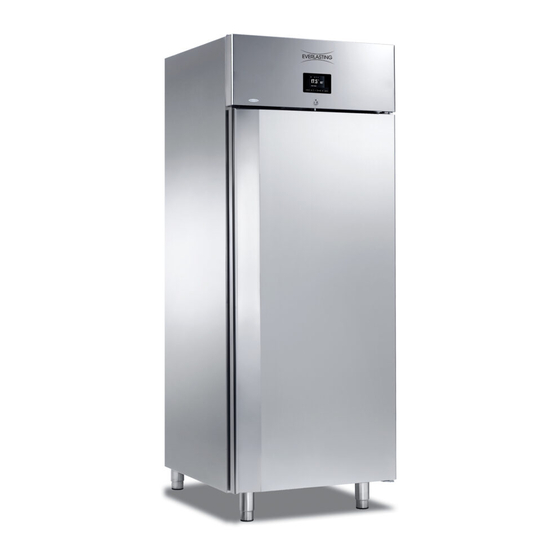
- Page 8 ITALIANO CAPITOLO 9 COMANDI 9.1 Descrizione dei comandi e pulsanti ( Fig. 3) Il pannello di comando è un termoregolatore digitale per regolare temperatura e umidità ed è provvisto di 6 pulsanti con funzioni specifiche: Fig.3 I pulsanti comando di cui è dotato l’armadio frigorifero sono: DISPLAY Visore di temperatura e dello stato dell’armadio frigorifero.
- Page 9 ITALIANO Legenda segnalazioni LED e indicazioni: ACCESO SPENTO LAMPEGGIANTE - protezione compressore attiva, compressore fermo o in attesa Compressore in funzione compressore fermo - impostazione setpoint in corso Ventilatore dell’evapora- ventilatore dell’evaporatore ventilatore in attesa di accen- tore acceso spento sione luce cella accesa da ingresso Luce cella accesa...
- Page 10 ITALIANO Allarme HACCP in me- nuovo allarme HACCP in me- HACCP moria moria o in corso Tastiera bloccata/sbloc- cata Porta aperta 9.2 INDICAZIONI RELATIVE ALL’USO 9.2.1 Avviamento Prima di effettuare l’avviamento dell’armadio frigorifero è necessario verificare che il collegamento elettrico e l’allacciamento siano stati realizzati come previsto nel capitolo 15. Sequenza d’avviamento (fig.3).
- Page 11 L’armadio frigorifero è impostato, dalla fabbrica per poter effettuare lo sbrinamento automatico ad intervalli prestabiliti come segue: • Gamma MULTILAB uno sbrinamento tipo “ad attivazione resistenze elettriche” di durata max 30 minuti, temperatura massima evaporatore 8°C, ogni 8 ore di funzionamento.
- Page 12 ITALIANO ① Premere SET e rilasciare per avviare lo ► sbrinamento manuale L’armadio frigorifero andrà in sbrinamento solo se necessario e la temperatura dell’evaporatore sarà inferiore alla temperatura di fine sbrinamento ② Premere il Tasto ON/OFF e rilasciare per ► ritornare alla videata principale.
- Page 13 ITALIANO 9.2.8 Impostazione data e ora (fig.3) Con tastiera sbloccata (cap.9.2.6) si accede entrando nel menù Configurazione premendo il tasto ① Menù per 5 secondi ③ Toccare il tasto il tasto DOWN per spostare ► il cursore sopra “Orologio” (disponibile solo con il modulo WiFi installato - Optional) ①...
- Page 14 ITALIANO CAPITOLO 10 ALLARMI HACCP Gli eventuali allarmi presenti sono visualizzati nella prima riga in basso del Display con accanto il simbolo 10.1 Elenco allarmi HACCP attivi Gli allarmi registrati sono elencati nel MENU di CONFIGURAZIONE_SERVICE_ALLARMI. La presenza è segnalata dall’icona sul display nella videata principale.
-
Page 15: Capitolo 13 Trasporto E Movimentazione
ITALIANO CAPITOLO 11 LIVELLO DI RUMOROSITA’ L’armadio frigorifero è stato progettato e costruito in modo tale che i rischi dovuti all’emissione di rumore siano ridotti al livello minimo (vedi schede tecniche). CAPITOLO 12 MATERIALI E FLUIDI IMPIEGATI I materiali a contatto o che possono venire a contatto con i prodotti alimentari sono conformi alle direttive in materia. - Page 16 ITALIANO Gli accessori a corredo dell’armadio frigorifero ( guide, griglie, vaschette, vassoi, unità condensatrice remota con tubazioni ) sono confezionati a parte e posizionati all’interno del mobile. L’armadio frigorifero è fissato su un basamento di legno mediante viti e confezionata con imballi in polietilene, cartone, gabbia o cassa.
- Page 17 ITALIANO La presenza di schegge potrebbe causare danni alle mani - rimuovere la pellicola in P.V.C. applicata come protezione alle superfici esterne dell’armadio frigorifero - posizionare l’armadio frigorifero utilizzando una livella con eventuale regolazione dei piedini del basamento metallico ( Fig. 5 ) Fig.5 - posizionare le guide porta-griglie negli appositi fori delle cremagliere ( Fig.
- Page 18 ITALIANO CAPITOLO 14 CABLAGGIO E ALLACCIAMENTO ELETTRICO L’impianto e l’allacciamento elettrico devono essere eseguiti da personale qualificato. Prima dell’installazione effettuare la misura dell’impedenza di rete; il valore di impedenza per il collegamento alla rete non deve superare 0,075 ohm. Ai fini della sicurezza è necessario attenersi alle seguenti indicazioni: - verificare che il dimensionamento dell’impianto elettrico sia adeguato alla potenza assorbita dall’armadio frigorifero e preveda un interruttore differenziale (salvavita) - in caso di incompatibilità...
- Page 19 EC label and compare it with the table below: Serie Temperature MULTILAB +18°C / -25°C The refrigerated cabinet complies with the European directives as described in detail in the Annex “EC Declaration of Conformity”...
- Page 20 ENGLISH The main general safety standards are listed below: - Do not use or place electrical devices inside the refrigerated compartments if they are not of the type recommended by the manufacturer - Do not touch the refrigerated cabinet with damp or wet hands or feet - Do not use the refrigerated cabinet barefoot - Do not insert screwdrivers or other objects between the guards or moving parts - Do not pull the power cord to unplug the refrigerated cabinet from the electricity network...
-
Page 21: Chapter 2 Cleaning The Refrigerator
ENGLISH CHAPTER 2 CLEANING THE REFRIGERATOR Since the refrigerated cabinet will be used to store food, cleaning is necessary for hygiene and health protection purposes. The cleaning of the refrigerated cabinet has already been carried out at the factory. It is suggested, however, to carry out an additional cleaning of the internal parts before use, making sure that the power cord is unplugged. - Page 22 ENGLISH CHAPTER 3 PERIODIC CHECKS TO BE CARRIED OUT The following are the points or units of the refrigerated cabinet that require periodic checks: - integrity and efficiency of door seals - integrity of the grilles in contact with food - integrity of the fixing hinges of the doors - integrity of the power cord 3.1 PRECAUTIONS IN CASE OF LONG PERIODS OF INACTIVITY...
- Page 23 ENGLISH CHAPTER 6 TROUBLESHOOTING Problems may occur, in the refrigerated cabinet, identified as shown in the table: TROUBLE DESCRIPTION POSSIBLE CAUSES HOW TO REPAIR IT the refrigerated cabinet does not turn no power supply check the plug, socket, fuses, line other contact technical support the refrigeration unit does not start...
- Page 24 ENGLISH The following are the measures taken to protect against other risks: - electricity: The refrigerated cabinet has been designed, built and equipped so as to prevent risks from electricity, in accordance with the specific legislation in force - noise: The refrigerated cabinet has been designed and built in such a way that risks resulting from the emission of airborne noise are reduced to the minimum level 8.1 safety devices adopted It is absolutely forbidden (Fig.
-
Page 25: Chapter 9 Controls
ENGLISH CHAPTER 9 CONTROLS 9.1 Controls and keys (picture 3) The control panel is a digital thermoregulator controlling temperature and humidity. It is provided with 6 keys with specific functions: Fig.3 The keys which the refrigerated cabinet is provided with are: Display visore di temperatura e dello stato dell’armadio frigorifero. - Page 26 ENGLISH LED signals and indications legend: FLASHING - activated compressor protec- tion, idle or on-hold compres- Working compressor Idle compressor - ongoing setpoint setting Turned-on evaporator fan Turned-off evaporator fan Fan waiting for start Turned-on internal light by turned-on internal light Turned-off light microswitch digital input AUX 1...
- Page 27 ENGLISH new stored or ongoing HACCP Stored HACCP alarm HACCP alarm Lock-Unlock door Open door 9.2 INSTRUCTIONS FOR USE 9.2.1 Start-up Before starting up the refrigerated cabinet, make sure that electrical connections have been carried out as indicated on chapter 15. Start-up sequence (picture 3).
- Page 28 The refrigerated cabinet is set from the factory to carry out automatic defrosting at pre-set intervals, as follows: • MULTILAB Range one 30-minute-long defrosting “by activation of electrical heaters”, maximum evaporator temperature 8°, every 8 operating hours. Users can carry out manual defrosting according to their needs, operating as follows: With unlocked keyboard (chapter 9.2.6)
- Page 29 ENGLISH ① Push and release SET to start manual ► defrosting The device will carry out a defrosting only if necessary and the evaporator temperature will be lower than the defrosting end temperature ② Push and release the ON/OFF key to return ►...
- Page 30 ENGLISH 9.2.8 Date and time setting (Picture 3) ① With unlocked keyboard (chapter 9.2.6), push the Menu key for 5 seconds to enter Configuration menu ③ Touch the DOWN key to move the cursor on ► “CLOCK” (available only with the WiFi module installed - Optional) ①...
-
Page 31: Chapter 10 Haccp Alarms
ENGLISH CHAPTER 10 HACCP ALARMS Possible alarms are visualized on the first line on the lower part of the Display with symbol next to them 10.1 Active HACCP alarm list Recorded alarms are listed in the ALARM_SERVICE_CONFIGURATION MENU. Their presence is signalled on the main screen by icon With unlocked keyboard (chapter 9.2.6) ①... -
Page 32: Chapter 13 Transport And Handling
ENGLISH CHAPTER 12 MATERIALS AND FLUID USED The materials in contact or which may come into contact with foodstuffs comply with the relevant directives. The refrigerated cabinet has been designed and built in such a way that these materials can be cleaned before each use. - Page 33 ENGLISH Regarding the disposal of the packaging it is necessary to refer to current regulations in your country. The movement of the refrigerated cabinet shall be performed using a fork lift or pallet trucks equipped with suitable forks (length of at least 2/3 of the unit). The limits of stackability and the centre of gravity are indicated on the label of the package.
- Page 34 ENGLISH Fig.5 - position the grille holding guide fails in the holes of the racks (Fig. 6 ) Fig.6 - insert the grilles for food in the special guides - insert the condensate water drain pan into the special guide rails already fixed under the refrigerated cabinet if provided.
- Page 35 ENGLISH CHAPTER 14 ELECTRICAL WIRING AND CONNECTIONS The electrical system and connection must be carried out by qualified personnel. Before installation, measure the impedance of the network, the impedance value for the connection to the network must not exceed 0.075 ohm. For safety reasons you must follow these guidelines: - verify that the sizing of the electrical system is suitable for the power consumption of the refrigerated cabinet and that it provides for a differential switch (circuit breaker)
- Page 37 ATTENZIONE! ISTRUZIONI RISERVATE A PERSONALE TECNICO AUTORIZZATO Si avvisano gli utenti che qualsiasi intervento eseguito da personale non tecnico o non autorizzato produrrà la decadenza delle condizioni di garanzia.
-
Page 38: Cambio Lingua
SERVICE CAMBIO LINGUA Con tastiera sbloccata (cap.9.2.6) ► Si accede entrando nel menù Configurazione ► ① premendo il tasto Menù per 5 secondi ④ ③ Toccare il tasto UP o il tasto DOWN per spostare il cursore sopra “Lingua” ► ①... - Page 39 VISUALIZZAZIONE E MODIFICA PARAMETRI Con tastiera sbloccata (cap.9.2.6) ► Si accede entrando nel menù Configurazione ► ① premendo il tasto Menù per 5 secondi ④ ③ Toccare il tasto UP o il tasto DOWN ► spostare il cursore sopra “Service” ①...
- Page 40 LISTA PARAMETRI ARMADI MULTILAB NB: sono modificabili dal servizio tecnico solamente i parametri evidenziati, gli altri solo dopo consultazione/autorizzazione del nostro servizio tecnico. PAR. DEF. SETPOINT MIN... MAX. (°c) in ta- r1..r2 MIN... MAX. (C°) stiera SET2 in ta- h1..h2 MIN...
- Page 41 Deumidifica con compressore o con compressore e caldo. 0 = Disabilitato; 1 = Compressore; 2 = Compres- sore e caldo Scalda e Deumidifica con Uscita defrost 0=no; 1=si PAR. DEF. REGOLAZIONE UMIDIFICA MIN... MAX. Differenziale Umidificazione (SET2-rh0) (SET2-rh1-rh0 in -25..-1 %rH zona neutra) Zona Neutra Umidificazione 0..10 %rH...
- Page 42 Allarme relativo SET2 Alta Umidità 0..100 %rH Ritardo Allarme Umidità e saturazione sonda. 0..240 min PAR. DEF. VENTOLE MIN... MAX. Modalità Ventole Evaporatore in Normale Funzionamento. 0 = Con cicli; 1 = Accese; 2 = ON per carichi on; Con F0=0 è possibile gestire dei cicli con F11-F12 rd2-rd3 3 = Termoregolate (F1 relativo alla regolazione rh2-rh3.
- Page 43 Configura relè K6 (sbrin) 0..15 PAR. DEF. TASTIERA MIN... MAX. Abilita Tasto ON/Stand-by 0=no 1=si Abilita Luce e Carico da Tasto inStand-by 0=no 1=si Disattiva Uscita Allarme Tacitando il Buzzer 0=no 1=si Abilita funzione o configurazione tastiera e cicalino. 0 = no; 1 = solo allarme no tasti; 2 = allarme e tasti PAR.
- Page 44 VISUALIZZAZIONE VALORI INTERNI Con tastiera sbloccata (cap.9.2.6) ► Si accede entrando nel menù Configurazione ► ① premendo il tasto Menù per 5 secondi ④ ③ Toccare il tasto UP o il tasto DOWN ► spostare il cursore sopra “Valori Interni” ①...
- Page 45 ③ Impostare con il tasto DOWN la password ► al valore 149 poi ① Premere il tasto SET per Resettare la me- ► moria dati registrati. ② Per ritornare alla videata principale premere il tasto ON/OFF per due volte, oppure non ►...
- Page 47 WARNING! INSTRUCTIONS STRICTLY RESERVED TO AUTHORIZED TECHNICAL PERSONNEL Every intervention executed by a non authorized technical personnel implies a warranty decay.
-
Page 48: Service Menu
SERVICE LANGUAGE MODIFICATION With unlocked keyboard (chapter 9.2.6) ► ① Push on the Menu key for 5 seconds to ► access Configuration menu ④ ③ Touch the UP or DOWN keys to move the cursor on “Language” ► ① ④ ③... - Page 49 With unlocked keyboard (chapter 9.2.6) ► ① Push on the Menu key for 5 seconds to ► access Configuration menu ④ ③ Touch the UP or DOWN keys to move ► the cursor on “Service” ① Push and release SET to enter Service ►...
- Page 50 MULTILAB PARAMETER LIST NB only the highlighted parameters can be modified by maintenance service. The other parameters can be modified only after reference/authorization by our technical department. PAR. DEF. SETPOINT MIN... MAX. (°c) in ta- r1..r2 MIN... MAX. (C°) stiera...
- Page 51 Dehumidification with compressor or with compressor and 0 = Disabilitato; 1 = Compressore; 2 = Compres- heat sore e caldo Heats and Dehumidifies with defrost Output 0=no; 1=si PAR. DEF. HUMIDIFICATION ADJUSTMENT MIN... MAX. Humidification Differential (SET2-rh0) (SET2-rh1-rh0 in -25..-1 %rH neutral zone) Humidification neutral zone 0..10 %rH...
- Page 52 Evaporator Fan Mode during Normal Operation. With F0=0 0 = Con cicli; 1 = Accese; 2 = ON per carichi on; it is possible to manage cycles with F11-F12 rd2-rd3 rh2- 3 = Termoregolate (F1 relativo alla regolazione rh3. temperatura); 4 = Termoregolate se carico ON (F1 relativo alla regolazione temperatura) Evaporator Fan Adjustment Threshold with F0=3 or 4 -99..+99 °C/F...
- Page 53 Enables functions or keyboard and buzzer configuration. 0 = no; 1 = solo allarme no tasti; 2 = allarme e tasti PAR. DEF. SAFETIES MIN... MAX. Parameter password -99... 999 Service level 1 password -99... 999 Evlink/Evconnect user password -99... 999 Evlink/Evconnect service password -99...
- Page 54 Internal Value Visualization With unlocked keyboard (chapter 9.2.6) ► ① Push on the Menu key for 5 seconds to ► access Configuration menu ④ ③ Touch the UP or DOWN keys to move ► the cursor on “Internal Values” ① Push and release SET to enter the Internal ►...
- Page 55 Set the password to value 149 with the DOWN ► ③ then ① Push the SET key to reset stored recorded ► data. ② Push the ON/OFF key twice or dot not operate on any key for 30 seconds to return to the ►...
- Page 56 - white ar - arancio ar - orange gv - giallo verde gv - yellow green EVERLASTING s.r.l. 46029 SUZZARA (MN) - ITALY - Strada Nazionale della Cisa km.161 Tel.0376/521800 (4 linee r.a.) - Telefax 0376/521794 http://www.everlasting.it - E-mail:everlasting@everlasting.it...
Need help?
Do you have a question about the MULTILAB and is the answer not in the manual?
Questions and answers