Table of Contents
Advertisement
Quick Links
Sterilizer
SK102C SK112C
SK201C SK211C
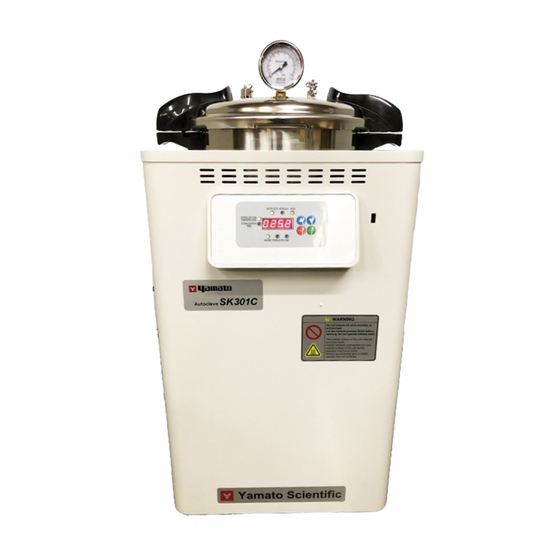
SK301C SK311C
Instruction Manual
- First Edition -
Thank you for purchasing "Sterilizer, SK Series"
of Yamato Scientific Chongqing Co., Ltd.
To use this unit properly, read this "Instruction
Manual" thoroughly before using this unit.
Keep this instruction manual around this unit for
referring at anytime.
WARNING!
Carefully read and thoroughly understand the
important warning items described in this manual
before using this unit.
Yamato Scientific Chongqing Co., Ltd
Model
Advertisement
Table of Contents

Subscribe to Our Youtube Channel
Related Manuals for Yamato SK102C


Summary of Contents for Yamato SK102C
- Page 1 Instruction Manual - First Edition - Thank you for purchasing "Sterilizer, SK Series" of Yamato Scientific Chongqing Co., Ltd. To use this unit properly, read this "Instruction Manual" thoroughly before using this unit. Keep this instruction manual around this unit for referring at anytime.
-
Page 2: Table Of Contents
Contents Cautions in Using with Safety .............. 1 U 3T • Explanation ........................ 1 • Table of Illustrated Symbols ..................2 • Fundamental Matters of "WARNING!" and "CAUTION!" ..........3 Before Using This Unit ................5 • Requirements for Installation .................. -
Page 3: Cautions In Using With Safety
Cautions in Using with Safety Explanation MEANING OF ILLUSTRATED SYMBOLS Illustrated Symbols Various symbols are used in this safety manual in order to use the unit without danger of injury and damage of the unit. A list of problems caused by ignoring the warnings and improper handling is divided as shown below.Be sure that you understand the warnings and cautions in this manual before operating the unit. -
Page 4: Table Of Illustrated Symbols
Cautions in Using with Safety Table of Illustrated Symbols Warning Warning Warning Warning Warning Warning generally high voltage high temperature drive train explosive Caution Caution Caution Caution Caution Caution generally electrical shock scald no road heating not to drench Caution Caution water only deadly poison... -
Page 5: Fundamental Matters Of "Warning!" And "Caution
Cautions in Using with Safety Fundamental Matters of "WARNING!" and "CAUTION!" WARNING! Do not use this unit in an area where there is flammable or explosive gas Never use this unit in an area where there is flammable or explosive gas. This unit is not explosion-proof. - Page 6 Cautions in Using with Safety Fundamental Matters of "WARNING!" and "CAUTION!" CAUTION! When opening the cover... Make sure that the pressure of equipment has decreased to 0(zero) MPa before opening the cover. Generally the cover does not open due to the safety lock mechanism under the high pressure condition.
-
Page 7: Before Using This Unit
Before Using This Unit Requirements for Installation 1. Choose a proper place for installation • Do not install this unit in a place where: ♦ Rough or dirty surface. ♦ Flammable gas or corrosive gas is generated. ♦ Ambient temperature 35°C and above or 5°C and below. ♦... - Page 8 • Choose a correct power distribution board or receptacle that meets the unit’s rated electric capacity. • Operating voltage range for respective equipment models are as follows. SK102C models: AC115V SK112C models: AC220~ 230V SK201C models: AC115V SK211C models: AC220~ 230V...
- Page 9 • The D class earth connecting works is required if no ground terminal is provided. In this case, consult with the selling office where you purchased or our sales office. • Securely connect it to the switchboard or outlet. SK102C/112C/201/C/211C/301C/311C Rounded terminal for M4...
-
Page 10: Installation Procedure
Before Using This Unit Installation Procedure Close the drain valve • Close the drain valve at the bottom on the left side face of main unit. Water leak occurs if not fully closed, which may cause the burn injury no-load (water) operation. The drain valve and lead it to the draining site. - Page 11 Before Using This Unit Installation Procedure Close the door before operation • Place the sterilizing drum with properly-piled items into the pot with the positioning mark on the pot lid to be aligned to the center of the lower handle. Press the lid gently by hand and turn it clockwise for the upper and lower handles to close completely and the safety lock to remain in open position, and the safety lock will lock the upper and lower handles automatically when the pressure in pot rises.
-
Page 12: Description And Function Of Each Part
Description and Function of Each Part Main Unit Name Name Safety valve Upper cover Vent valve Operation panel Handle (up/down) Power switch Exhaust (drain) valve Exhaust (drain) port Pressure gauge Power interface... -
Page 13: Control Panel (Keys)
Description and Function of Each Part Control Panel (Keys) Name Function When there is water shortage/cut off in the sterilizer, the lamp normally Water level lamp blinks, with a buzzer alarm sound. When the water is added to the "standard" water level, the water level lamp will be normally ON. Sterilize temp. -
Page 14: Operation Method
Operation Method Apparatus/Liquid Sterilization Course Follow the procedures below for the setting of apparatus sterilization and liquid sterilization courses. Turn the cover CCW and separate the upper and lower handles completely (Figure 1). Remove the cover and place it on a flat surface (Figure 2). - Page 15 Operation Method Apparatus/Liquid Sterilization Course 4. The control system in the control platform has the function of data memory, which can store the sterilization temperature and time of the last use for the next continuous use. For the first use, may need to adjust the sterilization temperature and time, it can be adjusted Figure 9 Figure 10...
- Page 16 Operation Method Apparatus/Liquid Sterilization Course When the heater starts to work, both the sterilization temperature lamp and the heating lamp on the control panel light up, indicating that the sterilizer has entered into the operation Figure 20 Figure 19 ★In order to ensure the sterilization effect, the lower state of heating, temperature and pressure rising (Figure 19).
- Page 17 Operation Method Apparatus/Liquid Sterilization Course After the sterilization operation, turn the lower Drain Exhaust exhaust valve knob to the ON position (Figure 24) to discharge the steam in the cylinder for pressure relief. When the temperature in the cylinder is lower than about 102℃, the interlock Figure 25 Figure 24 lamp turns to blink (Figure 25), indicating that...
-
Page 18: Sterilizing Parameters
Operation Method Sterilizing Parameters Use calibration offset function Calibration offset is a function which corrects the difference between the temperature in furnace and that of controller (sensor temperature) if arises. The function parallel corrects the difference either to the plus or minus side within the whole temperature range of unit. The function can be set or cancelled by the key. -
Page 19: Handling Precautions
Handling Precautions WARNING WARNING! If a problem occurs If smoke or strange odor should come out of this unit for some reason, turn off the power key right away, and then turn off the circuit breaker and the main power. Immediately contact a service technician for inspection. -
Page 20: Caution
Handling Precautions CAUTION CAUTION! During a thunder storm During a thunderstorm, turn off the power key immediately, then turn off the circuit breaker and the main power. If this procedure is not followed, fire or electrical shock may be caused. Do not touch the hot section The temperature on the cover and top board on the chamber are very hot during operation or just after operation is completed. -
Page 21: Maintenance Method
Maintenance Method Daily Inspection and Maintenance For the safety use of this unit, please perform the daily inspection and maintenance without fail. Using the city water to this unit might attach dirt. Do inspect and maintain this point while performing daily inspection and maintenance. -
Page 22: Long Storage And Disposal
Long storage and disposal When not using this unit for long term / When disposing CAUTION! When not using this unit for long term… • Turn off the power and disconnect the power cord. WARNING! When disposing… • Keep out of reach of children. •... -
Page 23: In The Event Of Failure
In the case of the error other than listed above occurred, turn off the power switch and primary power source immediately. Contact the shop of your purchase or nearest Yamato Scientific Service Office. -
Page 24: After Service And Warranty
If the failure occurs, stop the operation, turn OFF the power switch, and unplug the power plug. Please contact the sales agency that this unit was purchased, or the Yamato Scientific’s sales office. < Check following items before contact >... -
Page 25: Specification
Specification Product name Sterilizer Model SK102C SK112C SK201C SK211C SK301C SK311C Temperature control 50 to 126℃ (sterilization ) range Maximum Operational 0.142Mpa Pressure Operational ambient 5℃~35℃ temperature 115V 220V 115V 220V 115V 220V Heater /2000W /2000W /2000W /2000W /2000W /2000W... -
Page 26: Wiring Diagram
Wiring Diagram SK102C/201/301C 115V Symbol Part name Symbol Part name Power switch SMJ1 Control board Safety tube SMJ2 Display board Heater Pt100 Temperature sensor Cover interlock switch Float Switch... - Page 27 Wiring Diagram SK112C/211/311C 220V Symbol Part name Symbol Part name Power switch SMJ1 Control board Safety tube SMJ2 Display board Heater Pt100 Temperature sensor Float Switch Cover interlock switch...
-
Page 28: Replacement Parts Table
Safety valve A990100469 Steam exhaust valve A990100255 8808049 ¢50 White Caster A080300019 8808062 ¢50 White Caster (With brake) A080300019 Terminal block A011302002 T3052-6-4P-CLO SK102C/201/301C Symbol Part Name Specification Manufacturer Code No. SMJ1 CONT board A020105005 SMJ1 110V Heater A080501015 2000W/115V... -
Page 29: Reference
Reference List of Dangerous Substances Never use explosive substances, flammable substances and substances that include explosive or flammable ingredients in this unit. EXPLOSIVE Ethylene glycol dinitrate (nitro glycol), Glycerin trinitrate (nitroglycerine), Cellulose nitrate (nitrocellulose), and other explosive nitrate esters Trinitrobenzene, Trinitrotoluene, Trinitrophenol (picric acid), and other explosive EXPLOSIVE: nitro compounds Acetyl hydroperoxide (peracetic acid), Methyl ethyl ketone peroxide, Benzyl... - Page 30 Responsibility Please follow the instructions in this document when using this unit. Yamato Scientific has no responsibility for the accidents or breakdown of device if it is used with a failure to comply. Never conduct what this document forbids. Unexpected accidents or breakdown may result in.
Need help?
Do you have a question about the SK102C and is the answer not in the manual?
Questions and answers