Table of Contents
Advertisement
Quick Links
Advertisement
Table of Contents

Related Manuals for Plus M-10


Summary of Contents for Plus M-10
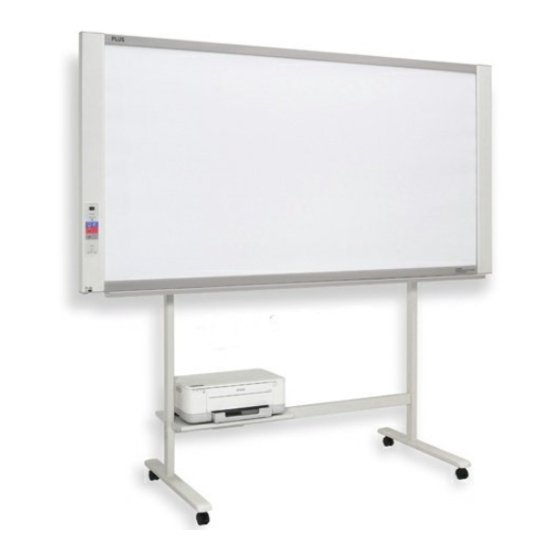
- Page 1 Copyboard with Memory Function M-10S/M-10W User’s Manual Thank you for your purchase of the PLUS Copyboard. Please read this User’s Manual carefully before use to take full advantage of the functions of this product. After you have finished reading the manual, please keep it for future reference.
- Page 2 (5) The use of a printer as the peripheral device of the PLUS Copyboard is taken to be a prerequisite; therefore, operation will not be guaranteed when the Copyboard is used with a direct connection to a personal computer.
-
Page 3: Table Of Contents
TABLE OF CONTENTS Features ... E-4 Safety Precautions Warnings and Precautions ... E-5 Care and Cleaning ... E-6 Package Contents ... E-7 Names of the Parts ... E-8 Copyboard Front ... E-8 Copyboard Rear ... E-9 Copyboard Control Panel ... E-10 Operation Steps ... -
Page 4: Features
Plain paper for easy to be Written on and Stored The printer for the M-10 supports the use of regular paper. The printed paper can be written on directly and stamps can also be applied so that the paper may be kept as a record of the meeting and may also be circulated conveniently. -
Page 5: Important Safety Information
IMPORTANT SAFETY INFORMATION WARNING The unit’s rear panel should never be opened by anyone other than a qualified serviceperson. There are many high voltage parts inside the unit, and touching them is dangerous. For replacement of the light source’s fluorescent bulb, internal inspections, adjustments, repairs or internal cleaning, please contact your store of purchase. -
Page 6: Care And Cleaning
CARE AND CLEANING Installation • For stand type units, be sure to lock the casters. • When mounting on a wall, be sure to check first that the wall surface is strong enough to support the total weight of the main unit, mount fittings and printer over a long period of time (including during earthquakes). -
Page 7: Package Contents
PACKAGE CONTENTS The package contents are as described below. Please check before use. Copyboard, main unit ... 1 See “Assembly and Setup Manual” for information about the assembly parts of the copyboard. Printer* ... 1 Please see the instruction manual of the printer for information about the printer accessories. Stand* ... -
Page 8: Names Of The Parts
NAMES OF THE PARTS Copyboard Front Copyboard Dust tray approx. 35mm approx. 30mm approx. 35mm Sheet Special markers are used on the sheet to draw diagrams and to write. Card slot A CompactFlash card is inserted here. Control panel Printer tray The printer* is placed here. -
Page 9: Copyboard Rear
Copyboard Rear The connector is located on the bottom surface of the copyboard. The diagram view is seen from the bottom. Note Please take the printer power directly from a wall outlet. Locking and unlocking the stand* casters After setup, please lock the casters with the stoppers. Unlock the caster stoppers when moving the copyboard. Lock the caster by pressing the bottom part of the lock button. -
Page 10: Copyboard Control Panel
Copyboard Control Panel Cancel COPY MEMORY REPEAT FEED/STOP Density MemoryClear POWER COLOR When pressing a button, please press the center area (i.e., the round and protruding portion). Press- ing the corner will not work. POWER button Switches the power of the copyboard on and off. Note The Power button does not synchronize with the main power control of the Copyboard. -
Page 11: Operation Steps
OPERATION STEPS The copyboard uses a CCD image sensor to read the diagrams and writing made with the special (four color) markers and prints this at reduced size with a printer that is connected to the copyboard. A press of the COPY button or MEMORY button scrolls the surface and reads it, accumulating the image data in internal memory. -
Page 12: Printing
PRINTING This function prints the sheet screen of the copyboard on the printer connected to the copyboard. Cancel COPY MEMORY REPEAT FEED/STOP Density MemoryClear POWER COLOR BASIC PRINTING OPERATION Preparation: 1. Set A4 or letter size paper in the printer. See Page E-19. 2. -
Page 13: Selecting The Print Density
Press the + button or the - button and select the number of copies. • When the power is switched on, one copy is selected. • A maximum of 20 copies can be set and the number of copies is displayed in the display window. •... -
Page 14: Cancellation Of The Print Operation In Progress
Cancellation of the print operation in progress During the read operation (when the COPY button was pressed) A press of the FEED/STOP button will stop the sheet during the reading operation and print the image data that has been read up to then. Please wait until the paper has been ejected from the printer. -
Page 15: Using Compactflash Cards
Please note that some of CF card adapters may have compatibility issues. Please see our home page for details. http://www.plus-vision.com • Items Required for Using the Memory Function CompactFlash card: TYPE 1 or TYPE 2 (Optional items), or commercially available items. (Please use products bearing the CF... - Page 16 Press the COLOR button and select Color or Black & White. COLOR lamp COLOR Lit ... Memory storage will be in color. Unlit ... Memory storage will be in black & white. • At first, when the power is switched on, black & white is selected. Press the MEMORY button to store MEMORY •...
-
Page 17: Examples Of Playback Of Compactflash Cards Witha Personal Computer
EXAMPLES OF PLAYBACK OF COMPACTFLASH CARDS WITH A PERSONAL COMPUTER This example shows how the data held in the memory card is copied to the hard disk of a personal computer, and deleted from the card. Methods include the use of Explorer and various other methods. Please see the instruction manual of your personal computer or the software being used for information about using your personal computer. -
Page 18: Deleting All Of The Memory Card Data With The Copyboard
Cancel COPY MEMORY FEED/STOP REPEAT Density MemoryClear POWER COLOR CAUTION Formatting is not possible with the copyboard. Files other data stored with the copyboard or files whose original names have been changed cannot be deleted with this operation. Delete such files using your computer. DELETING ALL OF THE MEMORY CARD DATA WITH THE COPYBOARD When the memory card has become full, copy the required image data on... -
Page 19: Printer Operation Guide
PRINTER OPERATION GUIDE A printer is used to print out the drawn sheet surface. Depending on the printer, the operation may differ and the names of the parts may be different. Please see your printer instruction manual for details. PRINTER SET UP Please check that the copyboard and the printer have been connected. -
Page 20: Meaning Of Error Messages
No memory card loaded Memory is full If the problem persists, please contact your nearby PLUS Vision sales office, dealer, or store. Problem and Solution • Is the printer cable connected? • Is power being supplied to the printer? •... -
Page 21: Troubleshooting
Color Mode. * If the problem persists, please contact your nearby PLUS Vision sales office, dealer, or store. A press of the COPY button does not result in printing. -
Page 22: Specifications
1970 (W) x 600 (D) x 1970 [max] (H) mm 36 kg Stand / Wall-mount AC Cable for M-10, USB Cable (Printer), Markers (Black, Red, Blue, Green), Eraser, Wall mounting hooks and screws, Operation Manual, Set-up Manual, Paper (10 sheet) -
Page 23: Appendix
APPENDIX CONNECTIONS BETWEEN THE COPYBOARD AND PRINTER The installation method at the printer side will differ depending on your printer. (1) Connect the printer connector of the copyboard with the USB connector of the printer using the supplied USB cable. (2) Plug the power cable that was supplied with the printer into a wall outlet. -
Page 24: Changing The Height Of The Unit
CHANGING THE HEIGHT OF THE UNIT This is the height adjustment when setting up the copyboard on the optional stand. The stand height can be adjusted to 3 levels in 100 mm units. Please have 2 or more persons hold the unit. CAUTION! If the unit is dropped or falls over, this could cause unexpected injury. -
Page 25: Quick Calibration Procedure
Note Depending on your copyboard (M-10), it may be necessary to update the program. For instructions on checking the program version and updating the program, contact your nearby PLUS Vision sales office, dealer, or store. 1. Cleaning the sheet surface First clean a strip at least 20 cm wide along the left edge of the sheet surface.
Need help?
Do you have a question about the M-10 and is the answer not in the manual?
Questions and answers