Table of Contents
Advertisement
Quick Links
Advertisement
Table of Contents

Related Manuals for Cognex DataMan 580 Series


Summary of Contents for Cognex DataMan 580 Series
- Page 1 ® DataMan 580 Series Quick Reference Guide 2023 February 01 Revision: 23.1.0.5...
- Page 2 The safety of any system incorporating this product is the responsibility of the assembler of the system. Do not install Cognex products where they are exposed to environmental hazards such as excessive heat, dust, moisture, humidity, impact, vibration, corrosive substances, flammable substances, or static electricity.
- Page 3 This product does not contain user-serviceable parts. Do not make electrical or mechanical modifications to product components. Unauthorized modifications can void your warranty. Changes or modifications not expressly approved by the party responsible for regulatory compliance could void the user’s authority to operate the equipment.
- Page 4 Symbols The following symbols indicate safety precautions and supplemental information: WARNING: This symbol indicates a hazard that could cause death, serious personal injury or electrical shock. CAUTION: This symbol indicates a hazard that could result in property damage. Note: This symbol indicates additional information about a subject. Tip: This symbol indicates suggestions and shortcuts that might not otherwise be apparent.
- Page 5 Accessories You can purchase the following components separately. For a list of options and accessories, contact your local Cognex sales representative. Kits Product Number Illustration MVT Spares: 25 mm lens kit DM5809QL-MVT13 DM5809X-MVT13 25 mm Cognex lens, focused and 3D...
- Page 6 Product Number Illustration DataMan 5809 with 16 mm lens kit Contact a Cognex sales representative for custom DataMan 5809 configurations. 16 mm Cognex lens, user-specified focus distance, 3D calibrated Lens cover DataMan 5809 DataMan 5809 with 25 mm lens kit...
- Page 7 Cables Note: Cables are sold separately. Accessory Product Number Illustration Ethernet Cable, X-coded M12-8 to RJ- CCB-84901-2001-xx (straight, xx specifies length: 2m, 5m, 10m, 15m, 30m) Ethernet Cable, X-coded M12-8 to RJ- CCB-84901-2002-xx (right-angled, xx specifies length: 2m, 5m, 10m) Ethernet Cable, Robotic X-Coded M12- CCB-84901-2RBT-xx (straight, xx specifies length: 2m, 8 to RJ-45...
-
Page 8: Mounting Brackets
Accessory Product Number Illustration Power and I/O Breakout Cable, M12-12 CCB-PWRIO- xx (straight, xx specifies length: 5m, to Flying Lead 10m, 15m) Power and I/O Breakout Cable, M12-12 CCB-PWRIO-xxR (right-angled, xx specifies length: to Flying Lead 5m, 10m, 15m) Mounting Brackets Accessory Product Number Illustration... - Page 9 DataMan 580 Systems Resolution Code Reading Multi-Reader Sync DM5809-QL Omnidirectional 1D Codes 4096 x 2160 DM5809-X Omnidirectional 1D/2D Codes...
- Page 10 Note: Cables are sold separately. If a standard component is missing or damaged, immediately contact your Cognex Authorized Service Provider (ASP) or Cognex Technical Support. CAUTION: All cable connectors are keyed to fit the connectors on the reader. Do not force the connections or damage may occur.
-
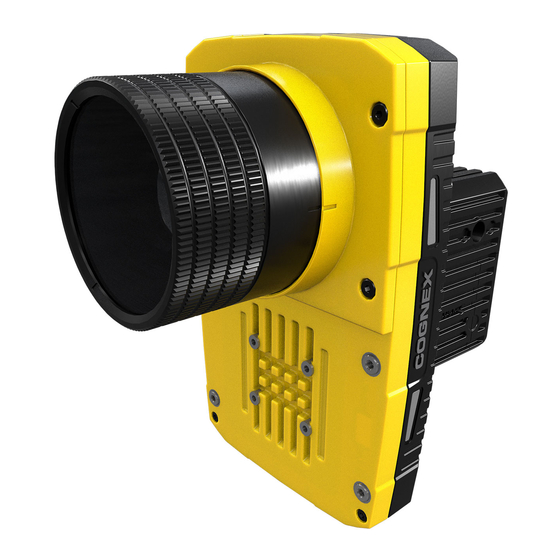
Page 11: Reader Layout
Reader Layout The image and table below shows the elements of the reader. Number Description Power I/O Breakout cable connector Ethernet connector 0 (default interface) USB-C slot (with plastic cover) Ethernet connector 1 Light connector Connector orientation locking screw... - Page 12 The following image and table shows the buttons and LEDs. Number Description Trigger button Power LED indicator Train status LED indicator Ethernet 0 status LED Ethernet 1 status LED Error LED indicator USB-C status LED Tune button...
- Page 13 Dimensions The following sections list dimensions of the reader. Note: Dimensions are in millimeters and are for reference purposes only. All specifications are for reference purposes only and can change without notice. DataMan 580 Dimensions The following images show the dimensions of DataMan 580.
- Page 15 Field of View and Distance This section discusses the Field of View (FoV) values for 16 mm, 25 mm, and 35 mm lenses. DataMan 580 Readers with 16 mm lens The following table lists the FoV values of a DataMan 5809 with 16 mm lens: Working Distance in mm Horizontal FoV in mm Vertical FoV in mm...
- Page 16 DataMan 580 Readers with 25 mm Lens The following table lists the FoV values of a DataMan 5809 with 25 mm lens: Vertical FoV in mm Working Distance in mm Horizontal FoV in mm = 1700 = 770 = 405 = 2100 = 950 = 500...
- Page 17 DataMan 580 Readers with 35 mm Lens The following table lists the FoV values of a DataMan 5809 with 35 mm lens: Vertical FoV in mm Working distance in mm Horizontal FoV in mm = 1800 = 575 = 300 = 2400 = 770 = 405...
-
Page 18: Mounting The Reader
Mounting the Reader The reader provides mounting holes for attachment to a mounting surface. CAUTION: The reader has to be grounded, either by mounting the reader to a fixture that is electrically grounded or by attaching a wire from the reader’s mounting fixture to frame ground or Earth ground. - Page 19 6x M6 flat washers 6x M6 split lock washers Assembly Instructions 1. Align the frame side pivot bracket with the frame. Place an M8 flat washer and an M8 split lock washer on each of the frame mounting holes. Put the M8 flat washers first.
- Page 20 2. Insert the two M4 threaded dowel pins into the small bracket mounting holes on the reader. Use a flat screw driver to tighten them. Align the holes on the pivot bracket with the dowel pins and bracket mounting holes on the reader. 3.
- Page 21 4. If you need to rotate the I/O module, see Rotating the I/O Module on page 28. 5. Slide the two mounting bracket sides together, align the arrows on the two parts. Push the camera side bracket in the direction of the arrow and rotate it so the two parts align horizontally.
- Page 22 7. Fix the bracket in place with one of the following methods: Use the delta 15° holes to fix in increments of 15°. Put a screw directly into the angle scale. In both cases, place one M6 flat washers and one M6 split lock washers on each of the two holes.
- Page 23 Mounting with Flat Bracket The mounting kit includes: 1x DataMan 580 flat bracket 2x M4 threaded dowel pins 4x M6X16 screws 2x M8x16 screws 2x M8 flat washers 2x M8 split lock washers 4x M6 flat washers 4x M6 split lock washers Assembly Instructions 1.
- Page 24 2. Place the four M6 flat washers and the four M6 split lock washers, one on each of the device mounting holes. The M6 flat washers go first. Insert the four M6X16 screws into the bracket mounting holes. Use a 6 mm hex wrench to tighten them.
- Page 25 4. Place an M8 flat washer and an M8 split lock washer on each of the frame mounting holes. Put the M8 flat washers first. Insert the M8x16 screws into the frame mounting holes. 5. Screw the device to the frame using an 8 mm hex wrench.
-
Page 26: Connecting The Ethernet Cable
Connecting the Ethernet Cable CAUTION: The Ethernet cable shield has to be grounded at the far end. Whatever this cable is plugged into (typically a switch or router) should have a grounded Ethernet connector. A digital voltmeter has to be used to validate the grounding. - Page 27 Connecting the Power and I/O Breakout Cable CAUTION: To reduce emissions, connect the far end of the Breakout cable shield to frame ground. Note: Perform wiring or adjustments to I/O devices when the reader is not receiving power. You can clip unused wires short or use a tie made of non-conductive material to tie them back.
- Page 28 Rotating the I/O Module Note: Mount the reader before rotating the I/O module. Instructions: 1. Unlock the I/O module with a 1.5 mm hex key and rotate the I/O module. The only supported alternative position is 90° down. 2. Lock the I/O module with a 1.5 mm hex key.
-
Page 29: Specifications
Using your device through USB You can utilize the DataMan 580's USB connector for emulating serial (USB-COM) functionality. Specifications The following sections list general specifications for the reader. DataMan 580 Series Reader Specification 0–40 °C (32–104 °F) Operating Temperature -10–60 °C (14–140 °F) - Page 30 1-D barcodes: Codabar, Code 39, Code 128, Code 93, Code 25, Interleaved 2 of 5, UPC/EAN/JAN 2-D barcodes: Data Matrix (IDMax and IDQuick: ECC 0, 50, 80, 100, 140, and 200), QR Code, PDF 417, MaxiCode DataMan 580 Series Reader Image Sensor DataMan 580 Specification 2/3-inch CMOS, global shutter Image Sensor Diagonal size: 12.96 mm...
-
Page 31: Regulations And Conformity
Regulations and Conformity Note: For the most current CE and UKCA declarations and regulatory conformity information, see the Cognex support site: cognex.com/support. DataMan 580 readers have Regulatory Model number 50114 and meet or exceed the requirements of all applicable standards organizations for safe operation. - Page 32 Safety and Regulatory Korea This device is certified for office use only and if used at home, there can be frequency interference problems. A급 기 기 (업 무 용 방 송 통 신 기 자 재 ): 이 기 기 는 업 무 용 (A급 ) 전 자 파 적 합 기 기 로...
- Page 33 中 国 大 陆 RoHS (Information for China RoHS Compliance) 根 据 中 国 大 陆 《 电 子 信 息 产 品 污 染 控 制 管 理 办 法 》 ( 也 称 为 中 国 大 陆 RoHS), 以...
-
Page 34: For European Community Users
For European Community Users Cognex complies with Directive 2012/19/EU OF THE EUROPEAN PARLIAMENT AND OF THE COUNCIL of 4 July 2012 on waste electrical and electronic equipment (WEEE). This product has required the extraction and use of natural resources for its production. - Page 35 Copyright © 2022 Cognex Corporation. All Rights Reserved.
Need help?
Do you have a question about the DataMan 580 Series and is the answer not in the manual?
Questions and answers