
Related Manuals for Toshiba DWS-34AHK


Summary of Contents for Toshiba DWS-34AHK
- Page 1 DISHWASHER INSTRUCTION MANUAL Model: DWS-34AHK Read these instructions carefully before using your DISHWASHER, and keep it carefully.
- Page 3 Disconnect power plug Do not connect or disconnect the power plug by wet hand. No touch This may cause electric shock or fault and cause injuries. by wet hand Do not use damaged power lines, power plug or loose power socket. Electric shock Do not damage power line.
- Page 4 Fault connection of the grounding wire will cause electric shock. If E3 failure occurs, please unplugging the power plug from the outlet, and needs to be repaired by professional electricians or service men. When it is difficult to confirm the correctness of grounding, please call for professional electricians or service men for inspection.
- Page 6 Washing capacity(60436): 34 pcs ( Soup plate X1 + Melamine bowl X1 + Melamine dessert plate X1 + Dessert plate X5 + Dessert bowl X2 + Mug X2 + Glass X3 + Loading Cup X1 + Saucer X1 + Knife X3 + Soup spoon X3 + Teas poon X3 + Dessert capacity spoon X3 + Fork X3 + Serving fork X1 + Gravy ladle X1) Do not strongly push open door and main body, nor put the downward...
- Page 7 Treatments Handle the package of the dishwasher with extreme care. All packages are recyclables. Plastic parts are marked with abbreviation of international standard; Polyethylene, e.g., tableted package material Polystyrene, e.g., packing material Polyacetal or polyox, e.g., plastic clip Acrylonitrile Butadiene Styrene , e.g., control panel Polypropylene, e.g., inner wall Warning The packing material may be dangerous to children!
-
Page 8: Table Of Contents
Care and maintenance Installation Preparation before installation Where to place Power connection Water connection Drainage pipe connection Troubleshooting Before connecting customer service center Error code Specification HOW TO CONNECT WITH TOSHIBA TSMARTLIFE APP INSTRUCTIONS TO FUNCTION WITH TSMARTLIFE APP Toshiba TSmartLife Troubleshooting... -
Page 9: Quick Instruction Manual
Quick instruction manual For detailed operation methods, read the manual carefully. Connected to power supplies The power supply is 220-240V AC 50Hz the specification of the socket is 10A 250V AC The connection of the drain pipe: Put end of the drain into a sink or bucket. Fix the drain pipe with the back pipe of the machine.The interface is fitted with clamps and tightened with a screwdriver. - Page 10 Open the door, put in the dishes and dishwashing powder Place them from the two sides to the center according to the size. It is the best to place in interruption of cleaning process and unsatisfactory cleaning results. Pull open Left side Right side Improper orientation of dishes can also...
-
Page 11: Recognize The Dishwasher
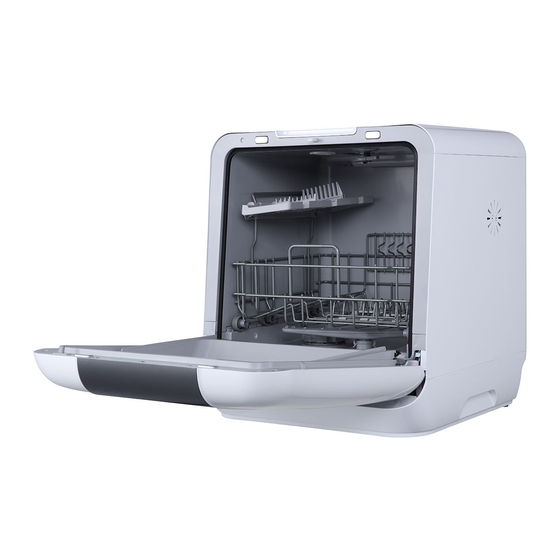
Recognize the dishwasher Important: ensure the best results. Dishwasher features Handle Control panel Tank lid Top nozzle Flashlight Lower spray arm Salt container Filter Dishwashing powder Adding place Inner door Chopstick rack... -
Page 12: Accessories
Note: When the machine in power-on or active state. If opening the door, Flashlight will turn-on automatically. If the door be opened or be closed for more than 5 mins, flashlight will turn off automatically. When the machine in working state. If you controlling button on the panel, and the flashlight will turn on automatically, if there no button controlling in 5 mins. -
Page 13: Control Panel
Control panel Power Program HYGIENE 7 ° Use to remove bacteria from your dishes and glassware. Maintains the water temperature at 70˚C. INTENSIVE For dishes with oil stains and heavy dirty cooking utensils and dishes. This is standard program. For general dirty dishes and utensils (such as pots, plates, glasses, pans). - Page 14 Delay start Press the button to increase the delay start time. Delay a cycle for up to 24 hours(H:01→H:24)in one-hour increments. Press the button for 3 seconds. After a shout bleeping and the WIFI icon starts to blink slowly, it's in the network linking status to APP. When the network link is successful, the indicator will be lit.
-
Page 15: Use The Dishwasher
Use the dishwasher Water softener The water softener must be set manually, using the water hardness dial. The water softener is designed to remove minerals and salts from the water, which would have a detrimental or adverse effect on the operation of the appliance. The more minerals there are, the harder your water is. -
Page 16: Adding Salt To The Softener
Adding salt to the softener Warning Only use salt specifically designed for dishwashers use! Every other type of salt not specifically designed for dishwasher use, especially table salt, will damage the water softener. In case of damages caused by the use of unsuitable salt the manufacturer does not give any warranty nor is liable for any damages caused. -
Page 17: Install Dishwasher Bowl Basket
Install dishwasher bowl basket Suggestion Purchase dishes suitable for dishwasher. Use a suitable mild dishwashing powder. If necessary, consult the manufacturer for more information. For special appliances, try to select a washing program that with a lower temperature. Do not take out the glass dishes immediately after the program ends to prevent damage. Use the dishwashing machine rationally Not for: Limited use:... - Page 18 Long or sharp knives (eg. meat cleavers) should be placed horizontally in the basket. Do not use the dishwasher overloaded so that you can get better cleaning performance. Use of baskets Small-size dishware will drop through the basket and block the rotation of spray arm. Flip the dishware support inward to support the small-size dishware.
- Page 19 Loading the basket according to EN60436: Place the dishes and utensils properly to avoid being moved by the water stream. In order to allow the spray water column to clean the surface, the dirty surface must face inside. 1 1 1 6 6 6 3 3 3 4 4 4...
- Page 20 Loading the cutlery basket 7 7 7 Number Item 5 5 5 6 6 6 Knife 4 4 4 2 2 2 Soup spoon 4 4 4 2 2 2 Teas poon 2 2 2 Dessert spoon 1 1 1 Fork 3 3 3 Serving fork...
-
Page 21: Put The Dishwashing Powder Into The Addition Place
Put the dishwashing powde r into the addition place Caution Only dishwashing powder is specially designed for dishwashers can be used. Do not use other dishwashing powders to avoid machine damage. The dishwashing powder is corrosive! Keep the dishwashing powder in a place where children cannot reach. -
Page 22: Program Setting
Program Setting Washing program The table below shows which programs are best for the levels of food residue on them and how much detergent is needed. It also show various information about the programs. Consumption values and program duration are only indicative except for ECO program. Dishwashing Highest Water Time... -
Page 23: Start Up
Start up To start the program: The plug shall be firstly plugged into the socket. Power supply shall be of 220-240V AC 50Hz type, with socket of 10 A 220-240V AC. Before selecting a program, press "ON/OFF" button turn on the dishwasher. Press the button of desired program, the corresponding indicator will light up. -
Page 24: Put Additional Dishes In
additional dishes in Additional dishes can be placed in at any time before dishwasher program start. If you want to reload dishes in the process of washing, please follow instructions below: 1. Press “Start/Pause” button to pause washing program; 2. Wait for 5 seconds to open the door; 3. -
Page 25: Cleaning And Care Filter
Cleaning and care Filter Warning Make sure that 3 are properly may also be damaged. ue from the washing water, which can be recycled at washing state. Therefore, when a washing program ends, to remove large food scraps. Remove It is suitable for large food residue, for example bone or glass which may block drainage pipe. -
Page 26: Filter Cleaning
Rotate direction and then lift them up Step 2: Lift B and C from A. step 3: Separate B and C. Caution Entire shall be cleaned once a week. Filter cleaning ilters reload entire assembly into the dishwasher and then position it on its base and press down as indicated in this page. -
Page 27: Care And Maintenance
Care and maintenance Control panel can be wiped with a slightly wet cloth. After cleaning, make sure it is completely dry. Do not use Sharp tools, Scratch sponge, or Rough detergent anywhere in the machine. Warning Do not use spray detergent to clean the door, as it may damage the door lock and other electrical components. -
Page 28: Installation
Installation Warning Electric Shock or death can be caused. Please make sure the machine is properly grounded before use. Preparation before installation The machine shall be installed close to existing water tap, outlets and socket. It should be close to drain to facilitate connection of drainage pipe. Where to place The back of the machine shall be against the wall and for lateral connection, it shall be arranged along adjacent cabinet or wall. -
Page 29: Water Connection
Grounding Instructions This appliance must be earthed. In the event of a malfunction or breakdown, earthing will reduce the risk of electric shock by providing a path of least resistance for the electric current. This appliance is equipped with a cord having an equipment-earthing conductor and an earthing plug. The plug must be plugged into an appropriate outlet that is installed and earthed in accordance with all local standards and requirements. -
Page 30: Drainage Pipe Connection
Drainage pipe connection Fix the drain pipe with the back pipe of the machine.The interface is fitted with clamps and tightened with a screwdriver. Fix the drain pipe with suction cups The connection of the drain pipe: Put end of the drain into a sink or bucket. How to Drain Excess Water From Hoses If the sink is more than1000 mm higher than the floor, the excess water in hoses cannot be drained directly into the sink. -
Page 31: Troubleshooting
Troubleshooting Before connecting customer service center. Please check the chart below before connecting customer service center Problem Possible cause Solutions Replace fuse or reset circuit breaker Fuse burn-out or circuit trip. Remove any other appliances that share same circuit with the dishwasher. The machine is Make sure that dishwasher is on and the not working... - Page 32 Problem Possible cause Solutions Noise from Suspend the program and reposition the Dishes are loose. dishwasher dishes. This may be caused by site Beats in water installation or cross section In case of any doubts, please contact pipe of pipelines. Please see “Loading the basket”...
-
Page 33: Error Code
Error code When failure occurs, error code will appear to remind you: Error code Code name Possible cause Long water Flow-meters, drain valves, or pump failures shall intake time Heating pipe or thermistor is at abnormal state, which needs to be unplugged the power plug from Abnormal heating the outlet , and needs to be repaired by qualified serviceman. -
Page 34: Specification
Specification Model DWS-34AHK 42 (W) x 47 (H) x 44 (D) Dimension (cm) 220 V AC Rated voltage 50 Hz Rated frequency 730 W Rated power Water consumption 0.430 kWh Power consumption Electronic type Control mode IPX1 Washing capacity : 34 pcs ( Soup plate X1 + Melamine bowl X1 +... -
Page 35: How To Connect With Toshiba Tsmartlife App
HOW TO CONNECT WITH TOSHIBA TSMARTLIFE APP Download the TSmartLife app 1. Download and install the app. Search for: On an app market (Google Play Store, Apple App TSmartLife in the mobile application market, Store), search for "TSmartLi download and install the APP. - Page 36 HOW TO CONNECT WITH TOSHIBA TSMARTLIFE APP 7. Enter email and confirmation 8.Set password.Then click the button 9.Enter the homepage. click code. Agree on the submit. the button of Add device. Privacy Policy and Software License and User Service Agreement.Click the button Next.
- Page 37 HOW TO CONNECT WITH TOSHIBA TSMARTLIFE APP 16.Choose While Using the App. 17.Return back to the TSmartLife. 18.Wait for connecting. Enter WiFi password.Click the button of Next. 19.Added successfully. Named 20.Back to the homepage. it as your wish.Then click the button of Done.
-
Page 38: Instructions To Function With Tsmartlife App
INSTRUCTIONS TO FUNCTION WITH TSMARTLIFE APP Application software operation interface Click power on to enter the home page of Dishwasher Click "Program Selection" to select the program, click "Confirm" to return to the main interface Slide the screen to the bottom, select the additional functions you need in "Additional", and click "Start"... - Page 39 Click "Delay" to set delay start. After entering the next interface, click "Delay" again to select the startup time you want, click "Program Selection" to select the program you need, and you can also select additional functions. After setting, click "Confirm" to jump to the appointment interface, the device will enter the appointment countdown automatically.
-
Page 40: Toshiba Tsmartlife Troubleshooting
Products cannot accept the legal agreement required to join the first time network. Please switch to a network that does not require authentication. Insufficient encryption ... for cybersecurity reasons Toshiba does not recommend ○ products to join non-encrypted or insufficiently encrypted networks (e.g. WEP encryption). - Page 41 For WiFi configuration modes A, Band C, follow the instructions provided by your router manufacturer to make the indicated router configuration changes: ● In case of router configuration A (see above), Toshiba recommends enabling 5GHz band if it is disabled in your router and choosing a distinct SSID name for the 5GHz band (e.g.
Need help?
Do you have a question about the DWS-34AHK and is the answer not in the manual?
Questions and answers