
Related Manuals for Toshiba DW-08T1CIS-UA


Summary of Contents for Toshiba DW-08T1CIS-UA
- Page 1 技术要求: 1.该手册印刷颜色均为黑色 : PANTONE BLACK 2.纸张规格为A 5 3.如果供应商的排版需要加空白页,请加在封底 6720602321 标记 处数 分区 更改文件号 签 名 日 期 阶 段 标 记 比 例 80G双胶 校对 REV. 编 制 性能 数 量 重 量 审 核 佛山市顺德区美的 审 定 排版 洗涤电器制造有限公司 批...
- Page 2 DISHWASHER INSTRUCTION MANUAL Model: DW-08T1CIS(W)-UA DW-08T1CIS(S)-UA Read these instructions carefully before using your DISHWASHER, and keep it carefully.
- Page 3 SAFETY INSTRUCIONS All instructions described should be carefully read and followed. These instructions are precautions to prevent the risks of serious injury or death of the user, and any damages to property. MARKINGS WARNING indicates high possibility of serious injury (*1) or WARNING death of the user.
- Page 4 Before cleaning or maintaining the dishwasher, disconnect the power plug first. Disconnect power plug Do not connect or disconnect the power plug by wet hand. No touch This may cause electric shock or fault and cause injuries. by wet hand Do not use damaged power lines, power plug or loose power socket.
- Page 5 Insert the power plug securely to the base and let the cord go downward. If the cord goes upward or if the plug is incompletely inserted, it may cause fire due Insert plug to electric leakage or heat generation. Do not operate by putting easily combustible items such as towels and cloth inside the cabinet of the dishwasher.
- Page 6 When disconnecting the plug from the socket, do not pull the power line by force. Pull out by grasping the power plug. It may cause electric shock or fault and cause No pulling injuries. by force Do not use soap, washing powder or other hand sanitizer. Only dishwashing powder suitable for automatic dishwasher.
- Page 7 Quantity of tableware advised: 96 pcs (Cup x8 + Saucer x8+ Glass x8 + Medium serving bowl x1 + Small serving bowl x1 + Large serving bowl x1 +Oval platter x1 + Loading Dinner plate x8 + Soup plate x8 + Dessert dish x8 + Fork x8 + Soup spoons x8 + capacity Dessert spoon x8 + Teaspoon x8 + Knife x8 + Serving spoon x2 + Gravy ladle x1 + Serving fork x1)
- Page 8 Treatments Handle the package of the dishwasher with extreme care. All packages are recyclables. Plastic parts are marked with abbreviation of international standard; Polyethylene, e.g., tableted package material Polystyrene, e.g., packing material Polymethyl, e.g., plastic clip Polymer, e.g., control panel Polypropylene, e.g., inner wall Warning The packing material may be dangerous to children!
-
Page 9: Table Of Contents
Contents Please carefully read the instruction manual before using the dishwasher, and this is helpful for the use and maintenance of the product. Recognize the dishwasher Dishwasher features Control panel Program Setting Washing program Start up Changing the program mid-cycle Put additional dishes in End of washing program Use the dishwasher... - Page 10 Installation Product dimension Power connection Water connection Connection of drain hoses Troubleshooting Before connecting customer service center Error code Specification...
-
Page 11: Recognize The Dishwasher
Recognize the dishwasher Important: Before using the dishwasher for the first time, read following instructions to ensure the best results. Dishwasher features Spray arm Salt container Filter assembly Dispenser Upper spray arm Upper basket Cutlery rack Lower basket... -
Page 12: Control Panel
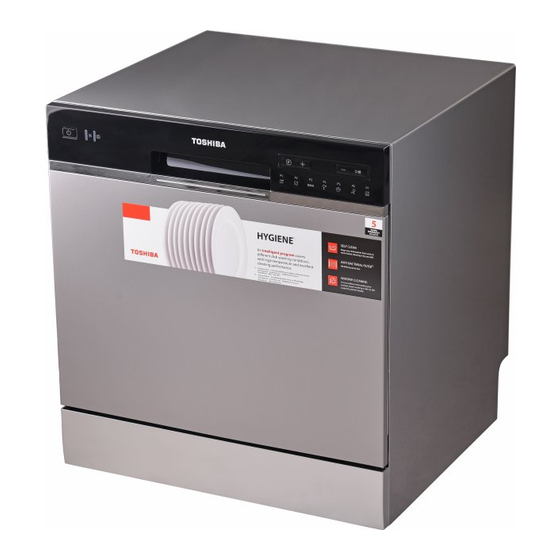
Control panel Power Power on/off Program Select the appropriate washing program and the corresponding indicator will light up. HYGIENE Use to remove bacteria y our dishes and glassware. Maintains the water temperature at 70˚C. NORMAL For normally soiled loads, such as pots, plates, glasses and lightly soiled pans. - Page 13 Warning If the “ ” indicator is lit, it means the dishwasher is low on indicator dishwasher rinse aid and requires a refill. If the “ ” indicator is lit, it means the dishwasher is low on dishwasher salt and requires a refill. Display To show the remaining time and delay time, error codes etc.
-
Page 14: Program Setting
Program Setting Washing program Following table shows best cleaning procedures and amount of dishwashing powder required according to the dirty level of the dishes, as well as the Highest Water Dishwashing Time Power Water Program Temperature powder (g) (min) (Kwh) 4/20 1.25 12.5... -
Page 15: Start Up
Start up 1. The plug shall be firstly plugged into the socket. Power supply shall be of 220-240V AC 50Hz type, with socket of 10 A 220-240V AC. 2. Make sure that the water supply is turned on to full pressure. 3. -
Page 16: Put Additional Dishes In
additional dishes in Additional dishes can be placed in at any time before dishwasher program start. If you want to reload dishes in the process of washing, please follow instructions below: 1. Press “Start/Pause” button to pause washing program; 2. Wait for 5 seconds to open the door; 3. -
Page 17: Use The Dishwasher
Use the dishwasher Water softener The water softener must be set manually, using the water hardness dial. The water softener is designed to remove minerals and salts from the water, which would have a detrimental or adverse effect on the operation of the appliance. The more minerals there are, the harder your water is. -
Page 18: Adding Salt To The Softener
Adding salt to the softener Warning Only use salt specifically designed for dishwashers use! Every other type of salt not specifically designed for dishwasher use, especially table salt, will damage the water softener. In case of damages caused by the use of unsuitable salt the manufacturer does not give any warranty nor is liable for any damages caused. -
Page 19: Rinse Aid And Detergent
Function of the rinse aid and detergent The rinse aid is released during the final rinse to prevent water from forming droplets on your dishes, which can leave spots and streaks. It also improves drying by allowing water to roll off the dishes. Your dishwasher is designed to use liquid rinse aids. Warning Only use branded rinse aid for dishwasher. -
Page 20: Adding Rinse Aid To The Dispenser
Adding rinse aid to the dispenser Remove the rinse aid reservoir cap Carefully pour in the rinse-aid into by rotating it counterclockwise. its dispenser, whilst avoiding it to overflow. Close the rinse aid reservoir cap by rotating it clockwise. Adjusting the rinse aid reservoir Turn the rinse aid indicator dial to a number between 1 and 6. -
Page 21: Adding Rinse Aid To The Dispenser
Adding detergent to the dispenser Push latch to open Press the release catch on the detergent Add detergent into the larger dispenser to open the cover. cavity (A) for the main wash cycle . For more heavily soiled wash loads, also add some detergent into the smaller cavity (B) for the pre-wash cycle . -
Page 22: Install Dishwasher Bowl Basket
Install dishwasher bowl basket Suggestion Purchase dishes suitable for dishwasher. Use a suitable mild dishwashing powder. If necessary, consult the manufacturer for more information. For special appliances, try to select a washing program that with a lower temperature. Do not take out the glass dishes immediately after the program ends to prevent damage. Use the dishwashing machine rationally Not for: Limited use:... - Page 23 Loading the upper basket Use the upper rack for small or delicate items such as small plates, cups, saucers, glasses. Place items so that the open end faces down for cleaning and drying. Do not stack items on top of each other. Item Number Cups...
- Page 24 Loading the cutlery rack Cutlery should be placed in the cutlery rack separately from each other in the appropriate positions, and do make sure the utensils do not nest together, this may cause bad performance. Up rack Down rack Item Item Number Number...
-
Page 25: Cleaning And Care
Cleaning and care Filter cleaning The filtering system in the base of the wash cabinet retains coarse debris from the washing cycle. The collected coarse debris may cause the filters to clog. Check the condition of the filters regularly and clean them if necessary under running water. Follow the steps below to clean the filters in the wash cabinet. -
Page 26: Spray Arms Cleaning
Spray arms cleaning It is necessary to clean the spray arms regularly for hard water chemicals will clog the spray arm jets and bearings. To clean the spray arms, follow the instructions below: To remove the upper spray arm, To remove the lower spray arm, pull hold the nut in the center still and out the spray arm upward. -
Page 27: Care And Maintenance
Care and maintenance The door and the door seal Clean the door seals regularly with a soft damp cloth to remove food deposits. When the dishwasher is being loaded, food and drink residues may drip onto the sides of the dishwasher door. These surfaces are outside the wash cabinet and are not accessed by water from the spray arms. -
Page 28: Product Dimension
Installation Product dimension Height (H) 590 mm Width (W) 550 mm Depth (D1) 500 mm (with the door closed) Depth (D2) 964 mm (with the door opened 90°) -
Page 29: Power Connection
Warning Electric Shock The machine shall be installed after the power is off. If not, electric shock or death can be caused. Please make sure the machine is properly grounded before use. Power connection Warning Electric Shock Do not use an extension cord or power adapter on this machine. In case, do not cut off or remove the grounding connection of power cord. -
Page 30: Water Connection
If there is no grounding in your place, the power cord with air switch will make a protection. When users touch the shell with electricity of the appliance, it will cut the power immediately to protect from constant electric shock. When power supply safely, the indicator(A) lights up. - Page 31 How to drain excess water from hoses If the sink is 1000 higher from the floor, the excess water in hoses cannot be drained directly into the sink. It will be necessary to drain excess water from hoses into a bowl or suitable container that is held outside and lower than the sink.
-
Page 32: Troubleshooting
Troubleshooting Before connecting customer service center Please check the chart below before connecting customer service center Problem Possible cause Solutions Replace fuse or reset circuit breaker Remove any other appliances that share Fuse burn-out or circuit trip. same circuit with the dishwasher. The machine is Make sure that dishwasher is on and the not working... - Page 33 Problem Possible cause Solutions Noise from Suspend the program and reposition the Dishes are loose. dishwasher dishes. Beats in water This may be caused by site In case of any doubts, please contact pipe installation or cross section Please see “Loading the basket” Dishes are not placed correctly.
-
Page 34: Error Code
Error code When failure occurs, error code will appear to remind you: Error code Code name Possible cause Long water Flow-meters, drain valves, or pump failures intake time shall be repaired by qualified serviceman. Heating pipe or thermistor is at abnormal state, which needs to be unplugged the Abnormal heating power plug from the outlet , and needs to... -
Page 35: Specification
Specification Model DW-08T1CIS(W)-UA, DW-08T1CIS(S)-UA 550 (W) x 590 (H) x 500 (D) Dimension (mm) 220-240V Rated voltage 50 Hz Rated frequency 1380-1620W Rated power Water consumption 0.72 kWh Power consumption Electronic type Control mode IP×1 96 pcs (Cup x8 + Saucer x8+ Glass x8 + Medium serving bowl x1 + Small serving bowl x1 + Large serving bowl x1 +Oval platter x1 + Dinner plate x8 + Soup plate x8 + Dessert dish x8 + Fork x8 + Washing capacity...
Need help?
Do you have a question about the DW-08T1CIS-UA and is the answer not in the manual?
Questions and answers