Advertisement
Quick Links
1
Comet Mini 4.5ft Euro/Elemac Camera Jib
(JB-CMTM-01)
A s s e m b l y M a n u a l
What's In The Box
Please inspect the contents of your shipped package to ensure you have received everything that is listed
below.
1 x 2ft Extension Arm
Flight Case
Proaim 2.5ft Comet Mini Jib
2 x Counter weight Rods
1 x Extension rod
All rights reserved.
No part of this document may be reproduced, stored in a retrieval system, or transmitted by any form or by any means,
electronic, mechanical, photo-copying, recording, or otherwise, except as may be expressly permitted by the applicable copyright
statutes or in writing by the Publisher.
Advertisement

Related Manuals for PROAIM JB-CMTM-01


Summary of Contents for PROAIM JB-CMTM-01
- Page 1 Please inspect the contents of your shipped package to ensure you have received everything that is listed below. 1 x 2ft Extension Arm Flight Case Proaim 2.5ft Comet Mini Jib 2 x Counter weight Rods 1 x Extension rod All rights reserved.
- Page 2 Comet Mini Jib Setup • Place the euro adapter plate (Not Included) to the center hole of the Spin Dolly (Not Included). • Attach the euro adapter plate (Not Included) to the Spin Dolly (Not Included) with the help of the bolt and then tighten it using the Allen key.
- Page 3 • Fix the jib fork with the center column by locking the knob via locking lever. • Comet Jib is properly attached. • Then pull & take out the side knob of the jib. • Loosen the knob located at one of ends of the jib, &...
- Page 4 • Then add weights (Not Included) on both the rods accordingly and secure them with the locking pins. 2 different length rods of counterweight for easy balancing NOTE: It comes with two counterweight rods that let you hang dumbbell weights for counterbalancing.
- Page 5 • The Comet jib provides 360° rotation with its panning knob. 360° panning • Loosen and remove the adapter knob present on the front of the Comet jib. • Loosen the ratchet knob of the offset bracket (Not Included) and mount it on the front section adapter of the jib.
- Page 6 Slide the Camera onto the Fluid Head and properly lock it with the help of the locking pin. NOTE: The Comet can be combined with additional Proaim accessories, Suitable for all standard Euro / Mitchell Remote Head systems. Extend the length of Comet Jib •...
- Page 7 • Now, loosen the ratchet knob present on this knob. • You can set the required height by removing the push pin present on the top most rod of the Comet Jib. • Now ,securely re-insert the push pin. • Firmly secure the ratchet knob by tightening it, as shown in the image.
- Page 8 • Now, detach the front section of the jib ,as shown in the image. Assembly of Extension Arm • Properly remove the extension arm by loos- ening it. • Insert the extension arm into the Comet Jib. • Now, re-insert and tighten the ratchet knob. •...
- Page 9 Assembly of Extension rod • Carefully align the extension rod with the rod of the Comet Jib and attach it. • Now, insert the push pin to secure the rod. • Insert the head section of the Comet Jib on the extension arm.
- Page 10 • Loosen the ratchet knob of the head section of the Jib. • Loosen the adapter knob present on the head section with the help of Allen key. • Now, remove the adapter with ease. Assembly of Boom Rig • Remove and attach the safety cap of the boom rig (Not Included)
- Page 11 Assembly of Offset Euro • Insert the offset euro (Not Included) with the bottom of boom rig (Not Included) loosening the ratchet knob. • Set the offset euro (Not Included) in the boom rig (Not Included) as per your requirement and tighten it with the ratchet knob.
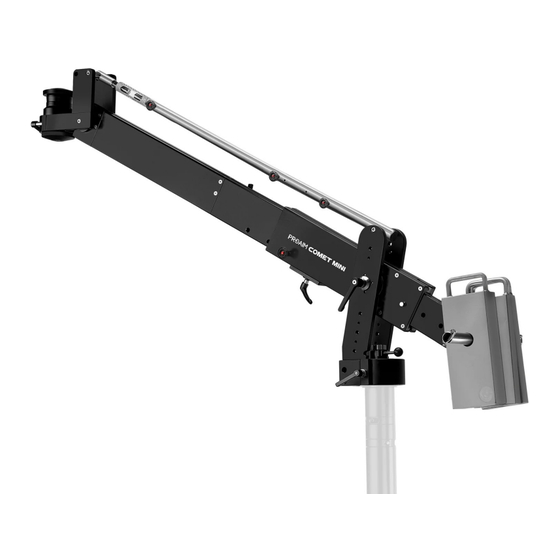
- Page 12 YOUR PROAIM COMET MINI 4.5FT EURO/ELEMAC CAMERA JIB ALL DRESSED UP AND READY TO GO! (SHOWN WITH OPTIONAL ACCESSORIES) Warranty: We offer one year warranty for our products from date of purchase. Within this period of time, we will repair it without charge for labor or parts. Warranty doesn’t cover transportation costs nor does it cover a product subjected to misuse or accidental damage.
Need help?
Do you have a question about the JB-CMTM-01 and is the answer not in the manual?
Questions and answers