Table of Contents
Advertisement
Quick Links
Advertisement
Table of Contents

Related Manuals for Wolfbox G910


Summary of Contents for Wolfbox G910
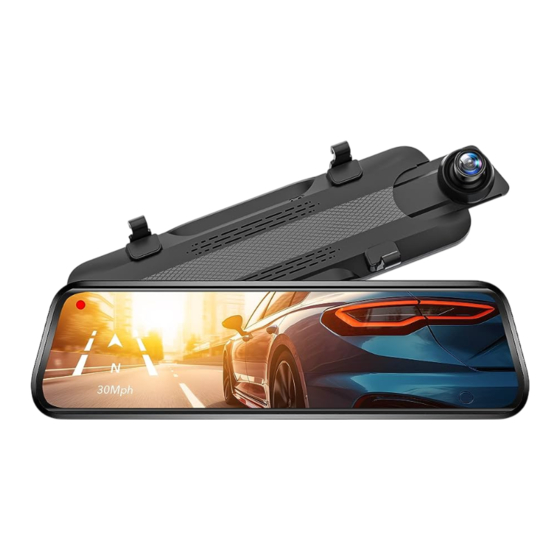
- Page 1 Mirror Dash Cam G910 User Manual...
- Page 3 IC warning: This device contains licence-exempt transmitter(s)/receiver(s)/ that comply with Innovation Science and Economic Development Canada's licence-exempt RSS(s). Operation is subject to the following two conditions: 1. This device not cause interference. 2. This device must accept any interference, including interference that may cause undesired operation of the device.
-
Page 4: Table Of Contents
Product Overview Product Specifications Precautions Warnings Package Contents Appearance About the Micro-SD card Installation... - Page 5 Power On/Off Menu Settings Playback Mode Playback Menu Home Play on Computer Trouble Shootings One Year Limited Warranty...
-
Page 6: Product Overview
Product Overview Thank you for choosing WOLFBOX G910 Mirror Dash Cam.This product provides high quality image and capture irrefutable evidence Ultra-high pixels can also record the beauty along the way for you. WOLFBOX is a professional automotive supplies manufacturing company. We have worked in the field of dash cam for more than ten years. -
Page 7: Product Specifications
Product Specifications V535 Video Format lmage Format JPEG Front Cam GC2093 Rear Cam AHD 1080P Display Type Rear Len FPS 25fps Display Size 10 inch External,3.5mm headphone interfcace Display Resolution 1280*320 Photograph Support Power Interface TYPE C Support Power by ACC with Hardware kit Full Touch Screen Support Working Temperature... -
Page 8: Precautions
Pre-cautions 1. If you have any questions, or have a need of accessories, please CONTACT US by customer service mailbox, we will solve it for you. 2. Please use original accessories provided in the package, just in case of compatible issues after using others', especially use 2 or 3 in 1 cigar socket will lead to 100% insufficient current supply. - Page 9 Be sure to use included accessories and parts. Using other parts may damage the equipment or cause fire, electric shock, or malfunction. If this product is damaged or malfunctions, stop using it immediately and consult your dealer. Continued use may cause fire, electric shock or vehicle failure. If it interferes with driving, please do not install it.
-
Page 10: Package Contents
Do not operate or install the camera while driving, or attempt to change any setting etc. Pull off the road first and only do so when it is safe. PACKAGE CONTENTS Tip: In addition to the original accessories in the package, we also provide separate Hardwire -Kit (used for parking monitoring and replacement of car chargers), rear 1* 1080P Rear... -
Page 11: Appearance
Appearance Name Description Record the front view of the Front Camera vehicle Power connector Power Supply Port(Type-C) Port used to connect the rear Rear Camera Port camera AV-IN TYPE-C Provide extensible storage TF card slot (class 10 Max 256GB) Used to connect GPS port(GPS function requires optional GPS GPS port antennal) - Page 12 Speed & Driving Direction: Once GPS is connected, Date & Time the information will show -- mph Settings: Touch to enter the menu setting File Playback: Playback the video & Photo Adjust the screen brightness Switching front and rear camera view Recording Status: Yellow flashing means Audio Record is on Lock Recording...
-
Page 13: About The Micro-Sd Card
About the Micro SD Card When using a new MicroSD card, be sure to format it in the dash cam. 1. When you remove or insert the SD card, make sure the device is turned off. 2. Use a Micro SD card with Class 10 or higher (32GB-256GB). we recommend 32GB SD card [Asin: B09Q87X76V] and 128GB SD card [Asin: B0B7KWV4CJ] 3. - Page 14 SD card removal When taking out the SD card, please ensure that the dashcam is powered off.
-
Page 15: Installation
Installation Please check the functionality of dash cam with its all accessories before installation. When you use the dash cam for the first time, the dash cam comes with factory default settings and you do not need to set it manually. Host installation Step 1: Place the host on the rear-view mirror by hand, be sure to separate the silicone brackets on both sides of the rear-view mirror. - Page 16 Step 2: Buckle the product in the rearview mirror by silicone button. Step 3: Adjust the front lens to the right position.
- Page 17 Rear camera installation AV-IN TYPE-C...
- Page 18 We recommend install the rear camera above the license plate. 1. Fix camera with 3M adhesive Find a best location tear off the 3M adhesive on the rear camera, fix the rear camera near by the car license plate lamp. (if you need to adjust the angle, please attach the rear camera bracket to the rear camera and tighten it with screws first).
- Page 19 3. Install the cable Look for lights near the license plate that have gaps to allow wires to pass through. Run the rear camera cable through the gap into the trunk of your car. 4. Connect the rear cameras power cable to the extension cable. After snaking your rear camera's extension cable, connect the power cable to your rear camera's extension cord.
- Page 20 5. Route your rear camera's power cable to the front of the car. If you'd like, use a trim removal tool to pop out the headlining panel directly above your windshield. Then, run your cable through the exposed chamber. 6. Power on the dash cam with box included car charger, don't charge it with your own chargers.
- Page 21 If you need a license plate bracket, we also provide this accessory (Asin: BOB91ZTXTJ). Glare due to high beams is unavoidable. We have an upgraded WDR rear camera (Asin: B09KRM9QQ5) that can effectively improve this problem. About the WDR rear camera: it has the function of automatically adjusting the brightness. So it will look darker than the front camera when shooting during the day.
- Page 22 How to install the mirror dash cam 1. Route your rear camera's power cable to the front of the car. If you'd like, use a trim removal tool to pop out the "headlining panel directly above your windshield. Then, run you cable through the exposed chamber.
- Page 23 4. Installation method (Note: GPS model is facing up, placed on the instrument panel). CAUTION: Connect the cigar plug cord connector in the correct orientation. Connecting in the wrong direction may cause malfunction or damage. If you cannot connect successfully, check the connection part carefully before connecting.
- Page 24 How to install the GPS GPS front and back Installation location...
- Page 25 Considering the use effect and installation convenience, we usually recommended customers to install it at the position specified in the picture. Of course, you can also try to install it in other locations for testing, and choose the location you think is most suitable. Installing step 1.
- Page 26 2. Once the GPS is installed, the GPS icon on the home screen will show. After the GPS signal has been received, it will show direction and speed. Q: Why is my GPS not working? /How to use GPS ? A: If you cannot receive the signal after inserting the GPS, please follow the steps below.
- Page 27 If still cannot receive the signal, it may be a GPS problem. Please CONTACT US and we will help you solve this problem.
-
Page 28: Power On/Off
Power ON/OFF If you turn on the engine (ACC on) while the cigar power adapter is connected,the power will be turned on automatically and the opening screen will be displayed. Press and hold the power button to turn off the power during startup,and then briefly press the power button again to turn on the power of the unit and display the opening screen. - Page 29 Swipe left and right to switch between front view, rear view and split screen Swipe the screen up and down to adjust the angle of view.
-
Page 30: Playback Mode
Playback Mode When you turn on the power, the dash cam will start recording automatically. Click enter the playback mode. Playback Menu Normal Recording... - Page 31 Emergency Recording ① ② ③ ④ ③ ① Normal Recording (Front) Lock Recording (Front&Rear) ② ④ Normal Recording (Front) Photos...
- Page 32 Function interface Click the setting icon to enter the function menu, where you can adjust various functions and parameters of the entire machine.
- Page 34 Function Description Function Function Options Adjust the loop 1min / 2min / 3min recording duration. Movie Clip Time Function Function Description Function Options Adjust the sensitivity of G-sensor. It is Off/Low/Middle/High recommended G-Sensor to adjust to"Low". Sensitivity...
- Page 35 Emergency Video Recording 30 Seconds 28 Seconds Car Crash 20 Seconds When the car crashes at 28 seconds, the normal recording time is 28 seconds, and then the G-sensor detects the impact for 20 seconds, so the emergency recording time is 48 seconds. NOTE :...
- Page 36 Short press power button to turn off screen,or set a screensaver if you don't want the screen to stay on all the time. Function Description Function Function Options Set the status of the screen display Turn off/10S/30S/60S when recording. Screen Saver...
- Page 37 Function Description Function Function Options Flip the recording direction horizontally Rear Mirror...
- Page 38 Function Description Function Function Options Flip the recording direction up and down Rear Flip...
- Page 40 Function Description Function Function Options Adjust the angle of Off On the auxiliary line for Reverse line reversing and the Calibration Reversing Line angle of the screen.
- Page 41 Reversing Mode To use the parking assist function, you need to connect the red wire of the rear camera to the positive pole of the car's reversing light. Then when you hang in the R gear, the recorder will automatically switch to parking mode. Full-screen reversing mode...
- Page 42 Panorama reversing mode After GPS plugged in,you can only set the time by timezone...
- Page 43 Set the current time All time zones. zone Time Zone CAUTION : The Parking Mode function requires a G910 hardwire kit activate. NOTE : If you need this function, please connect the hardwire kit.(CONTACT US to get G910 hardwire kit...
- Page 44 When G910 Hardwire Kit is connected, and you will find. 12-hour or 24-hour parking modes is available. Parking Mode Select "12h/24h" After the car is turned off, the dash cam screen will display: Acc off, will close LCD: 05. The dash cam screen is black, but the dash cam still record at 1fps. Time-lapse video...
-
Page 45: Home
Home Click to enter home 00:08 02 11 Playback Setting Fri, 10 Mar 2023... - Page 46 Function Function Options Function Description Pedestrain detection Pedestrain not detected Pedestrain detected...
-
Page 47: Play On Computer
Correct Video Player to Play Videos We recommend GPS Media player which can view google maps. You can get it free.Mac/Win Version Download: https://wolfbox.com/gps-player/ 1. Playback Screen: Playback screen display 2. Scroll Bar: Click, can speed forward or back 3. GPS Information: Including Latitude, Longtitude,Speed 4. -
Page 48: Trouble Shootings
Trouble Shootings Please feel free to contact our customer support at contact@wolfbox.com. Most emails- are typically replied within 10 hours. However, all questions will be answered within 24 Hours. Why the rear camera does not display 1.Please confirm whether the rear cable is installed correctly, pay attention to whether the 4pin connection position is loose and whether the position of the host and the rear camera mouth is loose. - Page 49 3.If the connection is correct, please use a tester to measure whether the voltage is output from the reversing light when in reverse gear. Why dash cam does not work/cannot be turned on/freezes/restarts repeatedly? 1. Unplug the GPS, card, and rear camera cable, reset after power on again, and try to see if it can be turned on.
-
Page 50: One Year Limited Warranty
ONE YEAR LIMITED WARRANTY We are committed to giving customers the best product experience and after-sale service. Our warranty period is one year. If the machine parts are damaged or there are any problems during use, we will solve them in time and provide you with a satisfactory shopping experience. Please CONTACT US with your online order, and we will provide free replacement and lifetime technical support. - Page 51 If you have any problem about the function or installation, please feel free to TELL us. Scan to Get WhatsAPP Line Help Center Installation of FAQ and Operation hardwire kit Videos For more information: WOLFBOX Europe: Service_EU@wolfbox.com E-mail: service_us@wolfbox.com Other Countries: Service@wolfbox.com Website: www.wolfbox.com Help Center :...
- Page 52 Check us out here! We have professional customer service! E-mail: service@wolfbox.com Phone: +1 888 296 8399...
Need help?
Do you have a question about the G910 and is the answer not in the manual?
Questions and answers