Table of Contents
Advertisement
Quick Links
Advertisement
Table of Contents

Subscribe to Our Youtube Channel
Related Manuals for Epson SL-D500 Series


Summary of Contents for Epson SL-D500 Series
- Page 1 User’s Guide CMP0386-00 EN...
- Page 2 Epson printer. Epson is not responsible for any use of this information as applied to other printers. Neither Seiko Epson Corporation nor its affiliates shall be liable to the purchaser of this product or third parties for damages, losses, costs, or expenses incurred by the purchaser or third parties as a result of accident, misuse, or abuse of this product or unauthorized modifications, repairs, or alterations to this product, or (excluding the U.S.) failure to strictly comply with Seiko Epson Corporation’s operating and maintenance instructions.
-
Page 3: Table Of Contents
Printing Photos Using Epson Smart Panel..47 How to Use EPSON Software Updater..22 Printing Documents Using Epson Smart Panel..47 Checking Software Update Availability. - Page 4 SL-D500 Series User's Guide Contents Replacing the Roller Assembly Kit... 59 Adding Paper Information from Custom Settings (Windows Only)....92 Print Head Nozzle Check.
- Page 5 Supported Media......135 Epson Special Media....135 Other Commercially Available Paper.
-
Page 6: Notes On Manuals
Warnings must be followed maintenance for daily use. to avoid serious bodily injury. Epson Support (PDF) Provides information about Epson Support for each region. Caution: Cautions must be followed to Online Manuals avoid damage to this product or bodily injury. - Page 7 SL-D500 Series User's Guide Notes on Manuals Click to print the PDF manual. Each time it is clicked the bookmarks are hidden or shown. Click the title to open the relevant page. Click [+] to open the titles lower in the hierarchy.
-
Page 8: Before Use
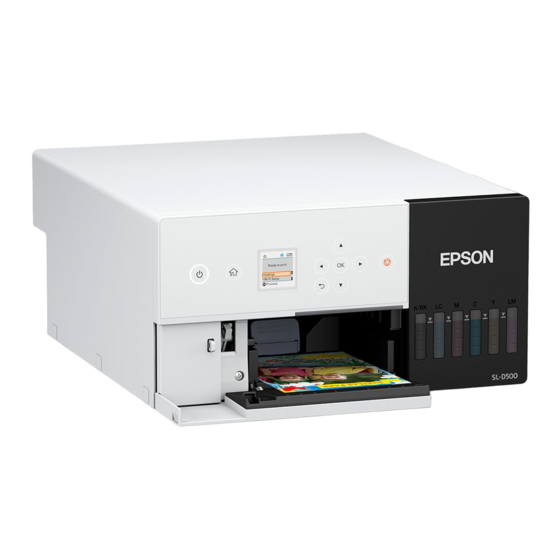
SL-D500 Series User's Guide Before Use Before Use Printer Parts Front Control panel “Control Panel” on page 13 Front cover Open when loading paper or printing. It opens automatically when printing starts. Status light : Error has occurred. Check the content of the error on the screen. - Page 9 SL-D500 Series User's Guide Before Use Edge guide Align them with the edges of the paper when loading paper.
-
Page 10: Inside
SL-D500 Series User's Guide Before Use Inside Inner cover Open when doing maintenance or removing paper jams. Maintenance box cover Open to replace the maintenance box. Maintenance box Container that holds the waste ink fluid. “Replacing Maintenance Box” on page 53 Ink tank Supplies ink to the print head. - Page 11 SL-D500 Series User's Guide Before Use Set in the transportation lock position so ink does not leak when moving or transporting the printer. Normally, set it in the print position. “Moving and Transporting the Printer” on page 137...
-
Page 12: Rear
SL-D500 Series User's Guide Before Use Rear AC inlet Connects the power cord to the printer. Rear cover Remove when doing maintenance or removing paper jams. By removing the rear cover, you can pull out the interior to the point that the print head is visible. -
Page 13: Control Panel
SL-D500 Series User's Guide Before Use Control Panel P button (power button), P light (power light) This is normally on (the light is lit) during use. If an emergency occurs, or when the printer is not going to be used for an extended period, turn this off (the light turns off). -
Page 14: Understanding And Operating The Display
SL-D500 Series User's Guide Before Use Understanding and Operating the Display Home Screen Settings menu Set the printer and execute maintenance functions. Use the u/d buttons to select items and press the Z button to go to the next screen. -
Page 15: Text Input Screen
SL-D500 Series User's Guide Before Use Text Input Screen To enter characters and symbols for network settings from the control panel, use the u/d/l/r buttons and the software keyboard on the screen. Press the u/d/l/r button to select a character or function button on the keyboard, and then press the Z button. -
Page 16: Notes On Usage
Use paper recommended by our company. Note the following points when handling paper. ❏ Use Epson special media under normal room conditions (temperature: 15 to 25 °C, humidity: 40 to 60%). ❏ Do not fold the paper or scratch the surface of the paper. - Page 17 SL-D500 Series User's Guide Before Use ❏ Avoid touching the printable surface of the paper with your bare hands. Moisture and oil from hands can have an adverse effect on the print quality. ❏ Handle paper by the edges of the paper. Also, we recommend wearing cotton gloves when handling paper.
-
Page 18: Notes On Handling Ink Bottles
SL-D500 Series User's Guide Before Use Notes on storage ❏ Avoid locations that are subject to direct sunlight, excessive heat, or humidity. ❏ Keep the paper in its original package after opening it, and keep the paper in a flat place. -
Page 19: Introducing The Software
Introducing the Software Install the printer driver and Maintenance Tool on your computer to use the printer. Download and install the latest printer driver and Maintenance Tool from the Epson Web site to use the printer in the best conditions. - Page 20 The software checks if new software or update information is available on the Internet and installs it when available. You can also update the manuals for this printer. “How to Use EPSON Software Updater” on page 22 EPSON NetConfig SE With this software, you can configure various network settings for the printer from your computer.
- Page 21 Firmware Updater updates to update the printer firmware. *1 This is optional software. *2 Download this software from App Store or Google Play if necessary. *3This is not installed automatically. Download it from Epson’s website and install it, if necessary.
-
Page 22: Installing Maintenance Tool (Windows Only)
Note: on page 64 Software that is not displayed in the list cannot be updated using EPSON Software Updater. Check for the latest versions of the software from the Epson Web site. How to Use EPSON https://www.epson.com Software Updater Receiving Update Notifications... -
Page 23: Instructions For Starting
Select the software to delete, and then click Enter or Return key. Uninstall/Change (or Uninstall). Format: To Delete the Printer Driver IPv4: https://IP address of printer/ Select EPSON SL-D500 Series Printer IPv6: https://[IP address of printer]/ Uninstall. Example: To Delete Maintenance Tool IPv4: https://192.168.100.201/ Select EPSON SL-D500 Series Software. -
Page 24: Mac
When the printer driver is deleted, Maintenance Tool is also deleted. Use the "Uninstaller" to uninstall the printer driver. Downloading the Uninstaller Download the "Uninstaller" from the Epson website. https://www.epson.com/ Using the Uninstaller Check the procedure when downloading "Uninstaller" on the Epson website, and follow the instructions. -
Page 25: Basic Operations
SL-D500 Series User's Guide Basic Operations Basic Operations Loading paper Item Prepared Spread apart the left, right, and front edge Prepare the following items. guides all the way. ❏ New paper to be loaded ❏ Gloves Wear when handling the paper so that the paper does not get dirty. - Page 26 If you grip to tightly, air cannot get into the edges of the paper to separate the sheets that are stuck together. Note: For Epson Special Media that supports two-sided printing, load it so the side facing the opening when the paper package is opened faces downward.
- Page 27 SL-D500 Series User's Guide Basic Operations Raise the front edge guide. Move the paper against the front edge guide. Insert the 2 hooks, as shown in the illustration, until you hear them click. Insert the paper cassette Important: Use both hands to insert the paper cassette. If...
-
Page 28: Basic Printing Methods (Windows)
SL-D500 Series User's Guide Basic Operations Basic Printing Methods Set the Image Size and Resolution, and then click OK. (Windows) Select Original Size for Fit To, and then match the Width and Height to the size of the paper being printed. - Page 29 SL-D500 Series User's Guide Basic Operations ❏ Print Quality Click File - Print in this order. The print qualities that you can select vary The Photoshop Print Settings screen is depending on the type of paper that was displayed. selected.
-
Page 30: How To Cancel Printing (From The Computer)
SL-D500 Series User's Guide Basic Operations To print without borders (margins), select Note: Borderless. ❏ When the printer driver’s Color Adjustment “Borderless Printing on All Sides” on is set to Color Controls, select Printer page 41 Manages Colors in Color Handling in Color Management. -
Page 31: How To Cancel Printing (From The Printer)
SL-D500 Series User's Guide Basic Operations “How to Cancel Printing (from the Printer)” on Basic Printing Methods page 31 (Mac) Click the printer icon on the taskbar. This section explains how to print and how to cancel printing. Printing is executed from application software on a Whether or not an icon is displayed depends on computer connected to the printer. - Page 32 SL-D500 Series User's Guide Basic Operations Set the Image Size and Resolution, and then Click File - Print in this order. click OK. The Photoshop Print Settings screen is Select Original Size for Fit To, and then match displayed. the Width and Height to the size of the paper being printed.
- Page 33 SL-D500 Series User's Guide Basic Operations The print qualities that you can select vary To do two-sided printing on paper that depending on the type of paper that was supports two-sided printing, select Two-sided selected. Printing Settings in the pop-up menu, and set Normally, set Normal.
-
Page 34: How To Cancel Printing (From The Computer)
SL-D500 Series User's Guide Basic Operations Select the print data you want to cancel, and Note: then click[×]. ❏ When the printer driver’s color adjustment is set to Manual Settings, select Printer Manages Colors in Color Handling in Color Management. -
Page 35: Printing Using Various Print Functions
SL-D500 Series User's Guide Printing Using Various Print Functions Color management from the printer Printing Using driver Various Print The printer driver uses the operating system’s color management system and carries out all color Functions management processes. This is used when you want to produce similar print results from different applications under the same operating systems. - Page 36 SL-D500 Series User's Guide Printing Using Various Print Functions Click Advanced in Color Adjustment. Note: For information on supported platforms, see the website for the application in question. Example of Adobe Photoshop 2021 The Photoshop Print Settings screen opens. Select Color Management, then select Printer Manages Colors in Color Handling.
- Page 37 SL-D500 Series User's Guide Printing Using Various Print Functions When the contrast is raised, bright sections become brighter, and dark sections become In other applications, set No Color darker. When the contrast is lowered, the Management. difference between light and dark sections decreases.
-
Page 38: Color Management From The Application (No Color Management)
Move the slide bar of each color to adjust the colors. Note: EPSON Color Controls will not be available in the following applications if step 1 is omitted. ❏ Adobe Photoshop CS6 or later ❏ Adobe Photoshop Elements 12 or later ❏... -
Page 39: Color Management From The Printer Driver (Icm) (Windows)
SL-D500 Series User's Guide Printing Using Various Print Functions Select Color Management, then select Photoshop Manages Colors in Color Handling, and then select Printer Profile and Rendering Intent. (2) In Color Management, select No Color Adjustment, and then click OK. -
Page 40: Color Management From The Printer Driver (Colorsync) (Mac)
SL-D500 Series User's Guide Printing Using Various Print Functions When using applications featuring a color Display the printer driver’s Main screen. management function, specify how to adjust When using Adobe Photoshop 2021, click Print colors from these applications. Settings to display the printer driver’s Main When using applications without a color screen. -
Page 41: Borderless Printing On All Sides
SL-D500 Series User's Guide Printing Using Various Print Functions Types of Borderless Printing Note: The following applications do not support color Methods management printing by ColorSync. ❏ Adobe Photoshop You can perform borderless printing using the ❏ Adobe Photoshop Elements following two methods: Auto Expand or Retain Size. -
Page 42: Setting Procedure
SL-D500 Series User's Guide Printing Using Various Print Functions ❏ Make the image data as large as the paper size. Select Auto Expand or Retain Size as the Method of Enlargement, and then click OK. When Auto Expand is selected, set the slider to set the amount of enlargement. -
Page 43: Printing On Paper Of Non-Standard Sizes
SL-D500 Series User's Guide Printing Using Various Print Functions Where XXXX is the actual paper size, such as The paper sizes you can set are shown below. 102 x 152 mm (4 x 6 in). Width Printing with margins: 89.0 to 101.6 mm Borderless printing: 89.0, 101.6 mm... -
Page 44: Settings On Mac
SL-D500 Series User's Guide Printing Using Various Print Functions “Basic Printing Methods (Mac)” on page 31 On the User-Defined Paper Size screen, enter Paper Size Name, set a paper size to use, and then click Save. Note: ❏ To change the information you saved, click... -
Page 45: Double-Sided Printing
SL-D500 Series User's Guide Printing Using Various Print Functions “Basic Printing Methods (Windows)” on Note: page 28 ❏ To edit saved information, click the paper size name from the list on the left side of the custom paper sizes screen. -
Page 46: Settings On Mac
SL-D500 Series User's Guide Printing Using Various Print Functions Set other items if necessary, and then print. Select Two-sided Printing Settings in the pop-up menu, and set the binding method in Two-sided Printing. Settings on Mac Open the Print screen, and set the Paper Size. -
Page 47: Printing From Smart Devices
“Basic Operations” on page 25 Set up your printer for wireless printing. Printing Photos Using If Epson Smart Panel is not installed, install it. “Introducing the Software” on page 19 Epson Smart Panel Connect your smart device to the same wireless network as your printer. -
Page 48: Printing Using Mopria Print Service
SL-D500 Series User's Guide Printing from Smart Devices Load paper in the printer. Print from your device to your printer. Note: Set up your printer for wireless printing. For more details, access the Mopria Web site at https://mopria.org. Connect your smart device to the same wireless network as your printer. -
Page 49: Printing From Cloud Services
This is a shared driver supported by Remote Print Driver. When printing using a printer in a remote location, you can print by changing the printer on the usual applications window. See the Epson Connect web portal for details on how to setup or print. https://www.epsonconnect.com/... -
Page 50: Maintenance
Dispose of consumables and optional parts in accordance with your local laws and statutes, such as by entrusting them to an industrial waste disposal company. In such cases, submit the “Safety data sheet” to the industrial waste disposal company. You can download it at your local Epson Web site. -
Page 51: Refilling Ink
Open the ink tank cover. Read the precautions for filling ink that are Important: shown on screen, and then proceed to the next ❏ Epson recommends the use of genuine Epson screen. ink bottles. ❏ Do not repeatedly refill with small amounts of ink. - Page 52 SL-D500 Series User's Guide Maintenance Align the bottle with the ink inlet and insert it, Securely close the ink tank cap. and then wait until the ink stops by itself at the upper limit line (a). By inserting the bottle into the ink inlet for the correct color, the ink automatically starts filling and then stops at the upper limit line.
-
Page 53: Replacing Maintenance Box
SL-D500 Series User's Guide Maintenance Follow the on-screen instructions to update the Check that the power light is lit. ink levels of the colors of ink you filled. When the power light is flashing, the printer is operating. Wait until all operations have Important: stopped. - Page 54 SL-D500 Series User's Guide Maintenance A buzzer sounds when it is pulled out in the Install the new maintenance box. orientation shown in the illustration. Press the maintenance box being installed all the way in until it stops. See the following for more information on disposing of the maintenance box.
-
Page 55: Cleaning The Platen
SL-D500 Series User's Guide Maintenance Cleaning the Platen Open the inner cover. If the back of printed paper is dirty, paper dust (white dust) has accumulated on the platen, making it dirty. Clean the platen according to the following procedure. -
Page 56: Cleaning And Replacing The Roller Assembly Kit
SL-D500 Series User's Guide Maintenance Install the rear cover. Pull the paper cassette out. Important: Use both hands to pull the paper cassette out. If you use only one hand, the paper cassette may fall and be damaged because the paper cassette is heavy when it is pulled out. - Page 57 SL-D500 Series User's Guide Maintenance Open the inner cover, and set the transportation lock in the transportation position, as shown in the illustration. Putting the transportation lock in the transportation position, prevents the ink from leaking when the printer is stood on end in step...
- Page 58 SL-D500 Series User's Guide Maintenance Use a soft cloth that has been dipped in water and carefully wrung out to wipe any dirt, such as paper dust, off of the rollers. Important: Do not wipe the rollers with a dry cloth. This could scratch the surface of the rollers.
-
Page 59: Replacing The Roller Assembly Kit
SL-D500 Series User's Guide Maintenance Open the inner cover, and set the Insert the paper cassette transportation lock in the print position, as shown in the illustration. Important: Use both hands to insert the paper cassette. If Important: you use only one hand, the paper cassette... -
Page 60: Print Head Nozzle Check
SL-D500 Series User's Guide Maintenance “How to Clean the Roller Assembly Kit” on “Using the Maintenance Tool (Mac)” on page 78 page 56 Important: Important: When checking the state of the nozzles, 1 sheet of Do not touch the roller surfaces of the Roller paper is used because the printer prints a check Assembly Kit. -
Page 61: How To Print A Nozzle Check Pattern
SL-D500 Series User's Guide Maintenance Print a nozzle check pattern to check whether How to Print a Nozzle Check any nozzles are clogged, and then select Nozzle Pattern Check. Repeat checking and cleaning until all the lines in the nozzle check pattern are printed. -
Page 62: Print Head Cleaning (Normal Cleaning)
SL-D500 Series User's Guide Maintenance Print a nozzle check pattern to check whether Printer menu Maintenance Tool any nozzles are clogged, and then select Nozzle Print Head Cleaning Forced Cleaning - Normal Check. Repeat checking and cleaning until all the lines in the nozzle check pattern are... -
Page 63: Power Ink Flushing
If that does not improve the situation, execute If the clogs are not cleared even after doing this, Power Ink Flushing. contact your dealer or Epson Support. See the next section for details about Power Ink Flushing. Power Ink Flushing... -
Page 64: Using The Maintenance Tool (Windows)
When multiple printers are connected to a single computer, you can operate multiple printers at one time. Starting and Closing Starting On the computer, click Start - Applications List - EPSON - EPSON SL-D500 Series Maintenance Tool in this order. Note: You can also start it by clicking Maintenance Tool in the Maintenance tab of the printer driver screen. -
Page 65: Explanation Of The Main Screen
SL-D500 Series User's Guide Using the Maintenance Tool (Windows) Explanation of the Main Screen The following main screen appears when you start Maintenance Tool. The configuration and functions of the main screen are shown below. Item Functions Printer list area Displays a list of printers that are connected to the computer. -
Page 66: Explanation Of The Printer Settings
SL-D500 Series User's Guide Using the Maintenance Tool (Windows) Item Functions Printer maintenance The following maintenance functions can be executed for the printer selected in the printer list area (A). Diagnostic Cleaning Detects clogged nozzles and automatically performs cleaning. “Diagnostic Cleaning” on page 74 Forced Cleaning Performs manual cleaning. - Page 67 SL-D500 Series User's Guide Using the Maintenance Tool (Windows) The configuration and functions of the Printer settings screen are shown below. Item Functions Printer list area Displays a list of printers that are connected to the computer. The settings of the items indicated by the following icons can be changed in the Printer settings tab.
- Page 68 SL-D500 Series User's Guide Using the Maintenance Tool (Windows) Item Functions Tabs and information display The following three types of tabs are displayed. area Printer settings tab You can set the printer’s various operations. “Printer settings tab” on page 68 Auto Nozzle Check You can set the various settings related to auto nozzle checks.
- Page 69 SL-D500 Series User's Guide Using the Maintenance Tool (Windows) The configuration and functions of the Auto Nozzle Check Settings tab in the Printer settings screen are shown below. to G, the changes are applied by clicking Set. After changing the settings in items...
- Page 70 SL-D500 Series User's Guide Using the Maintenance Tool (Windows) Item Functions Periodic Check Set the time to execute auto nozzle check according to the number of sheets printed. If the number of sheets being printed for a single job exceeds the number of printed sheets set for this item, then the number of sheets for that job is printed, after which auto nozzle check is executed.
-
Page 71: Explanation Of The System Environment Settings Screen
Clicking Save saves log files saved on the printer to the desktop of the computer. The following shows the file name. Epson SL-D500 Series_<saved date>.zip Save Status Sheet Select a printer in Printer Name, and then click Save to save a status sheet of the selected printer to a PDF file. -
Page 72: Printer Maintenance
SL-D500 Series User's Guide Using the Maintenance Tool (Windows) Print Nozzle Check Pattern Printer Maintenance Print a nozzle check pattern when you want to confirm whether clogged nozzles have been cleared You need to perform print head maintenance if there... -
Page 73: Print Nozzle Check Pattern Method
SL-D500 Series User's Guide Using the Maintenance Tool (Windows) Select a printer, in the printer list area on the Print Nozzle Check Pattern main screen, on which to execute a nozzle Method check. When you select multiple printers, press and Load paper in the paper cassette. -
Page 74: Print Head Cleaning Method
SL-D500 Series User's Guide Using the Maintenance Tool (Windows) If none of the check pattern is missing, then the Note: print head nozzles are not clogged. Diagnostic Cleaning uses 1 sheet of paper each Example of clogged nozzles time for the following. - Page 75 SL-D500 Series User's Guide Using the Maintenance Tool (Windows) “Refilling Ink” on page 51 Check the results of Diagnostic Cleaning in the message displayed in Printer history. When “Clogged nozzles detected. Perform [Forced Cleaning].” is displayed, execute Diagnostic Cleaning again.
-
Page 76: Print Head Alignment Method
SL-D500 Series User's Guide Using the Maintenance Tool (Windows) “Power Ink Flushing” on page 63 Check the printed adjustment pattern. Confirm which of the print pattern numbers has no gaps between the nozzles in each group. Print Head Alignment Method If the print results appear grainy or out of focus, perform Print Head Alignment. - Page 77 SL-D500 Series User's Guide Using the Maintenance Tool (Windows) “Explanation of the Printer settings” on page 66 Click Print in Paper Feed Adjustment. Adjustment patterns are printed. Check the printed adjustment pattern. Two groups of adjustment patterns, #1 and #2, are printed.
-
Page 78: Using The Maintenance Tool (Mac)
SL-D500 Series User's Guide Using the Maintenance Tool (Mac) Using the Maintenance Tool (Mac) This section explains how to use Maintenance Tool by starting it from the computer connected to the printer. Summary of the Maintenance Tool From your computer you can perform adjustment and maintenance operations such as checking the printer’s status, making settings, performing head cleaning and so on. -
Page 79: Explanation Of The Main Screen
SL-D500 Series User's Guide Using the Maintenance Tool (Mac) Explanation of the Main Screen The following main screen appears when you start Maintenance Tool. The configuration and functions of the main screen are shown below. Item Functions Printer Name Displays the printer name. -
Page 80: Explanation Of The Printer Window Screen
SL-D500 Series User's Guide Using the Maintenance Tool (Mac) Item Functions Menu List Clicking on an icon executes the following functions for the printer displayed in printer name (A). Printer Window Displays information about the loaded paper, the approximate amount of space in the maintenance box, and the ink levels. -
Page 81: Explanation Of The Operation Condition Settings Screen
SL-D500 Series User's Guide Using the Maintenance Tool (Mac) The configuration and functions of the Printer Window screen are shown below. Item Functions Ink Levels Displays the ink level for each color. The following is shown for each color of ink. -
Page 82: Explanation Of The Auto Nozzle Check Settings Screen
SL-D500 Series User's Guide Using the Maintenance Tool (Mac) The configuration and functions of the Operation Condition Settings screen are shown below. Item Functions Buzzer Set volume of and whether to sound the warning buzzer. Sleep Mode Threshold Set the time before switching to Sleep Mode. - Page 83 SL-D500 Series User's Guide Using the Maintenance Tool (Mac) Item Functions Auto Nozzle Check Set the conditions in which an automatic nozzle check is done. Select one of the following. ❏ High quality You can printing at high print quality because you can execute a Nozzle Check automatically before printing and stop printing if clogged nozzles are detected while printing.
-
Page 84: Printer Maintenance
SL-D500 Series User's Guide Using the Maintenance Tool (Mac) Print Nozzle Check Pattern Printer Maintenance Print a nozzle check pattern when you want to confirm whether clogged nozzles have been cleared You need to perform print head maintenance if there... -
Page 85: Print Nozzle Check Pattern Method
SL-D500 Series User's Guide Using the Maintenance Tool (Mac) Select Normal, and then click Execute. Select Print Nozzle Check Pattern, and then click Execute. Nozzle check is executed. The check pattern is printed. Check the results of the nozzle check in the Review the printed check pattern while message displayed on screen. -
Page 86: Print Head Cleaning Method
SL-D500 Series User's Guide Using the Maintenance Tool (Mac) Click Execute. Print Head Cleaning Method Types of Cleaning and Order of Implementation There are two types of cleaning, Forced Cleaning, which is cleaning the print head manually, and Diagnostic Cleaning, which detects clogged nozzles and cleans the print head automatically. -
Page 87: Print Head Alignment Method
SL-D500 Series User's Guide Using the Maintenance Tool (Mac) Power cleans more powerfully than Normal. If the clogged nozzles are not cleared even after Use this setting if the nozzles are still clogged executing cleaning at Power, then do not use even after repeating Normal cleaning several the printer for printing for at least 12 hours. -
Page 88: Paper Feed Adjustment Method
SL-D500 Series User's Guide Using the Maintenance Tool (Mac) “Print Head Alignment Method” on Select the number of the print pattern you page 87 confirmed, and then click Set. Select the number of the print pattern you confirmed individually for both #1 and #2. - Page 89 SL-D500 Series User's Guide Using the Maintenance Tool (Mac) Select the number of the print pattern you confirmed, and then click Set. Select the number of the print pattern you confirmed individually for both #1 and #2. The adjustment values are applied.
-
Page 90: Adding Paper Information
SL-D500 Series User's Guide Adding Paper Information Right-click your printer icon, and select Adding Paper Printing preferences. Information If the paper information for the paper you want to use is not displayed on the control panel screen or in the printer driver, you can add paper information. -
Page 91: Settings On Mac
SL-D500 Series User's Guide Adding Paper Information Click Reading Paper Type File, select a Paper Select the printer and click Options & Supplies Type File, and then click Open. - Utility - Open Printer Utility. Maintenance Tool starts. Click SL Paper Type Additional Tool. -
Page 92: Adding Paper Information From Custom Settings (Windows Only)
SL-D500 Series User's Guide Adding Paper Information Click Next. Open the Control Panel, and click Hardware and Sound - Devices and Printers, in this order. Right-click your printer icon, and select Printing preferences. Select the paper to use, and then click Next. - Page 93 SL-D500 Series User's Guide Adding Paper Information Click Custom Settings, and select Media Type. Confirm that the paper information you added in step 5 is selected, and then click Set. Choose a paper type that is the closest match to the paper to be used.
-
Page 94: Control Panel Menu
SL-D500 Series User's Guide Control Panel Menu Control Panel Menu Menu List The following items and parameters can be set and executed in the Menu. See the reference pages for more details on each item. Settings For more information on these items, see U “Details of the Menu”... - Page 95 SL-D500 Series User's Guide Control Panel Menu Item Parameter Paper Source Settings Error Notice Paper Size Notice On, Off Paper Type Notice On, Off Paper Setup Auto Display On, Off Sound Mute Off, On Button Press Off, Low, Medium, High...
- Page 96 SL-D500 Series User's Guide Control Panel Menu Item Parameter Print Status Sheet Wi-Fi Setup Wi-Fi (Recommended) Wi-Fi Setup Wizard Other SSIDs Push Button (WPS) Others PIN Code (WPS) Wi-Fi Auto Connect Disable Wi-Fi Wi-Fi Direct Other Methods Other OS Devices...
- Page 97 SL-D500 Series User's Guide Control Panel Menu Item Parameter Epson Connect Services Register/Delete Suspend/Resume Email Address Status Print Network Status Sheet Print Counter Reports Network Security Settings Admin Settings Admin Password Change Restore Default Settings Lock Setting Off, On Password Encryption...
-
Page 98: Details Of The Menu
SL-D500 Series User's Guide Control Panel Menu Details of the Menu * indicates default settings. Item Parameter Explanation Printer Status Supply Status You can confirm how to check the amount of ink remaining, the free space in the maintenance box, and the product number of the maintenance box. - Page 99 SL-D500 Series User's Guide Control Panel Menu Item Parameter Explanation Print Head Nozzle Print a nozzle check pattern to check whether nozzles (holes that eject Check ink) in the print head are clogged. Print Head Cleaning Clean the print head nozzles to clear the clogs.
- Page 100 SL-D500 Series User's Guide Control Panel Menu Item Parameter Explanation Sound Sets volume of sounds produced by the printer. When Mute is On, all sounds are muted. Mute Button Press Medium High Error Tone Medium High Thick Paper Normally, leave this Off.
- Page 101 SL-D500 Series User's Guide Control Panel Menu Item Parameter Explanation Language Arabic Select the language that appears on screen. Czech Danish Dutch English Farsi Finnish French German Greek Hindi Hungarian Indonesian Italian Japanese Korean Malay Norwegian Polish Portuguese Romanian Russian...
- Page 102 SL-D500 Series User's Guide Control Panel Menu Item Parameter Explanation Keyboard Select the keyboard layout used in the control panel screens. QWERTY Sleep Timer 1 to 60 Set the time until the printer automatically goes into sleep (energy saving) mode when the printer has continuously not been operated.
- Page 103 SL-D500 Series User's Guide Control Panel Menu Item Parameter Explanation Wi-Fi Direct Directly connect smart devices to the printer using a wireless LAN. “Connecting to a Smart Device” on page 107 Other Methods Other OS Devices Modify Change Network Name:...
- Page 104 “How to Use Web Config” on page 22 Epson Connect Services Register/Delete Register a printer to Epson Connect or delete a registered printer. See the following portal site for details on using the Epson Connect service. https://www.epsonconnect.com/ Suspend/Resume Temporarily stop using the Epson Connect service or restart using the service after it was stopped.
- Page 105 SL-D500 Series User's Guide Control Panel Menu Item Parameter Explanation Print Network Status Prints a network status sheet. Sheet Print Counter Shows the amount of printing from when the printer was first used until the present. Reports Checks the status of the printer’s network connection and prints a network connection diagnosis report.
-
Page 106: Wireless Lan Connection
SL-D500 Series User's Guide Wireless LAN Connection Wi-Fi Direct (Simple AP) Wireless LAN Connection Connection Use this connection method when you want to connect the printer directly to a computer or smart device without using wireless LAN (Wi-Fi) and a Types of Wireless LAN wireless LAN router (access point). -
Page 107: Connecting To A Smart Device
QR code method of the printer to the computer. Select the connection method for the printer, and then Epson Smart Panel is used to print from a smart click Next. device. Install an Epson printing app, such as Epson Smart Panel, on the smart device in advance. - Page 108 SL-D500 Series User's Guide Wireless LAN Connection Use the Camera app for iOS 11 or later. You Use the l/r buttons to select iOS, and then cannot connect to the printer using the press the Z button. standard camera app for iOS 10 or earlier. Also, you cannot connect to the printer using an app for scanning codes.
-
Page 109: Connecting To Devices Other Than Ios Using Wi-Fi Direct
Note: ❏ If you are using Android, you may find it convenient to do the settings from Epson Smart Panel. ❏ You only need to make these settings for the printer and the device that you want to connect to once. -
Page 110: Making Wi-Fi Settings By Entering The Ssid And Password
SL-D500 Series User's Guide Wireless LAN Connection Related information Select the SSID for the wireless LAN router (access point) from the printer’s control panel, “Making Wi-Fi Settings by Entering the SSID and and then press the Z button. Password” on page 110 Note: “Making Wi-Fi Settings by Push Button Setup”... -
Page 111: Setting Up Using Wi-Fi Auto Connect
SL-D500 Series User's Guide Wireless LAN Connection ❏ The wireless router is compatible with WPS Related information (Wi-Fi Protected Setup). ❏ The current Wi-Fi connection was established by “Printing a Network Connection Report” on page 112 pressing a button on the wireless router. -
Page 112: Printing A Network Connection Report
SL-D500 Series User's Guide Wireless LAN Connection Select PIN Code (WPS). Press the Z button to print the network connection report. If an error has occurred, check the network Use your computer to enter the PIN code (an connection report, and then follow the printed eight digit number) displayed on the printer’s... - Page 113 SL-D500 Series User's Guide Wireless LAN Connection ❏ If you are using push button setup to establish a “E-10” on page 114 network connection, make sure your wireless router supports WPS. You cannot use push button “E-11” on page 115 setup if your wireless router does not support WPS.
- Page 114 SL-D500 Series User's Guide Wireless LAN Connection ❏ WEP-64 bit (40 bit) ❏ If the printer’s Obtain IP Address setting is set to Manual, the IP address you manually set is invalid ❏ WEP-128 bit (104 bit) due to out of range (for example: 0.0.0.0). Set a valid IP address from the printer’s control panel or...
- Page 115 SL-D500 Series User's Guide Wireless LAN Connection ❏ Make network settings again using the installer. If DHCP is enabled, change the printer’s Obtain IP Address setting to Auto. If you want to set the IP You can run it from the following website.
-
Page 116: Message On The Network Environment
SL-D500 Series User's Guide Wireless LAN Connection Message on the Network Environment Message Solution The Wi-Fi environment needs to be After moving the printer closer to the wireless router and removing any improved. Turn the wireless router off obstacles between them, turn off the wireless router. Wait for about 10 seconds, and then turn it on. -
Page 117: Replacing Or Adding New Wireless Routers
SL-D500 Series User's Guide Wireless LAN Connection Replacing or Adding New Wireless Routers If the SSID changes due to the replacement of a wireless router, or a wireless router is added and a new network environment is established, re-set the Wi-Fi settings. -
Page 118: Problem Solver
If you turn the power off and on several times and the same error occurs, then a sensor may be malfunctioning. Contact your dealer or Epson Support. Failed to check nozzle clogging. For Could not read the check pattern of the Auto Nozzle Check function. - Page 119 Recovery Mode 1. Connect the printer to a computer by USB (updates during recovery mode cannot use a wired or wireless network connection). Update Firmware 2. Download the latest firmware from the Epson website, and start the update.
-
Page 120: Error Messages (Windows)
To check error messages on the computer, open EPSON Status Monitor 3. Click the utility icon in the Windows taskbar, and then click the printer’s name - EPSON Status Monitor 3, in this order, to start EPSON Status Monitor 3. -
Page 121: Error Messages (Mac)
SL-D500 Series User's Guide Problem Solver Check the printer’s status, such as the remaining amount of ink, also. Error Messages (Mac) When an error occurs while printing, you can check error messages on the computer that is connected to the printer. -
Page 122: Message Codes That Appear In Maintenance
SL-D500 Series User's Guide Problem Solver Select the printer and click Options & Supplies - Utility - Open Printer Utility. Error messages are displayed at the top of the screen. When an error message is displayed, click the Printer Window, then check the solution on the screen and take the required measures. - Page 123 If you turn the power off and on several times and the same error occurs, then a sensor may be malfunctioning. Contact your dealer or Epson Support. I-2401 Maintenance box is nearing the end of its There is little available space in the maintenance box.
- Page 124 Confirm whether the ink tanks for all the colors of ink are being filled. Repairs are needed if all the colors of ink are being filled. Contact your dealer or Epson Support. W-2325 Failed to check nozzle clogging. Could not read the check pattern of the Auto Nozzle Check function.
- Page 125 Check the condition of the wireless LAN and communication cables for the printer and computer, and then turn the printer’s power off and on again. If the situation is still not improved, then repairs are needed. Contact your dealer or Epson Support.
- Page 126 “Paper jammed in paper cassette.” on page 127 If the situation is still not improved, then repairs are needed. Contact your dealer or Epson Support.
-
Page 127: Troubleshooting
❏ Do not remove paper forcibly when clearing paper jams. Otherwise, the printer could be damaged. ❏ If paper is jammed inside the printer where you cannot reach it with your hands, do not try to forcibly extract it yourself, contact your dealer or Epson Support. - Page 128 SL-D500 Series User's Guide Problem Solver Remove the rear cover. Remove the rear cover even if the paper jammed inside the rear cover is left inside the printer. Insert the paper cassette Slowly pull out the paper and scraps of paper Important: jammed inside the rear cover.
-
Page 129: You Cannot Print (Because The Printer Does Not Work)
Sound - Device Manager - Other devices, “Control Panel” on page 13 in this order. (2) Right-click EPSON SL-D500 Series, and “When a Message Is Displayed” on page 118 then click Update Driver Software. (3) Click Search automatically for updated driver software. -
Page 130: The Printer Sounds Like It Is Printing, But Nothing Prints
SL-D500 Series User's Guide Problem Solver The nozzle check pattern is not Does the current printer status show printed correctly. Paused? (Mac) Open the status dialog for your printer and check Perform head cleaning. whether printing is paused. (1) Click the Apple menu - System Preferences - The nozzles may be clogged. -
Page 131: The Prints Are Not What You Expected
SL-D500 Series User's Guide Problem Solver The color is not exactly the same as The Prints Are Not What You another printer. Expected Colors vary depending on the printer type Print quality is poor, uneven or due to each printer’s characteristics. -
Page 132: Feeding Or Ejecting Problems
Assembly Kit with a new one. temperature? “Consumables and Optional Items” on page 134 Epson special media should be used at normal room “Replacing the Roller Assembly Kit” on page 59 temperature (temperature: 15 to 25°C, humidity: 40 to 60%). For information about paper, such as thin... -
Page 133: Others
The initial value for the administrator’s password is the product’s serial number. If you forget the password after it was changed from the product serial number, contact your dealer or Epson Support. If the Lock Setting is Off, then you can execute Clear All Data and Settings without inputting the admin password. -
Page 134: Appendix
Ink bottle Epson recommends the use of genuine Epson ink bottles. Epson warranty does not cover damage caused by inks other than those specified, including any genuine Epson ink not designed for this printer or any third party ink. Other products not manufactured by Epson may cause damage that is not covered by Epson’s warranties, and under certain circumstances, may cause erratic printer behavior. -
Page 135: Supported Media
This part is for replacing the roller in the base of the printer. Supported Media We recommend you use the following Epson special media for high-quality printing results. The following paper can be used with the printer. (As of May 2022) Epson Special Media... - Page 136 SL-D500 Series User's Guide Appendix And, add these paper types before using them. “Adding Paper Information” on page 90 Important: ❏ Do not use paper that is wrinkled, scuffed, torn, or dirty. ❏ Paper types that are within the range of the printer’s specifications can be loaded, but paper feeding and print quality are not guaranteed.
-
Page 137: Moving And Transporting The Printer
SL-D500 Series User's Guide Appendix Moving and Transporting Important: the Printer When moving or transporting the printer, be sure that it is level; do not tilt it at an angle or place it upside down. Otherwise, ink could leak out. - Page 138 SL-D500 Series User's Guide Appendix Turn off the printer and remove the power cord Open the inner cover, and set the and all cables from the printer. transportation lock in the transportation position, as shown in the illustration. Important: Putting the transportation lock in the...
- Page 139 SL-D500 Series User's Guide Appendix Confirm that all the ink tank caps are securely Install the rear cover. closed. Put the printer in the shipping bag provided, and close it. Securely close the ink tank cover. Put the printer in the box, and pack in the protective materials from the time of purchase or commercially available packaging materials.
- Page 140 SL-D500 Series User's Guide Appendix Remove the rear cover. Note: See the Setup Guide for the procedure to connect LAN/USB cables to the printer. Open the front cover, and pull out the interior If you do not have a Setup Guide on hand, you can go of the printer until it stops.
-
Page 141: System Requirements
Appendix System Requirements Software for this printer can be used in the following environments. (As of May 2022) Supported OS and other elements may change. For the latest information, see the Epson Web site. Printer Driver Windows Operating system Windows 11 Windows 10/Windows 10 x64 Windows 8.1/Windows 8.1 x64... -
Page 142: Web Config
SL-D500 Series User's Guide Appendix Intel Core2 Duo 3.0 GHz or better Available memory space 1 GB or more Hard disk (Available volume to install) 2 GB or more Display resolution SXGA (1280×1080) or better USB connection, or wired or wireless LAN connection Connection method with the printer * For details on the connection methods (interface specifications), see the following. - Page 143 SL-D500 Series User's Guide Appendix Important: Use this printer at an altitude of up to 2000 m. Warning: This is a class A product. In a domestic environment this product may cause radio interference in which case the user may be required to take adequate measures.
- Page 144 SL-D500 Series User's Guide Appendix Interface Specifications Standards SL-D500, SL-D530 (except for Taiwan): IEEE802.11b/g/n Other than those noted above (including Taiwan): IEEE802.11b/g/n/a/ac Frequency band IEEE802.11b/g/n: 2.4GHz IEEE802.11a/n/ac: 5GHz Maximum 2.4GHz: radio-frequency 2400-2483.5 MHz: 20 dBm (EIRP) power transmitted 5GHz: 5150-5250 MHz: 20 dBm (EIRP)
- Page 145 SL-D500 Series User's Guide Appendix Warning: To prevent radio interference to the licensed service, this device is intended to be operated indoors and away from windows to provide maximum shielding. Equipment (or its transmit antenna) that is installed outdoors is subject to licensing.
-
Page 146: Necessary Space
*Space needed to do maintenance OPEN SOURCE SOFTWARE LICENSE TERMS This product uses open source software as well as software for which Epson owns the rights. The entire texts of the license agreements of the open source software are shown below. - Page 147 SL-D500 Series User's Guide Appendix 32 bit: %ProgramFiles%\EPSON\SL-D500 Series\License\License.txt Linux /usr/share/doc/epson-inkjet-printer-sld500-series/COPYING.LIB /usr/share/doc/epson-inkjet-printer-sld500-series/COPYING.EPSON...
Need help?
Do you have a question about the SL-D500 Series and is the answer not in the manual?
Questions and answers