Table of Contents
Advertisement
Quick Links
Advertisement
Table of Contents

Related Manuals for Epson SureLab D800 Series


Summary of Contents for Epson SureLab D800 Series
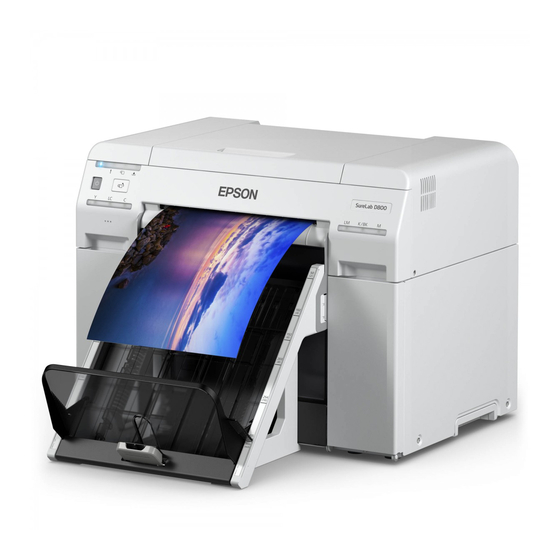
- Page 1 Epson® SureLab® D800 Series Operation Guide...
- Page 2 Windows is a registered tradermark of Microsoft Corporation in the United States and/or other countries. General Notice: Other product names used herein are for identification purposes only and may be trademarks of their respective owners. Epson disclaims any and all rights in those marks.
-
Page 3: Table Of Contents
Contents Contents Attaching the Print Tray (Optional) ..44 Attaching the Large Print Tray Introduction Optional....... 46 Meaning of Symbols. - Page 4 Contents When a Problem Cannot be Cleared... 99 Appendix Consumables and Optional Items... . . 100 Notes on Moving the Printer....101 Preparing to Move.
-
Page 5: Introduction
Before Use Introduction Meaning of Symbols Warning: Warnings must be followed to avoid serious bodily injury. Caution: Cautions must be followed to avoid damage to this product or bodily injury. Important: Important must be followed to avoid damage to this product. Note: Notes contain important information on the operation of this product. -
Page 6: Printer Parts
Before Use Printer Parts Front Top cover Open when a paper jam occurs or to perform maintenance. Status display light This light indicates when the printer's status is normal or if an error has occurred. See “Lights” on page 12 button Press to replace the roll paper. - Page 7 Before Use Scrap paper box Holds waste paper that is cut off during printing. Empty the scrap paper box when you replace the paper. Needs to be removed when loading or removing paper. See “Emptying the Scrap Paper Box” on page 61 Print tray (optional)/Large print tray (optional) Holds the ejected print outs.
- Page 8 Before Use Maintenance Tank Container that holds waste ink. See “Replacing the Maintenance Tank” on page 56...
-
Page 9: Rear
Before Use Rear Exhaust vent Exhausts air used to cool the printer internally. AC inlet USB port Airflow vent Takes in air to cool the printer internally. Lock lever Releases the lock for the rear cover. Rear cover Open when a paper jam occurs or to perform maintenance. -
Page 10: Paper Feed
Before Use Paper Feed Inner edge guide Set this to the width of the roll paper. Roll paper spindle Holds the roll paper. Knob Turn this to rewind the roll paper onto the roll paper spindle. Front edge guide Set this to the width of the paper. Paper light (blue) Indicates the paper insertion status for the roll paper feeder. -
Page 11: Print Head
Before Use Print head Print head Do not touch the print head unless you are removing a paper jam. Manually moving the print head may damage the printer. Platen Clean the platen if the back of the printed paper is dirty. See “Cleaning the Platen”... -
Page 12: Lights
Before Use Lights light (blue) Indicates the printer's operational status: The printer is ready to print. The printer is printing, initializing, performing maintenance, etc. Flashing: Off: The printer is not on, or printer operations have stopped due to an error. light (orange) Indicates the printer's error status: An error has occurred, the printer is performing error recovery operations, or a printer system... - Page 13 Before Use light (orange) Indicates the status of the maintenance tank: There is not enough free space in the maintenance tank, or an error has occurred because the maintenance tank was not recognized correctly. See “Replacing the Maintenance Tank” on page 56 Off: No error.
-
Page 14: Safety Instructions
Meaning of Symbols and Marks The symbols on this Epson product are used in order to ensure safety and proper use of the product and to prevent danger to customers and other persons, and property damage. -
Page 15: Notes On Installation
Before Use Notes on Installation Warning Do not block the printer's airflow vents. If the airflow vents are blocked, the internal temperature rises and could cause a fire. Do not cover with a cloth or other materials and do not install in an area with poor ventilation. Make sure to leave enough space around the printer. - Page 16 Before Use Warning Except as instructed in the documentation, do not disassemble the printer. Making repairs yourself is extremely dangerous and must not be attempted. Do not use the printer in locations where flammable or explosive gas may be present in the atmosphere.
-
Page 17: Notes On The Power Supply
Before Use Notes on the Power Supply Warning Use only the type of the power supply indicated on the label. Electric shock or fire could occur. Do not use the power plug if any foreign materials such as dust are stuck to it. Electric shock or fire could occur. -
Page 18: Notes On Consumables
Before Use Caution For safety reasons, when the printer is not used for an extended period of time, unplug the power cable from the electrical outlet. Notes on Consumables Caution If ink gets in the eyes or mouth, or stains the skin, treat the area as follows: ❏... -
Page 19: Notes On Usage
❏ If the printer is not used for an extended period of time, make sure you leave the ink cartridges and maintenance tank installed. ❏ Contact Epson Service and Support for guidelines when transporting the printer. Notes on the Paper Notes on handling Use paper recommended by Epson. - Page 20 ❏ Do not use paper that is wrinkled, scuffed, torn, or dirty. ❏ If the printer is left with paper loaded for some time, the leading edge of the paper may curl and print quality may decline. Epson recommends removing paper from the printer when it is not in use.
-
Page 21: Notes On Ink Cartridges
"replace cartridge" indicator comes on. ❏ This printer is designed for use with Epson genuine cartridges and ink only, not third-party cartridges or ink. ❏ Epson periodically provides firmware updates to address issues of security, performance, minor bug fixes and ensure your printer functions as designed. -
Page 22: Disposing Of Used Ink Cartridges And Maintenance Tanks
Before Use ❏ Even while nothing is printed, the printer uses ink from all cartridges during head cleaning and other maintenance operations to keep the print head in good condition. ❏ Although the ink cartridges may contain recycled materials, this does not affect printer function or performance. -
Page 23: Printing Methods
Printing Methods Printing Methods Basic Printing Methods See the "Printer Driver Operation Guide" for more details on the printer driver. Load paper into the printer. See “Replacing Paper” on page 25 Display the print screen for the application you are using. Click Print (or Print...) from the File menu. - Page 24 Printing Methods Select any of the settings as necessary. Mac: Windows: See the "Printer Driver Operation Guide" for an explanation of each setting item. When you have finished, click OK. On the application's print screen, click Print (or Print...) to start printing.
-
Page 25: Replacing Paper
If the Paper Level is not set correctly, the level displayed may not be correct. See “Changing Paper Settings” on page 38 ❏ You can load genuine Epson paper in 5", 6" and 8" roll widths in the roll paper feeder. The roll paper feeder supports roll paper between 3.5" and 8.3" wide. - Page 26 Replacing Paper See “Attaching the Roll Paper” on page 32 ❏ See “Attaching the Roll Paper Spindle” on page 33 ❏ ❏ See “Changing Paper Settings” on page 38...
-
Page 27: Recording The Remaining Paper Level
Replacing Paper Recording the Remaining Paper Level If necessary, make a note of the paper level before replacing the paper. Windows Open the Print Settings menu. See “Basic Printing Methods” on page 23 Click Display Printer Status. Make a note of the Paper Level from Paper Setup from Printer. - Page 28 Replacing Paper Start the Maintenance Tool. See the following for information on starting the Maintenance Tool. See “Error Messages (Mac)” on page 71 Click Printer Window. The Printer Window screen is displayed. Make a note of the Paper Level from Paper Setup from Printer.
-
Page 29: Removing The Roll Paper Spindle From The Printer
Replacing Paper Removing the Roll Paper Spindle from the Printer Important: When the M light is lit and paper is ejected from the eject slot, the printer is out of paper. light is lit and isn't flashing. Check that the printer's Important: Make sure the power is on before replacing paper. - Page 30 Replacing Paper Grip the handle to release the roll paper feeder and pull it out. Important: If you cannot remove the roll paper feeder for some reason, do not try to pull it out by force. Paper may be jammed inside the printer. Remove the paper by following the procedure in "Paper is Jammed in the Internal Paper Feeder".
-
Page 31: Removing The Roll Paper From The Spindle
Replacing Paper Removing the Roll Paper from the Spindle Stand the roll paper spindle on a flat surface and remove the gray adapter. Remove the paper. Note: After carefully rewinding the paper, place it in its original packaging, and then store the paper. -
Page 32: Placing Roll Paper On The Spindle
Replacing Paper Placing Roll Paper on the Spindle Remove the new paper from its packaging, and stand it on a flat, clean surface. Wipe the edge of the paper with a soft, clean cloth several times to remove any dust. Flip the paper roll and repeat the process. Place the paper roll on the spindle so that the paper winds clockwise. -
Page 33: Inserting The Roll Paper Spindle
Replacing Paper Insert the gray adapter onto the spindle and press down until there is no gap between the adapter and the roll paper. Inserting the Roll Paper Spindle To adjust the position of the inner edge guide, lift it towards you slightly and slide it to the width of the roll paper. - Page 34 Replacing Paper Hold the roll paper spindle in the orientation shown below, and place it in front of the roll paper feeder. Remove any tape or protective material from the paper. If the leading edge of the paper is not straight, cut it in a straight line with a pair of scissors. Load the roll paper spindle in the roll paper feeder with the gray adapter on the left.
- Page 35 Replacing Paper Lift the front edge guide and slide it to the width of the paper. Insert the leading edge of the paper into the paper feed slot until the paper light turns on. Make sure the leading edge is cut straight across to avoid paper feeding problems.
- Page 36 Replacing Paper Note: If the paper light does not turn on, turn the knob counter clockwise, and then insert the paper again. Push the roll paper feeder into the printer. Carefully roll the paper into the printer to remove any slack.
- Page 37 If the paper is left loaded in the printer for long periods of time, the leading edge of the paper may curl and print quality may decline. Epson recommends removing paper from the printer when it is not in use.
-
Page 38: Changing Paper Settings
Replacing Paper Changing Paper Settings After replacing paper, set the Paper Type and the Paper Level in the Maintenance Tool. See the "Maintenance Tool Operation Guide" for more details on the Maintenance Tool. Windows Set the Paper Type and Paper Level in Paper Settings - Current media, and then click Set. The paper width set in Paper Width is displayed. - Page 39 Replacing Paper Click Operation Condition Settings on the Maintenance Tool's main screen. Select Change the paper type and the paper remaining. When this is selected, you can change the Paper Type and Paper Level.
- Page 40 Replacing Paper Set the Paper Type and the Paper Level, and then click Set. The paper width set in Paper Width is displayed.
-
Page 41: Paper Output
Paper Output Printed paper is ejected from the front of the printer. Epson recommends that you use genuine Epson paper (available in 5, 6, or 8 inch widths), but you can use a variety of roll paper in sizes from 3.5 to 8.3 inches wide. -
Page 42: Print Tray (Optional)
Ejecting Paper Important: ❏ Do not pull paper that is being ejected. ❏ When paper is being ejected from the front, do not pull it or raise it higher than the output slot. Otherwise, print quality may decline. Note: When removing the scrap paper box, make sure you remove the print tray first. Print tray (optional) After printing, the paper is cut to the specified size and ejected to the print tray. -
Page 43: Large Print Tray (Optional)
Ejecting Paper Large print tray (optional) After printing, the paper is cut to the specified size and ejected to the large print tray. -
Page 44: Attaching The Print Tray (Optional)
Ejecting Paper Attaching the Print Tray (Optional) Tilt to insert the hooks, and then lower to hook it in place. - Page 45 Ejecting Paper When the length of the print size is 3.5 to 4 inches (89 to 102 mm), place the hooks into the top holes. When the length of the print size is 4 to 8 inches (102 to 203 mm), place the hooks into the bottom holes.
-
Page 46: Attaching The Large Print Tray Optional
Ejecting Paper Attaching the Large Print Tray (Optional) Tilt to insert the hooks, and then lower to hook it in place. - Page 47 Ejecting Paper Pinch the handle and move it to match the length of the printer size.
-
Page 48: Replacing Ink Cartridges
Replacing Ink Cartridges Replacing Ink Cartridges Caution: ❏ Do not disassemble ink cartridges. If disassembled, ink could get in your eyes or adhere to your skin. ❏ Do not shake the ink cartridges too vigorously; this can cause them to leak. ❏... -
Page 49: Checking From The Computer
Replacing Ink Cartridges Checking from the Computer Windows Click Display Printer Status in the printer driver . - Page 50 Replacing Ink Cartridges Check how much ink remains. When you have finished checking, click OK.
- Page 51 Replacing Ink Cartridges Start the Maintenance Tool. See the following for information on starting the Maintenance Tool. See “Error Messages (Mac)” on page 71 Click Printer Window on the main screen. The Printer Window screen is displayed. Check how much ink remains. When you have finished checking, click OK.
-
Page 52: Replacing The Ink
Replacing Ink Cartridges Replacing the Ink Important: ❏ Install ink cartridges into each slot. You cannot print if any of the slots are empty. Check that the printer's light is on. If the light is flashing, the printer is operating. Wait until all operations have stopped. The ink light indicates if it is necessary to replace the ink cartridges. - Page 53 Replacing Ink Cartridges Open the cartridge cover on the side that needs to be replaced. A warning buzzer sounds when you open the cover. Gently push in the empty ink cartridge so that it pops out a little, and then remove. See the following for more information on disposing of ink cartridges.
- Page 54 Replacing Ink Cartridges Important: Removed ink cartridges may have ink around the ink supply port, so be careful not to get any ink on the surrounding area when removing the cartridges. Remove the new ink cartridge from the box. Important: ❏...
- Page 55 Replacing Ink Cartridges Slide the ink cartridge all the way into the printer. Close the cartridge cover. Check that the printer's light is lit and isn’t flashing.
-
Page 56: Replacing The Maintenance Tank
Replacing the Maintenance Tank Replacing the Maintenance Tank The maintenance tank absorbs ink consumed during head cleaning. This section explains how to replace used maintenance tanks. Important: After removing the maintenance tank, do not leave the cartridge cover open, install a new tank immediately. -
Page 57: Checking From The Computer
Replacing the Maintenance Tank Checking from the Computer Windows Click Display Printer Status in the printer driver. Check the free space in the maintenance tank. When you have finished checking, click OK. - Page 58 Replacing the Maintenance Tank Start the Maintenance Tool. See the following for information on starting the Maintenance Tool. See “Error Messages (Mac)” on page 71 Click Printer Window on the main screen. The Printer Window screen is displayed. Check the free space in the maintenance tank. When you have finished checking, click OK.
-
Page 59: Replacement Procedure
Replacing the Maintenance Tank Replacement Procedure Check that the printer's light is on. If the light is flashing, the printer is operating. Wait until all operations have stopped. Open the cartridge cover on the right. A warning buzzer sounds when you open the cover. Be careful not to tilt the maintenance tank, and remove it carefully. - Page 60 Replacing the Maintenance Tank Prepare a new maintenance tank. Important: Do not touch the chip on the maintenance tank. Doing so may affect normal operation and printing. Insert the new maintenance tank. Close the cartridge cover. Check that the printer's light is lit and isn’t flashing.
-
Page 61: Emptying The Scrap Paper Box
Emptying the Scrap Paper Box Emptying the Scrap Paper Box Scraps of paper cut during printing accumulate in the scrap paper box. You need to empty out the paper scraps before the box is full. Check visually how much scrap paper has accumulated in the box. Empty the scrap paper box when you replace the paper. -
Page 62: Emptying The Scrap Paper Box
Emptying the Scrap Paper Box Attach the scrap paper box. Insert the bottom section, and then push the top section into place. Check that the printer's light is lit and isn’t flashing. -
Page 63: Cleaning The Platen
Cleaning the Platen Cleaning the Platen When the back of print outs is dirty, paper dust has accumulated on the platen. Follow the steps below to clean the platen. Perform cleaning with the power on. button and wait until the M light turns on. Press the Open the top cover by sliding it forward. -
Page 64: Cleaning The Platen
Cleaning the Platen Wipe off any paper dust (this is normally white dust) on the platen (the blue sections in the following figure) with a commercially available cotton swab. Important: Do not use a dirty swab when cleaning the platen. Wipe off any paper dust that has accumulated in the borderless absorbent areas (the blue sections in the following figure) with a commercially available cotton swab. - Page 65 Cleaning the Platen If there is no paper dust on the right side of the platen, go to step 7. If there is paper dust on the right side of the platen, press the button for three seconds. The print head moves to the left. Perform steps three and four to wipe off any paper dust.
-
Page 66: Maintenance
Maintenance Maintenance Maintenance Tool With the Maintenance Tool, you can perform various adjustment and maintenance operations from your computer. Windows In operator mode, you can only use Current media for Printer maintenance and Paper Settings. Items of the Main Screen Settings Printer maintenance Perform print head maintenance functions such as Diagnostic Cleaning, Forced... -
Page 67: Regular Maintenance
Maintenance Regular Maintenance To keep your printer working correctly and to prevent any issues with print quality, perform the regular maintenance described below. Checking Check Part Contents Reference Time See “Emptying the Scrap Paper Scrap paper box Empty out the scrap paper. When replacing Box”... -
Page 68: Troubleshooting
Troubleshooting Troubleshooting Note: See the "Printer Driver Operation Guide" for more details on troubleshooting the printer driver. See Printer Driver Operation Guide" - "Troubleshooting" When an Error Occurs Light Status When the warning buzzer sounds or the lights turn on or flash, check the solutions in the following table and take the recommended steps. - Page 69 Troubleshooting Warning Light Indicator Problems and Solutions Buzzer M light on None There is no paper loaded in the roll paper feeder. Load the paper. Paper light off See “Replacing Paper” on page 25 light on The warning Operations have stopped because an error has buzzer continues occurred, the printer is performing error recovery to sound...
- Page 70 Troubleshooting Warning Light Indicator Problems and Solutions Buzzer light on The warning There is no paper loaded in the roll paper feeder, M light on buzzer continues or the paper has run out. Load the paper. to sound Paper light off intermittently See “Replacing Paper”...
-
Page 71: Error Messages (Windows)
Troubleshooting Error Messages (Windows) Error messages are displayed when an error occurs in the printer while printing. The code, error details, and solutions are displayed on the screen. Error Messages (Mac) When errors occur in the printer while printing, you can check the content of the error and solutions with the Maintenance Tool. -
Page 72: Errors And Solutions (Windows)
Prepare a new ink cartridge. replacement. You can continue printing until replacement is required. See “Replacing Ink Cartridges” on Epson recommends the genuine Epson cartridges listed above. page 48 Contact Epson Product Support and I-2101 to I-2104 It is nearly time to replace parts. - Page 73 If the printer is setup so that you cannot access the rear of the printer to perform maintenance, contact Epson Product Support See “Paper Jams” on page 84 W-1103 An error has occurred in the paper feeding unit.
- Page 74 Check the ink cartridge with the color displayed in xxxx, and then replace the (xxxx) cartridge. Please install correct cartridge. If a message is displayed, check the Epson recommends the genuine Epson cartridges listed above. details. See “Replacing Ink Cartridges” on page 48 W-2202 Replace Cartridge...
- Page 75 (xxxx) and then replace the cartridge. Please install correct cartridge. If a message is displayed, check the Epson recommends the genuine Epson cartridges listed above. details. See “Replacing Ink Cartridges” on page 48 W-2205 Insufficient ink left to perform head cleaning or initial charge.
- Page 76 Epson ink. normally. We recommend using Do you want to continue? genuine Epson products. Please call Epson user service hot-line 400-810-9977 for genuine I/C purchase. E-5201 Failed to acquire printing calibration data. Turn off the printer, and then start it again.
-
Page 77: Errors And Solutions (Mac)
You may continue printing until replacement of the ink xxxx, and then get ready to replace the cartridge is required. cartridge. Epson recommends the genuine Epson cartridges listed above. See “Replacing Ink Cartridges” on page 48 Contact Epson Product Support and I-2101 to I-2104 It is nearly time to replace parts. - Page 78 If the printer is setup so that you cannot access the rear of the printer to perform maintenance, contact Epson Product Support . See “Paper Jams” on page 84 W-1103 An error has occurred in the paper feeding unit.
- Page 79 Delete all print jobs remaining in the operating system's print for more details on updating the queue. information. Update the paper information. Contact Epson Product Support and W-2101 to Parts have reached the end of their service life. request replacement for the part W-2104 xxxxxx displayed in xxxxxx.
- Page 80 Delete all print jobs remaining in the operating system's print cartridge. queue. If a message is displayed, check the Please install correct cartridge. details. Epson recommends the genuine Epson cartridges listed above. See “Replacing Ink Cartridges” on page 48 W-2202 Replace Cartridge After deleting all of the print jobs,...
- Page 81 W-2206 You have not installed genuine Epson ink cartridges. This printer is developed for use with genuine ink cartridges. If you use xxxx non-genuine cartridges, the print...
-
Page 82: Cannot Clear The Displayed Error
Troubleshooting Cannot Clear the Displayed Error If an error is displayed that cannot be cleared, follow the steps below to restart the printer. light is on. Press the power button to turn the power off (the light turns off). Check that the printer's If you cannot turn off the power using the button, unplug the power cable. - Page 83 Troubleshooting Note: If the error persists even after restarting, contact Epson Product Support .
-
Page 84: Paper Jams
Troubleshooting Paper Jams This section explains how to clear paper jammed in the printer. When a paper jam occurs, the light on the front of the printer turns on, and the light flashes. See “Lights” on page 12 light The procedure differs for the roll paper feeder and the internal paper feeder. Check the error message to determine which procedure to use. -
Page 85: Deleting Print Jobs
Troubleshooting Deleting Print Jobs Before starting operations on Mac, delete all jobs from the print queue. Click the printer icon in the Dock. Select the job you want to cancel, and then click [×] (or Delete). -
Page 86: Paper Is Jammed In The Roll Paper Feeder
Troubleshooting Paper is Jammed in the Roll Paper Feeder Error message W-1101 - When the message "Remove any paper remaining from the roll paper feeder, and then reload the paper. " is displayed, follow the steps below. For Mac, delete all jobs from the print queue. Remove the scrap paper box. - Page 87 Troubleshooting Important: If you cannot remove the roll paper feeder for some reason, do not try to pull it out by force. Paper may be jammed inside. When you can access the top and rear of the printer, remove the paper by following the procedure in the next section "Paper is Jammed in the Internal Paper Feeder".
- Page 88 Troubleshooting Remove the roll paper spindle. Lift the rear plate.
- Page 89 Troubleshooting Check that there is no paper or foreign material inside of the printer. If there is a jam, remove the paper slowly. Lift the front plate. Check that there is no paper, foreign material, or scrap paper at the back of the printer. If there is a jam, remove the paper slowly.
- Page 90 Troubleshooting Lower the front plate and press down until you hear it click into place. Repeat this for the rear plate. Reload the paper. Make sure the leading edge is cut straight across to avoid paper feeding problems. See “Replacing Paper” on page 25 If an error message is still displayed on a Windows computer's screen, click OK to close the screen.
- Page 91 Troubleshooting light is lit and isn't flashing. Check that the light turns off, and the...
-
Page 92: Paper Is Jammed Inside The Printer
Troubleshooting Paper is Jammed Inside the Printer Error message W-1102 - When the message "Open the rear cover and the top cover, remove any paper remaining, and then reload the paper." is displayed, follow the steps below. If you have cleared a paper jam from the roll paper feeder but the error is still not cleared, or you cannot pull out the roll paper feeder, there may be a jam inside the printer. - Page 93 Troubleshooting Open the top cover. Check the point where the jam occurred. If paper is caught in the the front of the printer, cut the paper in front of the jam with a pair of scissors.
- Page 94 Troubleshooting Slowly pull the remaining paper towards the back of the printer. If you successfully pull out the paper, go to step 8. If the paper is caught under the print head and cannot be easily removed, go to step 7. Move the print head manually, and remove the paper from the back of the printer.
- Page 95 Troubleshooting Important: ❏ If you cannot move the print head unit, do not try to force it to move, contact Epson support. Otherwise, the print head unit could be damaged. ❏ When removing the paper, do not touch the ink absorbing areas.
- Page 96 Troubleshooting Close the top cover. Check if there is a paper jam in the roll paper feeder. Perform steps 2 to 11 in "Paper is Jammed in the Roll Paper Feeder". See “Paper is Jammed in the Roll Paper Feeder” on page 86 Close the rear cover.
- Page 97 Troubleshooting If an error message is still displayed on a Windows computer's screen, click OK to close the screen. light is lit and isn't flashing. Check that the light turns off, and the...
-
Page 98: Problems With Print Results
Troubleshooting Problems with Print Results Cause What to do Stripes appear at regular intervals in the Are the print head unit nozzles clogged? print outs. If the print head unit is clogged, stripes appear at regular intervals, and print quality declines. Check the nozzle status in the Maintenance Tool, and then try cleaning. -
Page 99: Problems When Cutting Paper
Contact Epson Product Support to request cutter replacement. turned up, or the coating is cracked. When a Problem Cannot be Cleared If you cannot resolve a problem after taking the measures described in the "Troubleshooting" section, contact Epson Product Support... -
Page 100: Appendix
Appendix Appendix Consumables and Optional Items The following consumable products and optional items are available for use with your printer. (As of April, 2019) Ink cartridges This printer is developed for use with genuine ink cartridges. If you use non-genuine cartridges, the print result may be faint, or the ink remaining may not be detected normally. Model name Ink color Product number... -
Page 101: Notes On Moving The Printer
Appendix Model name Ink color Product number T43S120 SL-D870 Black T43S220 Cyan T43S320 Magenta T43S420 Yellow T43S520 Light Cyan T43S620 Light Magenta Others Product name Product number Explanation MAINTENANCE CARTRIDGE T5820000 Absorbs ink consumed during head cleaning. See “Replacing the Maintenance Cartridge” on page 56 ROLL PAPER SPINDLE The same as the roll paper spindle supplied with the C12C934881... -
Page 102: Preparing To Move
Appendix Place your hands at the points indicated in the photo, and then lift. Important: ❏ Only hold the required area. Otherwise, it may breakdown. ❏ Move the printer with ink cartridges installed. Do not remove the ink cartridges; otherwise, the nozzles may be clogged and make it impossible to print, or ink may leak. -
Page 103: Printer Specifications
Appendix Printer Specifications Basic specifications Printing method On-demand ink jet Nozzle configuration 180 nozzles for each color Print direction Bidirectional printing Highest resolution 1440 x 720 dpi Paper feed method Friction feed Interface Universal Serial Bus Specifications Revision 2.0 Important: Use this printer at an altitude of up to 6500 feet (2000 m). -
Page 104: Standards And Approvals
Appendix Ink Specifications 1 (W) x 7.9 (D) x 3.9 (H) inches (25 (W) x 200 (D) x 100 (H) mm) Cartridge dimensions Important: ❏ The ink freezes if left at below 5˚F (-15˚C) for a long time. If it does freeze, leave it at room temperature (77˚F (25˚C)) for at least four hours until it has defrosted (without condensation). -
Page 105: Necessary Space
Appendix FCC part 15 subpart B class A ICES-003 Class A AS/NZS CISPR 32 Class A EMC Directive 2014/30/EU EN55032 Class A EN 55024 EN 61000-3-2 EN 61000-3-3 Warning: This is a class A product. In a domestic environment this product may cause radio interference in which case the user may be required to take adequate measures. -
Page 106: Notes
Appendix Notes ❏ Unauthorized reproduction of a part or all of this manual is strictly prohibited. ❏ The contents of this manual are subject to change without prior notice. ❏ Contact our company if you have any questions, find a mistake, or encounter a missing description, in the contents of this manual. - Page 107 Appendix Indication of the manufacturer and the importer in accordance with requirements of directive 2011/65/EU (RoHS) Manufacturer: SEIKO EPSON CORPORATION Address: 3-5, Owa 3-chome, Suwa-shi, Nagano-ken 392-8502 Japan Telephone: 81-266-52-3131 Importer: EPSON EUROPE B.V. Address: Azie building, Atlas ArenA, Hoogoorddreef 5, 1101 BA Amsterdam Zuidoost The Netherlands...
-
Page 108: Where To Get Help
If you experience difficulty with the toll-free line, call (562) 276-1305. Purchase Supplies and Accessories You can purchase genuine Epson ink cartridges, maintenance cartridges, paper, and accessories from an Epson authorized reseller. To find the nearest reseller, call 800-GO-EPSON (800-463-7766). Or you can purchase online at http://www.epsonstore.com (U.S. sales) or http://www.epson.ca...
Need help?
Do you have a question about the SureLab D800 Series and is the answer not in the manual?
Questions and answers
Please i need help with my surelab d870 It comes on with and shows the blue light after booting up, but doesn't respond when i try to make prints. The maintenance tool is also greyed out when i try use it. I tried reinstalling the driver but it still didnt work and showed this message "cannot print because the information registered for EPSON SL-D800 Series is not correct. Start the maintenance tool and then click cancel registration-register." but like i said the maintenance tool is greyed out. what do i do?
If your Epson SureLab D800 Series printer shows a blue light after booting but does not respond to print commands and the Maintenance Tool is greyed out, here’s what you should do based on the context provided:
1. Check the Connection:
- The issue could be due to the printer being disconnected. Make sure all cables (USB, network, power) are properly connected.
- After confirming the connections, restart the printer.
2. Restart the Printer:
- Turn the printer off completely.
- Check if there is any paper jam or leftover paper inside the printer.
- Turn the printer back on and see if it becomes responsive.
3. Check for Error Codes:
- Look at the printer display or the Maintenance Tool (even though it’s greyed out, sometimes a code appears at startup).
- Common codes like E-5101 (disconnected), E-9901 or E-9902 (system errors) suggest a deeper issue.
- If an error code appears, follow the specific instructions (e.g., restart or contact support).
4. Maintenance Cartridge/Parts Check:
- If the printer previously showed a message about replacing the maintenance cartridge or parts reaching end of service life (codes like E-2101 to E-2104), it may have locked itself to prevent further printing.
- You would need to replace the indicated part or maintenance cartridge.
5. Contact Epson Support:
- If after checking connections, restarting, and confirming there’s no physical issue the printer still doesn't respond, it could be a system error or hardware failure.
- Contact Epson Product Support for further diagnosis or repair.
Important Tip:
Since the Maintenance Tool is greyed out, it suggests the printer is not fully recognized by the computer — either due to connection problems, driver issues, or internal printer errors.
---
Would you like me to also show you a basic troubleshooting diagram you can follow step-by-step?
This answer is automatically generated