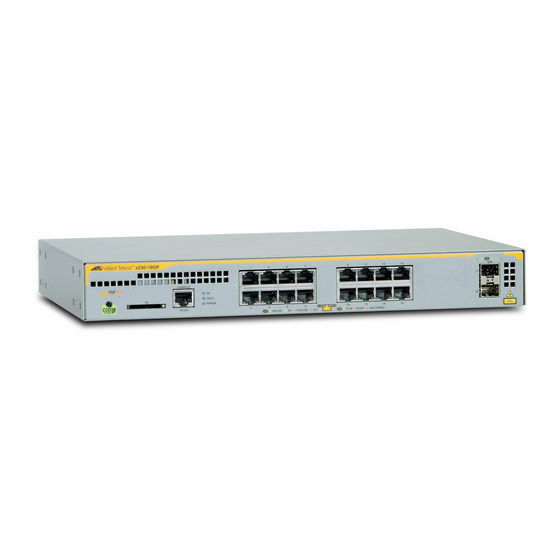
Allied Telesis AT-X230-10GP User Manual
Hide thumbs Also See for AT-X230-10GP:

Advertisement

Quick Links

Technical Guide
Allied Telesis Milestone
Integration Plug-In User Guide
Version 1.0.2.9-r1
C613-02090-00 REV A

Advertisement

Table of Contents
loading

Summary of Contents for Allied Telesis AT-X230-10GP

  • Page 1 Technical Guide Allied Telesis Milestone Integration Plug-In User Guide Version 1.0.2.9-r1 C613-02090-00 REV A...
  • Page 2: Table Of Contents

    Introduction Introduction The Allied Telesis Milestone Integration Plug-In is an add-on to the Milestone Video Management System (VMS) that provides convenient access to common port and switch management functions for Power over Ethernet (PoE)-capable AlliedWare Plus switches. The Milestone VMS is a widely used system for managing video surveillance cameras and recordings.
  • Page 3: System Requirements

    Software Requirements The AlliedWare Plus switches must be running AlliedWare Plus 5.5.0-1.4 or later. The Allied Telesis Milestone Integration Plug-In has been tested with the Milestone XProtect 2020 software suite, running on Microsoft Windows. Compatibility with older versions of the Milestone XProtect software is not guaranteed.
  • Page 4: Restrictions And Limitations

    Restrictions and Limitations Restrictions and Limitations The Allied Telesis Milestone Integration Plug-In is currently not designed to be used with switches configured in Virtual Chassis Stacking (VCStack) modes. The Allied Telesis Milestone Integration Plug-In currently does not manage power settings on the “spare”...
  • Page 5: Network Configuration

    Camera Network Cameras However, when using the Allied Telesis Plug-In to manage Allied Telesis PoE switches that are connected to the camera network, direct network connectivity is required between the switch and the machines that are hosting the XProtect Client software. To preserve network security and performance, it is recommended that separate VLANs be used on the switch for the management interface and the camera ports.
  • Page 6 Care should be taken to ensure that the uplink ports on the PoE switch are physically secure from intrusion. C613-02090-00 REV A Allied Telesis Milestone Integration Plug-In User Guide Page 5...
  • Page 7: Tcp Port Access

    Network Configuration TCP Port Access If a firewall is configured between the client network and the camera network, the Allied Telesis Milestone Integration Plug-In requires access to these TCP protocol ports:  TCP Port 443 (HTTPS protocol)  TCP Port 22 (SSH protocol) and/or TCP Port 23 (Telnet protocol)
  • Page 8: Software Installation

    Software Installation Running the Installer Before installing the Allied Telesis Milestone Integration Plug-In, close the Milestone XProtect Smart Client and Milestone XProtect Management Client, if they are running. Open the application installer executable. (The version number may be different than the example below).
  • Page 9 Software Installation The installer will attempt to stop and restart Milestone background services as a part of the installation process: C613-02090-00 REV A Allied Telesis Milestone Integration Plug-In User Guide Page 8...
  • Page 10: Troubleshooting The Installation Process

    You may also need to manually stop the Milestone Event Server service. This can be done by right- clicking the toolbar icon and selecting “Stop Event Server service”: C613-02090-00 REV A Allied Telesis Milestone Integration Plug-In User Guide Page 9...
  • Page 11 It may take some time for the service to terminate; the icon will show a red triangle when the service is fully stopped. Alternatively, you can stop the service using Microsoft Windows’ Services utility: Find the Milestone XProtect Event Server service, and click “Stop the service”. C613-02090-00 REV A Allied Telesis Milestone Integration Plug-In User Guide Page 10...
  • Page 12: Uninstallation

    Note that any configuration in the Milestone application associated with the plug-in will not be removed when the plug-in is uninstalled. It is recommended that any Allied Telesis switch-related configuration be removed using the Milestone XProtect Management Client prior to uninstallation of the plug-in.
  • Page 13: Usage

    Usage Prerequisites To use the Allied Telesis Milestone Integration Plug-In, the cameras and Allied Telesis switch devices should be cabled and powered on. Use the AlliedWare Plus command-line or web-based user interface to configure basic settings such as the switch’s management IP interface and administrative user credentials.
  • Page 14: Configure Ati Switches

    Milestone XProtect Management Client, and select “Add New”. Enter a name for the switch and click “OK”. A configuration page for the switch will be shown. C613-02090-00 REV A Allied Telesis Milestone Integration Plug-In User Guide Page 13...
  • Page 15 Note that this will cause the current switch configuration to be written to the switch’s flash file system as the default boot configuration. 1. IPv6 is currently not supported by the plug-in. C613-02090-00 REV A Allied Telesis Milestone Integration Plug-In User Guide Page 14...
  • Page 16: Associate Cameras To Ati Switch Ports

    To provide more convenient management of switch ports, the Milestone XProtect Management Client may be used to associate cameras to switch ports. If the switches and cameras are powered on and connected, this association can be done easily using the Allied Telesis Milestone Integration Plug-In. Click the “Query Ports” button.
  • Page 17 “ATI” tab in the row of tabs at the bottom of the “Properties” panel. (If the “ATI” tab is not shown, use the right-arrow at the bottom right of the panel to scroll the list of tabs.) C613-02090-00 REV A Allied Telesis Milestone Integration Plug-In User Guide Page 16...
  • Page 18 “Suggest” button may be used to choose that port automatically. Once the desired camera association has been made, save the configuration using the save icon at the upper left, or type Ctrl-S. C613-02090-00 REV A Allied Telesis Milestone Integration Plug-In User Guide Page 17...
  • Page 19: Managing Switch Data And Power Settings

    Once switches and cameras have been configured, the Milestone XProtect Smart Client can be used to manage settings easily and conveniently for the Allied Telesis switches and their ports. In the Smart Client, select the “ATI” tab from the tab bar at the top of the window. Select a switch to manage from the list at the left side of the window.
  • Page 20 Select “Auto” to have the maximum power draw defined by the device’s power class. Note that “Auto” is recommended for Allied Telesis switches that are capable of dynamic power allocation. Note that the controls will be disabled (greyed out) if the current user does not have write access to the switch, as assigned in the configuration in the Milestone XProtect Management Client.
  • Page 21: Other Switch Operations

    The Allied Telesis Milestone Integration Plug-In will be available under the “MIP Plug-Ins” section of the left panel. When a camera window is selected, and the camera has been associated with an Allied Telesis switch and port, information about that switch and port will be shown in the plug-in panel.
  • Page 22 To make the changes permanent, go to the “ATI” tab and use the “Write Boot Config” button as described in the “Managing Switch Data and Power Settings” section, above. C613-02090-00 REV A Allied Telesis Milestone Integration Plug-In User Guide Page 21...
  • Page 23: User Access Logging

    F: +31 20 7950021 alliedtelesis.com © 2021 Allied Telesis, Inc. All rights reserved. Information in this document is subject to change without notice. All company names, logos, and product designs that are trademarks or registered trademarks are the property of their respective owners.

Table of Contents