Sign In
Upload
Download
Table of Contents
Contents
Add to my manuals
Delete from my manuals
Share
URL of this page:
HTML Link:
Bookmark this page
Add
Manual will be automatically added to "My Manuals"
Print this page
×
Bookmark added
×
Added to my manuals
Manuals
Brands
Compleo Manuals
Battery Charger
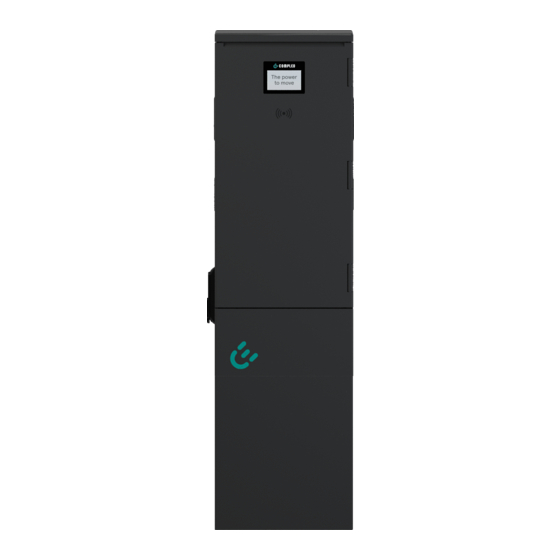
DUO bm
Operating instructions manual
Compleo DUO bm Operating Instructions Manual
Hide thumbs
1
Table Of Contents
2
3
4
5
6
7
8
9
10
11
12
13
14
15
16
17
18
19
20
21
22
23
24
25
26
27
28
29
30
31
32
33
34
35
36
37
38
39
40
41
42
43
44
45
46
47
48
49
50
51
52
53
54
55
56
57
58
59
60
61
62
63
64
65
66
67
68
69
70
71
72
73
74
75
76
77
78
79
80
81
82
83
84
85
86
87
88
89
90
91
92
93
94
95
96
97
98
99
100
101
102
103
104
105
106
107
108
109
110
111
112
113
page
of
113
Go
/
113
Contents
Table of Contents
Bookmarks
Table of Contents
Table of Contents
About this Manual
Further Requirements
Manufacturer and Contact Address
Conventions of Presentation
Abbreviations
Safety
Warnings
Sectional Warnings
Intended Use
Foreseeable Misuse
Safety Instructions for the User
Personnel Qualification
Dangers and Residual Risks
Electrical Voltage
Incorrect Handling
Product Description
Design
Series Label
Scope of Delivery
Technical Specifications
Transport, Packaging and Storage
Transport Inspection
Storage Conditions
Installation
Location
Installation Work
Mechanical Installation
Base Mounted
Lateral Cable Routing through the Unit Housing
Installation on SMC Base
Installation on Concrete Base
Closure of the Housing, Single and Double Lock
Electrical Installation
Power Supply Cable
Equipotential Bonding
Data Connection Cable
RJ45 Connector
Commissioning
Testing the Charging System
System Start-Up
Configuration of the Charging System with Compleo DUCTO
Creating a Network Connection
Calling up the Configuration Interface
Operator Login
Changing Parameters
Log in as Electrician
DUCTO Guide
Load Management
Operation
Charging Process
Meaning of the Status LED Colours
Authorisation
Connecting the Charging Cable
Starting the Charging Process
Ending the Charging Process
Disconnecting the Charging Cable
Retrieve Billing Data
Operating Signals and Displays
Error Display and Measures
Error Status
Evcommunicationerror (A)
Groundfailure (B)
Hightemperature (C)
Internalerror (D)
Overvoltage (E)
Powermeterfailure (F)
Powerswitchfailure (G)
Readerfailure (H)
Undervoltage (I)
Weaksignal (J)
Compleo-Specific Error Status
Isolationwarning (K)
Isolationerror (L)
Dooropen (M)
Doorclosed (N)
Inoperative (O)
Fuseerror (P)
Temperaturesensormissing (Q)
Temperaturesensorhighlimitviolation (R)
Temperaturesensorlowlimitviolation (S)
Automaticrcdtestrunning (T)
Automaticrcdtestfailed (U)
Rcsensortestrunning (W)
Dcpsuconnectionfailure (X)
Dclnsulationcodewarning (Y)
Dclnsulationcodefault (Z)
Dclnsulationcodelnvalid (1)
Dclnsulationtestfailureonstart (2)
Dclnsulationtestfailureoncharge (3)
Samtransactionmemoryfull (4)
Samevseidmemoryfull (5)
Samfirmwarecorrupted (6)
Samnotouchcontrollercomm (7)
Samnotinitialized (8)
Saminternalerror (9)
Unlockplugfailure (A)
Outletcloseerror (B)
Lpccommunicationerror (C)
Cableerror (D)
Rcsensortesterror (E)
Powermonitoringerror (F)
Adcerror (G)
Shortcircuiterror (H)
Lpcovervoltageerror (I)
Lpchightemperatureerror (J)
Lpcselftesterror (K)
Error Events
Automaticrcdtestresetfailure ()
Resetfailure ()
Automaticrcdtestsuccess ()
Automaticrcdtesttripfailure ()
Automaticrcdresetcontactortestfailed ()
Automaticrcdresetsuccess ()
Automaticrcdresetswitchonfailed ()
Automaticrcdresetcontactortestfailed ()
Connectorlockfailure ()
Driveerror ()
Lastgasp ()
Mcureset ()
Outletopenerror ()
Overcurrentfailure ()
Rcsensorerrorduringcharge ()
Rcsensornoerror ()
Rcsensortestok ()
Rcsensortesterror ()
Malfunctions
Internal Errors
Residual Current Circuit Breaker (RCCB)
Circuit Breaker (MCB)
Error Display and Measures
About this Advices
Field of Application
Ocpp 1.6
Compleo-Specific
Maintenance
Maintenance Plan
Cleaning
Decommissioning, Dismantling and Disposal
Disposal
Annexes
Housing Dimensions
Prüfprotokoll
EU Declaration of Conformity
Advertisement
Quick Links
Download this manual
Operating instructions
Compleo ADVANCED bm
Compleo DUO bm/ DUO fleet bm
Article Number: A010C3XX1X
Issue: 2023-02
Revision: 05
Table of
Contents
Previous
Page
Next
Page
1
2
3
4
5
Advertisement
Table of Contents
Need help?
Do you have a question about the DUO bm and is the answer not in the manual?
Ask a question
Questions and answers
Related Manuals for Compleo DUO bm
Battery Charger Compleo Cito BM 500 Operating Instructions Manual
(105 pages)
Battery Charger Compleo eBOX professional Instructions For Use Manual
(20 pages)
Battery Charger Compleo eBOX professional Operating Manual
(17 pages)
Battery Charger Compleo ADVANCED IMS bm SAM Operating Instructions Manual
(80 pages)
Battery Charger Compleo eBOX smart Instructions For Use Manual
(20 pages)
Battery Charger Compleo ECO s Instruction Manual
(10 pages)
Battery Charger Compleo Cito 500 BM SAM Operating Instructions Manual
(139 pages)
Battery Charger Compleo SOLO smart Operating Instructions Manual
(114 pages)
Battery Charger Compleo SOLO N+ Operating Instructions Manual
(116 pages)
Battery Charger Compleo SOLO advanced AV06 Operating Instructions Manual
(114 pages)
Battery Charger Compleo eCLICK Installation Instructions Manual
(34 pages)
Battery Charger Compleo GO Instruction Manual
(10 pages)
This manual is also suitable for:
Duo fleet bm
Advanced bm
Table of Contents
Print
Rename the bookmark
Delete bookmark?
Delete from my manuals?
Login
Sign In
OR
Sign in with Facebook
Sign in with Google
Upload manual
Upload from disk
Upload from URL


Need help?
Do you have a question about the DUO bm and is the answer not in the manual?
Questions and answers