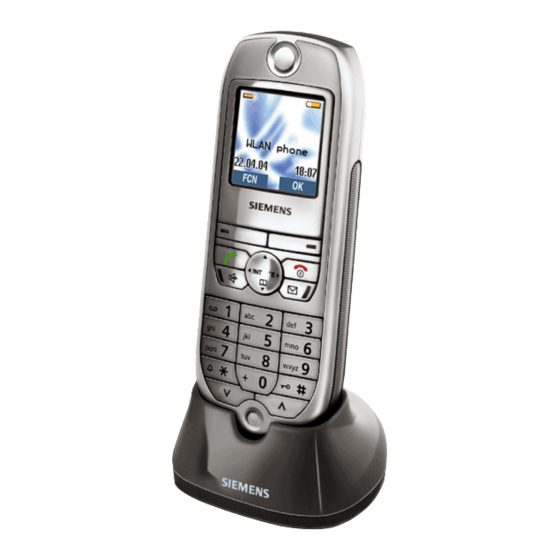
Siemens HiPath 2000 Manual
Hide thumbs Also See for HiPath 2000:

Advertisement

Quick Links

HiPath 2000
HiPath 3000
HiPath 4000
optiPoint WL 2 professional
Help for WebBasedManagement

Advertisement

Table of Contents
loading

Summary of Contents for Siemens HiPath 2000

  • Page 1 HiPath 2000 HiPath 3000 HiPath 4000 optiPoint WL 2 professional Help for WebBasedManagement...
  • Page 2: Table Of Contents

    Help topics Help topics About Help ..........4 Home .
  • Page 3 Help topics Enter Location Server Data ........36 VPN Settings .
  • Page 4: About Help

    About Help About Help optiPoint WL2 professional Web Interface You can use the Web Interface on your handset to set the handset according to the user's specific requirements and to create and administer network access profiles. The following means of representation are used: bold User interface terms such as buttons, menus, and the names of input fields.
  • Page 5: Home

    Login/Logout Home You will find the entry Home in the navigation area of every Web page. Click on Home to switch to the Status > Handset Web page. Logging out takes place automatically. Login/Logout User Login / Admin Login If your handset is protected by a Handset PIN and/or an Admin PIN, you must log in when establishing a connection to the Web Interface.
  • Page 6: Logout

    Menu Status Logout Navigation: Admin > Logout or User > Logout If you click on Logout in the navigation area, you log out. The handset's status screen (see Handset) is displayed. If you change from any Web Interface Web page to the Status menu, logging out takes place automatically.
  • Page 7 Menu Status File System Navigation: Status > File System Ringtones, pictures (screen pictures) and certificates, are stored in your handset's file system. In addition to the standard ringtones and pictures that are part of the handset's scope of delivery you can save your own ringtones and pictures (see Transfer).
  • Page 8: Menu User

    Menu Status Menu User Profile Selection (User) Navigation: User > Profile Selection The displayed list contains all network access profiles stored on the handset. The most important WLAN settings for the profiles are displayed (see Meaning of WLAN settings messages displayed). You can identify the profile that is currently active by the associated option activated in the Active column.
  • Page 9 Menu Status Meaning of WLAN settings messages displayed Number Current number of the profile in the list. It is possible to store up to 16 profiles on the handset. If there are already 16 profiles in the list you must delete a profile before you can create a new one.
  • Page 10: Handset Pin

    Menu Status Handset PIN Navigation: User > Handset PIN or Admin > System Settings > Handset PIN You can protect your handset against unauthorised access with the Handset PIN. It is requested when the handset is switched on and when the Web Interface User menu is opened.
  • Page 11: Handset Settings: Audio

    Menu Status Handset Settings: Audio Navigation: User > Handset Settings > Audio Setting advisory tones You can switch your handset's various advisory tones on and off independ- ently of one another by clicking on the relevant option (On or Off). Key Click Acknowledges each key press with a signal tone (beep).
  • Page 12: Handset Settings: Ringer Tone

    Menu Status Handset Settings: Ringer Tone Navigation: User > Handset Settings > Ringer Tones Select the ringer melody with which incoming calls are to be signalled on your handset, and specify the signal volume. When the handset is supplied, standard ringtones are stored on the handset.
  • Page 13: Handset Settings: Display

    Menu Status Handset Settings: Display Navigation: User > Handset Settings > Display You can change the following settings for the display on the handset. Handset Name The handset name is shown in the handset's idle display. You can change the name. It can be up to 16 characters long and can contain letters, digits, special characters and spaces (e.g.
  • Page 14: Call Settings

    Menu Status Call Settings Navigation: User > Call Settings You can make the following settings: Easy Answer When this function is activated, when a call arrives you can simply lift the handset out of the charging cradle to be directly connected to the caller without having to press the talk key.
  • Page 15 Menu Status Transferring a ringtone/picture from the PC to the handset Carry out the following steps: • In the upper section of the Web page, click on the Browse... button and select the file you wish to transfer or enter the file name in the field along with its complete path details.
  • Page 16 Menu Status Backing up/restoring the directory • If you import the backup file for a directory, the directory current- ly stored in the handset will be overwritten. • Any voice pattern stored in the directory for voice dialling will be lost during the transfer.
  • Page 17: Menu Admin

    Menu Status Menu Admin Network Profile Selection (Admin) Navigation: Admin > Network > Profile Selection You can store 16 network access profiles on your handset. In the profiles you can specify the data for access to various access points (WLAN routers). You therefore only need to activate another profile if, for example, you take your handset from your home to your office.
  • Page 18 Menu Status Creating a new profile, editing an existing profile • In the upper section of the Web page, click on the New button to create a new profile. If there are already 16 profiles stored on the handset you must first Deleting a profile before you can create a new profile.
  • Page 19: Profile Name

    Menu Status Profile Name Navigation: Admin > Network > Profile Selection > New / Edit > Profile Name Specify the name under which the profile is to be displayed on the handset. To avoid unnecessary work when creating or editing a profile you can copy WLAN settings from other profiles stored in the handset.
  • Page 20: Ip Addresses

    Menu Status IP Addresses Navigation: Admin > Network > Profile Selection > New / Edit > IP Addresses Specify the IP address for the handset within the WLAN. You have two options: • An IP address is dynamically assigned to the handset. For this, the DHCP Client must be activated at the access point/WLAN router of the DHCP server and on the handset.
  • Page 21 Menu Status Primary DNS IP Address / Secondary DNS IP Address DNS (Domain Name System) allows you to assign IP addresses to symbolic names. The DNS server is required to convert the DNS name into the IP address when connection is being established to a server. If you want to ensure that specific DNS servers are used for the conversion, you can specify the IP address of the primary/secondary DNS server.
  • Page 22: Ip Routing

    Menu Status IP Routing Navigation: Admin > Network > Profile Selection > New / Edit > IP Routing You can only specify the IP routing if a static IP address is assigned to your handset in the WLAN (see IP Addresses). If the WLAN network is in a subnetwork that is connected to the Internet via other WLAN or LAN networks, you can specify two alternative routes here for transferring data between the handset and the access point to the...
  • Page 23 Menu Status Network scan If you are within the transmission range of the access point for which you wish to create a profile, click on the Scan button. The handset then searches for access points within its receiving range. The SSIDs of the access points that can be reached and for which "SSID visible"...
  • Page 24 Menu Status Transfer Mode Specify whether data is to be transmitted within the WLAN in accordance with Standard IEEE 802.11b (only 802.11b) or whether you wish data transmission to be possible both in accordance with IEEE 802.11b and with IEEE 802.11g (Mixed Mode). The important difference between the two standards is the transmission rate: in the case of IEEE 802.11g this is almost 5 times faster.
  • Page 25: Wlan Security

    Menu Status Roaming Threshold (Value range: 0-100 in %) If, to improve the range, the WLAN includes several access points with the same SSID and the same radio channel, the handset can switch between the access points without interrupting the connection. I.e. if the handset is too far from one access point it should establish a connection with the next access point in the WLAN.
  • Page 26 Menu Status Encryption Your handset supports non-encrypted data transmission and encrypted data transmission with WEP, WPA and WPA-PSK methods of encryption. For WPA and WPA-PSK the encryption algorithm TKIP is used. Open the Encryption list and select the method of encryption that is used. Depending on the selected method of encryption, additional fields appear in which you have to state the key or password.
  • Page 27 Menu Status For a WEP Mode of 64 bits the key must consist of 5 ASCII characters or 10 hexadecimal characters. For a WEP Mode of 128 bits the key must consist of 13 ASCII charac- ters or 26 hexadecimal characters. Please note that the WEP key needs to be changed at regular inter- vals! –...
  • Page 28 Menu Status Authentication If access to the WLAN is protected, the handset has to provide authenti- cation when logging in. You need to store the necessary data, login details (user name), password and, where applicable, certificate, in the handset. The data must be known to the access point. The standard 802.1x uses the EAP security protocol.
  • Page 29 Menu Status Validate Server Certificate (only for EAP Type = TLS) If you activate the Validate Server Certificate option, the handset checks the validity of the server certificate received. For this check, the corre- sponding root certificate must be saved in the handset (see Certificates).
  • Page 30: Srsr

    Menu Status Mobility Password If you forgot to cancel the subscriber number at the "host" telephone by using the „Mobility“ function, you can catch up on this at your "home" telephone after entering the mobility password 6 to 32 alphanumeric characters).
  • Page 31: Audio Settings

    Menu Status Audio Settings Navigation: Admin > Audio Settings The values for the voice quality are set at the factory to ensure the voice quality is generally acceptable with the minimum possible use of resources (bandwidth). You should therefore only change the preset values if the voice quality seems to you to be too poor or if you wish to reduce the bandwidth required at the expense of the voice quality (e.g.
  • Page 32 Menu Status – G.729A/B preferred (low bandwidth) / G.729A/B only (low bandwidth) The voice quality is better than for G.723. The necessary bandwidth is about 8 Kbit/s per voice connection. The delay is about 15 ms. – G.722 preferred (high quality) The voice quality is very good.
  • Page 33: Dialling Settings

    Menu Status Dialling Settings Navigation: Admin > Dialling Settings To dial phone numbers saved in canonical format, these must be made "dialable" using output rules or dialing properties. The various codes are recognized here as part of the phone number and, where applicable, replaced with the corresponding dial prefixes (DP) or the external access (EA).
  • Page 34 Menu Status Redial List Mark die option Active at Redial Listto store the last 10 numbers dialled from the handset in a redial list. Prefer Preparation Editor Using this checkbox you can change the function of the talk key in idle mode.
  • Page 35: Enter Ldap Server Data

    Menu Status Enter LDAP Server Data Navigation: Admin > LDAP Settings Configure the connection to the LDAP-Server. LDAP Server Address Enter the IP address or DNS name of an LDAP-Server (see Addressing a server). Port Enter the Portnumber of an LDAP-Server (Default: 389). Saving/rejecting changes Click on the Apply button if you wish to save the settings on this page in the profile.
  • Page 36: Enter Location Server Data

    Menu Status Enter Location Server Data Navigation: Admin > Location Server Configure the connection to the Location-Server. Location Server Mark Enable if a location server is integrated into your system. Location Server Address Enter the IP address or DNS name of an Location-Server (see Addressing a server).
  • Page 37: Quality Of Service

    Menu Status Quality of Service(QoS): Protocol Settings Navigation: Admin > Quality of Service To improve the quality of your telephone connections you can request preferential treatment for the telephone data (voice packets and signals) in the Internet. Quality of Service for IP The DiffServ procedure distinguishes between several quality of service classes and various priority levels.
  • Page 38 Menu Status VLAN Settings Choose one of the following options at VLAN Mode: • Manual Choose Manual if you want to configure the QoS settings without a DHCP server. • Automatic (via DHCP) Choose Automatic (via DHCP) if you want to configure the QoS set- tings with a DHCP server.
  • Page 39: Quality Of Service (Qos): Monitoring Settings

    Menu Status Quality of Service (QoS): Monitoring Settings Navigation: Admin > Quality of Service > Monitoring Settings Using Quality of Service you can set up error reports for a QCU server and define the threshold settings. Send a report (report mode) Select the mode for report generation: –...
  • Page 40 Menu Status Threshold Settings Maximum Jitter (in ms) Enter a maximal value for jitter (from 1 to 255 ms) Default: 15 ms. The jitter value is measured between two consecutive RTP packets. The jitter value is checked against this threshold. Average Round Trip Delay (in ms) Enter a value for the average round trip delay (from 1 to 65535 ms).
  • Page 41: Reset User Data

    Menu Status Reset User Data Navigation: Admin > System Settings > Reset User Data You can delete user data stored on the handset and individual handset settings separately. Deleting user data In the Clear all user data section, click on the Clear button. The following user data is deleted: •...
  • Page 42: Admin Pin

    Menu Status Admin PIN Navigation: Admin > System Settings > Admin PIN Protect access to the Web Interface's administration functions with a 1 to 10-digit PIN. This will prevent any subscriber in the WLAN from accessing your handset by means of the Web Interface and reading and changing the settings.
  • Page 43 Menu Status Editing or deleting an Admin PIN There are dots in the Admin PIN field, i.e. a PIN is set. If you click inside the Admin PIN field, the contents of the field will be deleted. • Click on the Apply button to delete the PIN. Your handset is no longer protected against unauthorised access.
  • Page 44: Handset Restart

    Menu Status Handset Restart Navigation: Admin > System Settings > Handset Restart If you cannot make any settings or the handset does not respond, you can reboot it. Any changes you have not saved will be lost. Click the Restart button. The handset is rebooted.
  • Page 45: Enter Ftp Server Data

    Menu Status Enter FTP Server Data Navigation: Admin > FTP Transfer > FTP Settings Use this web page to enter the FTP server data for the following features: • Backup/recovery of configuration data via FTP , see FTP Backup and Restore.
  • Page 46: Ftp Backup And Restore

    Menu Status FTP Backup and Restore Navigation: Admin > FTP Transfer > Backup and Restore When you have finished configuring the handset and entering all settings you should save the handset configuration to a FTP server. In case of a system failure you can then restore the settings from the backup configu- ration file to the handset.
  • Page 47: Ftp Update Firmware

    Menu Status FTP Update Firmware Navigation: Admin > FTP Transfer > Firmware Update Firmware is the device software stored in the handset. Firmware updates are performed if • the handset does not work properly or does not work at all, or •...
  • Page 48: Ftp Update Ldap Template

    Menu Status FTP Update LDAP Template Navigation: Admin > FTP Transfer > LDAP Update The LDAP template is needed to use the LDAP search feature (company phonebook). Perform an update of the LDAP template if • the LDAP search feature of the handset does not work properly or does not work at all, or •...
  • Page 49: Local Backup And Restore

    Menu Status Local Backup and Restore Navigation: Admin > HTTP Transfer > Backup and Restore When you have finished configuring the handset and entering all settings you should save the handset configuration in a backup file on your PC or a data medium (e.g.
  • Page 50: Local Firmware Update

    Menu Status Local Firmware Update Navigation: Admin > HTTP Transfer > Firmware Update The firmware is the device software stored in your handset. You can carry out a Firmware Update in the following cases: • Your handset is not working or not working correctly or •...
  • Page 51: Factory Reset

    Menu Status Factory Reset Navigation: Admin > Factory Reset This function restores your handset to the factory settings. All handset and network settings, all user data (e.g. directory) plus the handset and admin PIN are deleted. You can use the factory reset, for example, in the following cases: •...
  • Page 52: Certificates

    Menu Status Certificates Navigation: Admin > Certificates > You need certificates for network access if authentication with EAP Type TLS is set up in the WLAN (see WLAN Security). Certificates are files containing information for authentication in the WLAN. A distinction is made between client, server and root certificate. The (WLAN) client certificate identifies the handset.
  • Page 53 Menu Status If there is not enough memory in the handset for importing a new format you will receive an appropriate message. You should then delete any certificates, pictures or melodies you no longer require to free up sufficient memory (see File System).
  • Page 54: Ping-Tests

    Menu Status PING-Tests Navigation: Admin > Diagnostics > Diagnostics You can use ping tests to check whether it is possible to establish a connection between the handset and a server in the Internet or WLAN. The ping test returns a test status from which you can tell whether there is a connection to the server or not.
  • Page 55: Rtp Statistics

    Menu Status RTP Statistics Navigation: Admin > Diagnostics > RTP Statistics These statistics display a wide range of data that can be very helpful in troubleshooting problems in RTP transmissions. Record Number Select the desired log number. Addressing a server You can address a server by its IP address or its name if this is known to your DNS server.
  • Page 56 An obligation to provide the respective characteristics shall only exist if Reference no.: A31003-J5000-M100-1-76A9 expressly agreed in the terms of contract. All trademarks are the property of Siemens AG or their respective own- Subject to availability. Right of modification reserved. ers.

This manual is also suitable for:

Hipath 3000Hipath 4000Optipoint wl 2 professional

Table of Contents