Table of Contents
Advertisement
Available languages
Available languages
Quick Links
Advertisement
Chapters
Table of Contents

Subscribe to Our Youtube Channel
Related Manuals for auna Connect 120 MKII


Summary of Contents for auna Connect 120 MKII
-
Page 3: Table Of Contents
Sehr geehrter Kunde, wir gratulieren Ihnen zum Erwerb Ihres Gerä- tes. Lesen Sie die folgenden Hinweise sorgfäl- tig durch und befolgen Sie diese, um möglichen Schäden vorzubeugen. Für Schäden, die durch Missachtung der Hinweise und unsachgemäßen Gebrauch entstehen, übernehmen wir keine Haf- tung. -
Page 4: Technische Daten
TECHNISCHE DATEN Artikelnummer 10040159, 10040160, 10040161 Radio Digital (DAB/DAB+), FM und Internetradio (über Wi-Fi). Frequenzen Digital Band III 174–240 MHz, FM 87,5-108 MHz (mit RDS). BT, Frequenzbereich: 2402 – 2480 MHz Maximale Leistung: 3,5 dBm (EIRP) Display 2.8", 320 x 240, TFT Farbdisplay WLAN-Netzwerk Wi-Fi: 802.11b, 802.11g and 802.11n unterstützt WEP und WPA/WPA2 Verschlüsselung,... - Page 5 ERKLÄRUNG DER SYMBOLE AUF DEM GERÄT CAUTION RISK OF ELECTRIC SHOCK DO NOT OPEN VORSICHT: DAS GEHÄUSE NICHT ÖFFNEN, UM EINEN STROMSCHLAG UND ERNSTE PERSONENVERLETZUNGEN ZU VERMEIDEN. IM INNEREN KEINE VOM KUNDEN ZU WARTENDEN KOMPONENTEN. WENDEN SIE SICH AUSSCHLIESSLICH AN QUALIFIZIERTE FACHLEUTE. WARNUNG: UM DIE GEFAHR EINES BRANDS ODER EINES STROMSCHLAGS ZU VERRINGERN, DAS GERÄT NICHT IN WASSER, REGEN ODER FEUCHTIGKEIT AUSZUSETZEN.
-
Page 6: Sicherheitshinweise
SICHERHEITSHINWEISE Lesen Sie die Anleitung. Alle Anwendungshinweise müssen vor der Verwendung des Geräts gelesen werden. • Kinder ab 8 Jahren, psychisch, sensorisch und körperlich eingeschränkte Menschen dürfen das Gerät nur benutzen, wenn sie vorher von einer für sie verantwortlichen Aufsichtsperson ausführlich mit den Funktionen und den Sicherheitsvorkehrungen vertraut gemacht wurden und die damit verbundenen Risiken verstehen. - Page 7 auf das Gerät gestellt werden. • Um die Stromzufuhr vollständig zu trennen, muss der Netzstecker des Gerätes vom Netz getrennt werden, da die Trennvorrichtungen der Netzstecker des Gerätes sind. • Der Netzstecker des Geräts darf nicht verstopft sein ODER sollte bei bestimmungsgemäßer Verwendung leicht zugänglich sein.
-
Page 8: Geräteübersicht
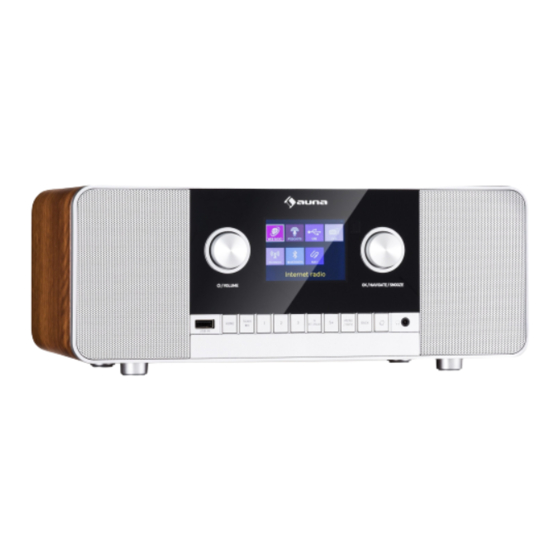
GERÄTEÜBERSICHT Vorderseite Rückseite... - Page 9 STANDBY/ Lautstärke-Drehregler LCD-Anzeige OK/NAVIGATE/SNOOZE-Drehknopf Bestätigen/Naviationsrad/Schlummer-Taste Kopfhöreranschluss Wecker stellen zurück Menü/Info Senderspeicher 5+/Programm Senderspeicher 4 BT-Kopplung 10 Senderspeicher 3 Senderspeicher 2 12 Senderspeicher 1 13 Wiedergabe/Pause / Suchlauf 14 HOME Betriebsart (USB/DAB/FM/Internetradio/ BT/AUX IN 15 USB-Anschluss 16 Anschluss für Netzadapter 17 AUX-Ausgang 18 AUX-Eingang 19 DAB/FM-Antenne...
-
Page 10: Fernbedienung
FERNBEDIENUNG... - Page 11 Ein/Standby-Taste Zahlentasten Lautstärke + Nach unten navigieren HOME (Betriebsart (USB/DAB/FM/Internetradio/ BT/AUX IN) Menü/Info Sleep-Timer SCAN-Taste Titel zurück (USB/BT) FM-Senderabstimmung zurück 10 Schlummer-Taste Programm 12 Nach oben navigieren 13 OK (Bestätigen) 14 Lautstärke - 15 Stumm 16 zurück 17 Wecker 18 FM ST/MONO-Taste 19 Wiederholen Zufallswiedergabe 20 Wiedergabe/Pause 21 Titel vor (USB/BT)
- Page 12 Einlegen der Batterien in die Fernbedienung Öffnen Sie den Batteriefachdeckel. Setzen Sie die mitgelieferte Batterie entsprechend der im Batteriefach angegebenen Polung ein. Schieben Sie die Batterie beim Einsetzen oder Entfernen in Richtung der (-) Batteriepole. Schließen Sie den Deckel. Achtung •...
-
Page 13: Inbetriebnahme
INBETRIEBNAHME Beiliegendes Zubehör Nehmen Sie das Gerät und alle Zubehörteile vorsichtig aus der Verpackung. Bitte vergewissern Sie sich, dass Sie alle folgenden Zubehörteile haben, bevor Sie den Geschenkkarton entsorgen. • Bedienungsanleitung • Fernbedienung • AUX IN-Kabel • Netzadapter 1. Lösen Sie die Antenne und fahren Sie sie vollständig aus (Schritte A und B). - Page 14 Sie den Netzwerkassistenten manuell ausführen: Wählen Sie Menü > Systemeinstellungen > Netzwerk > Netzwerkassistent. Wählen Sie Ja, um den Einrichtungsassistenten zu starten. Wenn Sie Nein wählen, werden Sie in einem zweiten Bildschirm gefragt, ob Sie den Assistenten das nächste Mal ausführen möchten. Wählen Sie Ja oder Nein.
- Page 15 Einrichtung über WPS WPS-verschlüsselte Netzwerke sind durch "[WPS]" am Anfang des Netzwerknamens gekennzeichnet und verfügen über zwei Verbindungsmethoden. Wählen Sie eine aus und folgen Sie den Aufforderungen: • "Push Button >" fordert Sie auf, die Verbindungstaste am Router zu drücken. Dann die Auswahltaste drücken. •...
-
Page 16: Bedienung
BEDIENUNG Geätebedienung 1. Drücken Sie die Einschalttaste zum Einschalten des Internet-Radios 2. Halten Sie die Einschalttaste 2 Sekunden lang gedrückt, um den Standby-Modus zu aktivieren. Einsatz der Fernbedienung 1. Tippen Sie im Standby-Modus auf die POWER-Taste auf der Fernbedienung, um das Gerät einzuschalten. Das Gerät wird eingeschaltet. -
Page 17: Anhören Von Internet-Inhalten
4. Drehen und drücken Sie das Navigationsrad, um den Pegel von '-6dB' (niedrig) bis '+6dB' (hoch) einzustellen. ANHÖREN VON INTERNET-INHALTEN Sie können das Connect 120 MKII mit Ihrem Netzwerk verbinden, um auf Tausende von Internet-Radiosendern und Podcasts aus der ganzen Welt zuzugreifen. Sobald Sie mit dem Internet verbunden sind, können Sie auch auf zusätzliche Abonnementdienste, die Ihnen sofortigen Zugriff auf... - Page 18 Sender auszuwählen, wählen Sie Menü > Zuletzt gehört und dann einen der aufgelisteten Sender. Die zuletzt gehörten Sender werden oben in der Liste angezeigt. Search: Sie können auch in Internet-Sendungen nach Sendern suchen, die bestimmte Schlüsselwörter im Titel enthalten. Wählen Sie zum Suchen Menü...
-
Page 19: Bt Audio Abspielen
Option Suchen oder Scannen auswählen. 3. Starten Sie den Kopplungsprozess auf Ihrem mobilen Gerät. Wählen Sie dazu "Connect 120 MKII" aus der Liste der verfügbaren Geräte, die auf dem Bildschirm des Mobilgeräts erscheint. Ihr mobiles Gerät verbindet sich nach der Kopplung automatisch. - Page 20 Wenn sich Ihr mobiles Gerät außerhalb der BT-Reichweite befindet (diese beträgt normalerweise ca. 10 m), wird die BT-Verbindung des mobilen Geräts automatisch getrennt. Um die Verbindung zu Ihrem mobilen Gerät manuell zu trennen, müssen Sie die BT-Einstellungen auf Ihrem mobilen Gerät öffnen (weitere Informationen finden Sie im Handbuch Ihres mobilen Geräts).
-
Page 21: Undok
UNDOK Das Gerät kann mithilfe der App UNDOK via Tablet oder Smartphone gesteuert werden. Laden Sie hierfür die App UNDOK für Android aus dem Google Play oder Apple Store auf Ihr Smartphone oder Tablet herunter. für Android für IOS (Google Play) (Apple store) Stellen Sie vor der Verwendung der App UNDOK sicher, dass sich das Smartphone/ Tablet sich im selben drahtlosen Netzwerk befindet wie das... -
Page 22: Dab/Fm-Radio
DAB/FM-RADIO Wechseln der DAB-Sender Drücken Sie die HOME-Taste am Gerät oder auf der Fernbedienung und drehen und drücken Sie das Naviagtionsrad, um "DAB-Radio" auf dem Home-Bildschirm auszuwählen. . Während des Suchlaufs wird auf dem Display "Scanning..." angezeigt. Wenn Sie zum ersten Mal DAB-Radio auswählen, führt DAB einen automatischen Suchlauf durch, um alle verfügbaren Sender zu finden, und stellt nach Abschluss des Suchlaufs einen Sender ein. - Page 23 3. Drücken Sie das Naviagtionsrad, um YES auszuwählen, und drücken Sie die Wähltaste zur Bestätigung. Oder wählen Sie NEIN zum Abbrechen. DRC (Dynamikbereich-Kompression) Wenn Sie Musik mit hohem Dynamikbereich in einer lauten Umgebung hören, möchten Sie möglicherweise den Audio-Dynamikbereich komprimieren. 1.
-
Page 24: Senderspeicher
SENDERSPEICHER Sie können bis zu 20 DAB-, 20 FM- und 20 Internet-Radiosender für den schnellen Zugriff speichern. Einen Sender schnell auf einer voreingestellten Taste (1-4) speichern Stellen Sie den DAB-, UKW- oder Internetradio-Sender ein, den Sie speichern möchten. Halten Sie eine der nummerierten Preset-Tasten (1-4) auf der Fernbedienung zwei Sekunden lang gedrückt, bis Sie eine Meldung sehen, die bestätigt, dass die Einstellung gespeichert wurde. -
Page 25: Usb-Wiedergabe
USB-WIEDERGABE 1. Drücken Sie die HOME-Taste, um das Menü "Funktion" aufzurufen. 2. Drehen und drücken Sie den NAVIGATE-Drehknopf, um "Music Player" auszuwählen. Drücken, um den gerade wiedergegebenen Titel zu ⏯ pausieren. Wenn Sie einen Titel pausiert haben, drücken Sie die Taste erneut, um die Wiedergabe fortzusetzen. Drücken, um zum nächsten Titel zu springen. -
Page 26: Aux In
angehalten. 4. Um die Zufallswiedergabe abzubrechen, halten Sie die Taste RANDOM während der RANDOM-Wiedergabe gedrückt. Die normale Wiedergabe wird fortgesetzt. Gerät laden Sie können Ihr Gerät mit einem USB-Kabel (nicht im Lieferumfang enthalten) über die USB-Buchse an diesem Gerät aufladen. Hinweise •... -
Page 27: Einstellungen
EINSTELLUNGEN Einen Wecker stellen 1. Halten Sie die MENU/INFO-Taste auf dem Gerät oder der Fernbedienung gedrückt, um das Hauptmenü zu sehen. 2. Drehen und drücken Sie das Navigationsrad, um 'Alarms' zu wählen. 3. Drehen und drücken Sie das Navigationsrad wählen, um 'Alarm 1' oder 'Alarm 2' zu wählen. - Page 28 45mins - 60mins" aus. Warten Sie nach der Auswahl 3 Sekunden, bis das Gerät die Auswahl bestätigt hat, dann spielt das Gerät für die gewählte Zeitdauer und schaltet sich automatisch aus. 3. Um den Einschlaf-Timer abzubrechen, tippen Sie wiederholt auf die SLEEP-Taste, bis der Timer "SLEEP OFF"...
- Page 29 1. Drücken Sie die MENU/INFO-Taste auf der Fernbedienung. 2. Drehen und drücken Sie das Navigationsrad oder verwenden Sie die Tasten VOL+/VOL- auf der Fernbedienung, um Hauptmenü > 'Systemeinstellungen' > 'Uhrzeit/Datum' auszuwählen. 3. Drehen und drücken Sie das Navigationsrad oder verwenden Sie die Tasten VOL+/VOL- auf der Fernbedienung, um 'Auto Update' zu wählen.
- Page 30 4. Drehen Sie sich und drücken Sie auf NAVIGATE wählen Sie "On", wenn Sie die Sommerzeit aktivieren möchten. Drehen Sie sich und drücken Sie die Taste NAVIGATE, um 'Off' zu wählen, wenn Sie die Sommerzeit deaktivieren möchten. Einstellen der bevorzugten Sprache Sie können die Sprache auswählen, die für Menüs und Optionen verwendet wird.
- Page 31 4. Drehen Sie sich und drücken Sie das Navigationsrad, um eine Zeitüberschreitungseinstellung zu wählen. Um festzulegen, dass die Hintergrundbeleuchtung immer eingeschaltet bleiben soll, wählen Sie 'Ein'. Helligkeitsstufe im Betrieb 1. Halten Sie die MENU/INFO-Taste auf dem Gerät oder der Fernbedienung gedrückt um das Hauptmenü...
- Page 32 aufzurufen. 2. Drehen und drücken Sie das Naviagtionsrad, um "System settings" > "Network" > "Network wizard" zu wählen. 3. Drehen und drücken Sie das Naviagtionsrad, um Ihre Region auszuwählen. Es wird nach verfügbaren WLAN-Netzwerken gesucht. 4. Drehen und drücken Sie das Naviagtionsrad, um den Namen (SSID) Ihres WLAN-Netzwerks auszuwählen.
-
Page 33: Spezielle Entsorgungshinweise Für Verbraucher In Deutschland
SPEZIELLE ENTSORGUNGSHINWEISE FÜR VERBRAUCHER IN DEUTSCHLAND Entsorgen Sie Ihre Altgeräte fachgerecht. Dadurch wird gewährleistet, dass die Altgeräte umweltgerecht verwertet und negative Auswirkungen auf die Umwelt und menschliche Gesundheit vermieden werden. Bei der Entsorgung sind folgende Regeln zu beachten: • Jeder Verbraucher ist gesetzlich verpflichtet, Elektro- und Elektronikaltgeräte (Altgeräte) sowie Batterien und Akkus getrennt vom Hausmüll zu entsorgen. - Page 34 • Bei einem Vertrieb unter Verwendung von Fernkommunikationsmitteln ist die unentgeltliche Abholung am Ort der Abgabe auf Elektro- und Elektronikgeräte der Kategorien 1, 2 und 4 gemäß § 2 Abs. 1 ElektroG, nämlich „Wärmeüberträger“, „Bildschirmgeräte“ (Oberfläche von mehr als 100 cm²) oder „Großgeräte“ (letztere mit mindestens einer äußeren Abmessung über 50 Zentimeter) beschränkt.
-
Page 35: Hinweise Zur Entsorgung
Berlin Brands Group UK Limited PO Box 42 272 Kensington High Street London, W8 6ND United Kingdom Hiermit erklärt Chal-Tec GmbH, dass der Funkanlagentyp Connect 120 MKII der Richtlinie 2014/53/EU entspricht. Der vollständige Text der EU-Konformitätserklärung ist unter der folgenden Internetadresse verfügbar: use.berlin/10040159... - Page 37 Dear Customer, Congratulations on purchasing this equipment. Please read this manual carefully and take care of the following hints to avoid damages. Any failure caused by ignoring the items and cautions men- tioned in the instruction manual are not covered by our warranty and any liability.
-
Page 38: Specifications
SPECIFICATIONS Item number 10040159, 10040160, 10040161 Radio: Digital (DAB/DAB+), FM and internet radio (via Wi-Fi). Frequencies Digital Band III 174–240 MHz, FM 87.5-108 MHz (with RDS). BT frequency range: 2402 – 2480 MHz Maximum power: 3.5 dBm (EIRP) Display 2.8", 320 x 240, TFT colour display WLAN Wi-Fi: 802.11b, 802.11g and 802.11n supported with WEP and WPA/WPA2 encryption, WPS... - Page 39 EXPLANATION OF THE WARNING SYMBOLS CAUTION RISK OF ELECTRIC SHOCK DO NOT OPEN AUTION: TO REDUCE THE RISK OF ELECTRIC SHOCK AND SERIOUS PERSONAL INJURY, DO NOT REMOVE ANY COVER. NO USER-SERVICABLE PARTS INSIDE. REFER SERVICING TO QUALIFIED SERVICE PERSONNEL ONLY. WARNING.
-
Page 40: Safety Instructions
SAFETY INSTRUCTIONS Read these instructions. All uses guidelines must be read before using the device. Keep the instructions for future use. • Children over the age of 8 and persons with reduced physical, sensory or mental capabilities or those with a lack of experience and knowledge may only use the device if they are instructed on how to do so by a person responsible for their safety, or if they are supervised and understand the hazards associated with the use of the device. - Page 41 easily accessed during intended use. • Excessive sound pressure form earphones and headphones can cause hearing loss. • No naked flame sources such as lighted candles should be placed on the apparatus; • Attention should be drawn to the environmental aspects of battery disposal;...
-
Page 42: Product Description
PRODUCT DESCRIPTION Front Back... - Page 43 STANDBY/ VOLUME dial LCD display OK/NAVIGATE/SNOOZE dial PHONE jack ALARM SET button BACK button MENU/INFO button PRESET 5+/PROG button PRESET 4 button BT PAIR button 10 PRESET 3 button PRESET 2 button 12 PRESET 1 button 13 SCAN button PLAY/PAUSE button 14 HOME button 15 USB jack 16 DC IN jack...
-
Page 44: Remote Control
REMOTE CONTROL... - Page 45 ON/STANDBY button NUMERIC button VOLUME + button CURSOR DOWN button HOME button MENU/INFO button SLEEP button SCAN button USB/BT SKIP PREVIOUS FM TUNER- button 10 SNOOZE button PROG button 12 CURSOR UP button 13 OK button 14 VOLUME - button 15 MUTE button 16 BACK button 17 ALARM button...
- Page 46 Putting the batteries into the remote 1. Open the battery cover. 2. Insert the supplied battery according to the terminal indicated in the battery compartment. When inserting or removing the battery, push it towards the (–) battery terminals. 3. Close the cover. Attention •...
-
Page 47: Getting Started
GETTING STARTED Accessories included Carefully remove the unit and all accessories from the package. Please verify that you have all the following accessories before recycling the gift box. • User Manual • Remote Control • AUX IN Cable • Adapter 1. - Page 48 if you would like to run the wizard next time, select Yes or No. The system then starts without configuring time/date and network settings and enters the Main Menu. Note: If power is removed while the wizard is in progress, the wizard will run again next time.
- Page 49 • Push Button > Prompts you to press the connect button on the router. It then presses the select control. • Pin > (code number) Generates an 8-digit code number which you enter into the wireless router, access point. • Skip WPS >...
-
Page 50: Operation
OPERATION Main unit operation: 1. Press the Power button for turning on the Internet radio 2. Press and hold the Power button for 2 seconds to switch 'standby' Remote control operation 1. In standby mode, tap the POWER Button on remote control to turn the unit ON. -
Page 51: Listening To Internet Content
LISTENING TO INTERNET CONTENT You can connect the Connect 120 MKII to your network to access to thousands of internet radio stations and podcasts from around the world. Thousands of radio stations around the world broadcast online. To listen to an internet radio station or podcast: 1. -
Page 52: Streaming Bt Audio
3. Start the pairing process on your mobile device. Do this by selecting 'Connect 120 MKII' from the list of available devices that appear on the mobile device's screen. Your mobile device will connect to automatically... - Page 53 To disconnect a mobile device: 1. Press and hold the BT PAIR Button for 3 seconds or turn off the BT function of device currently paired with Connect 120 MKII then repeat step 3 above. 2. Turn and press the NAVIGATE dial to select 'Yes' to disconnect your mobile device.
-
Page 54: Undok
UNDOK The device gives a feature of network remote by smartphone or tablet in iOS or Android system. By downloading the assigned app named UNDOK, you can view all the modes the device. Search UNDOK from Google Play or Apple Store, and install it to your smartphone or tablet. -
Page 55: Listening To Dab Or Fm Radio
LISTENING TO DAB OR FM RADIO Changing DAB stations Press the HOME button and turn and press the NAVIGATE dial to select 'DAB radio' from the Home screen. During the scan the display will show “Scanning… ” . The first time you select DAB radio, Will perform an auto tune to find all available stations and will tune into one when finished. -
Page 56: Using Radio Presets
3. Press NAVIGATE dial to select DRC high/low/off and press OK button to confirm the setting. Changing FM stations Seek tuning 1. Press the Home button and turn and press the NAVIGATE dial to select 'FM radio' from the Home screen. 2. -
Page 57: Usb Operation
USB OPERATION 1. Press the HOME button to display the 'function' menu. 2. Turn and press the NAVIGATE dial to select 'Music Player'. ⏯ Press to pause the track that is currently playing. If you have paused a track, press again to resume playback. Press to skip to the next track. -
Page 58: Aux In Mode
Charge your device You can charge your device through the USB socket on this unit with a USB cable (not supplied). Notes • The maximum current for USB charging is 1 A. • All devices for USB charging are not guaranteed. •... -
Page 59: Settings
SETTINGS Setting an alarm 1. Press and hold the MENU/INFO button to view the main menu. 2. Turn and press the NAVIGATE dial to select 'Alarms' 3. Turn and press the NAVIGATE dial to select 'Alarm 1' or 'Alarm 2'. 4. - Page 60 Snoozing a sounding alarm To snooze a sounding alarm, press the NAVIGATE dial. The display will show a countdown timer to show how long the alarm will snooze for. To adjust the amount of time the alarm will be snoozed by, press the NAVIGATE dial to change the snooze duration in 5 minute intervals up to 15 minutes, and then 30 minutes.
- Page 61 Changing the time format 1. Press and hold the MENU/INFO button to view the main menu. 2. Turn and press the NAVIGATE dial to select 'System settings' > 'Time/ Date'. 3. Turn and press the NAVIGATE dial to choose 'Set format '. 4.
- Page 62 3. Turn and press the NAVIGATE dial to choose 'Inactive Standby '. 4. Turn and press the NAVIGATE dial to choose between the Off > 2 hours > 4 hours > 5 hours > 6 hours. Backlight You can adjust the duration that the screen is illuminated for and the brightness of the screen when it times out.
- Page 63 Network setting Connecting to your Wi-Fi using the setup wizard 1. Press and hold the MENU/INFO button to view the main menu. 2. Turn and press the NAVIGATE dial to select 'System settings' > 'Network' > 'Network wizard'. 3. Turn and press the NAVIGATE dial to select your region. Will search for available Wi-Fi networks.
-
Page 64: Disposal Considerations
For Great Britain: Hereby, Chal-Tec GmbH declares that the radio equipment type Connect 120 MKII is in compliance with the relevant statutory requirements. The full text of the declaration of conformity is available at the... - Page 65 Cher client, chère cliente, Toutes nos félicitations pour l’acquisition de ce nouvel appareil. Lisez attentivement les in- dications suivantes et suivez-les pour éviter d'éventuels dommages. Nous ne saurions être tenus pour responsables des dommages dus au non-respect des consignes et à la mauvaise uti- lisation de l’appareil.
-
Page 66: Fiche Technique
FICHE TECHNIQUE Numéro d'article 10040159, 10040160, 10040161 Radio Radio numérique (DAB/DAB+), FM et radio Internet (via Wi-Fi). Fréquences Bande numérique III 174-240 MHz, FM 87,5-108 MHz (avec RDS). BT, gamme de fréquences : 2402 - 2480 MHz Puissance maximale : 3,5 dBm (EIRP) Écran 2.8", 320 x 240, écran couleur TFT Réseau WLAN... - Page 67 EXPLICATION DES SYMBOLES SUR L'APPAREIL ATTENTION RISQUE DE CHOC ÉLECTRIQUE NE PAS OUVRIR ATTENTION : N'OUVREZ PAS LE BOÎTIER POUR ÉVITER UN CHOC ÉLECTRIQUE ET DES BLESSURES GRAVES. L'APPAREIL NE CONTIENT AUCUNE PIÈCE RÉPARABLE PAR L'UTILISATEUR. ADRESSEZ-VOUS EXCLUSIVEMENT À UN PERSONNEL QUALIFIÉ. AVERTISSEMENT : POUR RÉDUIRE LE RISQUE D'INCENDIE OU DE CHOC ÉLECTRIQUE, N'EXPOSEZ PAS L'APPAREIL À...
-
Page 68: Consignes De Sécurité
CONSIGNES DE SÉCURITÉ Lisez le mode d'emploi. Vous devez avoir lu toutes les consignes avant d'utiliser l'appareil. • Les enfants à partir de 8 ans et les personnes souffrant de handicaps mentaux, sensoriels et physiques ne peuvent utiliser l'appareil que s'ils ont été... - Page 69 • Pour couper complètement l'alimentation électrique, débranchez la fiche secteur de l'appareil car il s'agit de son seul dispositif de déconnexion. • La fiche d'alimentation de l'appareil ne doit pas être obstruée OU doit être facilement accessible pour l'utilisation prévue. •...
-
Page 70: Descriptif De L'appareil
DESCRIPTIF DE L'APPAREIL Face avant Dos de l'appareil... - Page 71 STANDBY/Bouton rotatif de volume Affichage LCD Bouton OK/NAVIGATE/SNOOZE - Confirmer/Molette de navigation/Bouton Snooze Prise casque Régler le réveil Précédent Menu/Info Mémorisation de station 5+/ programme Mémorisation de station 4 Appairage BT 10 Mémorisation de station 3 Mémorisation de station 2 12 Mémorisation de station 1 13 Lecture / Pause / Recherche 14 HOME...
-
Page 72: Télécommande
TÉLÉCOMMANDE... - Page 73 Touche On/Standby Touches numériques Volume + Naviguer vers le bas HOME (Mode de fonctionnement (USB/DAB/FM/ Radio Internet / BT/AUX IN)) Menu/Info Sleep-Timer Touche SCAN Piste précédente (USB/BT) Syntonisation de l'émetteur précédente FM 10 Bouton Snooze Programme 12 Naviguer vers le haut 13 OK (Confirmer) 14 Volume - 15 Muet...
- Page 74 Insertion des piles dans la télécommande Ouvrez le couvercle du compartiment des piles. Insérez la pile fournie en respectant la polarité indiquée dans le compartiment de la pile. Lorsque vous insérez ou retirez la pile, poussez-la dans la direction des bornes (-) de la pile. Fermez le couvercle.
-
Page 75: Mise En Marche
MISE EN MARCHE Accessoires fournis Retirez soigneusement l'appareil et tous les accessoires de l'emballage. Veuillez vous assurer que vous avez bien tous les accessoires suivants avant de jeter l'emballage cadeau. • Mode d'emploi • Télécommande • Câble AUX IN • Adaptateur secteur 1. - Page 76 > Réseau > Assistant réseau. Sélectionnez Oui pour lancer l'assistant de configuration. Si vous choisissez Non, un deuxième écran vous demandera si vous souhaitez exécuter l'assistant la prochaine fois. Choisissez Oui ou Non. Le système démarre alors sans réglage de l'heure, de la date et du réseau et appelle le menu principal.
- Page 77 Configuration avec WPS Les réseaux cryptés WPS sont identifiés par « [WPS] » au début du nom du réseau et disposent de 2 méthodes de connexion. Choisissez-en une et suivez les indications : • « Push Button > » vous invite à appuyer sur le bouton de connexion du routeur.
-
Page 78: Utilisation
UTILISATION Fonctionnement de l'appareil 1. Appuyez sur la touche d'alimentation pour allumer la radio Internet. 2. Appuyez sur la touche d'alimentation et maintenez-la pendant 2 secondes pour activer le mode Veille. Utilisation de la télécommande 1. En mode Veille, appuyez sur la touche POWER de la télécommande pour allumer l'appareil. -
Page 79: Écoute De Contenu Sur Internet
3. Tournez et appuyez sur la molette de navigation pour sélectionner « Bass » ou « Treble ». 4. Tournez et appuyez sur la molette de navigation pour régler le niveau de « -6dB » (faible) à « +6dB » (élevé). ÉCOUTE DE CONTENU SUR INTERNET Vous pouvez connecter le Connect 120 M2K II à... - Page 80 émissions diffusées sur Internet dont le titre contient certains mots-clés. Pour rechercher, sélectionnez Menu > Liste des stations > Rechercher. Saisissez un mot-clé en sélectionnant les caractères les uns après les autres et validez par OK. Les écrans de saisie pour la recherche sont structurés de la même manière que l'écran de saisie du mot de passe Wifi.
-
Page 81: Lecture D'audio Par Bt
Rechercher ou Scanner. 3. Lancez le processus d'appairage sur votre appareil mobile. Pour ce faire, sélectionnez « Connect 120 MKII » dans la liste des appareils disponibles qui apparaît sur l'écran de l'appareil mobile. Votre appareil mobile se connecte automatiquement après l'appairage . - Page 82 Si votre appareil mobile se trouve en hors de portée BT (normalement environ 10 m), la connexion BT de l'appareil mobile est automatiquement déconnectée. Pour vous déconnecter manuellement de votre appareil mobile, ouvrez les paramètres BT de votre appareil mobile (voir le manuel de votre appareil mobile pour plus d'informations).
-
Page 83: Undok
UNDOK L'appareil peut être contrôlé via une tablette ou un smartphone grâce à l'application UNDOK. Pour ce faire, téléchargez l'application UNDOK pour Android depuis le Google Play ou l'Apple Store sur votre smartphone ou votre tablette. Pour Android pour IOS (Google Play) (Apple Store) Avant d'utiliser l'appli UNDOK, assurez-vous que le smartphone/tablette se... -
Page 84: Radio Dab/Fm
RADIO DAB/FM Changer les stations DAB Appuyez sur la touche HOME de l'appareil ou de la télécommande et tournez et appuyez sur la molette de navigation pour sélectionner « Radio DAB » sur l'écran d'accueil. . Pendant le balayage, l'écran affiche «... - Page 85 DRC (Dynamic Range Compression) Lorsque vous écoutez de la musique à plage dynamique étendue dans un environnement bruyant, vous pouvez souhaiter compresser la plage dynamique audio. 1. Appuyez et maintenez la touche MENU/INFO pour afficher le menu principal. 2. Tournez et appuyez sur la molette de navigation pour sélectionner « DRC ».
-
Page 86: Mémorisation De Station
MÉMORISATION DE STATION Vous pouvez stocker jusqu'à 20 stations de radio DAB, 20 stations de radio FM et 20 stations de radio Internet pour un accès rapide. Mémorisation rapide d'une station sur une touche de présélection (1-4) Réglez la station de radio DAB, FM ou Internet que vous souhaitez mémoriser. -
Page 87: Lecture Par Usb
LECTURE PAR USB 1. Appuyez sur la touche HOME pour afficher le menu « Fonction ». 2. Tournez et appuyez sur le bouton NAVIGATE pour sélectionner « Music Player ». Appuyez sur cette touche pour mettre en pause la piste en ⏯... -
Page 88: Aux In
Chargement de l'appareil Vous pouvez charger votre appareil à l'aide d'un câble USB (non fourni) sur la prise USB de cet appareil. Remarques • Le courant de charge maximal pour la charge par USB est de 1 A. • La charge USB n'est pas garantie pour tous les appareils. •... -
Page 89: Réglages
RÉGLAGES Réglage d'un réveil 1. Maintenez la touche MENU/INFO de l'appareil ou de la télécommande pour accéder au menu principal. 2. Tournez et appuyez sur la molette de navigation pour sélectionner « Alarms ». 3. Tournez et appuyez sur la molette de navigation pour sélectionner « Alarme 1»... - Page 90 - 45 min - 60 min ». Après avoir sélectionné, attendez 3 secondes que l'appareil confirme la sélection, puis l'appareil jouera pendant la durée sélectionnée et s'éteindra automatiquement. 3. Pour annuler la minuterie d'arrêt, appuyez sur la touche SLEEP à plusieurs reprises jusqu'à...
- Page 91 2. Tournez et appuyez sur la molette de navigation ou utilisez les touches VOL+/VOL- de la télécommande pour sélectionner « Menu principal » > « Paramètres du système » > « Heure/Date ». 3. Tournez et appuyez sur la molette de navigation ou utilisez les touches VOL+/VOL- de la télécommande pour sélectionner «...
- Page 92 1. Appuyez sur la touche MENU/INFO de la télécommande. 2. Tournez et appuyez sur la molette de navigation ou utilisez les touches VOL+/VOL- de la télécommande pour sélectionner « Menu principal » > « Paramètres du système » > « Langue ». 3.
- Page 93 sélectionner « On level ». 4. Tournez et appuyez sur la molette de navigation NAVIGATE pour choisir entre « Haut », « Moyen », et « Bas ». Niveau de luminosité réduit en mode Veille 1. Maintenez la touche MENU/INFO de l'appareil ou de la télécommande pour accéder au menu principal.
- Page 94 sur pour confirmer. 6. Tournez et appuyez sur la molette de navigation pour sélectionner « OK » se connecte à votre réseau. Conseil pratique : La clé WLAN est sensible à la casse, veillez donc à la saisir exactement comme indiqué.
-
Page 95: Informations Sur Le Recyclage
London, W8 6ND United Kingdom Le soussigné, Chal-Tec GmbH, déclare que l’équipement radioélectrique du type Connect 120 MKII est conforme à la directive 2014/53/UE. Le texte complet de la déclaration UE de conformité est disponible à l’adresse internet suivante : use. - Page 97 Gentile cliente, La ringraziamo per l'acquisto del dispositivo. La preghiamo di leggere attentamente le seguenti indicazioni e di seguirle per prevenire eventuali danni. Non ci assumiamo alcuna responsabilità per danni scaturiti da una mancata osservanza delle avvertenze di sicurezza e da un uso impro- prio del dispositivo.
-
Page 98: Dati Tecnici
DATI TECNICI Numero articolo 10040159, 10040160, 10040161 Radio Digitale (DAB/DAB+), FM e web (via WiFi). Frequenze Banda digitale III 174–240 MHz, FM 87,5–108 MHz (con RDS) Gamma di frequenza BT: 2402 - 2480 MHz Potenza max.: 3,5 dBm (EIRP) Display 2,8", 320 x 240, display a colori TFT Rete WiFi WiFi: 802.11b, 802.11g e 802.11n supporta codifiche... - Page 99 SPIEGAZIONE DEI SIMBOLI SUL DISPOSITIVO ATTENZIONE RISCHIO DI SCOSSE ELETTRICHE NON APRIRE ATTENZIONE: NON APRIRE L’ALLOGGIAMENTO, IN MODO DA EVITARE SCOSSE ELETTRICHE E SERIE LESIONI. ALL’INTERNO NON CI SONO COMPONENTI CHE NECESSITANO DI MANUTENZIONE DA PARTE DELL’UTENTE. RIVOLGERSI ESCLUSIVAMENTE A TECNICI QUALIFICATI. AVVERTIMENTO: PER RIDURRE IL RISCHIO DI INCENDI E SCOSSE ELETTRICHE, NON ESPORRE IL DISPOSITIVO A PIOGGIA, ACQUA O UMIDITÀ.
-
Page 100: Avvertenze Di Sicurezza
AVVERTENZE DI SICUREZZA Leggere il manuale. Tutte le avvertenze di utilizzo devono essere lette prima di procedere all’uso del dispositivo. • I bambini a partire da 8 anni e le persone con limitate capacità fisiche, psichiche e sensoriali possono utilizzare il dispositivo solo se sono stati istruiti da una persona responsabile della loro sicurezza sulle modalità... - Page 101 consistono nella stessa spina del dispositivo. • La spina del dispositivo non deve essere ostacolata O deve essere facilmente accessibile secondo l’utilizzo corretto. • La batteria non deve essere esposta a calore eccessivo come sole, fuoco o simili. • Un pressione sonore eccessiva da cuffie e auricolari può causare la perdita dell'udito.
-
Page 102: Descrizione Del Prodotto
DESCRIZIONE DEL PRODOTTO Lato anteriore Lato posteriore... - Page 103 STANDBY/Manopola del volume Schermo LCD Manopola OK/NAVIGATE/SNOOZE Confermare/Navigazione/Snooze Connessione cuffie Impostare la sveglia Indietro Menu/Info Memoria delle emittenti 5+/Programmazione Memoria delle emittenti 4 Accoppiamento BT 10 Memoria delle emittenti 3 Memoria delle emittenti 2 12 Memoria delle emittenti 1 13 Riproduzione/Pausa/Ricerca 14 HOME Tipo di funzionamento (USB/DAB/FM/Web radio/BT/ AUX IN)
-
Page 104: Telecomando
TELECOMANDO... - Page 105 On/Standby Tasti numerici Volume + Navigare verso il basso HOME (tipo di funzionamento CD/USB/DAB/FM/ Web radio/BT/AUX IN) Menu/Info Timer di autospegnimento SCAN Titolo precedente (USB/BT) Regolazione emittente FM verso il basso 10 Snooze Programma 12 Navigare verso l'alto 13 OK (confermare) 14 Volume - 15 Muto 16 Indietro...
- Page 106 Inserire la batteria nel telecomando. Aprire il coperchio del vano della batteria. Inserire la batteria in dotazione nel vano rispettando la polarità corretta. Quando si toglie e inserisce la batteria, spingere in direzione del polo (-) della batteria. Chiudere il coperchio. Attenzione •...
-
Page 107: Messa In Funzione
MESSA IN FUNZIONE Accessori inclusi Rimuovere con cura dall'imballaggio il dispositivo e tutti gli accessori. Prima di smaltire la confezione, assicurarsi che siano presenti tutti i seguenti accessori. • Manuale d'uso • Telecomando • Cavo AUX IN • Adattatore di rete 1. - Page 108 Impostazioni di sistema > Rete > Assistente di rete. Selezionare Sì per avviare l'assistente di configurazione. Se si seleziona No, una seconda schermata chiederà se si desidera avviare l'assistente la volta successiva. Selezionare Sì o No. Il sistema si avvia quindi senza la configurazione di ora/data e rete e accede al menu principale.
- Page 109 Configurazione tramite WPS Le reti criptate WPS sono identificate da "[WPS]" all'inizio del nome e offrono due metodi di connessione. Sceglierne uno e seguire le istruzioni: • "Push button >" richiede di premere il tasto di connessione sul router. Premere poi il tasto di selezione. •...
-
Page 110: Utilizzo
UTILIZZO Controllo del dispositivo 1. Premere l'apposito tasto per accendere la radio. 2. Tenere premuto il tasto di accensione per 2 secondi per attivare la modalità standby. Utilizzo del telecomando 1. In standby, premere POWER sul telecomando per accendere il dispositivo. -
Page 111: Ascoltare Contenuti Web
ASCOLTARE CONTENUTI WEB Connect 120 MK II può essere collegato alla rete per ascoltare migliaia di emittenti radio e podcast da tutto il mondo tramite il web. Non appena ci si connette a Internet, è possibile accedere a ulteriori servizi ad abbonamento, che permettono di ascoltare immediatamente milioni di brani. - Page 112 Popular: presenta un elenco delle emittenti web più popolari di tutto il mondo. Discover: Discover permette di selezionare da un elenco di emittenti definite in base all'origine (Paese), al genere (stile musicale) o alla lingua. Navigare tra le categorie: non appena è stata effettuata la scelta, una schermata conferma la categoria selezionata e il numero di emittenti in tale categoria.
-
Page 113: Riprodurre Audio Bt
Ecco come interrompere il collegamento con un dispositivo portatile: 1. Tenere premuto per 3 secondi BT PAIR o spegnere il BT sul dispositivo attualmente connesso a Connect 120 MKII e ripetere il passaggio 3. 2. Ruotare e premere la manopola di navigazione per scegliere "Yes" (Sì) e interrompere il collegamento. - Page 114 BT viene interrotto automaticamente dal dispositivo portatile. Per interrompere manualmente il collegamento, aprire le impostazioni BT del dispositivo portatile (ulteriori informazioni sono disponibili sul manuale del dispositivo portatile in questione). Quando si interrompe il collegamento con un dispositivo portatile, la fonte rimane "BT".
-
Page 115: Undok
UNDOK Il dispositivo può essere controllato tramite tablet o smartphone con l’aiuto della app UNDOK. Scaricare l'app UNDOK su smartphone o tablet da Android Google Play o Apple Store. Per Android Per IOS (Google Play) (Apple store) Prima di utilizzare UNDOK, assicurarsi che smartphone/tablet sia collegato con la stessa rete senza fili della radio. -
Page 116: Radio Dab/Fm
RADIO DAB/FM Cambiare emittenti DAB Premere HOME su dispositivo o telecomando, ruotare e premere la manopola di navigazione per selezionare "Radio DAB" dalla schermata Home. Durante la ricerca, sullo schermo compare "Scanning...". Quando si seleziona la radio DAB per la prima volta, viene eseguita una ricerca automatica di tutte le emittenti disponibili e viene poi impostata un'emittente. - Page 117 Se si ascolta musica con elevata gamma dinamica in un ambiente rumoroso, potrebbe essere consigliabile comprimere la gamma dinamica audio. 1. Tenere premuto il tasto MENU/INFO per accedere al menu principale. 2. Ruotare e premere la manopola di navigazione per scegliere "DRC". 3.
-
Page 118: Memoria Delle Emittenti
MEMORIA DELLE EMITTENTI Si possono salvare per l'accesso rapido un massimo di 20 emittenti DAB, 20 FM e 20 web. Salvare rapidamente un'emittente sui tasti predefiniti (1-4) Impostare l'emittente DAB, FM o web che si desidera salvare. Tenere premuto per 2 secondi il tasto numerato di preselezione (1-4) sul telecomando fino a quando compare un messaggio che conferma il salvataggio dell'impostazione. -
Page 119: Riproduzione Usb
RIPRODUZIONE USB 1. Premere HOME per visualizzare il menu "Funzione". 2. Ruotare e premere la manopola NAVIGATE per selezionare "Lettore musicale". Premere per mettere in pausa il titolo in riproduzione. ⏯ Quando è stato messo in pausa un brano, premerlo di nuovo per riavviare la riproduzione. -
Page 120: Aux In
È possibile caricare un dispositivo esterno con un cavo USB (non incluso) attraverso la porta USB integrata. Note • La tensione di carica massima tramite USB è di 1 A. • La ricarica via USB non è garantita per tutti i dispositivi. •... -
Page 121: Impostazioni
IMPOSTAZIONI Impostare una sveglia 1. Tenere premuto il tasto MENU/INFO su dispositivo o telecomando per accedere al menu principale. 2. Ruotare e premere la manopola di navigazione per scegliere "Alarms". 3. Ruotare e premere la manopola di navigazione per scegliere "Alarm 1" o "Alarm 2". - Page 122 Funzione snooze Premere la manopola di navigazione per mettere in pausa una sveglia che suona. Sul display compare un conto alla rovescia che indica la durata della pausa. Per impostare la durata dello snooze, premere la manopola di navigazione e modificare la durata in intervalli di 5 minuti fino a 15 minuti e poi 30 minuti.
- Page 123 Cambiare il formato orario 1. Premere il tasto MENU/INFO sul telecomando. 2. Ruotare e premere la manopola di navigazione o utilizzare VOL+/VOL- sul telecomando per scegliere Menu principale > Impostazioni di sistema > Ora/Data. 3. Ruotare e premere la manopola di navigazione o utilizzare VOL+/VOL- sul telecomando per scegliere "Impostare il formato".
- Page 124 tempo. In questo modo si evita che la radio rimanga in funzione se si esce di casa mentre è ancora accesa. 1. Tenere premuto il tasto MENU/INFO per accedere al menu principale. 2. Ruotare e premere la manopola NAVIGATE per selezionare Impostazioni di sistema >...
- Page 125 3. Ruotare e premere la manopola di navigazione NAVIGATE per scegliere "Dim level". 4. Ruotare e premere la manopola di navigazione NAVIGATE per scegliere tra "Medio" e "Basso". Ripristinare le impostazioni di fabbrica Resettando il dispositivo alle impostazioni di fabbrica, vengono cancellate tutte le impostazioni, le emittenti salvate, le sveglie e tutte le opzioni tornano alle impostazioni standard.
-
Page 126: Smaltimento
272 Kensington High Street London, W8 6ND United Kingdom Il fabbricante, Chal-Tec GmbH, dichiara che il tipo di apparecchiatura radio Connect 120 MKII è conforme alla direttiva 2014/53/UE. Il testo completo della dichiarazione di conformità UE è disponibile al seguente indirizzo Internet: use.berlin/10040159... - Page 129 Estimado cliente: Le felicitamos por la adquisición de este produc- to. Lea atentamente el siguiente manual y siga cuidadosamente las instrucciones de uso con el fin de evitar posibles daños. La empresa no se hace responsable de los daños causados por el incumplimiento de las instrucciones y el uso inde- bido.
-
Page 130: Datos Técnicos
DATOS TÉCNICOS Número del artículo 10040159, 10040160, 10040161 Radio Radio digital (DAB/DAB+), FM e Internet. (con Wifi) Frecuencias Banda digital III 174-240 MHz, FM 87,5-108 MHz (con RDS) BT Gama de frecuencias: 2402 - 2480 MHz Potencia máxima de transmisión: >3,5 dBm (EIRP) Pantalla Pantalla TFT en color de 2,8", 320 x 240 Red Wifi... - Page 131 EXPLICACIÓN DE LOS SÍMBOLOS PRESENTES EN EL APARATO PRECAUCIÓN: RIESGO DE DESCARGA ELÉCTRICA NO ABRIR PRECAUCIÓN: NO ABRA LA CARCASA DEL APARATO, ASÍ EVITARÁ DESCARGAS ELÉCTRICAS Y LESIONES PERSONALES GRAVES. EL APARATO NO CONTIENE PIEZAS EN SU INTERIOR QUE EL USUARIO PUEDA REPARAR.
-
Page 132: Indicaciones De Seguridad
INDICACIONES DE SEGURIDAD Lea las instrucciones. Todas las instrucciones de uso deben ser leídas antes de usar el aparato. • Los niños mayores de 8 años y las personas con discapacidad física, sensorial o psíquica pueden utilizar el aparato si han sido previamente instruidos por una persona responsable sobre el funcionamiento del mismo y conocen las funciones, las indicaciones de seguridad y los riesgos asociados. - Page 133 del dispositivo debe estar desconectado de la red eléctrica, ya que los dispositivos de desconexión son los enchufes del equipo. • El enchufe del dispositivo no debe estar bloqueado O debe ser fácilmente accesible para el uso previsto. • La batería no debe ser expuesta a un calor excesivo como la luz del sol, el fuego o similares.
-
Page 134: Vista General Del Aparato
VISTA GENERAL DEL APARATO Parte frontal Parte trasera... - Page 135 STANDBY/ Botón de control de volumen Pantalla LCD Botón OK/NAVEGAR/SNOOZE Confirmar/Rueda de navegación /Botón de desplazamiento Entrada para auriculares Configurar el despertador atrás Menú/info Memoria de emisoras 5+/Programa Memoria de la estación 4 BT emparejamiento 10 Memoria de emisoras 3 Memoria de emisoras 2 12 Memoria de emisoras 1 13 Reproducción/pausa/búsqueda...
-
Page 136: Mando A Distancia
MANDO A DISTANCIA... - Page 137 Botón de encendido/espera Teclas numéricas Volumen + Navegar hacia arriba HOME (modo CD/USB/DAB/FM/radio Internet/ BT/AUX IN) Menú/info Apagado automático Tecla de escaner Retroceso de la pista (USB/BT) Retroceso de la sintonización de emisoras FM 10 Silencio Programa 12 Navegar hacia arriba 13 OK (Confirmar) 14 Volumen - 15 Silencio...
- Page 138 Colocación de las pilas en el mando a distancia Abra la tapa del compartimento de las pilas. Inserte la batería suministrada según la polaridad indicada en el compartimento de la batería. Deslice la batería hacia los terminales de la batería (-) cuando la introduzca o la extraiga. Cierre la tapa.
-
Page 139: Puesta En Marcha
PUESTA EN MARCHA Accesorios cerrados Saque con cuidado la unidad y todos los accesorios del embalaje. Por favor, asegúrese de tener todos los siguientes accesorios antes de deshacerse de la caja de regalo. • Manual de instrucciones • Mando a distancia •... - Page 140 Asistente de Red manualmente: Seleccione Menú > Configuración del sistema > Red > Asistente de red. Seleccione Sí para iniciar el asistente de configuración. Si selecciona No, una segunda pantalla le preguntará si desea ejecutar el asistente la próxima vez. Seleccione Sí o No. El sistema se pone en marcha sin ajustes de hora/ fecha y de red y accede al menú...
- Page 141 Configuración a través de WPS Las redes WPS encriptadas se identifican con «[WPS]» al principio del nombre de red y tienen 2 métodos de conexión. Seleccione uno y siga las indicaciones: • "Push Button >" le pide que pulse el botón de conexión del router. A continuación, pulse el botón de selección.
-
Page 142: Funcionamiento
FUNCIONAMIENTO Funcionamiento de la unidad 1. Pulse el botón de encendido para encender la radio por Internet. 2. Mantenga pulsado el botón de encendido durante 2 segundos para activar el modo de espera. Uso del mando a distancia 1. En el modo de espera, pulse el botón POWER del mando a distancia para encender la unidad. -
Page 143: Escuchar Contenidos De Internet
ESCUCHAR CONTENIDOS DE INTERNET Puedes conectar el Connect 120 MKII a tu red para acceder a miles de emisoras de radio por Internet y podcasts de todo el mundo. Una vez conectado a Internet, también puedes acceder a servicios de suscripción adicionales, que te da acceso instantáneo a millones de canciones. - Page 144 Seleccione una emisora de radio de la lista para sintonizarla. Popular: Presenta una lista de las emisoras de Internet más populares de todo el mundo. Descubre: Permite seleccionar entre una lista de podcasts definidos por su origen (país), género (tipo de música) o idioma. Navegue por las opciones de categoría;...
-
Page 145: Reproducción De Bt
Búsqueda o Escaneo. 3. Inicia el proceso de emparejamiento en tu dispositivo móvil. Para ello, seleccione "Connect 120 MKII" en la lista de dispositivos disponibles que aparece en la pantalla del dispositivo móvil. Tu dispositivo móvil se conecta automáticamente tras el emparejamiento. - Page 146 ser de unos 10 m), la conexión BT del dispositivo móvil se desconecta automáticamente. Para desconectar tu dispositivo móvil manualmente, debes abrir los ajustes de BT de tu dispositivo móvil (para más información, consulta el manual de tu dispositivo móvil). Cuando te desconectas de un dispositivo móvil.
-
Page 147: Undok
UNDOK La unidad se puede controlar a través de una tableta o un smartphone mediante la aplicación UNDOK. Para ello, descargue la aplicación UNDOK para Android desde Google Play o Apple Store en su smartphone o tableta. para Android para IOS (Google Play) (App store) Antes de utilizar la aplicación UNDOK, asegúrese de que el smartphone/... -
Page 148: Radio Dab/Fm
RADIO DAB/FM Cambio de emisoras digitales DAB Pulse el botón HOME de la unidad o del mando a distancia, gire y pulse el dial NAVIGATE para seleccionar 'DAB Radio' en la pantalla de inicio. Durante la exploración, la pantalla muestra "Escaneando...". Cuando seleccionas la radio DAB por primera vez, DAB realiza una búsqueda automática para encontrar todas las emisoras disponibles y sintoniza una emisora cuando la búsqueda está... - Page 149 es posible que quieras comprimir el rango dinámico del audio. 1. Mantenga pulsada la tecla del MENU/INFO para mostrar el menú principal. 2. Gire y pulse la rueda de navegación para seleccionar "DRC". 3. Pulse la rueda de navegación para seleccionar DRC alto/bajo/ desactivado y pulse el botón OK para confirmar el ajuste.
-
Page 150: Memoria De Emisoras
MEMORIA DE EMISORAS Puedes almacenar hasta 20 emisoras de radio DAB, 20 de FM y 20 de Internet para acceder rápidamente a ellas. Guarda rápidamente una emisora en un botón de preselección (1-4). Sintoniza la emisora de radio DAB, UKB o de Internet que quieras almacenar. -
Page 151: Reproducción Usb
REPRODUCCIÓN USB 1. Pulse la tecla HOME para mostrar el menú "Función". 2. Gire y pulse el selector NAVIGATE para seleccionar 'Music Player'. Pulsa para pausar la pista que se está reproduciendo. Si ha ⏯ puesto en pausa una pista, pulse el botón de nuevo para reanudar la reproducción. -
Page 152: Aux In
toma USB de esta unidad. Notas • La corriente de carga máxima es de 1 A. • La carga por USB no está garantizada para todos los dispositivos. • La carga por USB funciona durante el funcionamiento. La carga no es compatible con el modo STANDBY. -
Page 153: Configuración
CONFIGURACIÓN Programar una alarma 1. Mantenga pulsado el botón de MENU/INFO del aparato o del mando a distancia para ver el menú principal. 2. Gire y pulse la rueda de navegación para seleccionar "Alarms". 3. Gire y pulse la rueda de navegación para seleccionar "Alarma 1" o "Alarma 2". - Page 154 3. Para cancelar el temporizador de reposo, pulse el botón SLEEP repetidamente hasta que el temporizador muestre "SLEEP OFF", el símbolo del temporizador de reposo "SLEEP OFF" desaparece de la pantalla. Silenciar una alarma sonora Pulse la rueda de navegación para poner en pausa una alarma que esté sonando.
- Page 155 3. Gire y pulse la rueda de navegación o utilice los botones VOL+/VOL- del mando a distancia para seleccionar "Actualización automática". 4. Gire y pulse la rueda de navegación o utilice los botones VOL+/VOL- del mando a distancia para seleccionar entre "Actualizar desde DAB", "Actualizar desde FM", "Actualizar desde la red"...
- Page 156 3. Gire y pulse la rueda de navegación o utilice los botones VOL+/VOL- del mando a distancia para seleccionar su idioma. Modo de espera inactivo Esta opción pone automáticamente la radio en modo de espera si no ha habido ninguna interacción con la radio en un determinado período de tiempo.
- Page 157 YNivel de brillo atenuado en espera 1. Mantenga pulsado el botón de MENU/INFO del aparato o del mando a distancia para ver el menú principal. 2. Gire y pulse la rueda de navegación NAVIGATE para seleccionar "Ajustes del sistema" > "Luz de fondo". 3.
- Page 158 London, W8 6ND United Kingdom Por la presente, Chal-Tec GmbH declara que el tipo de equipo radioeléctrico Connect 120 MKII es conforme con la Directiva 2014/53/UE. El texto completo de la declaración UE de conformidad está disponible en la dirección Internet siguiente: use.berlin/10040159...
Need help?
Do you have a question about the Connect 120 MKII and is the answer not in the manual?
Questions and answers