Table of Contents
Advertisement
Available languages
Available languages
Advertisement
Chapters
Table of Contents

Related Manuals for auna Connect 150 SE


Summary of Contents for auna Connect 150 SE
-
Page 3: Table Of Contents
Sehr geehrter Kunde, wir gratulieren Ihnen zum Erwerb Ihres Gerätes. Lesen Sie die folgenden Hinweise sorgfältig durch und befolgen Sie diese, um möglichen Schäden vorzubeugen. Für Schäden, die durch Missachtung der Hinweise und unsachgemäßen Gebrauch entstehen, übernehmen wir keine Haftung. Scannen Sie den QR-Code, um Zugriff auf die aktuellste Bedienungsanleitung und weitere Informationen rund um das Produkt zu erhalten. -
Page 4: Technische Daten
TECHNISCHE DATEN Artikelnummer 10034077, 10034956, 10034957 Stromversorgung 100 – 240V AC, 50/60 Hz, 1.5A Anzeige 2.8", 320 x 240, TFT Farbdisplay Unterstützte Netwerke WiFi IEEE 802.11b/g/n wireless; BT (BT 2.1, Unterstützung von A2DP- und AVRCP-Profilen) Frequenzband WiFi : 2.400 - 2.4835 GHz; BT: 2.4 - 2.48 GHz Maxiamale Funkleistung WiFi: <20dBm;... - Page 5 Netzadapter Hersteller Chal-Tec GmbH Adresse Wallstr. 16 10179 Berlin Modellnummer A361-1502400E Eingangsspannung 100-240 V~ Frequenz Stromnetz 50/60 Hz Ausgangsspannung 15 V Ausgangsstrom 2,4 A Ausgangsleistung 36 W Durchschnittlicher 89,18% @ 115 VAC/60 Hz Wirkungsgrad 88,21% @ 230 VAC/50 Hz Wirkungsgrad bei niedriger 91,96% @ 115 VAC/60Hz Last (10%) 87,14% @ 230 V/50 Hz...
- Page 6 WARNUNG VORSICHT: DAS GEHÄUSE NICHT ÖFFNEN, UM EINEN STROMSCHLAG UND ERNSTE PERSONENVERLETZUNGEN ZU VERMEIDEN. IM INNEREN KEINE VOM KUNDEN ZU WARTENDEN KOMPONENTEN. WENDEN SIE SICH AUSSCHLIESSLICH AN QUALIFIZIERTE FACHLEUTE. WARNUNG. UM DIE GEFAHR EINES BRANDS ODER EINES STROMSCHLAGS ZU VERRINGERN, DAS GERÄT NICHT IN WASSER, REGEN ODER FEUCHTIGKEIT AUSZUSETZEN.
-
Page 7: Sicherheitshinweise
SICHERHEITSHINWEISE Lesen Sie sich die Bedienungsanleitung vor der Installation und Inbetriebnahme des Geräts aufmerksam durch und bewahren Sie diese für den zukünftigen Gebrauch auf. Allgemeine Sicherheitshinweise • Achten Sie darauf, dass sich das Gerät und die Gerätebestandteile außerhalb der Reichweite von Kindern befinden. •... - Page 8 Feuchtigkeit und Wasser • Zur Vermeidung der Brand- und Stromschlaggefahr: • Stellen Sie dieses Gerät nicht in der Nähe von Wasser oder Feuchtigkeit auf. • Stellen Sie dieses Gerät nicht in der Nähe von Badewannen oder Waschbecken, in der Nähe eines Swimmingpools oder an sonstigen orten auf, welche Wasser enthalten oder feucht sind.
-
Page 9: Geräteübersicht
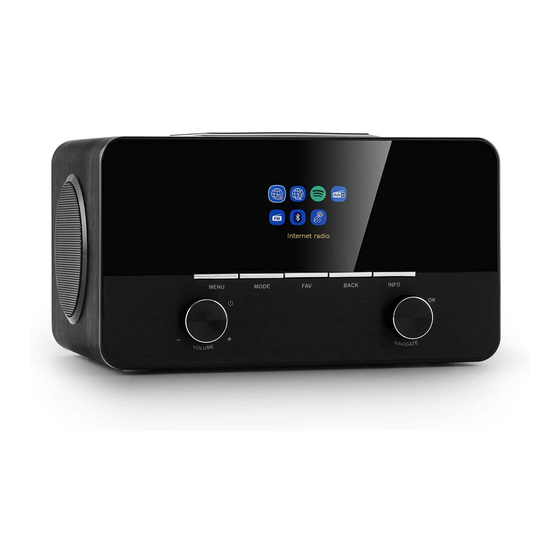
GERÄTEÜBERSICHT IR-Empfänger FAV (Favoriten) MODE (Modus) BACK (Zurück) MENU (Menü) INFO VOLUME -/+ (Lautstärkeregler) OK/NAVIGATE (Bestätigen/ 2,8“ Farbdisplay Navigieren) 10 FM/DAB+-Antenne Netzschalter 12 DC-IN-Anschluss 13 Kopfhörerausgang 14 AUX-IN-Anschluss... - Page 10 Remote control Ein-/Ausschalten/ Alarm 13 13 SHUFFLE/REPEAT deaktivieren) (Zufallswiedergabe/ MODE (Modus) Wiederholen) MENU (Menü) 14 ALARM (Weckeinstellung) Titel zurück, schnell zurück 15 BT PAIR (BT koppeln) Wiedergabe/ Pause 16 Titel vor, schnell vor EQ (Equalizer) 17 + (Lautstärke erhöhen) nach oben; FM: Frequenz 18 - (Lautstärke senken) einstellen 19 stummschalten aktivieren/...
-
Page 11: Inbetriebnahme
INBETRIEBNAHME Verbindungsherstellung und Vorbereitung Schließen Sie das eine Ende des Netzadapters an das Gerät an und stecken Sie den Netzstecker auf der anderen Seite des Netzkabels in die Steckdose. Schalten Sie das Gerät ein. Ziehen Sie die DAB-/FM-Antenne vollständig aus, um einen besser Radioempfang zu bekommen. -
Page 12: Bedienung
BEDIENUNG Drehen Sie zur Lautstärkeanpassung am Lautstärkeregler des Geräts oder drücken Sie die Tasten der Fernbedienung. Schalten Sie die Lautstärke durch Drücken der Taste stumm. • Drücken Sie zur Modusauswahl die Taste MODE. • Drücken Sie zum Öffnen des Menüs die Taste MENU. Drücken Sie diese Taste erneut, um die Menüanzeige zu schließen und zum Wiedergabemodus zurückzukehren. - Page 13 Modus es sich befindet, kann es vorkommen, dass das Gerät viele Daten verarbeiten muss. Dies kann zum Einfrieren des Bildschirms oder zu Fehlfunktionen führen. • Starten Sie das Gerät, falls notwendig, neu. Erstmalige Inbetriebnahme des Geräts • Wenn Sie das Gerät zum ersten Mal einschalten, werden die Informationen zur Datenschutzerklärung angezeigt.
- Page 14 Netzwerkeinstellungen Zunächst fragt das Gerät, ob das Netzwerk verbunden bleiben soll. Wenn Sie das Gerät in allen Kontrollmodi via App kontrollieren möchten, wählen Sie „YES“ aus. Wenn Sie „NO“ auswählen, können Sie das Gerät in den Kontrollmodi (Standby, AUX IN, FM, DAB) nicht via App kontrollieren. Beachten Sie, dass der Stromverbrauch im Standbymodus höher ist, wenn die Netzwerkverbindung aufrechterhalten wird.
- Page 15 Internetradio, Podcasts Das Gerät kann tausende Radiosender und Podcasts von der ganzen Welt via Breitbandinternetverbindung empfangen. Wenn Sie den Internetradio- oder Podcastmodus auswählen, stellt das Gerät eine direkte Verbindung zum „Frontier Smart Technologies Portal“ her, um eine Liste von Sendern oder Podcasts zu erhalten.
-
Page 16: Spotify Connect
SPOTIFY CONNECT Dein neues Gerät hat Spotify Connect Verwende dein Smartphone, Tablet oder deinen Computer als Fernbedienung für Spotify. Auf spotify.com/connect erfährst du mehr. 1. Verbinde den iTuner mit Deinem WLAN-Netzwerk (Siehe Produktanleitung für Details). 2. Öffne die Spotify-App auf Deinem Smartphone, Tablet oder PC und verbinde Dich mit demselben WLAN-Netzwerk. -
Page 17: Dab+ Radio
DAB+ RADIO Im DAB-Modus kann DAB/DAB+ digitales Radio empfangen werden. Auf dem Bildschirm werden Sender-, Stream- und Titelinformationen angezeigt. Sendersuche Wenn Sie den DAB-Modus das erste Mal auswählen oder wenn die Senderliste leer ist, startet das Gerät einen automatischen Sendersuchlauf, um fest zu stellen, welche Sender verfügbar sind. -
Page 18: Aux In
manuell durch schnelles Drücken der Tasten oder Drehen am Drehregler suchen. Einstellungen Sucheinstellung: Die FM-Sendersuche stoppt, sobald ein verfügbarer Sender gefunden wurde. Dies kann dazu führen, dass das Gerät bei Sendern stoppt, die auf Grund eines schlechten Empfangs rauschen. Sie können die Sucheinstellung dahingehend ändern, dass Sie einstellen, dass das Gerät nur bei Sendern mit gutem Empfang stoppt. -
Page 19: Ausschalt-Timer
AUSSCHALT-TIMER Drücken Sie zum Einstellen der Zeit bis zum automatischen Ausschalten im Hauptmenü die Taste . Sie können zwischen „OFF“ (aus), 15, 30, 45 oder 60 Minuten auswählen und Ihre Auswahl bestätigen. Sobald Sie eine Zeit ausgewählt haben, kehrt das Gerät zum Wiedergabebildschirm zurück. ALARM •... -
Page 20: Systemeinstellungen
Stellen Sie vor der Verwendung der App UNDOK sicher, dass sich das Smartphone/ Tablet sich im selben drahtlosen Netzwerk befindet wie das Radio. Starten Sie die App. Die App wird gestartet und sucht das Internetradio im Netzwerk. Drücken Sie auf das Gerät, um die Verbindung herzustellen. Geben Sie, falls benötigt, den aktuellen PIN ein. - Page 21 Radio verbinden möchten. Netzwerkprofile: Das Gerät speichert die letzten vier Netzwerke, mit denen es verbunden wurde, automatisch und versucht automatisch, sich mit einem dieser Netzwerke zu verbinden. In diesem Menüpunkt wird Ihnen eine Liste der registrierten Netzwerke angezeigt. Sie können bei Bedarf ungewünschte Netzwerke löschen.
-
Page 22: Reinigung Und Pflege
Hinweis: Stellen Sie vor dem Durchführen eines Softwareupdates sicher, dass sich der Netzstecker des Geräts in der Steckdose befindet und das die Stromverbindung stabil ist. Ein Ziehen des Netzsteckers während eines Softwareupdates kann das Gerät permanent beschädigen. Einstellungsassistent Mit dieser Funktion kann der Einstellungsassistent jederzeit gestartet werden. -
Page 23: Fehlersuche Und Fehlerbehebung
FEHLERSUCHE UND FEHLERBEHEBUNG Fehler Lösung Das Gerät lässt sich nicht Überprüfen Sie, ob der Netzstecker richtig einschalten. in der Steckdose steckt. Kein Ton. 1. Der Ton könnte stummgeschaltet sein. Drehen Sie den Ton auf. 2. Erhöhen Sie die Lautstärke. 3. Ziehen Sie das Kopfhörer- oder Lautsprecherkabel aus dem entsprechenden Anschluss heraus. - Page 24 Rauschen im FM-Modus. 1. Überprüfen Sie die FM-Antenne und richten Sie diese neu aus. 2. Stellen Sie das Gerät an einen anderen Ort. Keine Sender 1. Stellen Sie das Gerät an einen anderen verfügbar/ Rauschen/ Ort. Unterbrechungen im DAB- 2. Suchen Sie ausschließlich nach lokalen Modus.
-
Page 25: Hinweise Zur Entsorgung
HINWEISE ZUR ENTSORGUNG Wenn es in Ihrem Land eine gesetzliche Regelung zur Entsorgung von elektrischen und elektronischen Geräten gibt, weist dieses Symbol auf dem Produkt oder auf der Verpackung darauf hin, dass dieses Produkt nicht im Hausmüll entsorgt werden darf. Stattdessen muss es zu einer Sammelstelle für das Recycling von elektrischen und elektronischen Geräten gebracht werden. - Page 26 Chal-Tec GmbH Wallstr. 15 10179 Berlin www.chal-tec.com Die Spotify-Software unterliegt den Nutzungsrechten von Drittanbietern, die auf folgender Seite eingesehen werden können: https://www.spotify.com/connect/third-party-licenses Alle aufgeführten Marken sind Warenzeichen der jeweiligen Unternehmen. Fehler und Auslassungen ausgenommen und technischen Änderungen unterliegend. Unsere allgemeinen Geschäftsbedingungen finden Anwendung.
- Page 27 Dear Customer, Congratulations on purchasing this equipment. Please read this manual carefully and take care of the following hints to avoid damages. Any failure caused by ignoring the items and cautions mentioned in the instruction manual are not covered by our warranty and any liability. Scan the QR code to get access to the latest user manual and other information about the product.
-
Page 28: Technical Data
TECHNICAL DATA Item number 10034077, 10034956, 10034957 Power input (power adapter) 100 – 240V AC, 50/60 Hz, 1.5A Display 2.8", 320 x 240, TFT colour display Network supported WiFi IEEE 802.11b/g/n wireless; BT (BT 2.1, Supports A2DP, AVRCP profiles) Frequency band WiFi : 2.400 - 2.4835 GHz;... - Page 29 Power Adaptor Producer Chal-Tec GmbH Address Wallstr. 16 10179 Berlin, Germany Model no. A361-1502400E Input voltage 100-240 V~ Input AC frequency 50/60 Hz Output voltage 15 V Output current 2.4 A Output power 36 W Average active efficiency 89.18% @ 115 VAC/60 Hz 88.21% @ 230 VAC/50 Hz Efficiency at low load (10%) 91.96% @ 115 VAC/60Hz...
- Page 30 WARNINGS CAUTION: TO REDUCE THE RISK OF ELECTRIC SHOCK AND SERIOUS PERSONAL INJURY, DO NOT REMOVE ANY COVER. NO USER-SERVICABLE PARTS INSIDE. REFER SERVICING TO QUALIFIED SERVICE PERSONNEL ONLY. WARNING. TO REDUCE THE RISK OF FIRE OR ELECTRICAL SHOCK, DO NOT EXPOSE THIS PRODUCT TO WATER, RAIN OR MOISTURE.
-
Page 31: Safety Instruction
SAFETY INSTRUCTION Please read these instructions fully before installing or operating. General safety information • Keep the product and all its parts out of reach of small children. • This product is not intended for use by persons (including children) with reduced physical, sensory or mental capabilities, or lack of experience and knowledge, unless they have been given supervision or instruction concerning the use of the appliance by a person responsible for their... - Page 32 • Do not place objects filled with water, such as a vase, on or near the product. • Keep it dry. Avoid exposure to precipitation, humidity and liquids which could all affect the product circuitry. Heat sources and flames • Do not leave this product in high temperatures as electronic devices and plastic parts may warp in heat.
-
Page 33: Overview
OVERVIEW IR receiver Button : FAV Button : MODE Button : BACK Button : MEUN Button : INFO Reel : Standby/Volume -/+ Reel : OK / NAVIGATE 2.8” TFT color display 10 FM/DAB+ Antenna On/Off switch 12 DC IN socket 13 Earphone out socket 14 AUX IN socket... - Page 34 Remote control Device power on/off; alarm off 14 Alarm setting Open, close mode selection 15 Press and hold to BT Press to open, close menu discoverable under BT mode Select track, hold down to seek 16 Select track Start playback, pause 17 Increase volume Select equalizer preset 18 Decrease volume...
-
Page 35: Getting Started
GETTING STARTED Connection and Preparation Connect the power adaptor to the back of device and plug it into power socket. Switch on the device, it starts up. Pull out the rod DAB/FM antenna for DAB and FM reception. Connecting to the network •... - Page 36 Press the volume knob on the device or press on the remote control to switch to standby mode. The time, date and any active alarm times display on the screen. Switch on with the same button. When album cover is displayed on the playing screen, press OK (SCAN) to view the full screen size of the picture.
- Page 37 After this, the following options are available, to define if the time to be synchronized from radios: "Update from DAB", "Update from FM", "Update from Network" or "No update". If you choose “Update from Network” you must indicate your time zone in the next window.
-
Page 38: Menu Operation
MENU OPERATION Internet Radio, Podcasts Device can play thousands of radio stations and podcasts from around the world though a broadband Internet connection. When you select Internet radio or Podcasts mode, the device directly contacts the Frontier Smart Technologies portal to get a list of stations or podcasts.The list menu is provided from the portal, so it is only accessible when the device is connected to the Internet. -
Page 39: Dab+ Radio
DAB+ RADIO DAB mode receives DAB/DAB+ digital radio and displays information about the station, stream and track playing. Scanning for stations The first time you select DAB radio mode, or if the station list is empty, the radio automatically performs a full scan to see what stations are available. You may also need to start a scan manually to update the list of stations. -
Page 40: Aux In
stations, this may result in a poor signal-to-noise ratio (hiss). To play weak stations in mono, select FM weak reception: Listen in mono only and then YES. In BT mode, you can turn on the BT of your BT device. Go to the menu and turn BT discoverable. -
Page 41: Undok
remote control. You can change the snooze period. The radio returns to standby for the set period, with the silenced alarm icon flashing. Press the VOLUME knob OR press or ALARM on the remote control to turn off the alarm. UNDOK The device gives a feature of network remote by smartphone or tablet in iOS or Android system. -
Page 42: System Settings
SYSTEM SETTINGS Equaliser Several preset EQ modes are available: Normal, Flat, Jazz, Rock, Movie, Classic, Pop, News and My EQ. Press EQ to select. A user-defined setting is available; create your own EQ with custom bass, treble settings. Network Network wizard: Enter to search AP SSID, then input the WEP / WPA key or choose Push Button/Pin/Skip WPS to connect to the wireless network. - Page 43 Inactive standby You may set the radio to inactive and go to standby. The duration you can choose as Off/2 hours/ 4hours/ 5 hours/ 6hours. Language The default language is English. Change it as your preference. Available languages: English, Danish, Dutch, Finnish, French, German, Italian, Norwegian, Polish, Portuguese, Spanish, Swedish, Turkish.
-
Page 44: Troubleshooting
TROUBLESHOOTING Error Remedy The device does not switch Check it the power adaptor is connected properly. No sound. 1. Turn on the sound as it may be muted 2. Increase the volume. 3. Pull any connected headphone or speaker from the connector jack. No network connection can 1. - Page 45 Alarm does not work. 1. Switch on the alarm. 2. Due to the volume setting, refer to the solutions of “No sound”. 3. The source of alarm was set to be station but there is no network connection. Change the source of alarm or reconfigure the connection.
- Page 46 DISPOSAL CONSIDERATIONS If there is a legal regulation for the disposal of electrical and electronic devices in your country, this symbol on the product or on the packaging indicates that this product must not be disposed of with household waste. Instead, it must be taken to a collection point for the recycling of electrical and electronic equipment.
- Page 47 Chère cliente, cher client, Toutes nos félicitations pour l’acquisition de ce nouvel appareil. Veuillez lire attentivement et respecter les instructions de ce mode d’emploi afin d’éviter d’éventuels dommages. Nous ne saurions être tenus pour responsables des dommages dus au non-respect des consignes et à...
-
Page 48: Fiche Technique
FICHE TECHNIQUE Numéro d'article 10034077, 10034956, 10034957 Alimentation (adaptateur secteur) 100 – 240V AC, 50/60 Hz, 1.5A Ecran 2.8", 320 x 240, TFT écran couleur Réseaux supportés WiFi IEEE 802.11b/g/n; BT (BT 2.1, Support des profils A2DP, AVRCP) Plage de fréquences WiFi : 2.400 - 2.4835 GHz;... - Page 49 Adaptateur secteur Fabricant Chal-Tec GmbH Adresse Wallstr. 16 10179 Berlin Numéro de modèle A361-1502400E Tension d'alimentation 100-240 V~ Fréquence de secteur 50/60 Hz Tension de sortie 15 V Intensité de sortie 2,4 A Puissance de sortie 36 W Rendement moyen 89,18% @ 115 VAC/60 Hz 88,21% @ 230 VAC/50 Hz Rendement en faible charge...
- Page 50 MISE EN GARDE ATTENTION : POUR RÉDUIRE LES RISQUES DE CHOCS ÉLECTRIQUES, NE DÉMIONTEZ AUCUN CACHE. L‘APPAREIL NE CONTIEN AUCUNE PIÈCE À ENTRETENIR. ADRESSEZ- VOUS UNIQUEMENT À DES PERSONNELS QUALIFIÉS POUR LA MAINTENANCE. MISE EN GARDE / POUR RÉDUIRE LE RISQUE D'INCENDIE ET DE CHOC ÉLECTRIQUE, NE PLONGEZ PAS L'APPAREIL DANS L'EAU ET NE L'EXPOSEZ PAS À...
-
Page 51: Consignes De Sécurité
CONSIGNES DE SÉCURITÉ Lisez attentivement toutes les consignes avant d'utiliser l'appareil et conservez le mode d'emploi en lieu sûr pour vous y référer ultérieurement. Consignes générales de sécurité • Assurez-vous que l'appareil et ses composants sont hors de portée des enfants. - Page 52 Humidité et eau • Pour éviter les risques d’incendie et de choc électrique : • Ne placez pas cet appareil à proximité d’eau ou d’humidité. • Ne placez pas cet appareil près d'une baignoire ou d'un évier, près d'une piscine ou dans des lieux contenant de l'eau ou humides. •...
-
Page 53: Aperçu De L'appareil
APERÇU DE L'APPAREIL Capteur IR FAV (favoris) MODE BACK (retour) MENU INFO VOLUME -/+ OK/NAVIGATE (confirmer/ 2,8“ 5 Ecran couleur naviguer) 10 Antenne FM/DAB+ Interrupteur réseau 12 Prise DC-IN 13 Sortie casque 14 Prise AUX-IN... - Page 54 Télécommande Marche/Arrêt/ désactiver aléatoire/ répétition) l'alarme 14 ALARM (réglage de l'alarme) MODE 15 BT PAIR (jumelage BT) MENU 16 Titre suivant, avance rapide Titre précédent, retour rapide 17 + (augmenter le volume) Lecture / Pause 18 - (réduire le volume) EQ (égaliseur) 19 Activer / désactiver la fonction Haut ;...
-
Page 55: Mise En Marche
MISE EN MARCHE Etablissement de la connexion et préparation Branchez l'une des extrémités de l'adaptateur secteur sur l'appareil et branchez la fiche d'alimentation à l'autre extrémité du cordon d'alimentation dans la prise. Allumez l'appareil. Déployez complètement l’antenne DAB / FM pour une meilleure réception de la radio. -
Page 56: Utilisation
UTILISATION Pour régler le volume, tournez le bouton de volume sur l'appareil ou appuyez sur les touches de la télécommande. Coupez le volume en appuyanrt sur la touche • Appuyez sur la touche MODE pour choisir le mode. • Appuyez sur la touche MENU pour ouvrir le menu. Appuyez à nouveau sur cette touche pour fermer l'écran de menu et revenir au mode de lecture. - Page 57 traiter beaucoup de données. Cela peut geler l'écran ou provoquer un dysfonctionnement. • Redémarrez l'appareil si nécessaire. Première mise en marche de l'appareil • Lorsque vous allumez l'appareil pour la première fois, les informations sur la politique de confidentialité s'affichent. Appuyez sur la touche OK pour continuer.
- Page 58 IN, FM, DAB). Notez que la consommation d'énergie en veille est supérieure si la connexion réseau est maintenue. • Tous les réseaux sans fil trouvés sont répertoriés avec leurs noms à l'écran. • Après avoir sélectionné un réseau, il vous sera demandé de saisir un cryptage par défaut.
- Page 59 la liste n'est disponible que lorsque l'appareil est connecté à Internet. Le contenu et les inter-menus peuvent varier de temps en temps. Sélectionnez la catégorie souhaitée et recherchez la station ou le podcast que vous souhaitez écouter.
-
Page 60: Spotify Connect
SPOTIFY CONNECT Votre nouvel appareil possède Spotify Connect Utilisez votre smartphone, tablette ou ordinateur comme votre Télécommande pour Spotify. Sur spotify.com/connect vous pouvez découvrir plus. 1. Connectez l'iTuner à votre réseau sans fil (voir le manuel du produit pour plus de détails). 2. -
Page 61: Radio Dab
RADIO DAB+ En mode DAB, vous pouvez recevoir la radio numérique DAB / DAB+. L'écran affiche les informations sur la station, le flux et le titre. Recherche de stations Lorsque vous sélectionnez le mode DAB pour la première fois ou que la liste des stations est vide, l’appareil lance un scan automatique des stations pour trouver les stations sont disponibles. - Page 62 Paramètres • Paramètres de recherche : la recherche de station FM s’arrête dès qu’une station disponible est trouvée. Cela peut entraîner l’arrêt de l’appareil sur des stations bruyantes en raison d’une mauvaise réception. Vous pouvez modifier le paramètre de recherche pour que l'appareil s'arrête uniquement sur les stations dont la réception est bonne.
- Page 63 • Enregistrez l'alarme après avoir défini tous les paramètres pour l'activation. L'écran signale les alarmes actives par une icône en bas à gauche. • L'alarme sonne à l'heure définie. Pour suspendre temporairement l’alarme, appuyez sur n’importe quelle touche à l’exception du réglage du volume ou de la touche ALARM.
-
Page 64: Paramètres Système
PARAMÈTRES SYSTÈME Egaliseur Plusieurs modes d’égalisation sont disponibles : Normal, Plat, Jazz, Rock, Film, Classique, Pop, Informations et Mon EQ. Appuyez plusieurs fois sur la touche EQ pour sélectionner. Vous pouvez également définir un paramètre personnalisé vous permettant de régler vous-même les paramètres des graves et des aigus. - Page 65 Heure / date : L'heure peut être réglée manuellement ou mise à jour automatiquement. Le format de l'heure, le fuseau horaire et l'heure d'été sont réglables. Pour plus de détails, voir la section "Réglage de l’heure et de la date". Veille en cas d'inactivité...
-
Page 66: Nettoyage Et Entretien
Protection des données Affiche les informations concernant a protection des données. Rétroéclairage Vous pouvez modifier le rétroéclairage pour chaque mode (allumé ou en mode veille). Vous pouvez définir les paramètres suivants : Elevé, Moyen, Faible ou Auto. Vous pouvez également définir le délai après lequel le rétro- éclairage s'éteint automatiquement lorsque vous n'utilisez pas l'appareil. -
Page 67: Identification Et Résolution Des Problèmes
IDENTIFICATION ET RÉSOLUTION DES PROBLÈMES Problème Solution Impossible d'allumer Vérifiez que la fiche d'alimentation est l'appareil. correctement branchée dans la prise. Pas de son. Le son est peut-être coupé. Augmentez le son. Augmentez le volume. Débranchez le câble du casque ou des enceintes de la prise correspondante. - Page 68 L'alarme ne fonctionne pas. Activez l'alarme. Il n'y a pas de son en raison de votre réglage du volume. Voir solution ci- dessus. La source d'alarme doit être une station de radio Internet, mais il n'y a actuellement aucune connexion réseau.
-
Page 69: Informations Sur Le Recyclage
CONSEILS POUR LE RECYCLAGE S‘il existe une réglementation pour l‘élimination ou le recyclage des appareils électriques et électroniques dans votre pays, ce symbole sur le produit ou sur l‘emballage indique que cet appareil ne doit pas être jeté avec les ordures ménagères. Vous devez le déposer dans un point de collecte pour le recyclage des équipements électriques et électroniques. - Page 70 Chal-Tec GmbH Wallstr. 15 10179 Berlin www.chal-tec.com Le logiciel Spotify est soumis aux droits d’utilisation de tiers, disponibles à la page suivante : https://www.spotify.com/connect/third-party-licenses Toutes les marques citées sont la propriété de leurs sociétés respectives. Sauf erreurs et omissions et sous réserve de modifications techniques. Nos conditions générales sont applicables.
- Page 71 Estimado cliente, Le felicitamos por la adquisición de este producto. Lea atentamente el siguiente manual y siga cuidadosamente las instrucciones de uso con el fin de evitar posibles daños. La empresa no se responsabiliza de los daños ocasionados por un uso indebido del producto o por haber desatendido las indicaciones de seguridad.
-
Page 72: Datos Técnicos
DATOS TÉCNICOS Número de artículo 10034077, 10034956, 10034957 Entrada de alimentación 100 – 240V AC, 50/60 Hz, 1.5A (adaptador de alimentación) Pantalla 2.8", 320 x 240, TFT pantalla TFT en color Red soportada WiFi IEEE 802.11b/g/n wireless; BT (BT 2.1, soporta A2DP, AVRCP perfiles) Rango de frecuencia WiFi : 2.400 - 2.4835 GHz;... - Page 73 Adaptador de alimentación Fabricante Chal-Tec GmbH Dirección Wallstr. 16 10179 Berlin Número de modelo A361-1502400E Tensión de entrada 100-240 V~ Frecuencia red eléctrica 50/60 Hz Tensión de salida 15 V Corriente de salida 2,4 A Potencia de salida 36 W Eficiencia media 89,18% @ 115 VAC/60 Hz 88,21% @ 230 VAC/50 Hz...
- Page 74 ADVERTENCIAS PRECAUCIÓN: NO ABRA LA CARCASA PARA EVITAR DESCARGAS ELÉCTRICAS Y LESIONES GRAVES. EN EL INTERIOR NO HAY COMPONENTES A MANTENER POR EL CLIENTE. PÓNGASE EN CONTACTO ÚNICAMENTE CON ESPECIALISTAS CUALIFICADOS. ADVERTENCIA. PARA REDUCIR EL RIESGO DE INCENDIO O DESCARGA ELÉCTRICA, NO EXPONGA EL APARATO AL AGUA, LA LLUVIA O LA HUMEDAD.
-
Page 75: Indicaciones De Seguridad
INDICACIONES DE SEGURIDAD Lea atentamente el manual de instrucciones antes de instalar y poner en funcionamiento el aparato y guárdelo para un uso posterior. Instrucciones generales de seguridad: • Asegúrese de que el aparato y sus componentes estén fuera del alcance de los niños. - Page 76 Humedad y agua • Para evitar el riesgo de incendio y descarga eléctrica: • No coloque este producto cerca de agua o humedad. • No coloque este producto cerca de una bañera o lavabo, cerca de una piscina o en cualquier otro lugar que contenga agua o humedad. •...
-
Page 77: Vista General Del Aparato
VISTA GENERAL DEL APARATO Receptor de infrarrojos BACK (Atrás) MODO (modo) INFO MENÚ (Menú) OK/NAVIGATE (Confirmar/ VOLUME -/+ (control de Navegar) volumen) OK/NAVIGATE (confirmer/ FAV (Favoritos) naviguer) 10 Antena FM/DAB Interruptor de red 12 Conexión DC IN 13 Salida de auriculares 14 Conector AUX-IN... - Page 78 Mando a distancia Activar/desactivar/desactivar la aleatoria) alarma 14 ALARMA (ajuste de la alarma) MODO (modo) 15 BT PAIR (Acoplamiento BT) MENÚ (Menú) 16 Avance de título, avance rápido Retrocede el título, retrocede 17 + (Aumentar el volumen) rápido. 18 - (Volumen abajo) Reproducir/Pausar 19 silenciar activar/desactivar EQ (ecualizador)
-
Page 79: Puesta En Marcha
PUESTA EN MARCHA Establecimiento y preparación de la conexión Conecte un extremo del adaptador de corriente a la unidad y enchufe el enchufe del otro extremo del cable de alimentación en la toma de corriente de la pared. Encienda el equipo. Desenchufe completamente la antena DAB/FM para una mejor recepción de radio. -
Page 80: Funcionamiento
FUNCIONAMIENTO Para ajustar el volumen, gire el control de volumen de la unidad o pulse los botones del mando a distancia. Silencie el volumen pulsando el botón • Pulse el botón MODE para seleccionar el modo. • Pulse el botón MENU para abrir el menú. Presione este botón de nuevo para cerrar la visualización del menú... - Page 81 independientemente del modo en que se encuentre, es posible que la unidad necesite procesar muchos datos. Esto puede causar que la pantalla se congele o funcione mal. • Si es necesario, reinicie la unidad. Puesta en marcha inicial del aparato •...
- Page 82 • Todas las redes WLAN encontradas se muestran con sus nombres en la pantalla. • Después de seleccionar una red, se le pedirá que introduzca un cifrado predeterminado. • Para introducir la contraseña de red, utilice el codificador rotativo o los botones de dirección del mando a distancia para introducir las letras/ números y pulse OK/SCAN para confirmar.
- Page 83 Radio por Internet, podcasts El dispositivo puede recibir miles de estaciones de radio y podcasts de todo el mundo a través de una conexión a Internet de banda ancha. Cuando selecciona el modo de radio por Internet o podcast, el dispositivo se conecta directamente al Portal de Frontier Smart Technologies para obtener una lista de estaciones o podcasts.
-
Page 84: Spotify Connect
SPOTIFY CONNECT Tu nuevo dispositivo tiene Spotify Connect Utilice su smartphone, tableta u ordenador como su mando a distancia para Spotify. En spotify.com/connect puedes obtener más información. 1. Conecte el iTuner a su red inalámbrica (consulte el manual del producto para obtener más detalles). -
Page 85: Radio Dab
RADIO DAB+ En el modo DAB, se puede recibir la radio digital DAB/DAB+. La pantalla muestra información sobre la estación, el stream y el título. Búsqueda de emisoras Al seleccionar el modo DAB por primera vez o cuando la lista de emisoras está... - Page 86 Ajustes • Ajuste de búsqueda: La búsqueda de emisoras de FM se detiene en cuanto se encuentra una emisora disponible. Esto puede hacer que la unidad se detenga en las estaciones que hacen ruido debido a la mala recepción. Puede cambiar la configuración de búsqueda para que la unidad se detenga sólo en emisoras con buena recepción.
- Page 87 • Después de ajustar todos los parámetros, guarde la alarma para su activación. La pantalla muestra las alarmas activas con un icono en la parte inferior izquierda de la pantalla. • La alarma suena a la hora ajustada. Para pausar la alarma temporalmente, presione cualquier botón excepto el control de volumen o el botón ALARM.
-
Page 88: Ajustes Del Sistema
AJUSTES DEL SISTEMA Ecualizador Hay varios modos de ecualizador disponibles: Normal, Flat, Jazz, Rock, Movie, Classic, Pop, News y My EQ. Pulse el botón EQ repetidamente para seleccionar. También puede realizar un ajuste personalizado en el que podrá realizar los ajustes de graves y agudos usted mismo. Asistente de red: Seleccione la red e introduzca la clave WEP/WPA o pulse el botón o seleccione "Pin"/"Skip WPS"... - Page 89 Hora/Fecha: La hora puede ser ajustada manualmente o actualizada automáticamente. El formato de hora, la zona horaria y el horario de verano se pueden ajustar. Para obtener más información, consulte la sección "Ajuste de la hora y la fecha". En espera durante la inactividad Puede desactivar la radio durante un cierto período de tiempo y cambiar al modo de espera.
-
Page 90: Limpieza Y Cuidado
Protección de datos Se muestra la información de protección de datos. Luz de fondo Puede cambiar la luz de fondo para cada modo (en modo activado o en modo de espera). Se pueden realizar las siguientes parametrizaciones: Alto, medio, bajo o automático. También puede establecer el tiempo después del cual la luz de fondo se apagará... -
Page 91: Búsqueda De Problemas Y Solución De Errores
BÚSQUEDA DE PROBLEMAS Y SOLUCIÓN DE ERRORES Problema Solución No se puede encender el Compruebe que la clavija de alimentación aparato. está conectada correctamente a la toma de corriente. No hay sonido. El sonido podría ser silenciado. Sube el volumen. Suba el volumen. - Page 92 Ruido en modo FM. Compruebe la antena de FM y reajústela. Mueva la unidad a otra ubicación. No hay transmisor 1. Mueva la unidad a otra ubicación. disponible/ Ruido/ 2. Busque sólo estaciones locales (mayor Interrupciones en modo intensidad de señal). 3.
- Page 93 INDICACIONES SOBRE LA RETIRADA DEL APARATO Si en su país existe una disposición legal relativa a la eliminación de aparatos eléctricos y electrónicos, este símbolo estampado en el producto o en el embalaje advierte que no debe eliminarse como residuo doméstico. En lugar de ello, debe depositarse en un punto de recogida de reciclaje de aparatos eléctricos y electrónicos.
- Page 94 Chal-Tec GmbH Wallstr. 15 10179 Berlin www.chal-tec.com El software Spotify está sujeto a los derechos de uso de terceros, disponibles en la pági- na siguiente: https://www.spotify.com/connect/third-party-licenses Todas las marcas comerciales mencionadas son propiedad de sus respectivas compañías. Salvo error u omisión, salvo modificaciones técnicas. Se aplican nuestros términos y condiciones generales.
- Page 95 Gentile cliente, La ringraziamo per aver acquistato il nostro prodotto. La preghiamo di leggere attentamente le seguenti istruzioni e di seguirle per evitare eventuali danni. Si declina ogni responsabilità per danni derivati da una mancata osservazione delle istruzioni e da un uso improprio del dispositivo. Scansionate il codice QR per scaricare il manuale d’uso attuale nella vostra lingua.
-
Page 96: Dati Tecnici
DATI TECNICI Codice articolo 10034077, 10034956, 10034957 Alimentazione (alimentatore) 100 – 240V AC, 50/60 Hz, 1.5A Display 2.8", 320 x 240, display a colori TFT Reti supportate WiFi: 2.400 - 2.4835 GHz; BT: 2.4 - 2.48 GHz Gamma di frequenza WiFi : 2.400 - 2.4835 GHz;... - Page 97 Adattatore Produttore Chal-Tec GmbH Indirizzo Wallstr. 16 10179 Berlin Numero di modello A361-1502400E Tensione di ingresso 100-240 V~ Frequenza rete elettrica 50/60 Hz Tensione di uscita 15 V Corrente di uscita 2,4 A Potenza di uscita 36 W Media del grado di efficacia 89,18% @ 115 VAC/60 Hz 88,21% @ 230 VAC/50 Hz Grado di efficacia a basso...
- Page 98 AVVERTENZE ATTENZIONE: NON APRIRE L’ALLOGGIAMENTO PER EVITARE SCOSSE ELETTRICHE E LESIONI GRAVI. LE COMPONENTI INTERNE NON NECESSITANO DI MANUTENZIONE DA PARTE DEL CLIENTE. RIVOLGERSI ESCLUSIVAMENTE A TECNICI QUALIFICATI. AVVISO. PER DIMINUIRE IL RISCHIO DI INCENDIO O SCOSSE ELETTRICHE, NON ESPORRE IL DISPOSITIVO ALL’ACQUA, PIOGGIA O UMIDITA’ . Il triangolo con il fulmine ha il seguente significato: TENSIONE ELETTRICA PERICOLOSA: Il simbolo del fulmine con la punta a freccia all’interno di un triangolo equilatero ha la funzione di mettere in...
-
Page 99: Istruzioni Di Sicurezza
ISTRUZIONI DI SICUREZZA Leggere attentamente le avvertenze prima di utilizzare il dispositivo e conservarle per consultazioni future. Avvertenze generali • Assicurarsi che il dispositivo e le componenti si trovino lontano dalla portata dei bambini. • Questo dispositivo può essere utilizzato da persone (bambini inclusi) con limitate capacità... - Page 100 Umidità e acqua • Per evitare il rischio di incendio e scosse elettriche: • Non collocare il dispositivo vicino all’acqua o all’umidità. • Non collocare il dispositivo in prossimità di vasche, lavandini, piscine o posti che contengono acqua o sono umidi. •...
-
Page 101: Descrizione Del Dispositivo
DESCRIZIONE DEL DISPOSITIVO Ricevitore a infrarossi FAV (preferiti) MODO modalità) BACK (indietro) MENÚ (Menú) INFO VOLUME -/+ (regolatore OK/NAVIGATE (confermare/ volume) navigare) 2,8“ display a colori 10 Antenna FM/DAB+ Interruttore generale 12 Collegamento DC IN 13 Uscita cuffie 14 Collegamento AUX IN... - Page 102 Telecomando accendere/spegnere/disattivare 14 ALARMA (impostazione sveglia) la sveglia 15 BT PAIR (accoppiare BT) MODO (modalità) 16 brano avanti, avanti veloce MENÚ (Menú) 17 + (aumenta volume) brano indietro, indietro veloce 18 - (abbassa volume) riproduzione / pausa 19 attivare/disattivare mute EQ (equalizzatore) 20 1 - 10/0 (tastiera numerica) verso l’alto;...
-
Page 103: Messa In Funzione
MESSA IN FUNZIONE Collegamento e preparazione Collegare un’estremità dell’adattatore di rete al dispositivo e inserire l’altra nella presa di corrente. Accendere il dispositivo. Estrarre completamente l’antenna DAB/FM per avere una ricezione radio migliore. Stabilire il collegamento di rete • Ci vuole un collegamento a bande larghe in combinazione con un punto di accesso wireless, un router o un dispositivo di rete simile. -
Page 104: Utilizzo
UTILIZZO Per regolare il volume girare la manopola del volume o premere i tasti sul telecomando. Impostare la modalità silenziosa premendo il tasto • Premere MODE per selezionare la modalità. • Per aprire il menù premere il tasto MENU. Premerlo nuovamente per chiuderlo e tornare nella modalità... - Page 105 Prima messa in funzione del dispositivo • Quando si accende il dispositivo per la prima volta vengono visualizzate le informazioni sulla tutela dei dati personali. Per proseguire premere il tasto OK. • Viene visualizzato un Assistente. Selezionare “Yes” e confermare per lanciare l’Assistente.
- Page 106 lettere/cifre i tasti direzione del telecomando e premere OK/SCAN per confermare. • Dopo aver effettuato la digitazione, sullo schermo appare la cifra/ lettera. • Ci sono tre possibilità per inserire la freccia prima delle lettere/cifre - BACK, OK e CANCEL. Ci sono dei riferimenti riguardanti il tipo di rete se il dispositivo supporta la funzione WPS.
- Page 107 Radio internet, podcast Il dispositivo è in grado di ricevere migliaia di emittenti radio e podcast da tutto il mondo tramite il collegamento internet a banda larga. Se si seleziona la modalità radio internet o podcast, il dispositivo stabilisce un collegamento con il “Frontier Smart Technologies Portal”...
-
Page 108: Spotify Connect
SPOTIFY CONNECT Il vostro nuovo dispositivo ha Spotify Connect. Usa il tuo smartphone, tablet o computer come telecomando Spotify. Per saperne di più su spotify.com/connect. 1. Collega iTuner alla tua rete wireless (vedi manuale del prodotto per i dettagli). 2. Apri l'applicazione Spotify sul tuo smartphone, tablet o PC e connettiti alla stessa rete wireless. -
Page 109: Radio Dab
RADIO DAB+ Nella modalità DAB è possibile ricevere canali radio digitali DAB/DAB+. Sul display vengono visualizzate le informazioni relative al canale radiofonico e alla musica in corso di riproduzione Ricerca delle stazioni Quando si sceglie per la prima volta la modalità DAB o quando la lista delle emittenti è... - Page 110 Impostazioni • Impostazioni per la ricerca: la ricerca delle stazioni FM si ferma non appena trova una stazione disponibile. Questo implica che vengono memorizzati molti canali dal segnale radio non di buona qualità. In questi casi è possibile attivare l’opzione di memorizzazione dei soli canali che dispongono di un segnale potente.
- Page 111 • La sveglia suona all’ora impostata. Per metterla temporaneamente in pausa premere un tasto a caso, tranne il volume o il tasto ALARM. • E’ possibile regolare il lasso di tempo della funzione snooze. La radio ritorna nella modalità standby e l’icona della sveglia silenziosa lampeggia sullo schermo.
-
Page 112: Impostazioni Di Sistema
IMPOSTAZIONI DI SISTEMA Equalizzatore Sono disponibili diverse tipologie di equalizzazioni: Normal, Flat, Jazz, Rock, Movie, Classic, Pop, News e My EQ. È possibile personalizzare l’equalizzatore, impostando i bassi e gli alti in base alle esigenze. Rete Assistente di rete: Selezionare la rete e digitare la chiave WEP/WPA o premere il tasto o selezionare “Pin”... - Page 113 Orario/Data: Inserire l’orario manualmente o in modalità automatica e impostare il formato orario, il fuso orario e l’ora legale. Per maggiori dettagli vedi il paragrafo “Impostazione data e ora”. Standby per inattività E’ possibile lasciare la radio inattiva per un determinato lasso di tempo e modificare in modalità...
-
Page 114: Pulizia E Manutenzione
Protezione dei dati Vengono visualizzate le informazioni inerenti la protezione dei dati. Retroilluminazione E’ possibile impostare la retroilluminazione in tutte le modalità (acceso o standby). E’ possibile eseguire le seguenti impostazioni: High (alto), Medium (medio), Low (basso) o Auto. Si può impostare anche dopo quanto tempo il dispositivo si deve spegnere automaticamente se non viene usato. -
Page 115: Ricerca E Risoluzione Dei Problemi
RICERCA E RISOLUZIONE DEI PROBLEMI Problema Soluzione Il dispositivo non si Verificare che la spina sia connessa alla accende. presa di corrente. Non si sente alcun suono. Probabilmente è attivata la modalità silenziosa. Alzare il volume. Scollegare le cuffie o gli altoparlanti dalla relativa connessione. - Page 116 La sveglia non funziona. Accendere la sveglia. A causa dell’impostazione del volume non si sente nulla. Per la soluzione vedi sopra. La fonte della sveglia dovrebbe essere una stazione radio internet, ma al momento non c’è alcun collegamento di rete. Scegliere un’altra fonte per la sveglia o reimpostare la connessione di rete.
-
Page 117: Smaltimento
AVVISO DI SMALTIMENTO Se nel proprio paese si applicano le regolamentazioni inerenti lo smaltimento di dispositivi elettrici ed elettronici, questo simbolo sul prodotto o sulla confezione segnala che questi prodotti non possono essere smaltiti con i rifiuti normali e devono essere portati a un punto di raccolta di dispositivi elettrici ed elettronici. - Page 118 Chal-Tec GmbH Wallstr. 15 10179 Berlin www.chal-tec.com...
Need help?
Do you have a question about the Connect 150 SE and is the answer not in the manual?
Questions and answers