Advertisement
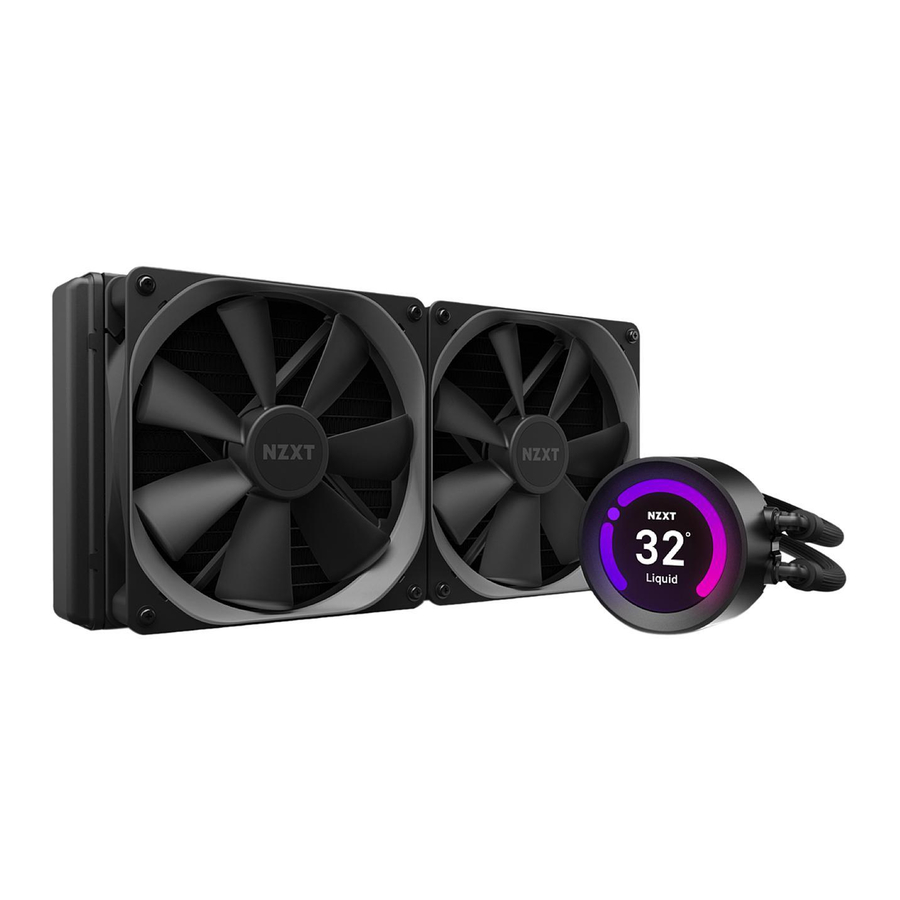
COMPONENTS


PREPARATION
PREPARATION - INTEL LGA 1200/115X/1366
STEP 1 - PREPARING THE BACKPLATE
Move all four sliders on the Intel backplate to the innermost positions for Socket 1200/115X or the outermost positions for Socket 1366.

STEP 2 - INSTALLING THE BACKPLATE
Install the Intel backplate on the rear of the motherboard as oriented in the picture. Please ensure the sliders fit into the mounting holes and the backplate of CPU socket fit within the cut-out of the Intel backplate.

STEP 3 - INSTALLING THE STANDOFFS
From the front of the motherboard, install the four Socket 1200/115X/1366 standoffs.

PREPARATION - INTEL LGA 2011/2066
STEP 1 - PREPARING THE BACKPLATE
From the front of the motherboard, install the four Socket 2011/2066 standoffs.

PREPARATION - AMD
STEP 1 - PREPARING THE RETENTION BRACKET
Remove the stock AMD mounting bracket and keep the original backplate on the rear of the motherboard.

 FOR SOCKET TR4, PLEASE SKIP TO AMD - STEP 3
STEP 2 - INSTALLING THE STANDOFFS
From the front of the motherboard, install the four AMD standoffs (AM4).

STEP 3 - CHANGING THE RETENTION BRACKET

- Press and hold the Intel retention bracket firmly towards the pump.
- Rotate the Intel retention bracket counterclockwise to release.
- Pull out the Intel retention bracket.
- Follow these steps in reverse order to install the AMD retention bracket onto the pump. For SocketTR4, Install the AMD SocketTR4 retention bracket included inside the Threadripper CPU retail box.
INSTALLATION
INSTALLING THE PUMP - PUMP ORIENTATION
The display orientation can be adjusted within NZXT CAM. We recommend installing the tubes exiting the right(3 o'clock) and towards the bottom (6 o'clock).

INSTALLING THE PUMP - INTEL/AMD AM4
Place the pump with the retention bracket onto the CPU. Ensure the standoffs go through the holes on the bracket and securely apply the thumb nuts.

INSTALLING THE PUMP - AMD TR4
Place the pump with the retention bracket onto the CPU. The SocketTR4 screw holes has a short and long side. Ensure the four screws are aligned and tighten the screws in sequence from 1 through 4.

MOUNTING THE RADIATOR AND FANS
Depending on your radiator mounting setup, please use the appropriate screws to mount the radiators:
- DIRECT MOUNTING
- INDIRECT MOUNTING
NOTE
- Always use washers to prevent damage.
DIRECT MOUNTING
For mounting in which the radiator fits directly onto the case, please install the fan(s) first using the 30mm fan screws and washers. Use the 5mm case screws and washers to mount the radiator.

INDIRECT MOUNTING
For mounting in which the fan(s) fit between the radiator and chassis, please use the 30mm fan screws and washers for mounting.

POWERING THE FANS
Connect the fan cable to the first fan connector on the breakout cable set with 4 pins. Use the remaining fan connectors as needed.

CONNECTING THE PUMP TACH
Connect the 3-pin connector on the breakout cable set to the 4-pin CPU_FAN or AIO_PUMP connector on the motherboard.

NOTE
- You may need to disable fan-fail warning within the motherboard BIOS if CPU_FAN is unused.
CONNECTING THE SATA POWER CABLE
Connect the SATA power cable on the power cable set to the SATA power cable from the power supply.

CONNECTING THE USB CABLE
Connect the Micro-USB cable from the pump to an available USB 2.0 internal connector on the motherboard.


Documents / ResourcesDownload manual
Here you can download full pdf version of manual, it may contain additional safety instructions, warranty information, FCC rules, etc.
Advertisement


Need help?
Do you have a question about the Kraken Z Series and is the answer not in the manual?
Questions and answers