Sign In
Upload
Download
Table of Contents
Contents
Add to my manuals
Delete from my manuals
Share
URL of this page:
HTML Link:
Bookmark this page
Add
Manual will be automatically added to "My Manuals"
Print this page
×
Bookmark added
×
Added to my manuals
Manuals
Brands
NZXT Manuals
Computer Hardware
KRAKEN Z Series
Manual
NZXT KRAKEN Z Series Manual
Liquid cooler with lcd display
Hide thumbs
Also See for KRAKEN Z Series
:
User manual
1
2
3
4
5
6
7
8
9
10
11
12
13
14
15
16
17
18
19
20
21
22
23
24
25
26
27
28
29
30
31
32
33
34
35
36
37
Table Of Contents
38
page
of
38
Go
/
38
Contents
Table of Contents
Bookmarks
Table of Contents
Table of Contents
Components
Preparation
Preparing the Backplate
Installing the Backplate
Installing the Standoffs
Preparing the Retention Bracket
Installation
Table of Contents
Installing the Pump - Pump Orientation
Installing the Pump - Intel/Amd AM4
Installing the Pump - AMD TR4
Mounting the Radiator and Fans
Direct Mounting
Indirect Mounting
Powering the Fans
Connecting the Pump Tach
Connecting the SATA Power Cable
Connecting the USB Cable
Connecting RGB LED for Lighting Control
Downloading Nzxt Cam
Advertisement
Quick Links
1
Table of Contents
2
Installing the Pump - Pump Orientation
3
Installing the Pump - Intel/Amd Am4
4
Powering the Fans
5
Connecting the Pump Tach
6
Connecting Rgb Led for Lighting Control
Download this manual
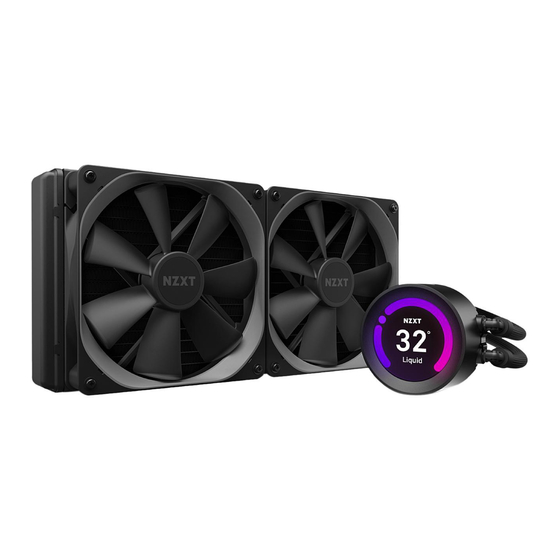
KRAKEN Z SERIES
LIQ UID COOL ER WITH LCD DISPLAY
Table of
Contents
Previous
Page
Next
Page
1
2
3
4
5
Advertisement
Table of Contents
Need help?
Do you have a question about the KRAKEN Z Series and is the answer not in the manual?
Ask a question
Questions and answers
Related Manuals for NZXT KRAKEN Z Series
NZXT Kraken Z Series Liquid Cooler Manual
(article)
Computer Hardware NZXT Kraken Z53 Faq
(2 pages)
Computer Hardware NZXT KRAKEN X RGB Series Manual
Liquid cooler with rgb fans (41 pages)
Computer Hardware NZXT KRAKEN ELITE Quick Start Manual
Refroidisseur par liquide 240mm / 280mm / 360mm avec écran lcd (40 pages)
Computer Hardware NZXT KRAKEN X53 RGB Manual
Liquid cooler with rgb fans (41 pages)
Computer Hardware NZXT KRAKEN X63 RGB Manual
Liquid cooler with rgb fans (41 pages)
Computer Hardware NZXT KRAKEN X73 RGB Manual
Liquid cooler with rgb fans (41 pages)
Computer Hardware NZXT KRAKEN M22 Manual
Liquid cooler (2 pages)
NZXT H7 FLOW - MID-TOWER Case Manual
(article)
NZXT H9 FLOW - MID-TOWER AIRFLOW Case Manual
(article)
Computer Hardware NZXT H7 ELITE Manual
Premium mid-tower case (38 pages)
NZXT H9 ELITE - MID-TOWER Case Manual
(article)
NZXT H6 Series - MID-TOWER AIRFLOW Case Manual
(article)
Computer Hardware NZXT F Series Manual
Rgb fans 120mm/140mm (25 pages)
NZXT H5 ELITE - MID-TOWER Case Manual
(article)
NZXT T120, T120RGB - CPU Air Cooler Manual
(article)
This manual is also suitable for:
Kraken z53
Rl-krz73-01
Rl-krz63-01
Rl-krz53-01
Table of Contents
Save PDF
Print
Rename the bookmark
Delete bookmark?
Delete from my manuals?
Login
Sign In
OR
Sign in with Facebook
Sign in with Google
Upload manual
Upload from disk
Upload from URL


Need help?
Do you have a question about the KRAKEN Z Series and is the answer not in the manual?
Questions and answers