Table of Contents
Advertisement
Quick Links
Advertisement
Table of Contents

Subscribe to Our Youtube Channel
Related Manuals for IBM ATA 133


Summary of Contents for IBM ATA 133
- Page 1 IBM ATA 133 RAID Controller User's Guide MAN-524 2/6/03...
- Page 2 MS-DOS, Windows, and Microsoft are registered trademarks of Microsoft Corporation. Microsoft Windows is a trademark of Microsoft Corporation. MegaRAID is a registered trademark of LSI Logic Corporation. IBM, AT, VGA, PS/2, and OS/2 are registered trademarks and XT and CGA are trademarks of International Business Machines Corporation. Revision History 2/6/03 Initial release.
-
Page 3: Table Of Contents
Step 1 Unpack ..............16 Step 2 Power Down............16 Step 3 Set Jumpers ............16 Step 4 Install IBM ATA 133 RAID Controller ....17 Step 5 Connect IDE Cables ..........18 Step 6 Power Up............. 20 Step 7 Configure the System BIOS ........ 20 Step 8 Install the Operating System Driver .... - Page 4 Hardware Service and Support........42 Warranty Information ......43 Warranty Information............. 43 Warranty Period ............. 43 Problem Determination ..........43 Warranty Service and Support ........44 International Warranty Service........45 Purchasing Additional Services........45 Index ..............47 IBM ATA 133 RAID Controller User’s Guide...
- Page 5 PIO 0-4, DMA 0-2, and Ultra DMA 0-6. The RAID levels supported are RAID 0, 1, and 10. The highest data transfer rate in UDMA mode 4 is 66 MBs, in UDMA mode 5 is 100 MBs, and in UDMA mode 6 is 133 MBs. This manual describes the IBM ATA 133 RAID controller.
- Page 6 IBM ATA 133 RAID Controller User’s Guide...
-
Page 7: Overview
Overview The IBM ATA 133 RAID controller is a short PCI adapter card that provides two IDE channels with ATA 133 capability. IBM ATA 133 provides a simple and cost-effective way to improve the performance and reliability of your storage subsystems. The RAID... -
Page 8: Documentation
PIO modes 0-4, DMA modes 0-2, and Ultra DMA modes 0-6 Documentation The technical documentation set for the IBM ATA 133 RAID controller includes the IBM ATA 133 RAID Controller Quick Hardware Setup Guide (hard copy), and IBM ATA 133 RAID Controller User's Guide (on CD). -
Page 9: Introduction To Raid
Introduction to RAID RAID (Redundant Array of Independent Disks) is an array (group) of multiple independent hard drives that provide high performance and fault tolerance. A RAID disk subsystem improves I/O (input/output) performance and reliability. The RAID array appears to the host computer as a single storage unit or as multiple logical units. I/O is expedited because several disks can be accessed simultaneously. -
Page 10: Raid Overview
These stripes are interleaved in a repeated sequential manner. The combined storage space is composed of stripes from each drive. IBM IDE supports stripe sizes of 32 KB to 4 MB. -
Page 11: Disk Mirroring
Disk Mirroring With mirroring (used in RAID 1), data written to one hard drive is simultaneously written to another hard drive. If one hard drive fails, the contents of the other hard drive can be used to run the system and reconstruct the failed drive. The primary advantage of disk mirroring is that it provides 100% data redundancy. -
Page 12: Disk Spanning
The following sections explains terms associated with RAID, including: • physical drive • physical drive state • array • array state • logical drive • rebuild • hot spare • consistency check • fault tolerance IBM ATA 133 RAID Controller User's Guide... -
Page 13: Physical Drive
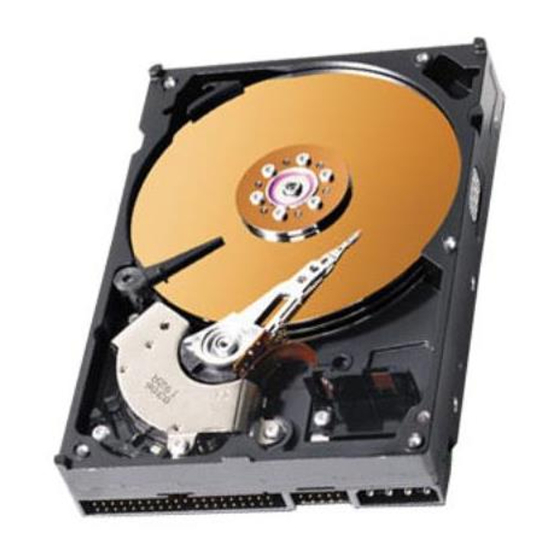
Physical Drive The physical drive is the IDE hard drive that is connected by cable to the IBM IDE card. The hard drive contains platters that are coated with material that allows them to record data magnetically. Another important feature is the read/write head, which hovers over the surface of the platter. -
Page 14: Disk Rebuild
IBM IDE implements automatic and transparent rebuilds using hot spare drives, providing a high degree of fault tolerance and zero downtime. The IBM IDE BIOS configurator allows you to specify physical drives as hot spares. When a hot spare is needed, IBM IDE automatically selects the spare and includes it in the configuration. -
Page 15: Selecting A Raid Level
Selecting a RAID Level To ensure the best performance, you should select the optimal RAID level when you create a system drive. The optimal RAID level for your disk array depends on the following factors: • Number of drives in the disk array •... - Page 16 IBM ATA 133 RAID Controller User's Guide...
-
Page 17: Raid Levels
RAID set. RAID 0 offers high bandwidth. By breaking up a large file into smaller blocks, IBM IDE can use multiple IDE channels and drives to read or write the file faster. RAID 0 involves no parity calculations to complicate the write operation. -
Page 18: Raid 1
RAID 1 requires twice as many hard drives. Performance is impaired during drive rebuilds. Drives Figure 3-2. RAID 1 Array Data Flow Segment 1 Segment 1 Duplicate Segment 2 Segment 2 Duplicate Segment 3 Segment 3 Duplicate Segment 4 Segment 4 Duplicate IBM ATA 133 RAID Controller User's Guide... -
Page 19: Raid 10
RAID 10 RAID 10 provides both RAID 0 (data striping) and RAID 1 (disk mirroring). It requires two sets of RAID 1 drives (total of four drives). In RAID 10, data is striped across the two arrays and duplicated from one drive to the second drive in each RAID 1 array. Uses Use RAID 10 for small databases or any other environment that requires fault tolerance and high data throughput, especially for large files. - Page 20 IBM ATA 133 RAID Controller User's Guide...
-
Page 21: Hardware Installation
IDE drives for RAID configuration Installation Steps Perform the following steps to install the IBM ATA 133 RAID controller. Each step is described in detail in the following pages. Unpack the RAID controller and inspect for damage. -
Page 22: Step 1 Unpack
Step 1 Unpack Unpack and install the hardware in a static-free environment. The IBM ATA 133 RAID controller is packed inside an anti-static bag between two sponge sheets. Remove the controller card and inspect it for damage. If the card appears damaged, or if any of items listed below are missing, contact IBM Support as outlined in Appendix A. -
Page 23: Step 4 Install Ibm Ata 133 Raid Controller
Step 3 Set Jumpers, continued IBM ATA 133 RAID controller layout The following diagram displays the headers and connectors on the RAID controller. S eco n da ry C h an ne l Pr im a ry C h an ne l... -
Page 24: Step 5 Connect Ide Cables
Use the selected ATA-100/133 cables to connect up to two IDE drives (one master and one slave) to each 40-pin IDE connector on the IBM ATA 133 RAID controller. When using the extended length cables, only one drive will be connected to each channel. - Page 25 Note: Do not attach ATAPI drives to the IBM ATA 133 RAID controller. The controller does not support ATAPI devices, such as CD-ROM, SL120, and Zip drives. Connect only hard drives to the RAID controller and connect ATAPI devices to the IDE channels on the motherboard or to any other off-board IDE/ATAPI adapters.
-
Page 26: Step 6 Power Up
When the ”Press Ctrl-M” message appears on the screen, press the <Ctrl> key and <M> key immediately to run the BIOS Configuration Utility. See the IBM ATA 133 RAID Controller User’s Guide on the Driver and Documentation CD for information about how to run and use this program. -
Page 27: Operating System Installation
Click on Control Panel. The Control Panel window displays. Select IDE Adapters. 5. Select Drivers tab. If the IBM ATA 133 RAID controller is already installed, it appears in the list as “LSI Logic MegaRAID IDE Controller”. Select it and remove by clicking the “Remove” button. -
Page 28: Confirming The Windows 2000 Driver Installation
“LSI Logic MegaRAID IDE #xx” under “LSI Logic MegaRAID IDE Controller”. Installing DOS For DOS, no driver installation is required. The RAID controller ROM BIOS contains the low-level driver for IBM IDE that is necessary for MS-DOS. IBM ATA 133 RAID Controller User's Guide... -
Page 29: Bios Configuration Utility
BIOS Configuration Utility The BIOS Configuration Utility configures disk arrays and logical drives. Because the utility resides in the BIOS, its operation is independent of the operating systems on your computer. The BIOS Configuration Utility is a character-based utility than you can run by pressing <Ctrl><M>... -
Page 30: Designating Drives As Hot Spares
Display the manufacturer data and error count for the selected drive. <F3> Display the logical drives that have been configured. <F4> Designate the selected drive as a hot spare. 2. Press the arrow keys to highlight specific physical drives. Cont’d IBM ATA 133 RAID Controller User's Guide... - Page 31 Selecting the Configuration Method, Continued Using Easy Configuration, cont’d 3. Press the spacebar to associate the selected physical drive with the current array. The indicator for the selected drive changes from READY to ONLIN A[array number]- [drive number]. For example, ONLIN A2-3 means hard drive 3 in array 2. 4.
- Page 32 19. Respond to the Save prompt. After you respond to the Save prompt, the Configure menu appears. 20. Initialize the logical drives you have just configured. See "Initializing Logical Drives" for more information. Cont’d IBM ATA 133 RAID Controller User's Guide...
- Page 33 Selecting the Configuration Method, Continued Using New Configuration If you select New Configuration, the existing configuration information on the selected controller is destroyed when the new configuration is saved. In New Configuration, you can modify the following logical drive parameters: •...
- Page 34 If the criteria are not met, the Span setting makes no difference for the current logical drive. 11. Highlight a spanning option and press <Enter>. Cont’d IBM ATA 133 RAID Controller User's Guide...
- Page 35 Selecting the Configuration Method, Continued Using New Configuration, cont’d 12. Move the cursor to Size and press <Enter> to set the logical drive size. NOTE: The full drive size is used when you span logical drives; you cannot specify a smaller drive size.
- Page 36 RAID The RAID level Size The logical drive size #Stripes The number of stripes (physical drives) in the associated physical array StrpSz The stripe size Drive-State The state of the logical drive Cont’d IBM ATA 133 RAID Controller User's Guide...
- Page 37 Selecting the Configuration Method, Continued Using View/Add Configuration, cont’d 8. Highlight RAID and press <Enter> to set the RAID level for the logical drive. The available RAID levels for the current logical drive appear. 9. Select a RAID level and press <Enter> to confirm. 10.
-
Page 38: Drive Roaming
The progress of the initialization for each drive is shown in bar graph format. 5. When initialization is complete, press any key to continue or press <Esc> to display the Management Menu. Cont’d IBM ATA 133 RAID Controller User's Guide... -
Page 39: Deleting Logical Drives
Initializing Logical Drives, Continued Individual Initialization You can use either the Initialize option from the Management Menu screen or the Objects—> Logical Drive—> Initialize menu to initialize an individual drive. Perform the following steps to use the Initialize option from the Management Menu screen: 1. -
Page 40: Formatting Physical Drives
2. Press the arrow keys to select the physical drive to be formatted and press <Enter>. 3. Select Format. Formatting can take some time, depending on the drive capacity. 4. When formatting completes, press any key to display the previous menu. IBM ATA 133 RAID Controller User's Guide... -
Page 41: Rebuilding Failed Hard Drives
Rebuilding Failed Hard Drives If a hard drive fails in an array that is configured as a RAID 1 or 5 logical drive, you can recover the lost data by rebuilding the drive. Rebuild Types Table 5-1. Rebuild Types describes automatic and manual rebuilds. Table 5-1. -
Page 42: Using Online Volume Extension
6. When the check is finished, press any key to clear the progress display. 7. Press <Esc> to display the Management Menu. (To check an individual drive, select Objects—> Logical Drives on the Management Menu, the desired logical drive(s), then Check Consistency on the action menu.) IBM ATA 133 RAID Controller User's Guide... -
Page 43: Exiting The Bios Configuration Utility
Exiting the BIOS Configuration Utility Perform the following steps to exit the BIOS Configuration Utility: 1. Press <Esc> when the BIOS Configuration Utility Management Menu displays. 2. Select Yes at the prompt. 3. You must reboot the computer. The BIOS message appears again. 4. - Page 44 IBM ATA 133 RAID Controller User's Guide...
-
Page 45: Troubleshooting
Drive Connection Tips If you have two drives, connect one per channel. The performance of IBM ATA 133 RAID controller is best with one drive per channel. Use the same type of drives or drives with similar capability (in terms of speed and capacity). -
Page 46: Problems And Suggested Solutions
Check the system BIOS configuration for PCI interrupt assignments. Make sure some Interrupts are assigned for PCI. Make sure that you have properly selected the Boot Device in the system BIOS setup (CMOS Setup). IBM ATA 133 RAID Controller User's Guide... -
Page 47: A Getting Help And Technical Assistance.41
If you need help, service, or technical assistance or just want more information about IBM products, you will find a wide variety of sources available from IBM to assist you. This appendix contains information about where to go for additional information about IBM and IBM products, what to do if you experience a problem with your xSeries or IntelliStation system, and whom to call for service, if it is necessary. -
Page 48: Getting Help And Information From The World Wide Web.42
Getting Help and Information from the World Wide Web On the World Wide Web, the IBM Web site has up-to-date information about IBM xSeries and IntelliStation products, services, and support. The address for IBM xSeries information is http://www.ibm.com/eserver/xseries/. The address for IBM IntelliStation information is http://www.ibm.com/pc/intellistation/. -
Page 49: B Warranty Information
The IBM Machine Warranties Web site at http://www.ibm.com/servers/support/machine_warranties/ contains a worldwide overview of the IBM Statement of Limited Warranty for IBM Machines, a glossary of terms used in the Statement of Limited Warranty, Frequently Asked Questions (FAQ), and links to Product Support Web pages. -
Page 50: Warranty Service And Support
Warranty Service and Support With the original purchase of an IBM xSeries or IntelliStation system, you have access to extensive service and support. During the IBM Machine warranty period, you may call IBM or your reseller for problem-determination assistance under the terms of the IBM Statement of Limited Warranty. -
Page 51: International Warranty Service
If you travel with your xSeries or IntelliStation system or relocate it to a country or region where your system is sold and serviced by IBM or IBM resellers authorized to perform warranty service, International Warranty Service (IWS) is available during the warranty period. - Page 52 IBM ATA 133 RAID Controller User's Guide...
-
Page 53: Index
3 hot spare, 7, 8 improved I/O, 3 increased reliability, 3 introduction to, 3 RAID 0, 11 RAID 1, 12 IBM RAID controller RAID 10, 13 installation, 17 RAID levels, 11 IDE cables RAID overview, 4 attaching, 18 RAID terminology, 6... - Page 54 45 period, 43 service and support, 44 warranty information, 43 Windows 2000, 20 technical assistance, 41 confirming the driver, 22 hardware service and support, 42 driver installation, 21 software service and support, 42 IBM ATA 133 RAID Controller User's Guide...
Need help?
Do you have a question about the ATA 133 and is the answer not in the manual?
Questions and answers