Table of Contents
Advertisement
Advertisement
Table of Contents
Troubleshooting

Related Manuals for Compaq AMC20493-KT5


Summary of Contents for Compaq AMC20493-KT5
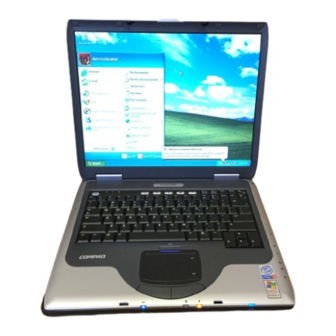
- Page 1 Compaq Notebook Series Reference Guide...
- Page 2 Notice © 2003 Hewlett-Packard Development Company, L.P. Microsoft, MS-DOS, and Windows are trademarks of Microsoft Corporation in the U.S. and/or other countries. All other product names mentioned herein may be trademarks of their respective companies. This product incorporates copyright protection technology that is protected by method claims of certain U.S.
-
Page 3: Important Safety Information
Important Safety Information CAUTION To reduce the risk of fire, use only No. 26 AWG or larger telecommunications line cord to connect a modem to the telephone wall jack. In Australia, the notebook must be connected to the Telecommunication Network through a line cord that meets the requirements of ACA Technical Standard TS008. -
Page 4: Software Product License Agreement
Software Product License Agreement Your HP product contains software programs. CAREFULLY READ THIS LICENSE AGREEMENT BEFORE PROCEEDING TO OPERATE THIS EQUIPMENT. RIGHTS IN THE SOFTWARE ARE OFFERED ONLY ON THE CONDITION THAT THE CUSTOMER AGREES TO ALL TERMS AND CONDITIONS OF THE LICENSE AGREEMENT. PROCEEDING TO OPERATE THE EQUIPMENT INDICATES YOUR ACCEPTANCE OF THESE TERMS AND CONDITIONS. - Page 5 OWNERSHIP. Customer agrees that he/she does not have any title or ownership of the software, other than ownership of the physical media. Customer acknowledges and agrees that the software is copyrighted and protected under the copyright laws. Customer acknowledges and agrees that the software may have been developed by a third party software supplier named in the copyright notices included with the software, who shall be authorized to hold the Customer responsible for any copyright infringement or violation of this Agreement.
- Page 6 U.S. GOVERNMENT RESTRICTED RIGHTS. Use, duplication, or disclosure is subject to HP standard commercial license terms and for non-DOD Departments and Agencies of the U.S. Government, the restrictions set forth in FAR 52.227-19(c)(1-2) (June 1987) Hewlett-Packard Company, 3000 Hanover Street, Palo Alto, CA 94304 U.S.A.
-
Page 7: Table Of Contents
Contents Getting Started with Your Notebook...1 Identifying Parts of the Notebook ...2 Front panel and right panel components...2 Left panel and back panel components...4 Bottom panel components ...6 Status lights...8 Setting Up Your Notebook...10 Step 1: Insert the battery ...10 Step 2: Connect AC power ...11 Step 3: Connect a phone line ...12 Step 4: Turn on the notebook ...13... - Page 8 Taking Care of Your Notebook...27 To protect your hard drive ...27 To maintain your notebook...27 To safeguard your data ...28 To extend the life of the display ...28 To clean your notebook ...28 Batteries and Power Management...29 Managing Power Consumption ...30 How the notebook manages power automatically...30 Using Battery Power...32 To check battery status ...32...
- Page 9 Replacing the Hard Drive...61 To replace the hard drive ...61 To replace the hard drive holder...62 To prepare a new hard drive ...63 Troubleshooting and Maintenance ...65 Troubleshooting Your Notebook...66 Audio problems ...66 CD-ROM and DVD problems ...67 Display problems ...68 Hard drive problems ...69 Heat problems...69 Infrared problems...70...
- Page 10 Regulatory Information ...101 U.S.A..101 Canada ...103 European Union ...104 Japan ...106 New Zealand...107 Russia...108 International...108 Index ...110 Reference Guide...
-
Page 11: Getting Started With Your Notebook
Getting Started with Your Notebook Reference Guide... -
Page 12: Identifying Parts Of The Notebook
Getting Started with Your Notebook Identifying Parts of the Notebook Identifying Parts of the Notebook Components included with the notebook may vary by geographical region and the features you selected. The following illustrations identify the standard external components included with most notebook models. Find the illustrations that match your notebook to identify your components. - Page 13 Notebook open/close latch One-Touch buttons Keyboard status lights Power button: turns the computer on and off TouchPad, scroll pad, Click buttons, plus on-off button Main status lights (left to right): power mode, hard drive activity, and battery Infrared port (select models only) Getting Started with Your Notebook Identifying Parts of the Notebook Wireless on-off button and indicator light...
-
Page 14: Left Panel And Back Panel Components
Getting Started with Your Notebook Identifying Parts of the Notebook Left panel and back panel components AC adapter jack Universal serial bus ports (USB) RJ-45 jack: connects a network cable S-Video out jack Parallel port (LPT1): use this port for a parallel printer or other parallel device Serial port (COM1): use this port for a serial mouse, modem, printer, or other serial device... - Page 15 AC adapter jack Two USB ports RJ-45 network jack: connects a network cable PS/2 port Parallel port (LPT1): use this port for a parallel printer or other parallel device External monitor port Getting Started with Your Notebook Identifying Parts of the Notebook S-Video out jack Cable lock slot (security connector) RJ-11 jack: connects a modem cable...
-
Page 16: Bottom Panel Components
Getting Started with Your Notebook Identifying Parts of the Notebook Bottom panel components Hard drive Battery latch RAM (memory) cover Reference Guide Reset button Docking port (select models only) Mini PCI cover (no user parts inside) - Page 17 Hard drive Battery latch Mini PCI cover (no user parts inside) Getting Started with Your Notebook Identifying Parts of the Notebook RAM (memory) cover Docking port (select models only) Reset button Reference Guide...
-
Page 18: Status Lights
Getting Started with Your Notebook Identifying Parts of the Notebook Status lights The notebook includes a number of status lights that report power and battery status, drive activity, and keyboard functions such as Caps Lock and Num Lock. The following diagram shows the main status lights on the front of the notebook. 1 Power mode •... - Page 19 The keyboard status lights, located above the keyboard, indicate the states of the keyboard locks. 1 Caps Lock On: Caps Lock is active. 2 Num Lock On: Num Lock is active. (The Keypad Lock must also be on to use the embedded keypad.) 3 Keypad Lock On: The embedded keypad is active (Fn+F8).
-
Page 20: Setting Up Your Notebook
Getting Started with Your Notebook Setting Up Your Notebook Setting Up Your Notebook WARNING Improper use of keyboards and other input devices has been associated with ergonomic injury. If you are using your notebook as your primary computer, or using it for extended periods, you should use it with a full-sized keyboard, monitor, and mouse. -
Page 21: Step 2: Connect Ac Power
Step 2: Connect AC power CAUTION Use only the AC adapter included with your notebook (or other approved adapter that meets the power requirements of the notebook). Using the wrong AC adapter could damage the notebook or adapter, cause data loss, and may void your warranty. 1. -
Page 22: Step 3: Connect A Phone Line
Getting Started with Your Notebook Setting Up Your Notebook Step 3: Connect a phone line 1. Make sure the telephone line is an analog line, sometimes called a data line. (Do not use a digital line.) 2. Connect the telephone cord (RJ-11) into a telephone jack. 3. -
Page 23: Step 4: Turn On The Notebook
Step 4: Turn on the notebook Press the power button above the left side of the keyboard. The notebook boots up, and Windows starts automatically. Hint If your notebook does not turn on when operating on battery power, the battery may be out of power. -
Page 24: Basic Operation
Basic Operation Reference Guide... -
Page 25: Operating Your Notebook
Basic Operation Operating Your Notebook Operating Your Notebook You can start and stop your notebook by using the power button. However, at certain times you may want to use other methods to start or stop the notebook, depending on power considerations, types of active connections, and startup time. Default power settings Power mode To enter this mode... -
Page 26: To Reset The Notebook
To reset the notebook Occasionally, you may find that Windows or the notebook has stopped responding and will not let you turn off the notebook. If this happens, try the following procedures in this order: • If possible, shut down Windows. Press CTRL+ALT+DEL, then select Shut Down, Restart. -
Page 27: To Use The Touchpad
Basic Operation Operating Your Notebook To use the TouchPad The TouchPad includes an on-off button so you can turn off the TouchPad to avoid moving the pointer accidentally when you are typing. The indicator light turns off when you turn off the TouchPad. Click buttons. -
Page 28: To Use The Function Hot Keys
To use the function hot keys The combination of the Fn key plus another key creates a hot key—a shortcut key sequence—for various system controls. To use a hot key, press and hold Fn, press the appropriate second key, then release both keys. This hot key Does this Fn+F1... -
Page 29: To Use The One-Touch Buttons
Basic Operation Operating Your Notebook To use the One-Touch buttons Your notebook includes five One-Touch buttons that can start any application or open a document or Web site with a single press. Press a One-Touch button to open the corresponding application, document, or Web site. -
Page 30: To Use The Windows And Applications Keys
To use the Windows and Applications keys The Windows key brings up the Windows Start menu. This is the same as selecting the Start button on the taskbar. The Applications key brings up the shortcut menu for the selected item. This is the same menu that appears when you right-click while pointing at the selected item. -
Page 31: Using Cds Or Dvds
Basic Operation Using CDs or DVDs Using CDs or DVDs To insert or remove a CD or DVD CAUTION Do not remove a CD or DVD while the notebook is reading it, or the notebook could stop responding and you could lose data. To avoid damage to the disk or drive, be sure to press the CD or DVD firmly onto the spindle. -
Page 32: To Play Dvd Movies
Select Start > All Programs > Multimedia > DVD Player > InterVideo WinDVD. Hint For best performance while playing movies on battery power, set the Control Panel Power Scheme to Portable/Laptop. Important DVDs can have regional codes embedded in the disc data. These codes prevent DVD movies from being played outside the region of the world in which they are sold. -
Page 33: Securing Your Notebook
Basic Operation Securing Your Notebook Securing Your Notebook To set up password protection You can protect your notebook from access by another user by setting up password protection, which is available through Windows and through the BIOS Setup utility. See details on the BIOS Setup Utility in the “Troubleshooting and Maintenance” chapter. -
Page 34: To Attach A Security Cable
Basic Operation Securing Your Notebook To attach a security cable Your notebook includes a built-in connector to allow you to secure the notebook with a cable and a lock (such as the Kensington MicroSaver lock system, available at many notebook stores). 1. -
Page 35: To Lock The Hard Drive
Basic Operation Securing Your Notebook To lock the hard drive The notebook enables you to lock its internal hard drive to help keep your information secure. Hard drive lock does not protect a second hard drive installed in the module bay. CAUTION When you enable the hard drive lock, the current BIOS user password (or administrator password if that is the only password set) is encoded on the... -
Page 36: Taking Care Of Your Notebook
Taking Care of Your Notebook Follow these recommendations to maintain your notebook during everyday use and prevent potential physical damage or data loss. To protect your hard drive Hard drives, as well as other internal components, are not indestructible and can be damaged by inappropriate handling and operation. -
Page 37: To Safeguard Your Data
Basic Operation Taking Care of Your Notebook To safeguard your data • Do not use a pointing device or activate any other device that interrupts operation while the system is starting or stopping. • Back up your work regularly. Copy files to diskettes, CDs, DVDs, and other media, or network drives. -
Page 38: Batteries And Power Management
Batteries and Power Management Reference Guide... -
Page 39: Managing Power Consumption
Batteries and Power Management Managing Power Consumption Managing Power Consumption When you are running your notebook on battery power, you can maximize operating time without compromising performance. Your notebook is designed to help you reduce power consumption and extend battery life. During idle periods, the notebook automatically enters power-saving modes after specified timeout periods. - Page 40 The notebook can also enter Hibernation if battery power reaches a critically low level. If this happens, you will find on resuming that all your data has been saved, but some functions may be disabled. To resume normal operation, restore power by connecting an AC adapter or installing a charged battery, then shut the notebook off and restart it.
-
Page 41: Using Battery Power
Batteries and Power Management Using Battery Power Using Battery Power To check battery status From the battery status light Check the battery status light on the notebook. From the Windows taskbar The Windows taskbar can display a power icon that provides detailed battery status information (see Windows Help for details). -
Page 42: To Respond To A Low-Battery Warning
To respond to a low-battery warning The notebook automatically alerts you when the battery power drops to a critically low level. The notebook first emits a high-pitched beep or displays a warning message. Then, if you do not restore power within a short time, the notebook goes into Hibernation. - Page 43 Batteries and Power Management Using Battery Power • Put the notebook in Standby when you are not using it for a short while. • Put the notebook in Hibernation whenever you want to save your current session but will not be using the notebook for a day or more. •...
-
Page 44: Modem And Network Connections
Modem and Network Connections Reference Guide... -
Page 45: Using The Modem
Modem and Network Connections Using the Modem Using the Modem You can connect your modem to a telephone line and communicate throughout the world. You can explore the Internet, send and receive e-mail messages, and use your notebook to send and receive faxes. Your notebook contains several software programs that work with your modem: •... -
Page 46: To Change Your Modem Settings
Special restrictions in certain countries • Many countries impose a blackout period after a modem repeatedly fails to connect to a service provider. The number of failed attempts and the period you must wait before trying again differ from country to country. Check with your telephone company. -
Page 47: Connecting To A Local Area Network (Lan)
Modem and Network Connections Connecting to a Local Area Network (LAN) Connecting to a Local Area Network (LAN) You can connect to local area networks (LANs). LANs give you access to network resources, such as printers and file servers on your corporate network, and possibly to the Internet. -
Page 48: Making Wireless Network Connections (Select Models Only)
Modem and Network Connections Making Wireless Network Connections (select models only) Making Wireless Network Connections (select models only) If your notebook includes a wireless on-off button, you can connect by radio to an 802.11 wireless local area network (LAN) and access notebooks and other resources on the network. - Page 49 Modem and Network Connections Making Wireless Network Connections (select models only) 2. A list of available networks appears. Select the network you want, enter the encryption key if required, then select Connect. If the network you want is not on the list, select Advanced > Configure, and enter the required network parameters.
-
Page 50: To Turn Wireless Communication On And Off
5. If you want to use encrypted communication, uncheck the automatic key option, then select the following parameters: • Key: ASCII passphrase or hexadecimal key string • Key format: ASCII for passphrase, hexadecimal for key string • Key length: smaller number for 64-bit encryption, larger number for 128-bit 6. - Page 51 Modem and Network Connections Making Wireless Network Connections (select models only) Turning off communication and ending a connection 1. Important: close any files that reside on other network notebooks. 2. To turn off the wireless 802.11 communication without turning off the notebook, press the wireless on-off button.
-
Page 52: Making Wireless Bluetooth Connections (Select Models Only)
Making Wireless Bluetooth Connections (select models only) If your notebook includes Bluetooth wireless capabilities, you can use it to make short-range radio connections to a wireless personal area network (PAN) and access other Bluetooth-compatible devices, such as other notebooks, cell phones, and printers. -
Page 53: To Prepare For Bluetooth Connections
Give your notebook a unique name that will identify it to other Bluetooth users. • Set the notebook type to Laptop. • Select the security mode you want to use. 5. On the Information Exchange tab, check the following settings: •... -
Page 54: To Send Or Receive Files Using Bluetooth
Making Wireless Bluetooth Connections (select models only) To create your business card, you can open Microsoft Outlook, then open the address book and create a new contact. After entering your personal information, select File, Export To vCard File, and store the file in your business card directory. To send or receive files using Bluetooth If your notebook includes Bluetooth wireless capabilities, it supports the following common protocols for transferring data. -
Page 55: Add-On Devices
Add-On Devices Reference Guide... -
Page 56: Connecting External Devices
Add-On Devices Connecting External Devices Connecting External Devices Connecting PC Cards The notebook PC Card slot is available for storing data and expanding the communication capabilities of the notebook. The notebook supports standard Type II and III PC Cards (PCMCIA and CardBus). To insert or remove a PC Card Note The location and number of the PC Card slots vary by model series. - Page 57 Removing a PC Card CAUTION Before removing a PC Card, you must use the Eject Hardware or Safely Remove Hardware icon in the taskbar, or shut down the notebook. Otherwise, you could lose data. 1. Before removing the card, select the Eject Hardware or Safely Remove Hardware icon in the taskbar, then select the card you want to remove.
-
Page 58: To Connect An Audio Device
Add-On Devices Connecting External Devices To connect an audio device You can plug in an external microphone, external speakers, or headphones. In addition, if you connect your notebook to the port replicator, you can plug in a stereo source (such as a CD player) or a device that accepts digital audio (such as a digital audio recorder). -
Page 59: To Use An External Monitor
To use an external monitor Connecting an external monitor 1. Plug a standard 4-pin S-Video cable to the S-Video out jack on your notebook (yellow connector on the back panel) to the S-Video in jack on your television. Restart your notebook. Note Although your notebook has a 7-pin S-Video out jack, the notebook accepts either a 7-pin or 4-pin cable connection. -
Page 60: To Connect An Ieee 1394 Device (Select Models Only)
Add-On Devices Connecting External Devices Using dual display mode You can extend your desktop by connecting an external monitor to your notebook. 1. Select Start > Control Panel > Appearance and Themes > Display. 2. Select the Settings tab. 3. Select the second display, then select the option to extend the desktop. You can set different resolutions and numbers of colors for each display. -
Page 61: To Connect An Infrared Device (Select Models Only)
To connect an infrared device (select models only) Note Select models include an infrared port. By default, the infrared port is not enabled, so you must first enable it before you can use it. If your model has an infrared port (a small, rectangular lens located on the front of the notebook), then your notebook has wireless, serial communication capability. -
Page 62: To Use A Port Replicator (Select Models Only)
Add-On Devices Connecting External Devices To use a port replicator (select models only) A port replicator provides your notebook with external connections that you can leave in place whenever you remove the notebook from your desk. Instead of disconnecting and reconnecting peripheral devices, you can simply undock and dock the notebook. - Page 63 To dock to the port replicator 1. Plug in the AC adapter, then connect it to the back of the port replicator. You can also operate the port replicator using power from the notebook battery. 2. Remove the rubber cover from the docking connector on the bottom of the notebook.
- Page 64 Add-On Devices Connecting External Devices To undock from the port replicator 1. Press down the undock button on the right side of the port replicator. 2. Lift the notebook out of the port replicator. Reference Guide...
-
Page 65: Installing Additional Ram (Memory)
Installing Additional RAM (Memory) The notebook has two slots that hold two RAM modules. At least one slot contains a RAM module installed at the factory. You can use both slots to expand your RAM. To install a RAM expansion module Use only PC2100 DDR-266 MHz or higher RAM. - Page 66 Add-On Devices Installing Additional RAM (Memory) 4. Insert the RAM board into the connector at about a 30 degree angle until it is fully inserted. Then press down at both sides until both latches snap closed. Match your notebook to one of the following illustrations. 5.
-
Page 67: To Remove A Ram Expansion Module
To remove a RAM expansion module You may want to remove a RAM module so you can install a larger one. You’ll need a small Phillips screwdriver for these steps. CAUTION Your notebook internal components are extremely sensitive to static electricity and can be permanently damaged by it. - Page 68 Add-On Devices Installing Additional RAM (Memory) 4. Release the two latches at the sides of the RAM board, so the free edge of the board pops up. Match your notebook to one of the following illustrations. 5. Pull the board out of the connector. 6.
-
Page 69: Replacing The Hard Drive
Replacing the Hard Drive To replace the hard drive You will need a small Phillips screwdriver for this procedure. 1. Unplug the AC adapter, if connected. 2. Remove the battery. 3. Turn the unit bottom side up. 4. Use a pointed tool to remove the plugs from the two screw holes, then remove the two screws. -
Page 70: To Replace The Hard Drive Holder
Add-On Devices Replacing the Hard Drive To replace the hard drive holder If you are installing a new hard drive that does not have a holder, you can remove the holder parts from the old hard drive. You’ll need a small Phillips screwdriver for this procedure. -
Page 71: To Prepare A New Hard Drive
Add-On Devices Replacing the Hard Drive To prepare a new hard drive When you install a new hard drive, you also need to prepare it to be able to work with your notebook. If you want to restore the Windows software and operating system that were originally installed on your notebook, use the QuickRestore System Recovery CD that came with your notebook. -
Page 72: Troubleshooting And Maintenance
Troubleshooting and Maintenance Reference Guide... -
Page 73: Troubleshooting Your Notebook
Troubleshooting and Maintenance Troubleshooting Your Notebook Troubleshooting Your Notebook This chapter contains solutions to many types of problems you might have with your notebook. Try the solutions one at a time, in the order in which they are presented. Here are some other sources of information for troubleshooting: •... -
Page 74: Troubleshooting And Maintenance
If you hear a loud high-pitched whine (feedback) from the speakers • In the Volume Control, try reducing the Master volume by selecting the speaker icon in the taskbar. • In Volume Control, select Options > Properties, and select the microphone option for the playback settings. -
Page 75: Troubleshooting Your Notebook
Troubleshooting and Maintenance Troubleshooting Your Notebook • Restart the system: remove the disc from the drive, and select Start > Turn Off Computer > Restart. • If you created the CD on a DVD/CD-RW combo-type drive, try using a different media brand. -
Page 76: Hard Drive Problems
Hard drive problems If the notebook hard drive doesn’t spin • Make sure the notebook has power. If necessary, connect the AC adapter, and make sure it is fully plugged into a power source and into the back of the notebook. -
Page 77: Infrared Problems
Troubleshooting and Maintenance Troubleshooting Your Notebook Infrared problems By default, the infrared port is not enabled, so you must enable it before you can use it. If you have problems with infrared communications • Make sure the line between the two infrared ports is not blocked, and that the ports face each other as squarely as possible. -
Page 78: Local Area Network (Lan) Problems
If a PS/2 scroll mouse doesn’t work • The TouchPad must be disabled for the mouse scroll feature to work. In the BIOS Setup utility, make sure the External Pointing Devices option in the System Devices menu is set to Auto. See “Configuring the Notebook” in this chapter. •... -
Page 79: Memory Problems
Troubleshooting and Maintenance Troubleshooting Your Notebook Memory problems If a message says you are out of memory • Make sure drive C is not running low on free space. • If you are having memory problems while running MS-DOS programs, use the MS-DOS or Application and Software troubleshooter in Windows Help. - Page 80 If the modem doesn’t dial or no dial tone is detected • Check all cables and connections. • Connect a standard telephone to the phone line and make sure the line is working. • Make sure someone else isn’t using the same phone line. •...
- Page 81 Troubleshooting and Maintenance Troubleshooting Your Notebook • Open the hardware Device Manager. Select Start > Control Panel > Performance and Maintenance > System. If the modem is disabled, try to enable it. If it has a conflict, try disabling another device. •...
-
Page 82: Pc Card (Pcmcia) Problems
PC Card (PCMCIA) problems If the notebook doesn’t recognize a PC Card • Remove and reinsert the PC Card. • Restart the notebook. Select Start > Turn Off Computer > Restart. • Try the card in another notebook to see whether the card functions properly. •... -
Page 83: Power And Battery Problems
Troubleshooting and Maintenance Troubleshooting Your Notebook • Press CTRL+ALT+DEL and use Task Manager to see if an application is not responding. • Restart the notebook. Select Start > Turn Off Computer > Restart. • Some file browsers respond slowly while processing graphics or waiting for broken network connections to time out. - Page 84 If the battery does not charge • Make sure the AC adapter is fully plugged into the power source and the notebook, and that the light on the adapter is on. • If you’re using a power strip, remove the AC adapter from the power strip and plug it directly into a wall outlet.
-
Page 85: Printing Problems
Troubleshooting and Maintenance Troubleshooting Your Notebook If the notebook doesn’t enter Standby mode as expected • If you have a connection to another computer, the notebook won’t enter Standby if the connection is active. • If the notebook is performing an operation, it normally waits for the operation to finish before going into Standby. -
Page 86: Serial, Parallel, And Usb Problems
Serial, parallel, and USB problems If a serial mouse doesn’t work • Make sure you followed the manufacturer’s installation instructions completely and have installed the mouse properly. If not, repeat the procedure. • Make sure the port connection is secure. •... -
Page 87: Startup Problems
Troubleshooting and Maintenance Troubleshooting Your Notebook If the USB port is not working • Contact the vendor of the peripheral device for the latest USB drivers. • Check the port settings in Control Panel. Open the hardware Device Manager, then select Universal Serial Bus Controller. Startup problems If the notebook doesn’t respond when you turn it on •... -
Page 88: Wireless Problems
Wireless problems If you have problems with wireless 802.11 communication • Make sure the wireless indicator light is on. • If your notebook includes Bluetooth capabilities, make sure wireless 802.11 communication is turned on. Select Start > All Programs > Utilities > Wireless Configuration, then select the 802.11 button if it’s not turned on. - Page 89 Troubleshooting and Maintenance Troubleshooting Your Notebook If you can connect, but the network is slow • Check whether you might be in an area served by more than one wireless LAN. If so, the LANs could be interfering with each other. •...
-
Page 90: Configuring The Notebook
Configuring the Notebook The BIOS Setup utility helps you configure your notebook operation. To run the BIOS Setup utility The BIOS (basic input and output system) Setup utility enables you to make changes to the notebook system configuration, and to tailor the operation of your notebook to your individual work needs. -
Page 91: System Devices Menu
Troubleshooting and Maintenance Configuring the Notebook Setting Description BIOS Revision Shows the current BIOS version. System Time Sets the time using 24-hour format. Values set take effect immediately. System Date Sets the date using dd/mm/yy format (except English, which uses mm/dd/yy format). Language Sets the language for BIOS Setup. -
Page 92: Security Menu
Setting Description User Password is Shows if a user password is set. Administrator Shows if an administrator password is set. Password is Set User Password Press ENTER to set, change, or clear the user password. The password can have no more than 8 characters (0-9, A-Z), and cannot include special or accented characters. -
Page 93: To Change Video Memory Settings Using Bios Setup Utility
Troubleshooting and Maintenance Configuring the Notebook To change video memory settings using BIOS Setup utility The notebook comes with either 32MB or 16MB of video memory. Note Changing your video memory to 8MB, 16MB, 32MB, or 64MB may change the performance of your notebook, depending on your selection. -
Page 94: Reinstalling And Updating Software
Reinstalling and Updating Software Your notebook includes two features that allow you to install individual software applications or to restore the entire contents of your hard drive: • QuickRestore System Recovery CD, included with the notebook, allows you to restore your hard drive to the factory image. •... -
Page 95: Reference Information
Reference Information Reference Guide... -
Page 96: Modem Reference Information
Reference Information Modem Reference Information Modem Reference Information You can customize the operation of the modem using AT commands and S-registers. You can do this from Phone and Modem Options in Control Panel, from most communications software, or by using terminal mode in your software. Note You should have a good understanding of modems and how they operate before you change default settings. - Page 97 Conexant AT Commands (Advanced Users Only) Command (Conexant) Activate speaker: 0=off, 1=on during handshaking and off when receiving carrier (default), 2=always on, 3=off when dialing and receiving carrier, on when answering. N0 or N1 Included for compatibility only; returns result code. 0=go on-line, 1=go on-line and initiate retrain sequence.
- Page 98 Reference Information Modem Reference Information Conexant AT Commands (Advanced Users Only) Command (Conexant) +ESA=a,b,c,d, Controls operation of synchronous access mode: e,f,g,h a=0 specifies in transparent sub-mode, modem transmits 8-bit SYN sequence on idle. b=0 specified in framed sub-mode, modem transmits HDLC flags on idle (default and fixed). c=0 specifies in framed sub-mode, modem transmits abort on underrun in middle of frame (default);...
-
Page 99: Modem Reference Information
Conexant AT Commands (Advanced Users Only) Command (Conexant) +VRID=n Report caller ID: 0=use formatted presentation, 1=use unformatted presentation. -QCPC Use full startup procedures on next connection, then select startup procedure defined by +PQC. -QCPS=n 0=do not allow modem to save generated quick-connect profile, 1=allow (default) &Cn Set RLSD: 0=always on, 1=follow carrier state (default). - Page 100 Reference Information Modem Reference Information Conexant AT Commands (Advanced Users Only) Command (Conexant) +MS=a,b,c,d, Select modulation (b, c, d, e, and f are optional). a is the carrier (allowable rates in parentheses): B103 (300), B212 (1200 Rx/75 Tx or 75 Rx/1200 Tx), V21 (300), V22 (1200), V22B (1200/2400), V23C (1200), V32 (4800/9600), V32B (4800–14400), V34 (2400–33600), K56 (32000–56000), V90 (28000–56000), V92 (downstream: 28000–56000;...
- Page 101 Conexant AT Commands (Advanced Users Only) Command (Conexant) +FMM Report modem model. +FMR Report modem version, revision, or date. +FPR=n Set DTE/modem interface rate in bits/sec: 0=automatic detection (default). +FRH=n Receive data with HDLC framing. +FRM=n Receive data. +FRS=n Receive silence, n ×10 ms. +FTH=n Transmit data with HDLC framing.
- Page 102 Reference Information Modem Reference Information Register Function (Conexant) Number of rings to auto-answer. Ring counter. Escape character. Line termination character. Response formatting character. Command line editing character. Wait time for dial tone. Wait time for carrier. Pause time for dial delay modifier. Carrier loss disconnect time.
-
Page 103: Safety Information
Safety Information Power cords The power cord supplied with the notebook AC adapter should match the plug and voltage requirements for your local area. Regulatory approval for the AC adapter has been obtained using the power cord for the local area. However, if you travel to a different area or need to connect to a different outlet or voltage, you should use one of the power cords listed below. -
Page 104: Battery Safety
Reference Information Safety Information Battery safety • To avoid risk of fire, burns, or damage to your battery pack, do not allow a metal object to touch the battery contacts. • Do not disassemble the battery. There are no serviceable parts inside. Do not dispose of the battery pack in fire or water. -
Page 105: Led Safety
• Do not attempt to make any adjustment of the unit. • Avoid direct exposure to the laser beam—do not open the unit. CLASS 1 LASER PRODUCT LASER KLASSE 1 LED safety The infrared port located on the front of certain models is classified as a Class 1 LED (light-emitting diode) device according to International Standard IEC 825-1 (EN60825-1). -
Page 106: Exposure To Radio Frequency Radiation
Reference Information Safety Information Exposure to radio frequency radiation The radiated output power of the IEEE 1394, 802.11 and Bluetooth internal wireless radio is far below the FCC radio frequency exposure limits. Nevertheless, the wireless radio shall be used in such a manner that the potential for human contact during normal operation is minimized. -
Page 107: Regulatory Information
Reference Information Regulatory Information Regulatory Information This section presents information that shows how your notebook complies with regulations in certain regions. Any modifications to your notebook not expressly approved by the manufacturer could void the authority to operate the notebook in these regions. - Page 108 Reference Information Regulatory Information Applicable certification jack USOC = RJ11C. A plug and jack used to connect this equipment to the premises wiring and telephone network must comply with the applicable FCC Part 68 rules and requirements adopted by the ACTA. A compliant telephone cord and modular plug is provided with this product.
-
Page 109: Canada
The Telephone Consumer Protection Act of 1991 makes it unlawful for any person to use a notebook or other electronic device, including fax machines, to send any message unless such message clearly contains in a margin at the top or bottom of each transmitted page or on the first page of the transmission, the date and time it is sent and an identification of the business or other entity, or other individual sending the message and the telephone number of the sending machine or such business,... -
Page 110: Regulatory Information
Reference Information Regulatory Information The internal wireless radio complies with RSS 210 of Industry Canada. To prevent radio interference to the licensed service, this device is intended to be operated indoors and away from windows to provide maximum shielding. Equipment (or its transmit antenna) that is installed outdoors is subject to licensing. - Page 111 Reference Information Regulatory Information Germany: License required for outdoor installations. Check with reseller for procedure to follow. Netherlands: License required for outdoor installations. Check with reseller for procedure to follow. Italy: Indoor or outdoor use in a public area requires a user license. Die Geräte wurden gemäß...
-
Page 112: Japan
Reference Information Regulatory Information Japan Japan Telecommunications Approval Name of Equipment: AMC20493-KT5 TELEC approval number: D02-0005JP Name of Equipment: T60H424 Reference Guide... -
Page 113: New Zealand
New Zealand Conexant AMC20493-KT5 Data Fax Modem PTC 211/02/071 PTC200 General Warning The grant of a Telepermit for any item of terminal equipment indicates only that Telecom has accepted that the item complies with minimum conditions for connection to its network. It indicates no endorsement of the product by Telecom, nor does it provide any sort of warranty. -
Page 114: Russia
Reference Information Regulatory Information Russia International Products sold internationally by the manufacturer and its authorized dealers meet the specifications listed on the following page. Note For regulatory identification purposes, your product is assigned a Regulatory Model Number. The Regulatory Model Number for your product is listed in the declaration below. - Page 115 Hewlett-Packard Company, Personal Systems Group Manufacturer’s Address: 19310 Pruneridge Ave., Cupertino, CA 95014, U.S.A. declares that the following product Product Name: Compaq Notebook Series Regulatory Model CRVSA-02T1-75 Number: Includes all options for analog modems (Conexant) and 802.11b RF devices (Ambit)
-
Page 116: Index
Index AC adapter compatibility, 11, 54 connecting, 11 AC adapter jack location, 4, 5 AdHoc wireless network setup, adjusting brightness, 19 volume, 19 airplanes, wireless communication in, 41, 43 ALT GR key, 21 antistatic precautions, 57, 59 Applications key, 21 AT commands, 37 audio adjusting volume, 66... -
Page 117: Laser Safety
replacing, 61 troubleshooting, 69 Hibernation status lights, 8 Hibernation mode definition, 16 Hibernation partition, 61, 86 hot computer, 69 hot keys, 19 IEEE 1394 port connecting devices, 52 location, 4, 5 infrared communication troubleshooting, 70 infrared port location, 3 printing, 53 safety, 99 troubleshooting, 70 inserting... - Page 118 Standby resuming and, 80 saving power, 34 status lights, 8 troubleshooting, 80 Standby mode and display life, 28 definition, 16 timeout, 16 startup, troubleshooting, 80 static electricity, 57, 59 status lights battery charge, 32 keyboard, 3 location, 3 meanings, 8 S-Video port, 4, 5 taskbar PC Card, 49...
Need help?
Do you have a question about the AMC20493-KT5 and is the answer not in the manual?
Questions and answers