
Related Manuals for EOS Invisio Midi NA


Summary of Contents for EOS Invisio Midi NA
- Page 1 EOS Invisio Midi NA Heater for Sauna Cabins Installation and Operating Instructions Made in Germany Druck-Nr.: 2902 5260 Stand: 50/22...
-
Page 2: Documentation
Table title Title of figure ≤ ≥ Less than or equal to, greater than or equal to Revision history Date Version Description 15 May 2022 01.00 First version EN-2 Installation and Operating Instructions - EOS Invisio Midi NA... -
Page 3: Table Of Contents
Attaching warning plates inside the cabin ........EN-40 4 Connections...................... EN-41 General instructions for electrical installation ......EN-41 Connections .................... EN-42 Internal wiring ..................EN-43 Establishing an electrical connection ..........EN-45 Heating time limitation ............... EN-45 EOS Invisio Midi NA - Installation and Operating Instructions EN-3... - Page 4 Water splash ....................EN-47 6 Maintenance .....................EN-48 Cleaning ....................EN-48 Sauna stones....................EN-48 Replacing the heating elements ............EN-51 Resetting the safety temperature limiter........EN-56 Troubleshooting..................EN-57 7 General terms and conditions of service ..........EN-58 8 Disposal.......................EN-61 EN-4 Installation and Operating Instructions - EOS Invisio Midi NA...
-
Page 5: General Safety Instructions
Fire hazard from overheating Insufficient ventilation can lead to device overheating and fire. Install air inlets and outlets in the cabin. Observe the cabin manufacturer’s safety and installation in- structions. EOS Invisio Midi NA - Installation and Operating Instructions EN-5... - Page 6 Multiple heaters may be installed in one sauna if the heater out- put can properly supply the cabin volume. In this case, depend- ing on the position, an additional safety temperature limiter must be installed for each additional heater. EN-6 Installation and Operating Instructions - EOS Invisio Midi NA...
- Page 7 The cabin door must open outward and must not have a lock that cannot be opened in the case of failure. We recommend magnetic or spring locks. EOS Invisio Midi NA - Installation and Operating Instructions EN-7...
-
Page 8: Operator Instruction
Inspect the sauna cabin prior to each commis- sioning. If you switch on the heater using pre-set timers or a remote con- trol, attach a protective cover to the heater or install a suitable safety system. EN-8 Installation and Operating Instructions - EOS Invisio Midi NA... - Page 9 Leave the sauna cabin if your body responds abnormally to the heat or if you do not feel well. Avoid alcohol, drugs, and medications when you are using the sauna. EOS Invisio Midi NA - Installation and Operating Instructions EN-9...
- Page 10 Children and persons who have not received proper instruction must not clean or service the system. EN-10 Installation and Operating Instructions - EOS Invisio Midi NA...
-
Page 11: Heater And Cabin Labels
Location of control unit in a dry area / Emplacement de l’unité de commande dans une zone sèche Print no. 29345299 / 14.22 EmoTec USA/CAN D/H Print no. 2934 5300 / 14.22 EOS Invisio Midi NA - Installation and Operating Instructions EN-11... - Page 12 ELECTROCUTION AND BURNS Do Not Operate Unless Guard Is In Place. 29344837_F38.1_ 20016970 29344841_F38.3_20016094 AVERTISSEMENT AVERTISSEMENT RÉDUIRE LE RISQUE D’ÉLECTROCUTION RÉDUIRE LE RISQUE DE ÉLECTROCUTION ET BRÛLURES 29345263_F38.1 / 2001xxxx EN-12 Installation and Operating Instructions - EOS Invisio Midi NA...
- Page 13 Séjourner trop longtemps dans une 2. Surveillez les enfants à tout moment. ceinte, en mauvaise santé ou sous traitement médical. entraîner une perte de conscience. 29345267_F38.4 / 2001xxxx EOS Invisio Midi NA - Installation and Operating Instructions EN-13...
-
Page 14: Safety Levels
Local regulations also apply to the installation and operation of heating, sauna, and steam room systems. EN-14 Installation and Operating Instructions - EOS Invisio Midi NA... -
Page 15: Identification
Identification Identification EOS Invisio Midi NA is an electrically heated sauna heater for Finnish mode available in a variety of output capacities. Requirements for operation The heater can be operated with the following control unit: EOS EmoTec D/H USA/CAN The control unit is not included in the scope of delivery. -
Page 16: Scope Of Delivery
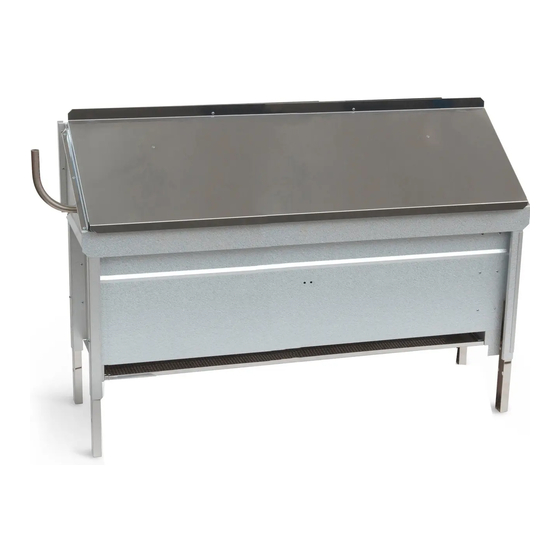
D Sauna heater with hood and water B Protective grill channel (completely installed) C Angled tube of stainless steel E 4 adjustable legs F Installation instructions G Mounting material and warning plate Scope of delivery EN-16 Installation and Operating Instructions - EOS Invisio Midi NA... -
Page 17: Technical Data
All line cross-section specifications are the minimum cross-sections in mm for a copper line. The following fuses are permitted: Class G, H, J, K Type S plug-in fuse Edison base EOS Invisio Midi NA - Installation and Operating Instructions EN-17... - Page 18 50.6–79.7 sq. ft. x 6.2 ft. 1.2 x 0.2 ft 7.4–9.5 sq. m x 1.90 m 35 x 7 cm 12 kW 79.7–102.3 sq. ft. x 6.2 ft. 1.2 x 0.3 ft EN-18 Installation and Operating Instructions - EOS Invisio Midi NA...
-
Page 19: Intended Use
Operating, service and maintenance requirements are not observed. The unit is operated by children or persons with reduced mental capac- ity or by persons who have not been thoroughly instructed in its use. EOS Invisio Midi NA - Installation and Operating Instructions EN-19... - Page 20 The first time the cabin is heated, you may notice a slight odor resulting from the evaporation of consumables used in the manufacturing pro- cesses. Air out your cabin once it has been heated and before using the sauna. EN-20 Installation and Operating Instructions - EOS Invisio Midi NA...
-
Page 21: Installation
Observe the requirements and instructions of the cabin manufacturer as well. Front view (mm), EN-22 Side view (mm), EN-23 Front view (inches), EN-24 Side view (inches), EN-25 EOS Invisio Midi NA - Installation and Operating Instructions EN-21... - Page 22 F Air inlet perature limiter Front view (mm) The heater can also be set up so that the connections for water and the mains supply are on the left side. EN-22 Installation and Operating Instructions - EOS Invisio Midi NA...
- Page 23 Installation dimensions in mm > 10 > 30 A Protective grill D Sauna bench B Temperature sensor/safety tem- E Air inlet perature limiter F Trough C Dividing wall Side view (mm) EOS Invisio Midi NA - Installation and Operating Instructions EN-23...
- Page 24 F Air inlet perature limiter Front view (inches) The heater can also be set up so that the connections for water and the mains supply are on the left side. EN-24 Installation and Operating Instructions - EOS Invisio Midi NA...
- Page 25 Installation dimensions in inches > 0.4 > 1.2 12.4 A Protective grill D Sauna bench B Temperature sensor/safety tem- E Air inlet perature limiter F Trough C Dividing wall Side view (inches) EOS Invisio Midi NA - Installation and Operating Instructions EN-25...
-
Page 26: Temperature Sensor
Ensure that the air inlets and outlets provide sufficient ventila- tion. Install a fan if necessary. Commission the cabin only after all air inlets and outlets have been opened. EN-26 Installation and Operating Instructions - EOS Invisio Midi NA... -
Page 27: Connecting Cables
The supplied protective grill is mounted above the heater on the top edge of the dividing wall facing the sauna’s rear wall. This prevents objects from falling onto the heater. Two people should always transport the heater. EOS Invisio Midi NA - Installation and Operating Instructions EN-27... - Page 28 Unpack the heater from the cardboard box and remove all transport locks and protective films. The heater must be lying down on its rear side to install the enclosed legs. EN-28 Installation and Operating Instructions - EOS Invisio Midi NA...
- Page 29 Adjust all legs so they are the same height. Fix each leg at the selected height using one of the supplied self-tapping screws (4.2 x 9.5). Set the heater upright again. EOS Invisio Midi NA - Installation and Operating Instructions EN-29...
-
Page 30: Removing The Hood (Air Deflection Hood
There are 2 screws on each side (C), one screw in the lower middle at the rear (A). A Middle retaining screw C 4 retaining screws for top side pan- B Hood Remove the hood (B) by lifting it up. EN-30 Installation and Operating Instructions - EOS Invisio Midi NA... - Page 31 Pull the sensor out of the bracket and place it in the heater. Remove the hood completely. Set up the heater so that the mains connection is on the desired side. EOS Invisio Midi NA - Installation and Operating Instructions EN-31...
-
Page 32: Connecting The Connecting Cables To The Heater
See also 4.2 Connections, EN-42. 9,0 kW = 6 x 1500 W AWG 12 V1 V2 W1 W2 AWG 12 AWG 12 AWG 12 Example: 9 kW EN-32 Installation and Operating Instructions - EOS Invisio Midi NA... - Page 33 The spacers on the back ensure proper distancing. Guide the cable from the cabin to the control unit. Leave enough cable in the sauna so that the heater can be moved from its spot for maintenance. EOS Invisio Midi NA - Installation and Operating Instructions EN-33...
-
Page 34: Filling The Rock Store
A Rock store Place layers of natural stones in small piles around the rock store. Do not place the stones on the edge. The air must flow freely. EN-34 Installation and Operating Instructions - EOS Invisio Midi NA... -
Page 35: Mounting The Safety Temperature Limiter Sensor
The capillary tube pipe may not be kinked or squashed by the heater legs. Insert the sensor into the hood’s bracket. A Carrier plate with bracket for the B Sensor sensor C Capillary tube pipe EOS Invisio Midi NA - Installation and Operating Instructions EN-35... -
Page 36: Installing The Water Channel
Place the water channel in the hood from below in the desired direction. The water channel’s incline must be directed away from the water splash connection. Attach the water channel on the side of the hood. EN-36 Installation and Operating Instructions - EOS Invisio Midi NA... -
Page 37: Mounting The Hood (Air Deflection Hood
Screw in the top 4 screws in the side panels and the retaining screw in the middle again. A Middle retaining screw B 4 retaining screws Remove the protective film on the hood completely, if necessary. EOS Invisio Midi NA - Installation and Operating Instructions EN-37... -
Page 38: Installing The Trough
D Angled tube Attach the silicone hose to the trough and the angled tube. The hose must lead down to the angled tube. Ensure that the tube has no kinks. EN-38 Installation and Operating Instructions - EOS Invisio Midi NA... -
Page 39: Dividing Wall And Protective Grill
Install the dividing wall so that the specified minimum clearance dis- tances are observed. See 3.1.2 Installation site, EN-21. A Protective grill B Dividing wall (example) Check that the dividing wall is securely in place. EOS Invisio Midi NA - Installation and Operating Instructions EN-39... -
Page 40: Attaching Warning Plates Inside The Cabin
Attaching the warning plate Attach the warning plate with 4 screws near the shaft on the inside wall of the cabin so it is clearly visible at eye level. EN-40 Installation and Operating Instructions - EOS Invisio Midi NA... -
Page 41: Connections
If, during commissioning, the RCD is triggered, the electrical installation must be checked again. The electrician is responsible for properly connecting the heaters; thus, the manufacturer does not assume liability. EOS Invisio Midi NA - Installation and Operating Instructions EN-41... -
Page 42: Connections
See also 2.4 Technical data, EN-17. Connection diagrams 6–9 kW 208 V 240 V 12 kW A Control unit C Heater B Safety temperature limiter D Power supply for control unit Connection diagram EN-42 Installation and Operating Instructions - EOS Invisio Midi NA... -
Page 43: Internal Wiring
Connections Internal wiring 6,0 kW = 3 x 2000 W AWG 12 V1 V2 W1 W2 AWG 12 Internal wiring 6 kW EOS Invisio Midi NA - Installation and Operating Instructions EN-43... - Page 44 Internal wiring 9 kW 12,0 kW = 6x 2000 W AWG 12 AWG 12 V1 V2 W1 W2 U1 V1 V2 W1 W2 U1 AWG 12 AWG 12 Internal wiring 12 kW EN-44 Installation and Operating Instructions - EOS Invisio Midi NA...
-
Page 45: Establishing An Electrical Connection
Connect the cable as described in the installation instructions for the re- lay box. Heating time limitation The heating time limitation is implemented by the control system. Refer to the installation and operating instructions of the control unit. EOS Invisio Midi NA - Installation and Operating Instructions EN-45... -
Page 46: Commissioning
Switching the system on Switch the sauna control unit on. The heater is switched on via the control unit. Use the control unit to select a suitable program. EN-46 Installation and Operating Instructions - EOS Invisio Midi NA... -
Page 47: Water Splash
After each water splash, wait approx. 10 minutes before starting the next one. This time is needed for the sauna stones to reheat. EOS Invisio Midi NA - Installation and Operating Instructions EN-47... -
Page 48: Maintenance
Check the sauna stones at least once per year and replace any defective stones. Use only natural sauna stones when you refill the rock store. Due to their roughness, they produce a better water splash effect than ceramic sauna stones. EN-48 Installation and Operating Instructions - EOS Invisio Midi NA... - Page 49 Remove the 5 screws from the hood. There are 2 screws on each side (B) and one screw in the lower middle at the rear (A). A Middle retaining screw B 4 retaining screws EOS Invisio Midi NA - Installation and Operating Instructions EN-49...
- Page 50 See Mounting the safety temperature limiter sensor, EN-35 Replace the hood and screw in the 5 screws. The capillary tube pipe may not be kinked or pinched off in the pro- cess. EN-50 Installation and Operating Instructions - EOS Invisio Midi NA...
-
Page 51: Replacing The Heating Elements
CAUTION! Allow the heater to cool before starting work. Provide access to the heater. Depending on the design of the cabin, you can, for example, remove the upper sauna bench. EOS Invisio Midi NA - Installation and Operating Instructions EN-51... - Page 52 There are 2 screws on each side and one screw in the lower middle at the rear. Carefully swing the hood upwards. The capillary tube pipe may not be kinked or squashed. EN-52 Installation and Operating Instructions - EOS Invisio Midi NA...
- Page 53 Unscrew the 2 screws in the support plate (D) and push the support plate outward. Carefully lower the heating elements onto the wood underneath. The capillary tube pipe may not be kinked or squashed. EOS Invisio Midi NA - Installation and Operating Instructions EN-53...
- Page 54 Insert the new heating element. Fix the heating element with the lock washer and nut. Plug in the flat plug. Check the wiring on all heating elements before reclosing the termi- nal box. EN-54 Installation and Operating Instructions - EOS Invisio Midi NA...
- Page 55 Replace the hood and screw in the 5 screws. The capillary tube pipe may not be kinked or squashed. Firmly insert the angled tube with water connection in the side opening again. Restart the heater. EOS Invisio Midi NA - Installation and Operating Instructions EN-55...
-
Page 56: Resetting The Safety Temperature Limiter
If the pin does not click into place, the heater has not cooled down fully. Replace the black cap and tighten it. Switch on the heater via the control unit. EN-56 Installation and Operating Instructions - EOS Invisio Midi NA... -
Page 57: Troubleshooting
The position of the Check the position of the safety safety temperature temperature limiter and adjust limiter is not optimal. as needed. See 3.1.3 Temperature sensor, EN-26. EOS Invisio Midi NA - Installation and Operating Instructions EN-57... -
Page 58: General Terms And Conditions Of Service
The customer shall provide assistance free of charge to the manufacturer in rendering services. In the case of a warranty claim, the manufacturer shall provide spare parts necessary for servicing free of charge. EN-58 Installation and Operating Instructions - EOS Invisio Midi NA... - Page 59 Wear parts shall include, for example, light sources, glass elements, tubular heating elements and sauna heater stones. Only original spare parts may be used within the warranty period. EOS Invisio Midi NA - Installation and Operating Instructions EN-59...
- Page 60 Complaints in respect of our products shall be reported to the responsible distributor and shall be handled exclusively by said distributor. The manufacturer’s General Terms and Conditions of Business, in the ver- sion available at www.eos-sauna.com/agb, shall apply in addition to the foregoing terms and conditions of service. EN-60...
-
Page 61: Disposal
The following materials are used in the packaging: Used paper, cardboard Plastic foil Electronic waste Electronic waste should be disposed of at a designated local collection point for electronic waste. EOS Invisio Midi NA - Installation and Operating Instructions EN-61... - Page 62 EN-62 Installation and Operating Instructions - EOS Invisio Midi NA...
- Page 63 EOS Invisio Midi NA - Installation and Operating Instructions EN-63...
- Page 64 Store this address with the installation and operating instructions in a safe place. Please always provide us with nameplate data, such as model, item num- ber and serial number so we can provide fast and efficient support. Date of sale Stamp/retailer signature: © EOS Saunatechnik GmbH - All rights reserved.
Need help?
Do you have a question about the Invisio Midi NA and is the answer not in the manual?
Questions and answers