Advertisement
Available languages
Available languages
Advertisement
Table of Contents

Related Manuals for OXFORD BABY WESTON 12145


Summary of Contents for OXFORD BABY WESTON 12145
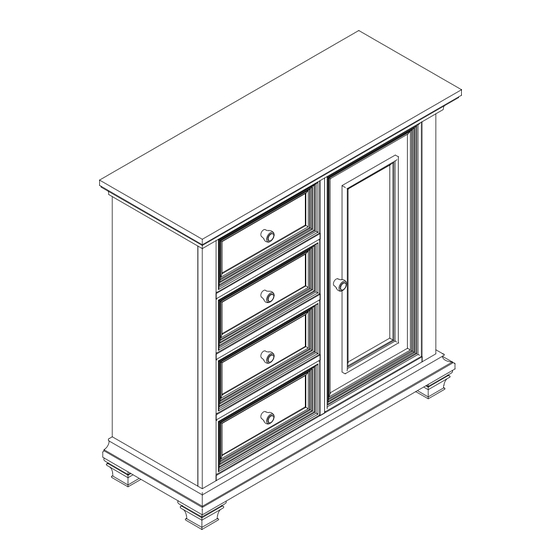
- Page 1 ASSEMBLY INSTRUCTIONS WESTON CHIFFEROBE Model #12145 100-12145-V-01 1 of 4...
- Page 2 Thank you for your purchase! Remove all parts and hardware from the box and lay on a carpeted or scratch -free work surface. Do not dispose of any contents until assembly is completed. TOOLS REQUIRED: ALLEN KEY (Included) PARTS ENCLOSED IN CARTON A.
- Page 3 STEP 1 "ASSEMBLY OF CHIFFEROBE" THIS STEP REQUIRES : (F) Allen key (1 pc) (length may vary) (E) Spring washer (4 pcs) A. Chifferobe (1 pc) B. Front foot (2 pcs) (D) Allen Bolt 3-1/2" (90 mm) (4 pcs) C. Back foot (2 pcs) STEP 1: - Open a drawer and take the feet.
- Page 4 STEP 2 "SHELVES ADJUSTMENT" The product is ready for use after removing all packing material. If you want to move the shelves up or down follow these steps: 1.Before removing the shelves, unscrew and remove the screws, which are attached to the shelf pegs underneath the shelves, with a screw driver.
- Page 5 INSTRUCTIONS DE MONTAGE ARMOIRE WESTON Modèle n° 12145 100-12145-V-01 1 sur 4...
- Page 6 Merci pour votre achat ! Retirez toutes les pièces et le matériel de la bo ît e et posez-les sur une surface de travaile recouverte de moquette. Ne jetez aucun contenu avant la fin du montage. Familiarisez-vous avec toutes les pièces et les shémas pour faciliter le montage de votre lit d'enfant. OUTILS NÉCESSAIRES: CLÉ...
- Page 7 ÉTAPE 1 "ASSEMBLAGE DE ARMOIRE" (F) Clé Allen (1 pièce) CETTE ÉTAPE EXIGE : (E) Rondelle à ressort (4 pièces) A. Armoire (1 pièce) B. Pied avant (2 pièces) (D) Boulon Allen 3-1/2" (90 mm) (4 pièces) C. Pied arrière (2 pièces) ÉTAPE 1: - Ouvrez un tiroir et prenez les pieds.
- Page 8 ÉTAPE 2 "RÉGLAGE DES ÉTAGÈRES" Le produit est prêt à l'emploi après avoir enlevé tout le matériel d'emballage. Si vous voulez déplacer les étagères vers le haut ou vers le bas, suivez les étapes suivantes : 1. Avant d'enlever les étagères, dévisser et enlever les vis, qui sont attachés aux chevilles d'étagère sous les étagères, avec un tournevis.
Need help?
Do you have a question about the WESTON 12145 and is the answer not in the manual?
Questions and answers