Advertisement
Available languages
Available languages
Quick Links
Advertisement

Subscribe to Our Youtube Channel
Related Manuals for OXFORD BABY MONTAUK 12233


Summary of Contents for OXFORD BABY MONTAUK 12233
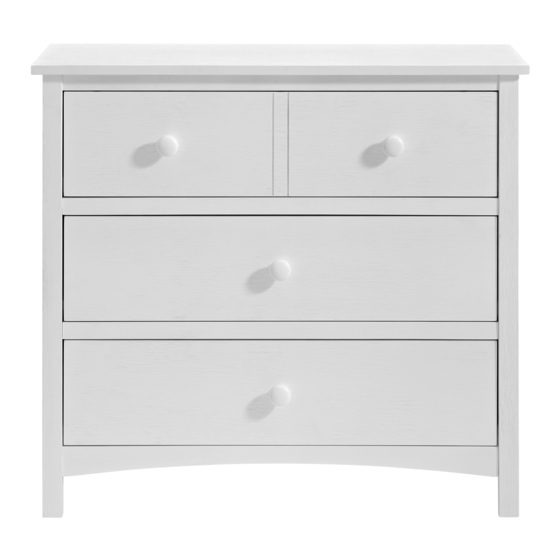
- Page 1 ASSEMBLY INSTRUCTIONS MONTAUK 3 DRAWER DRESSER Model #12233 90-12233-V-01 1 of 8...
-
Page 2: Tools Required
Thank you for your purchase! Remove all parts and hardware from the box and lay on a carpeted or scratch -free work surface. Do not dispose of any contents until assembly is completed. TOOLS REQUIRED: ALLEN KEY (included) SCREW DRIVER (Not Included) PARTS ENCLOSED IN CARTON 1. - Page 3 TOOLS REQUIRED: ALLEN KEY (included) SCREW DRIVER (Not Included) HARDWARE (A) Allenbolt 2-3/4" (70mm) (12 pcs) (B) Allenbolt 1-1/2" (38 mm) (10 pcs) (C) Barrel nut (12 pcs) (D) Spring washer (19 pcs) (E) Crescent washer (3 pcs) (F) Dowel Ø8x30mm (6 pcs) (G) Dowel Ø6x30mm (12 pcs) (H) Screw 1"...
- Page 4 STEP 1 " ASSEMBLY OF DRESSER" THIS STEP REQUIRES : (L) Allen key (1 pc) (A) Allenbolt 2-3/4" (70mm) (6 pcs) 2. Left side (1 pc) 4. Top front rail (1 pc) 5. Drawer rail (2 pcs) 6. Bottom rail (1 pc) (D) Spring washer (6 pcs) (F) Dowel Ø8x30mm (2 pcs) (C) Barrel nut (6 pcs)
- Page 5 STEP 2 " ASSEMBLY OF DRESSER" THIS STEP REQUIRES : (L) Allen key (1 pc) (A) Allenbolt 2-3/4" (70mm) (6 pcs) 3. Right side (1 pc) (D) Spring washer (6 pcs) (F) Dowel Ø8x30mm (2 pcs) (C) Barrel nut (6 pcs) FIG 3 FIG 4 STEP 2 :...
- Page 6 STEP 3 " ASSEMBLY OF DRESSER" THIS STEP REQUIRES : (L) Allen key (1 pc) (B) Allenbolt 1-1/2" (38 mm) (10 pcs) 1. Top panel (1 pc) (E) Crescent washer (3 pcs) (D) Spring washer (7 pcs) (F) Dowel Ø8x30mm (2 pcs) BACK SIDE STEP 3 : - Flip up the dresser.
- Page 7 STEP 4 " ASSEMBLY OF DRAWER" THIS STEP REQUIRES : (J) Bolt 1" (25 mm) (4 pcs) (H) Screw 1" (25 mm) (30 pcs) (K) Knob (4 pcs) 9. Top drawer front (1 pc) 10. Bottom drawer front (2 pcs) 11.
- Page 8 STEP 5 " ASSEMBLY OF DRAWER" FIG 5 STEP 5 : Assembly drawer box to the dresser as shown. Complete as shown in FIG 5. Thank you. 90-12233-V-01 8 of 8...
-
Page 9: Instructions De Montage
INSTRUCTIONS DE MONTAGE COMMODE À 3 TIROIRS MONTAUK Model #12233 90-12233-V-01 1 sur 8... -
Page 10: Outils Nécessaires
Merci pour votre achat ! Retirez toutes les pièces et le matériel de la boîte et posez-les sur une surface de travail recouverte de moquette Ne jetez aucun contenu avant la fin du montage. OUTILS NÉCESSAIRES: TOURNEVIS (non inclus) CLÉ ALLEN (inclus) PIÈCES INCLUSES DANS LE CARTON 1. - Page 11 OUTILS NÉCESSAIRES: TOURNEVIS (non inclus) CLÉ ALLEN (inclus) MATÉRIEL (A) Boulon Allen 2-3/4" (70mm) (12 pièces) (B) Boulon Allen 1-1/2" (38 mm) (10 pièces) (D) Rondelle à ressort (19 pièces) (C) Écrou de canon (12 pièces) (E) Rondelle en croissant (3 pièces) (F) Cheville Ø8x30mm (6 pièces) (G) Cheville Ø6x30mm (12 pièces) (H) Vis 1"...
- Page 12 ÉTAPE 1 " ASSEMBLAGE DE COMMODE" (L) Clé Allen (1 pièce) CETTE ÉTAPE EXIGE : (A) Boulon Allen 2-3/4" (70mm) (6 pièces) 2. Côté gauche (1 pièce) 4. Barre avant supérieur (1 pièce) 5. Barre de tiroir (2 pièces) (D) Rondelle à ressort 6.
- Page 13 ÉTAPE 2 " ASSEMBLAGE DE COMMODE" (L) Clé Allen (1 pièce) CETTE ÉTAPE EXIGE : (A) Boulon Allen 2-3/4" (70mm) (6 pièces) 3. Côté droit (1 pièce) (D) Rondelle à ressort (6 pièces) (F) Cheville Ø8x30mm (2 pièces) (C) Écrou de canon (6 pièces) FIG 3 FIG 4 ÉTAPE 2 :...
- Page 14 ÉTAPE 3 " ASSEMBLAGE DE COMMODE" (L) Clé Allen (1 pièce) (B) Boulon Allen 1-1/2" (38 mm) (10 pièces) CETTE ÉTAPE EXIGE : 1. Panneau supérieur (1 pièce) (E) Rondelle en croissant (3 pièces) (D) Rondelle à ressort (7 pièces) (F) Cheville Ø8x30mm (2 pièces) BACK SIDE CÔTÉ...
- Page 15 ÉTAPE 4 " ASSEMBLAGE DU TIROIR" (H) Vis 1" (25 mm) (30 pièces) (H) Vis de bouton 1" (K) Bouton (4 pièces) CETTE ÉTAPE EXIGE : (25 mm) (4 pcs) 9. Avant du tiroir supérieur (1 pièce) 10. Avant du tiroir inférieur (2 pièces) 11.
- Page 16 ÉTAPE 5 " ASSEMBLAGE DU TIROIR" FIG 5 ÉTAPE 5 : Assemblage la boîte de tiroir à la commode comme indiqué. Complet comme le montre la FIG 5. Merci. 90-12233-V-01 8 sur 8...
Need help?
Do you have a question about the MONTAUK 12233 and is the answer not in the manual?
Questions and answers