Hoymiles HYS-3.0LV-EUG1 User Manual
Hide thumbs
Also See for HYS-3.0LV-EUG1:
- User manual (63 pages) ,
- Quick installation manual (33 pages) ,
- Quick installation manual (16 pages)
Table of Contents
Advertisement
Quick Links
Advertisement
Table of Contents

Related Manuals for Hoymiles HYS-3.0LV-EUG1


Summary of Contents for Hoymiles HYS-3.0LV-EUG1
- Page 1 Open Energy for All USER MANUAL HYS-3.0LV-EUG1/AUG1 HYS-3.6LV-EUG1/AUG1 HYS-4.6LV-EUG1/AUG1 HYS-5.0LV-EUG1/AUG1 HYS-6.0LV-EUG1/AUG1 HAS-3.0LV-EUG1/AUG1 HAS-3.6LV-EUG1/AUG1 HAS-4.6LV-EUG1/AUG1 HAS-5.0LV-EUG1/AUG1 Region: Global REV1.1 hoymiles.com...
-
Page 2: Table Of Contents
3.5.1.1 DTS Online Setting 3.5.1.2 System Commissioning of Wireless Access Point (AP) Connection 3.5.2 Commissioning 3.5.3 Decommissioning 4. Troubleshooting 5. Technical Datasheet 5.1 HYS Series Technical Parameters 5.2 HAS Series Technical Parameters Appendix A © 2023 Hoymiles Power Electronics Inc. All rights reserved. -
Page 3: Safety Introduction
After the inverter is turned off, wait for at least 10 minutes before opening the inverter or touching live parts. 10min Products shall not be disposed as household waste. CE mark. UKCA mark. © 2023 Hoymiles Power Electronics Inc. All rights reserved. -
Page 4: Safety Information
Safety instructions in this manual cannot cover all precautions that should be taken. Please consider the actual conditions on site when performing operations. Any damage caused by a violation of the safety instructions in this manual shall not be the responsibility of Hoymiles. Symbol... - Page 5 Please keep the user manual properly. • The manual contains no instructions for user-serviceable parts. See Warranty for instructions on obtaining service. • If an error occurs, contact your local distributor or qualified electricians. © 2023 Hoymiles Power Electronics Inc. All rights reserved.
-
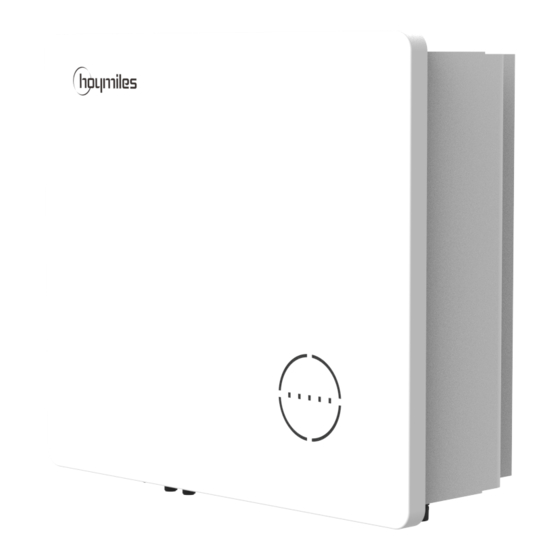
Page 6: Product Introduction
Label Emergency Power Supply (EPS) Connector PE Terminal (1) Only for HYS series inverters. (2) For HYS-LV-AUG1 series inverters, it has a DC switch lock. (3) Only for HYS series inverters. © 2023 Hoymiles Power Electronics Inc. All rights reserved. - Page 7 On – BMS and meter communications are normal Off – No fault On - A fault happens FAULT Blink 1 – EPS port overload Blink 2 – ISO/RCD fault Blink 3 – Arc fault © 2023 Hoymiles Power Electronics Inc. All rights reserved.
-
Page 8: Operating Modes
Meanwhile, the battery can be forced to charge from the grid Economic Mode during the preset charge time. For instance, the battery could be charged or discharged according to valley or peak electricity price. © 2023 Hoymiles Power Electronics Inc. All rights reserved. - Page 9 In case of frequent power outages, a backup power SOC can be Back-up Mode configured, which ensures that the battery always has enough energy to handle critical loads. Power flow of back-up mode © 2023 Hoymiles Power Electronics Inc. All rights reserved.
-
Page 10: System Diagram
This diagram is a simplified system sketch that is only intended to explain system architecture. • Please refer to https://www.hoymiles.com for compatible battery list, and the user should first contact Hoymiles for technical consultation and obtain official confirmation prior to installing any battery not included in the official published list. NOTICE •... -
Page 11: Basic Diagram
If the battery integrates a readily accessible internal DC breaker, no additional ① DC breaker is required. • • ⑥⑦ 30 mA RCD is recommended but not mandatory; please comply with local regulation. © 2023 Hoymiles Power Electronics Inc. All rights reserved. - Page 12 If the battery integrates a readily accessible internal DC breaker, no additional ① DC breaker is required. • • ⑥⑦ 30 mA RCD is recommended but not mandatory; please comply with local regulation. © 2023 Hoymiles Power Electronics Inc. All rights reserved.
- Page 13 If the battery integrates a readily accessible internal DC breaker, no additional ① DC breaker is required. • • ⑦⑧ 30 mA RCD is recommended but not mandatory; please comply with local regulation. © 2023 Hoymiles Power Electronics Inc. All rights reserved.
- Page 14 If the battery integrates a readily accessible internal DC breaker, no additional ① DC breaker is required. • • ⑦⑧ 30 mA RCD is recommended but not mandatory; please comply with local regulation. © 2023 Hoymiles Power Electronics Inc. All rights reserved.
-
Page 15: Retrofit System
The HYS/HAS-LV series inverter is compatible with any single-phase grid-connected PV inverters. With the addition of Hoymiles hybrid inverter or AC-coupled inverter, existing PV system can be retrofitted to be a PV Energy Storage System (ESS) allowing more self-consumption energy and more back-up energy. -
Page 16: Unacceptable Diagram
Hybrid Inverter User Manual 2.3.3 Unacceptable Diagram Avoid the following installation types to prevent damage to the system or the HYS/HAS series inverter. © 2023 Hoymiles Power Electronics Inc. All rights reserved. -
Page 17: Installation Instruction
Hybrid Inverter User Manual 3. Installation Instruction Packing List Please ensure that none of the components listed below are missing or damaged upon receipt of the hybrid inverter or AC-coupled inverter. HYS Series © 2023 Hoymiles Power Electronics Inc. All rights reserved. -
Page 18: Installation Tools
Wire stripper Hydraulic pliers Network cable crimper OT terminal PV terminal Tubular termianl Heavy-duty connector crimping tool Protective goggles crimping tool crimping tool crimping tool Safety gloves Dust mask Safety shoes © 2023 Hoymiles Power Electronics Inc. All rights reserved. -
Page 19: Mounting
6. The inverter should be installed at eye level for convenient maintenance. 7. The product label on the inverter should be clearly visible after installation. 8. The inverter should be installed far from flammable materials. © 2023 Hoymiles Power Electronics Inc. All rights reserved. -
Page 20: Mounting Inverter
Prepare the cable and OT/DT Step 1 terminal. Use the screw from the L=H+(2-3) mm S 6 mm² Step 2 accessory box. Then fasten the cable with a screwdriver. 1.2 N·m © 2023 Hoymiles Power Electronics Inc. All rights reserved. -
Page 21: Ac Wiring Connection
Assemble the parts in sequence. • Tighten the waterproof terminal clockwise. • Connect the grid connector to the inverter. Step 5 There should be a “click” sound, if it is plugged in correctly. Click © 2023 Hoymiles Power Electronics Inc. All rights reserved. -
Page 22: Gen Connection
Make sure the EPS load power rating is within the EPS output rating, otherwise the inverter will shut down with an “overload” warning. • For the nonlinear load, please make sure the inrush power should be within the EPS output power range. © 2023 Hoymiles Power Electronics Inc. All rights reserved. - Page 23 L/N/PE are correctly assembled. • Assemble the parts in sequence. • Tighten the waterproof terminal clockwise. Step 5 • Connect the EPS connector to the inverter and tighten it. © 2023 Hoymiles Power Electronics Inc. All rights reserved.
-
Page 24: Pv Wiring Connection
Step 4 inverter input limit of 550 V. • Connect the PV connectors to the inverter. There should be a “click” sound, if they are Click plugged in correctly. © 2023 Hoymiles Power Electronics Inc. All rights reserved. -
Page 25: Battery Wiring Connection
Click inverter. There should be a “click” sound if they are plugged in correctly. Lock • Push the button downward to lock the Step 4 connection with a “click“ sound. Click © 2023 Hoymiles Power Electronics Inc. All rights reserved. -
Page 26: Communication Wiring Connection
Dry contact output. The DO1 can be set to one of the DO1 (NO1, COM1) functions as follows: Earth Fault Alarm, Load Control and Generator Control. Dry contact output. The DO2 will control the bypass DO2 (NO2, COM2) contactor under certain logic. © 2023 Hoymiles Power Electronics Inc. All rights reserved. -
Page 27: Bms Connection
• Clip the Ethernet cable into the rubber ring. • Insert the RJ45 plug into the BMS port until it Step 5 clicks into place. • Tighten the cable gland. © 2023 Hoymiles Power Electronics Inc. All rights reserved. -
Page 28: Smart Meter And Ct Connection
Clamp CT to L line and connect wirings to 5/6 respectively. The arrow on the surface of CT should point to the grid. Step 1 • Connect the communication cable between the inverter and smart meter. Step 2 485B 485A • © 2023 Hoymiles Power Electronics Inc. All rights reserved. -
Page 29: Drm Connection
Disassemble the parts in sequence. • Strip the insulation layer of the communication cable, and lead the Step 3 corresponding signal cables out. Press the terminal. A: 35-45 mm B: 7-8 mm C: 0.2-0.35 mm² © 2023 Hoymiles Power Electronics Inc. All rights reserved. -
Page 30: Di Connection
There is an integrated DI (IN+, IN-) as the dry contact input to the bypass contactor of the inverter. The connection method is the same as that described in “3.3.5.3 DRM Connection“. Wiring the No.1 and No.2 holes if used, and the function of each connection position is shown below. © 2023 Hoymiles Power Electronics Inc. All rights reserved. -
Page 31: Do Connection
As shown in the figure, parallel operation is performed through PARA1/PARA2 interface. When inverters are used in parallel, the first and the last inverters are “ON”, and the others are “OFF”. © 2023 Hoymiles Power Electronics Inc. All rights reserved. -
Page 32: Dts Connection
Proper communication with the inverter. Improper communication with the inverter. Proper communication with S-Miles Cloud. Improper communication with S-Miles Cloud BLINK Improper communication with S-Miles Cloud, but the network is connected. © 2023 Hoymiles Power Electronics Inc. All rights reserved. -
Page 33: Operation
S-Miles End-user 3.5.1.1 DTS Online Setting 1. Search “Hoymiles” in the App Store (iOS) or the Play Store (Android), or scan the QR code to download the Hoymiles Installer App. 2. Open the app and log in with your installer account and password. For new Hoymiles installers, please apply for an installer account from your distributor in advance. - Page 34 5. Check the DTS indicator for a solid blue light, which signifies a successful connection. The network configuration takes about 1 minute, please be patient. If the network is not connected, please check the internet as instructed. © 2023 Hoymiles Power Electronics Inc. All rights reserved.
-
Page 35: System Commissioning Of Wireless Access Point (Ap) Connection
PV side meter also needs to be configured. 3. Click on “O&M → Toolkit”, access the Overview page and click the “Self-check”. The self check can be completed after PV, battery, grid, EPS and GEN are properly connected. © 2023 Hoymiles Power Electronics Inc. All rights reserved. -
Page 36: Commissioning
Step 6 Disconnect all the communication cables. Remove DTS and power meter. Remove the inverter from the wall, and remove the bracket if necessary. Step 7 Pack the inverter and accessories. © 2023 Hoymiles Power Electronics Inc. All rights reserved. -
Page 37: Troubleshooting
1. Check the specification and numbers of corresponding The PV voltage is higher than string PV modules. PV Overvoltage the permissible range. 2. If the alarm persists, contact Hoymiles technical support team. © 2023 Hoymiles Power Electronics Inc. All rights reserved. - Page 38 BMS Communication The inverter detects that there 2. Reconnect the BMS communication cable. Fault is a BMS communication fault. 3. If the alarm persists, contact Hoymiles technical support team. © 2023 Hoymiles Power Electronics Inc. All rights reserved.
- Page 39 BMS. battery manufacturer. The inverter detects that there Try to restart the inverter. If the fault persists, contact Relay Fault is a relay self-check fault. Hoymiles technical support team. © 2023 Hoymiles Power Electronics Inc. All rights reserved.
-
Page 40: Technical Datasheet
9200, 10s 10000, 10s 10000, 10s Nominal AC Voltage (V) Nominal AC Frequency (Hz) 50/60 Max. Output Current (A) 13.0 16.0 20.0 21.7 26.0 Total Harmonic Distortion <3% (@ linear load) © 2023 Hoymiles Power Electronics Inc. All rights reserved. - Page 41 (1) 4600 for VDE-AR-N 4105 & VDE0126-1-1; 4999 for AS/NZS 4777.2 (2) Max. output apparent power 3680 VA for TOR Erzeuger Type A (3) 21.7 A for AS/NZS 4777.2 (4) Can be achieved only if PV and battery power are sufficient. © 2023 Hoymiles Power Electronics Inc. All rights reserved.
- Page 42 9200, 10s 10000, 10s 10000, 10s Nominal AC Voltage (V) Nominal AC Frequency (Hz) 50/60 Max. Output Current (A) 13.0 16.0 20.0 21.7 26.0 Total Harmonic Distortion <3% (@ linear load) © 2023 Hoymiles Power Electronics Inc. All rights reserved.
- Page 43 EN 61000-6-1, EN 61000-6-3 (1) 4600 for VDE-AR-N 4105 & VDE0126-1-1; 4999 for AS/NZS 4777.2 (2) 21.7 A for AS/NZS 4777.2 (3) Can be achieved only if PV and battery power are sufficient. © 2023 Hoymiles Power Electronics Inc. All rights reserved.
-
Page 44: Has Series Technical Parameters
95.2% 95.2% Protection Anti-islanding Protection Integrated AC Over Current Protection Integrated AC Short Current Protection Integrated AC Overvoltage and Undervoltage Integrated Protection Surge Protection DC Type II / AC Type III © 2023 Hoymiles Power Electronics Inc. All rights reserved. - Page 45 IEC 62109-1, IEC 62109-2, IEC 62477-1 EN 61000-6-1, EN 61000-6-3 (1) 4600 for VDE-AR-N 4105 & VDE0126-1-1; 4999 for AS/NZS 4777.2 (2) Max. output apparent power 3680 VA for TOR Erzeuger Type A © 2023 Hoymiles Power Electronics Inc. All rights reserved.
- Page 46 95.2% 95.2% Protection Anti-islanding Protection Integrated AC Over Current Protection Integrated AC Short Current Protection Integrated AC Overvoltage and Undervoltage Integrated Protection Surge Protection DC Type II / AC Type III © 2023 Hoymiles Power Electronics Inc. All rights reserved.
- Page 47 Grid Regulation EN 50549, VDE-AR-N 4105, AS/NZS 4777.2 Safety Regulation IEC 62109-1, IEC 62109-2, IEC 62477-1 EN 61000-6-1, EN 61000-6-3 (1) 4600 for VDE-AR-N 4105 & VDE0126-1-1; 4999 for AS/NZS 4777.2 © 2023 Hoymiles Power Electronics Inc. All rights reserved.
- Page 48 AUSTRALIA-AS4777_ New Zealand Supported Supported Supported Supported Supported NZ-LV230 power grid Spain LV power RD1699/166 Supported Supported Supported Supported Supported grid Poland power EN50549-poland Supported Supported Supported Supported Supported grid © 2023 Hoymiles Power Electronics Inc. All rights reserved.
- Page 49 Israel power grid Supported Supported Supported Supported Supported Mexico power Supported Supported Supported Supported Supported grid *The power of Hoymiles hybrid inverter can be limited below 5000 VA in accordance with local grid requirements. © 2023 Hoymiles Power Electronics Inc. All rights reserved.
- Page 50 Supported Supported Supported C-LV230 AUSTRALIA-AS4777_ New Zealand power Supported Supported Supported Supported NZ-LV230 grid RD1699/166 Spain LV power grid Supported Supported Supported Supported EN50549-poland Poland power grid Supported Supported Supported Supported © 2023 Hoymiles Power Electronics Inc. All rights reserved.
- Page 51 Israel power grid Supported Supported Supported Supported Mexico power grid Supported Supported Supported Supported *The power of Hoymiles AC-coupled inverter can be limited below 5000 VA in accordance with local grid requirements. © 2023 Hoymiles Power Electronics Inc. All rights reserved.
- Page 52 S-Miles End-user Floor 6-10, Building 5, 99 Housheng Road, Gongshu District, Hangzhou 310015 P. R. China +86 571 2805 6101 General inquiry: info@hoymiles.com Technical support: service@hoymiles.com Visit https://www.hoymiles.com/ for more informations. © 2023 Hoymiles Power Electronics Inc. All rights reserved.
Need help?
Do you have a question about the HYS-3.0LV-EUG1 and is the answer not in the manual?
Questions and answers