
Related Manuals for Juniper SSG 500M Series


Summary of Contents for Juniper SSG 500M Series
- Page 1 Security Products SSG 500M-series Hardware Installation and Configuration Guide Juniper Networks, Inc. 1194 North Mathilda Avenue Sunnyvale, CA 94089 408-745-2000 www.juniper.net Part Number: 530-017259-01, Revision 06...
- Page 2 Juniper Networks, the Juniper Networks logo, JUNOS, NetScreen, ScreenOS, and Steel-Belted Radius are registered trademarks of Juniper Networks, Inc. in the United States and other countries. JUNOSe is a trademark of Juniper Networks, Inc. All other trademarks, service marks, registered trademarks, or registered service marks are the property of their respective owners.
-
Page 3: Table Of Contents
Table of Contents About This Guide Organization ....................5 Web User Interface Conventions .............. 6 Command Line Interface Conventions ............6 Requesting Technical Support ................7 Self-Help Online Tools and Resources............7 Opening a Case with JTAC ................. 7 Feedback ......................8 ........................ - Page 4 SSG 500M-series Installation and Configuration Guide Basic Device Configuration ................33 Admin Name and Password ..............34 Administrative Access ................34 Interface IP Address ................34 Management Services................35 Hostname and Domain Name ..............35 Domain Name System Server..............36 Date and Time..................36 Default Route...................
-
Page 5: About This Guide
ScreenOS version you are running. For the latest device documentation, refer to the Juniper Networks Technical Publications website at www.juniper.net/techpubs/hardware. To determine which ScreenOS versions are currently available for your device, refer to the Juniper Networks Support website at http://www.juniper.net/customers/support/. Organization This guide contains the following chapters and appendix: Chapter 1, “Hardware Overview,”... -
Page 6: Web User Interface Conventions
SSG 500M-series Installation and Configuration Guide Web User Interface Conventions The Web user interface (WebUI) contains a navigational path and configuration settings. To enter configuration settings, begin by clicking a menu item in the navigation tree on the left side of the screen. As you proceed, your navigation path appears at the top of the screen, with each page separated by angle brackets. -
Page 7: Requesting Technical Support
7 days a week, 365 days a year. Self-Help Online Tools and Resources For quick and easy problem resolution, Juniper Networks has designed an online self-service portal called the Customer Support Center (CSC) that provides you with the following features: Find CSC offerings—http://www.juniper.net/customers/support/... -
Page 8: Feedback
SSG 500M-series Installation and Configuration Guide For international or direct-dial options in countries without toll-free numbers, visit us at http://www.juniper.net/customers/support/requesting-support/. Feedback If you find any errors or omissions in this document, contact Juniper Networks at techpubs-comments@juniper.net. Feedback... -
Page 9: Hardware Overview
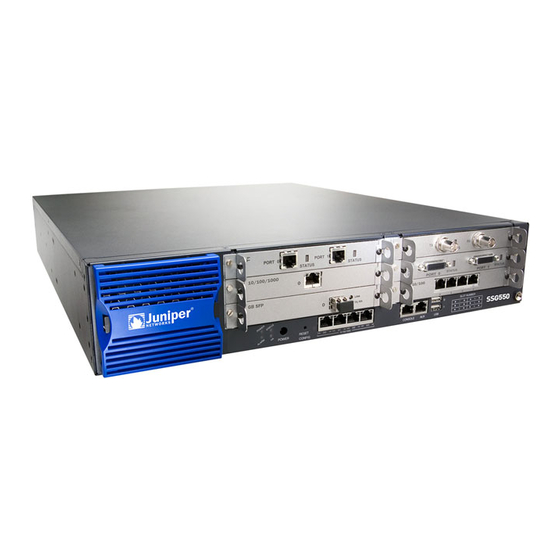
Chapter 1 Hardware Overview This chapter provides detailed descriptions of the Secure Services Gateway (SSG) 520M and SSG 550M device and components. It includes the following sections: “Front Panel” on page 9 “Back Panel” on page 14 Front Panel Figure 1 shows the front panel of an SSG 500M-series device. Figure 1: SSG 500M-series Front Panel (SSG 550M Shown, SSG 520M Similar) PIM Slot 1 PIM Slot 4... -
Page 10: Port Descriptions
SSG 500M-series Installation and Configuration Guide The following sections describe the elements on the front panel of an SSG 500M-series device: “Port Descriptions” on page 10 “Power Button” on page 11 “Reset Config Button” on page 11 “Device Status LEDs” on page 11 “Ethernet Port LEDs”... -
Page 11: Power Button
Hardware Overview Power Button The power button is located on the left side of the front panel. You use the power button to power the device on and off. When you power on the device, ScreenOS starts as the power supply completes its startup sequence. See “Powering the Device On and Off”... -
Page 12: Ethernet Port Leds
SSG 500M-series Installation and Configuration Guide Table 2: Device Status LED Descriptions (Continued) Name Color Status Description ALARM On steadily Critical alarm: Failure of hardware component or software module Firewall attacks detected Amber On steadily Major alarm: Low memory (less than 10% remaining) High CPU utilization (more than 90% in use) Session full Maximum number of VPN tunnels reached... -
Page 13: Physical Interface Module Slots
WAN PIM, uPIM or ePIM WAN PIM, uPIM or ePIM NOTE: When you install PIMs with Small Form-factor Pluggable (SFP) interfaces, Juniper strongly recommends the use of Juniper SFP transceivers. Juniper cannot guarantee correct operation if non-Juniper transceivers are used. The transceiver type can be different in each port, as long as a supported part number is used. -
Page 14: Back Panel
SSG 500M-series Installation and Configuration Guide To transfer data between a USB storage device and an SSG 500M-series device: 1. Connect the USB storage device to either the upper or lower USB port on the security device. 2. Save the files from the USB storage device to the internal flash storage on the device with the save {software | config | image-key} from usb filename to flash command. -
Page 15: Ac Power Supply Unit
Hardware Overview For PSU servicing instructions, see “Replacing Power Components (SSG 550M Only)” on page 48. NOTE: Do not mix SSG 550M PSU types. The only supported combinations are AC+AC and DC+DC. The POWER LED on the front panel of an SSG 500M-series device glows either green or red. -
Page 16: Dc Power Supply Unit
SSG 500M-series Installation and Configuration Guide Figure 6: SSG 550M Device Replaceable AC PSU Faceplate Ejector tab Input power light Power cord receptacle Handle DC Power Supply Unit The fixed DC PSU faceplate for an SSG 520M device contains an ejector tab, an input power light, and two DC power terminal blocks that connect to power cables. - Page 17 Hardware Overview To ground the device before connecting power, connect a grounding cable to earth ground and then attach the cable to the lug on the rear of the chassis. For more information, see “Chassis Grounding” on page 22. Back Panel...
- Page 18 SSG 500M-series Installation and Configuration Guide Back Panel...
-
Page 19: Installing And Connecting The Device
“Powering the Device On and Off” on page 26 “Connecting the Device to a Network” on page 26 For safety warnings and instructions, refer to the Juniper Networks Security NOTE: Products Safety Guide. When working on any equipment, be aware of the hazards involved with electrical circuitry, and follow standard practices for preventing accidents. -
Page 20: Before You Begin
SSG 500M-series Installation and Configuration Guide Before You Begin The location of the chassis, the layout of the equipment rack, and the security of your wiring room are crucial for proper device operation. CAUTION: To prevent abuse and intrusion by unauthorized personnel, install the device in a secure environment.
Need help?
Do you have a question about the SSG 500M Series and is the answer not in the manual?
Questions and answers