
Subscribe to Our Youtube Channel
Related Manuals for Juniper SSG 500M Series


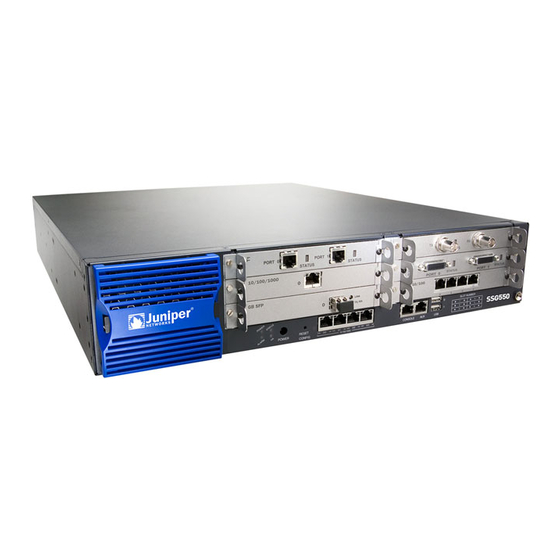
Summary of Contents for Juniper SSG 500M Series
- Page 1 Security Products SSG 500M Series Hardware Installation and Configuration Guide Juniper Networks, Inc. 1194 North Mathilda Avenue Sunnyvale, CA 94089 408-745-2000 www.juniper.net Part Number: 530-017259-01, Revision 02...
- Page 2 Copyright © 2007 Juniper Networks, Inc. All rights reserved. Juniper Networks and the Juniper Networks logo are registered trademarks of Juniper Networks, Inc. in the United States and other countries. All other trademarks, service marks, registered trademarks, or registered service marks in this document are the property of Juniper Networks or their respective owners.
-
Page 3: Table Of Contents
Document Conventions..................6 Command Line Interface Conventions............6 Naming Conventions and Character Types ..........7 Web User Interface Conventions ............... 8 Juniper Networks Documentation ..............8 Chapter 1 Hardware Overview Port and Power Connectors ................10 Front Panel ....................11 Device Status LEDs .................. - Page 4 SSG 500 M Series Hardware Installation and Configuration Guide Connecting a Device Using Ethernet Ports ........31 Connecting a Device Using Serial (AUX) Ports ........31 Connecting PIMs to an Untrusted Network ..........31 Connecting an Internal Network or a Workstation........32 Chapter 3 Configuring a Device Default Device Settings ..................
-
Page 5: About This Guide
SSG 500M Series device. Chapter 2, “Installing and Connecting a Device,” describes how to mount an SSG 500M Series device and how to connect cables and power to it. Chapter 3, “Configuring a Device,” describes how to configure and manage an SSG 500M Series device and how to perform some basic configuration tasks. -
Page 6: Document Conventions
SSG 500 M Series Hardware Installation and Configuration Guide Document Conventions This document uses several types of conventions, which are introduced in the following sections: “Command Line Interface Conventions” on this page “Naming Conventions and Character Types” on page 7 “Web User Interface Conventions”... -
Page 7: Naming Conventions And Character Types
About This Guide Naming Conventions and Character Types ScreenOS employs the following conventions regarding the names of objects—such as addresses, admin users, auth servers, IKE gateways, virtual systems, VPN tunnels, and zones—defined in ScreenOS configurations: If a name string includes one or more spaces, the entire string must be enclosed within double quotes;... -
Page 8: Web User Interface Conventions
IP/Netmask: (select), 10.2.2.5/32 Zone: Untrust Figure 1: Navigational Path and Configuration Settings Juniper Networks Documentation To obtain technical documentation for any Juniper Networks product, visit www.juniper.net/techpubs/. For technical support, open a support case using the Case Manager link at http://www.juniper.net/support/ or call 1-888-314-JTAC (within the United States) or 1-408-745-9500 (outside the United States). -
Page 9: Hardware Overview
Chapter 1 Hardware Overview This chapter provides detailed descriptions of the Secure Services Gateway (SSG) 500M Series security devices, namely the SSG 520M and SSG 550M chassis and components. It includes the following sections: “Port and Power Connectors” on page 10 “Front Panel”... -
Page 10: Port And Power Connectors
Power AUX port button Reset config Ethernet Console port button ports Table 1: SSG 500M Series Port and Cable Connector Descriptions Port Labels Description Connector Speed/Protocol 0/0-0/3 Enables direct connections to workstations or a LAN RJ-45 10/100 Mbps Ethernet connection through a switch or hub. This... -
Page 11: Front Panel
Physical Interface Modules Device Status LEDs The SSG 500M Series device status LEDs display information about critical device functions. When the device powers up, the STATUS LED changes from off to blinking green. Startup takes approximately 90 seconds. If you want to turn the device off and on again, we recommend you wait a few seconds between shutting it down and restarting it. -
Page 12: Port Descriptions
SSG 500 M Series Hardware Installation and Configuration Guide Name Color Status Description ALARM On steadily Critical alarm: Failure of hardware component or software module Firewall attacks detected Amber On steadily Major alarm: Low memory (less than 10% remaining) High CPU utilization (more than 90% in use) Session full Maximum number of VPN tunnels reached HA status changed or redundant group member... -
Page 13: Console Port
Figure 3: Activity Link LEDs TX/RX LINK Table 3: LAN Port LEDs Name Function Color State Description LINK Link Green On steadily Port is online TX/RX Activity Green Blinking Port is receiving data Port might be on, but it is not receiving data Console Port The console port is an RJ-45 serial data terminal equipment (DTE) port that can be... -
Page 14: Physical Interface Modules
If a slot is unoccupied, a PIM blank panel must be installed to shield the empty slot and to allow cooling air to circulate properly through the chassis. The SSG 500M Series devices support the following PIMs: Gigabit Ethernet Dual-Port Serial... -
Page 15: Pim Summary
PIM Summary Figure 4 shows the slot numbering on an SSG 520M device. Table 4 shows the PIM types you can install in the slots of an SSG 520M device. The E located on some of the slots identifies where the enhanced PIMs (EPIMs) can be installed. CAUTION: PIMs are not hot-swappable. -
Page 16: Gigabit Ethernet
Active with a local alarm; device has detected a failure Gigabit Ethernet In addition to the four built-in Gigabit Ethernet ports, the SSG 500M Series devices also supports the field-replaceable Gigabit Ethernet PIM, which provides a physical connection to Gigabit Ethernet network media types. The field-replaceable Gigabit Ethernet PIM is available in two versions, copper and optical, and each version has one port. -
Page 17: Dual-Port Serial
Figure 7: Optical Gigabit Ethernet PIM Configure Gigabit Ethernet interfaces up to a Maximum Transmission Unit (MTU) NOTE: size of 1518 bytes. The CLI allows you to configure an MTU of up to 9192 bytes; however, packets greater than 1518 bytes will be dropped. Dual-Port Serial The dual-port serial PIM (shown in Figure 8) provides a physical connection to serial network media types through two serial interface ports. -
Page 18: Dual-Port T1 Or E1
SSG 500 M Series Hardware Installation and Configuration Guide Dual-Port T1 or E1 The dual-port T1 PIM (shown in Figure 9) and dual-port E1 PIM (shown in Figure 10) provide a physical connection to T1 or E1 network media types. Each PIM has two physical T1 or E1 ports with an integrated channel service unit (CSU) or data service unit (DSU). -
Page 19: Dual-Port T3
Dual-Port T3 The dual-port T3 (also known as DS3) PIM (shown in Figure 11) provides a physical connection to T3 network media types. The T3 PIM includes two physical T3 ports with integrated data service unit (DSU). Figure 11: T3 PIM The T3 PIM provides the following key features: Onboard network processor Integrated DSU—eliminates the need for a separate external device... -
Page 20: Back Panel
SSG 500 M Series Hardware Installation and Configuration Guide Back Panel The back panel of an SSG 500M Series device contains the fan tray and power supply unit(s) and a two-hole grounding lug. Figure 13: Back Panel of an SSG 500M Series Device... -
Page 21: Ac Power Supply Unit
AC Power Supply Unit The fixed AC PSU faceplate for an SSG 520M device contains a power switch and a male power-cord receptacle. The fixed AC PSU does not have a power LED on the PSU. Figure 14: SSG 520M Device Fixed AC PSU Faceplate Power switch Power cord receptacle... -
Page 22: Dc Power Supply Unit
SSG 500 M Series Hardware Installation and Configuration Guide DC Power Supply Unit The fixed DC PSU faceplate for an SSG 520M device contains an ejector tab, an input power light, and two DC power terminal blocks that connect to power cables. Figure 16: SSG 520M Device Fixed DC PSU Faceplate Ejector tab Input... -
Page 23: Installing And Connecting A Device
Chapter 2 Installing and Connecting a Device This chapter describes how to install an SSG 500M Series device in a standard 19-inch equipment rack and how to connect cables and power to the device. This chapter includes the following sections: “Before You Begin”... -
Page 24: Before You Begin
You can rack-mount a device into a standard 19-inch equipment rack. The device is shipped with mounting brackets. You can mid- or front-mount a SSG 500M Series device in a rack. In general, a center-mount rack is preferable to a front-mount rack because the more even distribution of weight in the center-mount rack provides greater stability. - Page 25 Front-mount: attach the left and right mounting brackets to the front of each side of the chassis. To install an SSG 500M Series device into a rack, perform the following steps: 1. Have one person grasp the sides of the device, lift the device, and position it in the rack.
-
Page 26: Connecting Interface Cables To A Device
SSG 500 M Series Hardware Installation and Configuration Guide Connecting Interface Cables to a Device To connect interface cables to a device, perform the following steps: 1. Have ready a length of the type of cable used by the interface. 2. -
Page 27: Dc Power
Connect one end of the grounding cable to a proper earth ground, such as the rack in which the device is installed. Connect the other end of the grounding cable to the two-hole grounding lug at the rear of an SSG 500M Series device. Figure 19: AC Grounding Washer Grounding lugs 4. - Page 28 SSG 500 M Series Hardware Installation and Configuration Guide Most sites distribute DC power through a main conduit that leads to frame-mounted DC power distribution panels, one of which might be located at the top of the rack that houses the router. A pair of cables (one input and one return) connects each set of terminal studs to the power distribution panel.
-
Page 29: Powering A Device On And Off
Each screw contains a washer used to secure a DC source power-cable lug to the terminal block. Figure 20: Connecting DC Power-Cable Lugs DC terminal block Washer Grounding lugs Screw with captive washer d. Secure the positive (+) DC source power cable lug to the RTN terminal. Secure the negative (–) DC source power cable lug to the –48 VDC terminal. -
Page 30: Connecting A Device To A Network
(5 V and 3.3 V) of standby voltage is still available in the chassis. Connecting a Device to a Network An SSG 500M Series device provides firewall and general security for networks when it is placed between internal networks and the untrusted network. This... -
Page 31: Connecting A Device Using Ethernet Ports
To establish a high-speed connection, connect the provided Ethernet cable from the Ethernet port marked 0/2 (ethernet0/2, which is in the Untrust security zone) on an SSG 500M Series device to the external router. The device auto-senses the correct speed, duplex, and MDI/MDIX settings. -
Page 32: Connecting An Internal Network Or A Workstation
You can connect your local area network (LAN) or workstation with the Ethernet interfaces. An SSG 500M Series device contains four built-in Ethernet ports. You can use one or more of these ports to connect to LANs through switches or hubs. -
Page 33: Configuring A Device
Chapter 3 Configuring a Device ScreenOS software is preinstalled on SSG 500M Series devices. When the device is started, it is ready to be configured. While the device has a default factory configuration that allows you to initially connect to the device, you need to perform further configuration for your specific network requirements. -
Page 34: Default Device Settings
SSG 500 M Series Hardware Installation and Configuration Guide Default Device Settings This section describes the default settings and operation of the SSG 500M Series devices. Table 8 describes the default interface-to-zone bindings on an SSG 500M Series device. Table 8: Default Interface-to-Zone Bindings... -
Page 35: Accessing A Device
Accessing a Device You can access, configure, and manage an SSG 500M Series device in several ways: Console: The console port on the device allows you to access the device through a serial cable connected to your workstation or terminal. To configure the device, you enter ScreenOS Command Line Interface (CLI) commands on your terminal or in a terminal-emulation program on your workstation. -
Page 36: Using The Webui
SSG 500 M Series Hardware Installation and Configuration Guide 3. Launch a serial terminal-emulation program on your workstation. The required settings to launch a console session with the device are as follows: Baud rate: 9600 Parity: None Data bits: 8 Stop bit: 1 Flow Control: None 4. -
Page 37: Using Telnet
Using Telnet To use a Telnet connection, the workstation must be in the same subnetwork as the security device. To access the device with a Telnet connection, perform the following steps: 1. Connect your workstation to the port labeled 0/0 (ethernet0/0 interface), which is prebound to the Trust security zone. -
Page 38: Admin Name And Password
SSG 500 M Series Hardware Installation and Configuration Guide Admin Name and Password The administrative user has complete privileges to configure a device. We recommend that you change the default admin name (netscreen) and password (netscreen) immediately. To change the admin name and password, use the WebUI or CLI as follows: WebUI Configuration >... -
Page 39: Management Services
set interface ethernet0/0 ip ip_addr/mask save Management Services ScreenOS provides services for configuring and managing a device, such as SNMP, SSL, and SSH, which you can enable on a per-interface basis. WAN interfaces cannot be configured for management services. To configure the management services for the ethernet0/0 interface, use the WebUI or CLI as follows: WebUI Network >... -
Page 40: Date And Time
SSG 500 M Series Hardware Installation and Configuration Guide Primary DNS Server: ip_addr Secondary DNS Server: ip_addr DNS Refresh: (select) Every Day at: time set dns host name ip_addr set dns host name ip_addr set dns host schedule time save Date and Time The time settings on a device affect events such as the setup of virtual private network (VPN) tunnels. -
Page 41: High Availability Configuration
High Availability Configuration An HA port allows you to cable two devices together and configure them to work as a redundant group. A redundant group consists of one primary device and one backup device. If the primary device fails, the backup device takes over as the new primary, thus avoiding interruption of services. - Page 42 SSG 500 M Series Hardware Installation and Configuration Guide NOTE: The provided cabling instructions reproduce the configuration shown in Figure 23; however, this is not the only possible HA configuration. In addition, the instructions assume that all physical ports and interfaces are still at their defaults. If you have changed the port and interface settings, the instructions might not work properly.
-
Page 43: Wan Pim Configuration
WAN PIM Configuration This section explains how to configure the wide area network (WAN) physical interface modules (PIMs): “Serial Interface” on this page “T1 Interface” on page 44 “T3 Interface” on page 45 “E1 Interface” on page 44 Interfaces on PIMs are bound to the Untrust zone by default. The examples provided in this section are only used to establish initial WAN interface connectivity. -
Page 44: T1 Interface
SSG 500 M Series Hardware Installation and Configuration Guide T1 Interface The T1 interface is a basic Physical Layer protocol used by the Digital Signal level 1 (DS-1) multiplexing method in North America. A T1 interface operates at a bit-rate of 1.544 Mbps and can support 24 DS0 channels. -
Page 45: T3 Interface
“junipertest” static-ip set ppp profile “junipertest” auth type chap set ppp profile “junipertest” auth local-name “juniper” set ppp profile “junipertest” auth secret “password” set interface serial1/0 ppp profile “junipertest” set interface serial1/0 ip 172.18.1.1/24 set user “server”... -
Page 46: Basic Firewall Protections
Concepts & Examples ScreenOS Reference Guide SSG 500M Series devices provide various detection methods and defense mechanisms to combat probes and attacks aimed at compromising or harming a network or network resource: ScreenOS Screen options secure a zone by inspecting, and then allowing or denying, all connection attempts that require crossing an interface to that zone. -
Page 47: Verifying External Connectivity
To verify that workstations in your network can access resources on the Internet, start a browser from any workstation in the network and enter the following URL: www.juniper.net. Resetting a Device to Factory Defaults If you lose the admin password, you can reset the device to its default settings. This action destroys any existing configurations but restores access to the device. - Page 48 SSG 500 M Series Hardware Installation and Configuration Guide Using the reset config button on the front panel of the device. You can reset the device and restore the factory default settings by pressing the reset config button. To perform this operation, you need to either view the device status LEDs on the front panel or start a Console session as described in “Using a Console Connection”...
-
Page 49: Servicing A Device
Required Tools and Parts To replace a component on an SSG 500M Series device, you need the following tools and parts: Electrostatic bag or antistatic mat... -
Page 50: Physical Interface Modules
SSG 500 M Series Hardware Installation and Configuration Guide Physical Interface Modules Both SSG 500M Series devices have six slots in the front panel for Ethernet or WAN physical interface modules (PIMs). PIMs are field installable and replaceable. WARNING: Make sure the device is powered off before removing PIMs. PIMs are not hot-swappable. -
Page 51: Installing A Pim
6. If necessary, arrange the cables to prevent them from dislodging or developing stress points: Secure the cable so that it is not supporting its own weight as it hangs to the floor. Place excess cable out of the way in a neatly coiled loop. Use fasteners to maintain the shape of cable loops. -
Page 52: Device Power Components (Ssg 550M Only)
SSG 500 M Series Hardware Installation and Configuration Guide 6. If necessary, arrange the cables to prevent them from dislodging or developing stress points: Secure the cable so that it is not supporting its own weight as it hangs to the floor. - Page 53 Figure 25: Sliding AC/DC Power Supply Ejector Tab Metal ejector tab 5. Grasp the handle on the power supply faceplate, and pull firmly to start removing the power supply. Slide it halfway out of the chassis as shown in Figure 25. 6.
-
Page 54: Installing A Power Supply Unit
SSG 500 M Series Hardware Installation and Configuration Guide NOTE: If you are not reinstalling a power supply into the emptied slot, install a blank power-supply faceplate over the slot. Installing a Power Supply Unit To install an AC PSU, perform the following steps: 1. -
Page 55: Replacing A Power-Supply Cord
Replacing a Power-Supply Cord To replace the AC power cord for a redundant power supply, perform the following steps: 1. Locate a replacement power cord with the type of plug appropriate for your geographical location. 2. Attach an ESD grounding strap to your bare wrist, and connect the strap to the ESD point on the chassis or to an outside ESD point if the device is disconnected from earth ground. - Page 56 SSG 500 M Series Hardware Installation and Configuration Guide 3. Use a phillips screwdriver to remove the screws from the top panel of the chassis. The screws are located at the rear and sides of the panel. Keep the screws nearby for use when closing the chassis later. 4.
-
Page 57: Replacing An Air Filter
8. Insert one of the 512 MB SIMM DRAM modules into the slot from which you just removed the 256 MB SIMM DRAM module. Exerting even pressure with both thumbs upon the upper edge of the module, press the module downward until the locking tabs click into position (Figure 28). - Page 58 SSG 500 M Series Hardware Installation and Configuration Guide Figure 29: Air Filter Components Air filter Filter cover Plastic tab Plastic tab 2. Pull the filter cover away from the chassis. 3. Remove the old filter. 4. Place the new filter in the opening. 5.
- Page 59 Replacing an Air Filter...
- Page 60 SSG 500 M Series Hardware Installation and Configuration Guide Replacing an Air Filter...
-
Page 61: Appendix A Specifications
“Electrical” on page 62 “Environmental Tolerance” on page 62 “Certifications” on page 62 “Connectors” on page 64 Physical Table 9 provides the physical specifications for an SSG 500M Series device. Table 9: SSG 500M Series Physical Specifications Description Value Chassis 3.44 in. -
Page 62: Electrical
SSG 500 M Series Hardware Installation and Configuration Guide Electrical Table 10 provides the electrical specifications for an SSG 500M Series device. Table 10: SSG 500M Series Electrical Specifications Item Specification AC input voltage Operating range: 100 to 240 VAC... - Page 63 Certification Type Certification Name EMC Immunity EN 55024 EN-61000-3-2 Power Line Harmonics EN-61000-3-3 Voltage Fluctuations and Flicker EN-61000-4-2 ESD EN-61000-4-3 Radiated Immunity EN-61000-4-4 EFT EN-61000-4-5 Surge EN-61000-4-6 Low Frequency Common Immunity EN-61000-4-11 Voltage Dips and Sags ETSI European Telecommunications Standards Institute (ETSI) EN-300386-2: Telecommunication Network Equipment.
-
Page 64: Connectors
SSG 500 M Series Hardware Installation and Configuration Guide Connectors Table 13 lists the RJ-45 connector pinouts. Table 13: RJ-45 Connector Pinouts Name Description RTS Out Request To Send DTR Out Data Terminal Ready Transmit Data Chassis Ground Chassis Ground Receive Data Data Set Ready Clear To Send... - Page 65 MDI3+ MDI3- Table 16 lists the cables that you can order from Juniper Networks to connect to a port on the serial PIM. The device to which you are connecting and the serial interface type determine which cable you need.
- Page 66 SSG 500 M Series Hardware Installation and Configuration Guide Connectors...
-
Page 67: Index
Index AC grounding E1 PIM ..............27 ................20 AC power supply electrical specifications ............21, 22 ..........62 installing environmental specifications ..............54 ........62 replacing cord Ethernet ports, built-in ............55 ..........12 admin name and password ..........38 administrative access ............38 alarm LED ..............11, 20 front panel components ..........11 back panel components ..........20... - Page 68 SSG 500 M Series Hardware Installation and Configuration Guide installing ..............51 Optical Gigabit Ethernet ......... 17 Serial ................. 17 status LEDs ............15, 16 ................18 ................19 power LED ..............11, 20 power supplies ............... 21, 22 AC, removing ............
Need help?
Do you have a question about the SSG 500M Series and is the answer not in the manual?
Questions and answers