Sign In
Upload
Download
Table of Contents
Contents
Add to my manuals
Delete from my manuals
Share
URL of this page:
HTML Link:
Bookmark this page
Add
Manual will be automatically added to "My Manuals"
Print this page
×
Bookmark added
×
Added to my manuals
Manuals
Brands
Pioneer Manuals
Speaker System
XV-EV51
Operating instructions manual
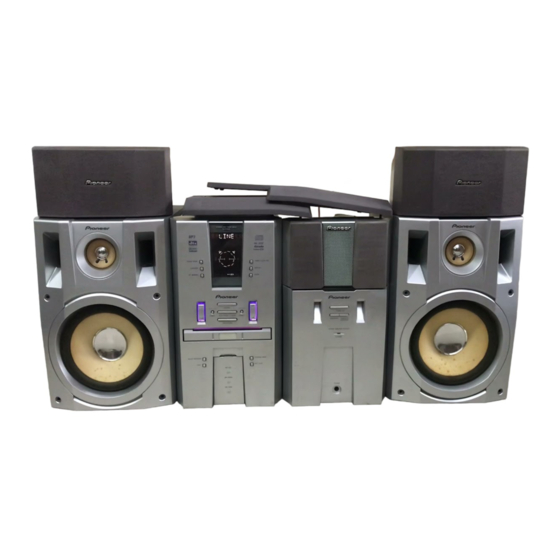
Pioneer XV-EV51 Operating Instructions Manual
Stereo dvd tuner deck, stereo power amplifier, speaker system
Hide thumbs
1
2
3
Table Of Contents
4
5
6
7
8
9
10
11
12
13
14
15
16
17
18
19
20
21
22
23
24
25
26
27
28
29
30
31
32
33
34
35
36
37
38
39
40
41
42
43
44
45
46
47
48
49
50
51
52
53
54
55
56
57
58
59
60
61
62
63
64
65
66
67
68
69
70
71
72
73
74
75
76
77
78
79
80
81
82
83
84
85
86
87
88
89
90
91
92
93
94
95
96
page
of
96
Go
/
96
Contents
Table of Contents
Troubleshooting
Bookmarks
Table of Contents
Table of Contents
Before You Start
What's in the Box
Putting the Batteries in the Remote Control
Using the Remote Control
General Disc Compatibility
CD-R/RW Compatibility
DVD-R/RW Compatibility
PC-Created Disc Compatibility
MP3 Audio Compatibility
Titles, Chapters and Tracks
DVD Video Regions
Connecting up
Connecting the System Components
Connecting the Speakers
Connecting the Front Speakers
Connecting the Front Speaker Cables
Connecting the Center Speaker
Connecting the Surround Speakers
Hints on Speaker Placement
Overhead View of Speakers
Basic Surround Sound Setup
Extra Power Mode Sound Setup
Connecting a Subwoofer
Connecting to Your TV
Connecting the Radio Antennas
Connecting External Antennas
External am Antenna
External FM Antenna
Connecting Auxiliary Components
Connecting the Power
Controls and Displays
Front Panel
Remote Control
Display
Getting Started
Setting the Unit to Match Your TV System
Switching on and Setting the Clock
Changing the Clock Format
Setting up the Remote to Control Your TV
Switching off the Demo
Using the On-Screen Displays
Playing Discs
Basic Playback Controls
Front Panel Controls
DVD-Video Disc Menus
Video CD PBC Menus
Listening to Auxiliary Components
Automatic Power on Buttons
Setting up for Surround Sound (EV51DVD Only)
Choosing Your Surround Sound Settings
Front Speaker Distance Setting
Center Speaker Distance Setting
Surround Speaker Distance Setting
Dynamic Range Control Setting
Dual Mono Setting
LFE Attenuator Setting
Subwoofer Setting
Setting the Relative Volume Level of each Channel
Playing Discs
Introduction
Using the Disc Navigator to Browse the Contents of a Disc
Scanning Discs
Playing in Slow Motion
Frame Advance/Frame Reverse
Looping a Section of a Disc
Using Repeat Play
Using the OSD
Using the Front Panel Display
Using Random Play
Using the OSD
Using the Front Panel Display
Creating Program Lists
Using the OSD
Editing Program Lists Using the OSD
Other Functions Available from the OSD Program Menu
Using the Front Panel Display
Clearing a Track from the Program List
Clearing the Program List
Searching a Disc
Switching Subtitles
Switching DVD Audio Language
Switching Audio Channels When Playing a Video CD
Zooming the Screen
Switching Camera Angles
Displaying Disc Information
Using the OSD
Using the Front Panel Display
Listening to the Radio
Choosing Stations
Improving Poor FM Reception
Memorizing Stations
Manually Saving Station Presets
Automatically Saving Station Presets
Listening to Station Presets
Changing Tuner Displays
Playing Cassette Tapes
Resetting the Tape Counter
Changing Tape Displays
Making Tape Recordings
Automatically Recording Cds (ASES)
Improving am Tape Recordings
Reducing the Source Signal Level
Singing Karaoke
Changing the Vocal MIX
Changing the Backing Track
Using Surround Sound
Introduction to Surround Sound
Surround Modes
Advanced Surround DSP Modes
Listening to Multi-Channel Playback
Using Advanced Surround
Adjusting the Sound
Adjusting the Bass and Treble
Adjusting the Balance
Creating Wider Stereo Sound
Saving Your Sound Preferences
Using the Sound Field Control
Adjusting the Effect Level
Switching off the Center Speaker
Boosting the Bass Level
Muting the Sound
Using the Timer
Setting the Wake-Up Timer
Turning the Wake-Up Timer On/Off
Setting the Sleep Timer
Setting the Record Timer
Turning the Record Timer On/Off
Child Lock
The Audio Settings Menu (EV21DVD Only)
Audio DRC
Virtual Surround
The Initial Setup Menu
Using the Initial Setup Menu
Video Settings
TV Screen
S Video out
Language Settings
Audio Language
Subtitle Language
DVD Menu Language
Subtitle Display
Display Settings
OSD Language
On Screen Display
Angle Indicator
Options
Parental Lock
Registering a New Password
Changing Your Password
Setting/Changing the Parental Lock Level
Setting/Changing the Country Code
Additional Information
Changing the Frequency Step
Setting the TV Format
Resetting the Unit
Using Discs with this Unit
Handling Discs
Storing Discs
Discs to Avoid
Using Cassette Tapes
Tapes You Should Avoid
Protecting Your Recordings
Proper Installation and Maintenance of this Unit
Hints on Installation
Cleaning the Pickup Lens
Problems with Condensation
Moving the Unit
Power Cord Caution
Troubleshooting
General
DVD/CD/Video CD Player
Tuner
Tape Deck
Error Messages
Screen Sizes and Disc Formats
Widescreen TV Users
Standard TV Users
Preset Code List
Language Code List
Country Code List
Glossary
Specifications
Advertisement
Quick Links
1
Table of Contents
2
Specifications
Download this manual
Stereo DVD Tuner Deck
XV-EV51
XV-EV21
Stereo Power Amplifier
M-EV51
M-EV21
Speaker System
S-EV51V
S-EV21V
Operating Instructions
Table of
Contents
Previous
Page
Next
Page
1
2
3
4
5
Advertisement
Table of Contents
Need help?
Do you have a question about the XV-EV51 and is the answer not in the manual?
Ask a question
Questions and answers
Related Manuals for Pioneer XV-EV51
Home Theater System Pioneer XV-E51 Service Manual
Stereo dvd tuner deck pioneer xv-e51/ xv-ev21 (126 pages)
Amplifier Pioneer M-EV51 Service Manual
Stereo power amplifier (49 pages)
Speaker System Pioneer HTZ-929DVR Operating Instructions Manual
Dvd-r w/hdd 5.1 ch surround system, dvd-rw/hdd tuner, speaker system, powered subwoofer (140 pages)
Speaker System Pioneer DCS-202K Operating Instructions Manual
(278 pages)
Speaker System Pioneer XW-NAV1K-K Operating Instructions Manual
Dvd speaker system for ipod (44 pages)
Speaker System Pioneer XW-NAV1-K Service Manual
Dvd speaker system for ipod (89 pages)
Speaker System Pioneer XW-NAV1-K Operating Instructions Manual
Dvd speaker system for ipod (89 pages)
Speaker System Pioneer XW-NAC3-K Operating Instructions Manual
Digital speaker system for ipod (132 pages)
Speaker System Pioneer XW-NAC3-K Service Manual
Digital speaker system for ipod (87 pages)
Speaker System Pioneer XW-NAS3 Operating Instructions Manual
Digital speaker system for ipod (60 pages)
Speaker System Pioneer XW-HTD630A Operating Instructions Manual
Digital wireless rear speaker system (32 pages)
Speaker System Pioneer XW-SMA1 Operating Instructions Manual
Wireless sound system (48 pages)
Speaker System Pioneer XY-122 Installation Manual
Loudspeaker xy series (78 pages)
Speaker System Pioneer XR-A790 Operating Instructions Manual
Stereo cd cassette deck receiver (72 pages)
Speaker System Pioneer x-rsm410dvh Service Manual
(70 pages)
Speaker System Pioneer S-X360 XTW/UC Service Manual
(6 pages)
This manual is also suitable for:
Xv-ev21
M-ev51
M-ev21
S-ev51v
S-ev21v
Table of Contents
Print
Rename the bookmark
Delete bookmark?
Delete from my manuals?
Login
Sign In
OR
Sign in with Facebook
Sign in with Google
Upload manual
Upload from disk
Upload from URL


Need help?
Do you have a question about the XV-EV51 and is the answer not in the manual?
Questions and answers