Pioneer XW-NAV1-K Operating Instructions Manual
Dvd speaker system for ipod
Hide thumbs
Also See for XW-NAV1-K:
- Operating instructions manual (44 pages) ,
- Service manual (89 pages) ,
- Operating instructions manual (132 pages)
Table of Contents
Advertisement
Available languages
Available languages
XW-NAV1
XW-NAV1K
DVD Speaker system for iPod
Sistema de Bocina para Ipod con lector DVD
Register your product at:
http://www.pioneerelectronics.com (US)
http://www.pioneerelectronics.ca (Canada)
• Protect your new investment
The details of your purchase will be on file for reference in the event of an insurance claim such as loss or theft.
• Receive free tips, updates and service bulletins on your new product
• Improve product development
Your input helps us continue to design products that meet your needs.
• Receive a free Pioneer newsletter
Registered customers can opt in to receive a monthly newsletter.
http://www.pioneerelectronics.com (États-Unis)
http://www.pioneerelectronics.ca (Canada)
Operating Instructions
Manual de instrucciones
-K
-K
Advertisement
Chapters
Table of Contents

Related Manuals for Pioneer XW-NAV1-K


Summary of Contents for Pioneer XW-NAV1-K
- Page 1 • Receive free tips, updates and service bulletins on your new product • Improve product development Your input helps us continue to design products that meet your needs. • Receive a free Pioneer newsletter Registered customers can opt in to receive a monthly newsletter. http://www.pioneerelectronics.com (États-Unis) http://www.pioneerelectronics.ca (Canada)
-
Page 2: Operating Environment
IMPORTANT NOTICE THE MODEL NUMBER AND SERIAL NUMBER OF THIS EQUIPMENT ARE ON THE REAR OR BOTTOM. RECORD THESE NUMBERS ON YOUR ENCLOSED WARRANTY CARD AND KEEP IN A SAFE PLACE FOR FUTURE REFERENCE. D36-AP9-1_A1_En NOTE: This equipment has been tested and found to comply with the limits for a Class B digital device, pursuant to Part 15 of the FCC Rules. - Page 3 IMPORTANT CAUTION RISK OF ELECTRIC SHOCK DO NOT OPEN CAUTION: The lightning flash with arrowhead symbol, The exclamation point within an equilateral within an equilateral triangle, is intended to TO PREVENT THE RISK OF ELECTRIC triangle is intended to alert the user to the alert the user to the presence of uninsulated SHOCK, DO NOT REMOVE COVER (OR presence of important operating and...
- Page 4 When you find it safe level – a level that lets the sound come through damaged, ask your nearest PIONEER authorized clearly without annoying blaring or distortion and, most service center or your dealer for a replacement.
-
Page 5: Table Of Contents
Thank you for buying this Pioneer product. Please read through these operating instructions so that you will know how to operate your model properly. After you have finished reading the instructions, put them in a safe place for future reference. -
Page 6: Before You Start
Before you start Chapter 1: Before you start Insert the batteries as shown on the diagram below. What’s in the box Please confirm that the following accessories are in the box when you open it. • Remote Control • Audio/Video cable •... -
Page 7: Using The Remote Control
Before you start then insert new batteries. If a battery • Remote operation may become unreliable should leak and the fluid should get on if strong sunlight or fluorescent light is your skin, flush it off with large quantities of shining on the unit’s remote sensor. -
Page 8: Connections
Connections Chapter 2: Connections • Be sure to turn off the power and unplug the power cord from the power outlet Connecting using an HDMI cable whenever making or changing By using an HDMI cable, digital signals can be connections. transferred to an HDMI-compatible TV on a •... -
Page 9: Connecting To A Tv
Connections • This unit is designed for connection to HDMI-compatible devices. It may not Connecting to an AV receiver or operate properly if connected to DVI amplifier devices. This unit’s rear panel Connecting to a TV This unit’s rear panel HDMI cable (commercially Match the direction... -
Page 10: Audio Signals That Can Be Output From This Unit's Hdmi Out Terminal
Connections Audio signals that can be output Plugging in After you’ve finished making all connections, from this unit’s HDMI OUT plug the unit into an AC outlet. terminal • 44.1 kHz to 96 kHz, 16-bit/ 20-bit/ 24-bit 2- channel linear PCM audio (including 2- channel downmixing) •... -
Page 11: Controls And Displays
Controls and displays Chapter 3: Controls and displays Remote control STANDBY/ON Press to turn the power on and off. FUNCTION STANDBY/ON TIMER/CLOCK Use to set the clock (page 29). TIMER/CLOCK VOLUME VOLUME –/+ Use to set the listening volume. (Default AUDIO SUBTITLE ANGLE... - Page 12 Controls and displays TOP MENU Play Mode Press to display the top menu of the DVD- Play Mode Video. A-B Repeat A(Start Point) /// Repeat B(End Point) Use these to select items, change settings Random Program and move the cursor. For iPod/iPhone’s Search Mode menu screen, this button is not available.
- Page 13 Controls and displays 11 PAUSE 19 // Press to stop playback temporarily. Press • Press during playback to fast-forward. again to resume. • Press in the pause mode to move forward frame-by-frame. (DVD-Video, DVD VR, 12 SLEEP Video CD or DivX discs only) Use to put the unit in sleep mode and select the amount of time before sleep (page 30).
-
Page 14: Front/Top Panel
Controls and displays Front/top panel Disc slot EJECT Eject the disc. VOLUME –/+ Use to set the listening volume. (Default setting: 10) 1 2 3 4 USB terminal When no USB storage device is connected, install the USB terminal cover. WARNING Store the USB terminal cover out of the reach of children and infants. -
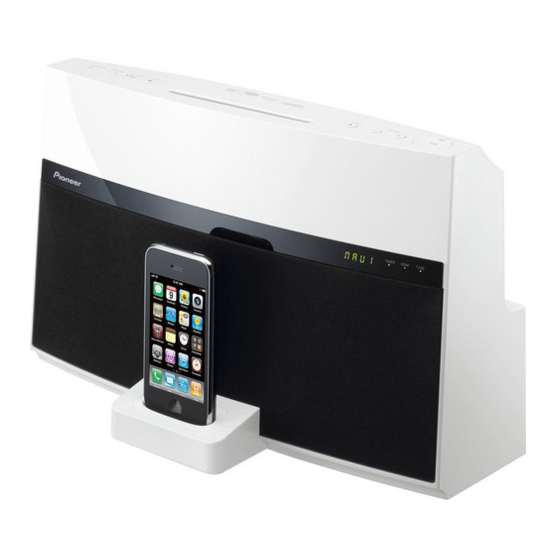
Page 15: Ipod/Iphone Playback
• Features such as the equalizer cannot be controlled using this system, and we recommend switching the equalizer off before connecting. • Pioneer cannot under any circumstances accept responsibility for any direct or indirect loss arising from any inconvenience or loss of recorded material resulting from the iPod/iPhone failure. -
Page 16: Connecting Your Ipod/Iphone
iPod/iPhone playback of the adapter into the depressions on the iPod/iPhone connector port and press into Connecting your iPod/iPhone position. When attaching the adapter, be careful not to strike the connectors. Caution Connect your iPod/iPhone. • When connecting an iPod/iPhone units, •... -
Page 17: Playing Your Ipod/Iphone
iPod/iPhone playback • Reconnect the iPod/iPhone to the unit. If this doesn’t seem to work, try resetting Playing your iPod/iPhone your iPod/iPhone. • Update the iPod/iPhone software to the Caution latest version. • When your iPod/iPhone is connected to If the iPod/iPhone cannot be operated, check this unit and you wish to operate the iPod/ the following items: iPhone by touching it directly, be sure to... -
Page 18: Disc Playback
Disc playback Chapter 5: Disc playback • Hold the disc as shown in the illustration, insert it in the center of the disc slot, and Playing discs or files press in gently from above. • The disc will then be automatically drawn into the slot. -
Page 19: Playing In The Desired Order (Programmed Play)
Disc playback Use /// to select the title, When the title menu or menu is displayed (TITLE) chapter, track or file, then press ENTER. Program Program Step Title 1-01 Chapter 1-015 Title 01 Chapter When the GUI is displayed or operated (GUI) Chapter Chapter Chapter... -
Page 20: Usb Playback
USB device. For details, see When a USB device is connected on page 36. • Pioneer does not support that all files WARNING recorded on all USB devices will play or Store the USB terminal cover out of the that power will be supplied to the USB reach of children and infants. -
Page 21: Recording All The Tracks
04:11 Total Time the audio CD is stopped. • When recording is completed, a folder named “PIONEER” is automatically created on the USB device. The recorded Selecting the track(s) to be recorded tracks are stored in this folder. Load the audio CD. -
Page 22: Using The Tuner
Using the tuner Chapter 7: Using the tuner • This unit can not transfer FM radio from the • Manually saving station presets HDMI OUT terminal. Press FUNCTION to switch to the tuner. The tuned frequency will be displayed on the front panel display. -
Page 23: Other Connections
Other connections Chapter 8: Other connections • Before making or changing the connections, switch off the power and Digital audio disconnect the power cord from the AC player, etc. outlet. • If the AUX IN mini-plug jack is connected to auxiliary phones jack, this unit’s volume will be changed by the playback component’s volume. -
Page 24: Changing The Settings
Changing the settings Chapter 9: Changing the settings The factory default settings are indicated in italic Note • The following settings is available for a disc or USB storage device content. These are not available for iPod/iPhone, tuner, external input (AUX). •... -
Page 25: Video Adjust Parameters
Changing the settings Note • The following settings is available for a disc or USB storage device content. These are not available for iPod/iPhone, tuner, external input (AUX). • In the USB mode, you can only change the Play Mode and Audio Settings on the HOME MENU screen. -
Page 26: Initial Settings Parameters
Changing the settings Note • The following settings is available for a disc or USB storage device content. These are not available for iPod/iPhone, tuner, external input (AUX). • In the USB mode, you can only change the Play Mode and Audio Settings on the HOME MENU screen. -
Page 27: Display Settings
Changing the settings Note • The following settings is available for a disc or USB storage device content. These are not available for iPod/iPhone, tuner, external input (AUX). • In the USB mode, you can only change the Play Mode and Audio Settings on the HOME MENU screen. -
Page 28: Sound Settings
Sound settings Chapter 10: Sound settings Using the Virtual Surround Adjusting the bass and treble You can add exciting effects to audio sources. Use the bass and treble controls to adjust the overall tone. • Default setting: ON Press SHIFT and SOUND to select ‘BASS’ Press SHIFT and SOUND to select or ‘TREBLE’. -
Page 29: Using The Timer
Using the timer Chapter 11: Using the timer Setting the clock Setting the wake-up timer Setting the clock allows you to use the timer. With the power turned ON, press • Default setting: TIMER/CLOCK. The current time is displayed on the front panel With the power turned ON, press display. -
Page 30: Turning The Wake-Up Timer On/Off
Using the timer Turning the wake-up timer on/off Note With the power turned ON, press • If at the wake-up time iPod/iPhone or USB TIMER/CLOCK. storage device is not connected to this unit The current time is displayed on the front panel or a disc is not slotted, this unit will be display. -
Page 31: Playable Discs And Files On Discs Or Usb Storage Devices
Playable discs and files on discs or USB storage devices Chapter 12: Playable discs and files on discs or USB storage devices Playable discs • Commercially available DVD-Video discs • DVD-R/ -RW/ -R DL and DVD+R/ +RW/ +R DL discs recorded in the Video mode DVD-R/ -RW/ -R DL discs recorded in the VR mode Video CDs •... -
Page 32: Playable Files
Playable discs and files on discs or USB storage devices • It is possible that when loading or ejecting Discs that cannot be played a DualDisc, the opposite side to that being • DVD-Audio discs played will be scratched. Scratched discs •... - Page 33 Playable discs and files on discs or USB storage devices • DivX files may also include such advanced Group 2 Albanian (sq), Croatian (hr), Czech playback functions as menu screens and (cs), Hungarian (hu), Polish (pl), selection of multiple subtitle languages/ Romanian (ro), Slovak (sk), Slovenian audio tracks.
- Page 34 Playable discs and files on discs or USB storage devices Windows Media Audio (WMA) Sampling frequencies: 32 kHz, 44.1 kHz and 48 Bit rate: Up to 192 kbps File extensions: .wma and .WMA • This unit supports files encoded using Windows Media Player Ver.
-
Page 35: Additional Information
Sometimes the trouble may lie in another component. Investigate the other components and electrical appliances being used. If the trouble cannot be rectified even after exercising the checks listed below, ask your nearest Pioneer authorized service center or your dealer to carry out repair work. - Page 36 Additional information Problem Check Remedy During playback, picture is This is not a problem with this This unit supports Rovi copy protection. With some TVs, the disturbed or dark. unit. picture may not display properly when playing discs including copy prevention signals. This is not a malfunction. Are this unit and TV connected via When this unit and TV are connected via a video deck, this a video deck?
- Page 37 Recording is not possible if the USB device contains 300 or the USB device? more folders. Are there already 99 PIONEER Recording is not possible if there are already 99 PIONEER folders on the USB device? folders on the USB device. When connected to an HDMI-compatible device...
- Page 38 Additional information When an iPod/iPhone is connected Problem Remedy Can’t operate the iPod/ Make sure the iPod/iPhone is connected correctly (refer to iPhone by the remote Connecting your iPod/iPhone on page 16). control. Can’t operate the iPod/ Make sure the iPod/iPhone is connected correctly (refer to iPhone.
-
Page 39: Code Table
Additional information Nauru (na), 1401 Siswati (ss), 1919 Language Code Table and Nepali (ne), 1405 Sesotho (st), 1920 Norwegian (no), 1415 Sundanese (su), 1921 Country/Area Code Table Occitan (oc), 1503 Swahili (sw), 1923 Oromo (om), 1513 Tamil (ta), 2001 Language Code Table Oriya (or), 1518 Telugu (te), 2005 Panjabi (pa), 1601... -
Page 40: Setting The Tv System
Additional information Do not expose to heat. Do not place this unit on top of an amplifier or Cautions on use other component that generates heat. When placing it in a rack, to avoid the heat given off When moving this unit by the amplifier or other audio component, When moving this unit, check first that there is place it on a shelf below the amplifier. -
Page 41: Handling Discs
Pioneer authorized service • Be sure to read the cautions included with center. Although lens cleaners for players the disc. -
Page 42: About Ipod/Iphone
Additional information them, and the label’s glue may have oozed out. Check that there is no glue around the About iPod/iPhone edges of such labels before using rented discs. “Made for iPod” means that an electronic About specially shaped discs accessory has been designed to connect Specially shaped discs (heart-shaped, specifically to iPod and has been certified by... -
Page 43: Specifications
FM wire antenna ......1 Operating instructions (This document) Note • Specifications and the design are subject to possible modifications without notice, due to improvements. Published by Pioneer Corporation. Copyright © 2010 Pioneer Corporation. All rights reserved. - Page 44 NOTA : Este equipo ha sido probado y se ha comprobado que cumple con los límites para un dispositivo digital de clase B, de acuerdo con la Parte 15 de las Reglas de FCC. Esos límites están concebidos para proveer una protección razonable contra interferencias prejudiciales en una instalación residencial.
- Page 45 IMPORTANTE CAUTION RISK OF ELECTRIC SHOCK DO NOT OPEN La luz intermitente con el símbolo de punta ATENCIÓN : El punto exclamativo dentro un triángulo de flecha dentro un triángulo equilátero. PARA PREVENIR EL PELIGRO DE CHOQUE equilátero convenido para avisar el usuário Está...
- Page 46 Revise el cable de alimentación está dañado, solicite el reemplazo del mismo al centro de servicio autorizado PIONEER más cercano, o a su distribuidor. S002*_A1_Es PRECAUCIÓN Este aparato es un producto de láser de clase 1 clasificado como tal en Seguridad de productos de láser, IEC 60825-1:2007.
- Page 47 Gracias por comprar un producto Pioneer. Le sugerimos que lea atentamente estas manual de instrucciones a fin de que aprenda a utilizar su equipo de manera adecuada. Después de leer las instrucciones, guárdelas en un lugar seguro para consultarlas en el futuro.
-
Page 48: Antes De Comenzar
Antes de comenzar Capítulo 1: Antes de comenzar Inserte las pilas como se muestra en la ilustración de abajo. Contenido de la caja Verifique que los siguientes accesorios estén en la caja al abrirla. • Mando a distancia • Cable de audio/vídeo •... -
Page 49: Utilización Del Mando A Distancia
Antes de comenzar • Cuando tenga que desembarazarse de las • La operación con el mando a distancia baterías usadas, por favor respete los puede no ser fiable si la luz solar o la reglamentos gubernamentales o las iluminación incandescente están disposiciones de las instituciones públicas incidiendo en el sensor de control remoto de protección del medio ambiente en vigor... -
Page 50: Conexiones
Conexiones Capítulo 2: Conexiones • Asegúrese de desconectar la alimentación y desenchufar el cable de alimentación de Conexión mediante un cable la toma de corriente siempre que haga o HDMI cambie conexiones. Usando un cable HDMI, las señales digitales • Conecte el cable de alimentación después se pueden transferir a un TV compatible con de terminar las conexiones entre los HDMI mediante un solo cable sin pérdida de... -
Page 51: Conexión A Un Televisor
Conexiones • Esta unidad ha sido diseñada para ser conectada a aparatos compatibles con Conexión a un amplificador o HDMI. Es posible que no funcione bien si receptor AV se conecta a dispositivos DVI. Panel posterior de esta unidad Conexión a un televisor Panel posterior de esta unidad Cable HDMI (de venta en los... -
Page 52: Señales De Audio Que Pueden Salir Por El Terminal Hdmi Out De Esta Unidad
Conexiones Señales de audio que pueden Para enchufarlo salir por el terminal HDMI OUT Después de haber terminado todas las conexiones, enchufe la unidad a una toma de de esta unidad corriente de CA. • Audio PCM lineal de 2 canales, 44,1 kHz a 96 kHz, 16 bits/ 20 bits/ 24 bits (incluyendo mezcla en 2 canales) •... -
Page 53: Controles E Indicaciones
Controles e indicaciones Capítulo 3: Controles e indicaciones Mando a distancia STANDBY/ON Púlselo para conectar y desconectar la FUNCTION STANDBY/ON alimentación. TIMER/CLOCK TIMER/CLOCK VOLUME Se emplea para ajustar el reloj (página 29). VOLUME –/+ AUDIO SUBTITLE ANGLE SHIFT Utilícelos para ajustar el volumen de audición. (Ajuste predeterminado: 10) SOUND ZOOM... - Page 54 Controles e indicaciones TOP MENU Play Mode Púlselo para visualizar el menú inicial del DVD- Play Mode Video. A-B Repeat A(Start Point) /// Repeat B(End Point) Random Úselos para seleccionar elementos, Program cambiar ajustes y mover el cursor. Para la Search Mode pantalla de menús del iPod/iPhone, este botón no está...
- Page 55 Controles e indicaciones 11 PAUSE 18 RETURN Púlselo para detener temporalmente la Púlselo para volver a la pantalla anterior. reproducción. Púlselo de nuevo para reanudar. Utilícelo también para cancelar el ajuste del reloj o el ajuste del sonido. 12 SLEEP 19 //...
-
Page 56: Panel Frontal/Superior
Controles e indicaciones Panel frontal/superior Ranura del disco EJECT Expulse el disco. VOLUME –/+ Utilícelos para ajustar el volumen de audición. (Ajuste predeterminado: 10) 1 2 3 4 USB terminal Cuando no tenga conectado ningún dispositivo de almacenamiento USB, instale la cubierta del terminal USB. -
Page 57: Reproducción Del Ipod/Iphone
3G/3GS Nota 1 • Pioneer no garantiza que esta unidad pueda reproducir otros iPod/iPhone que no sean los especificados. • Dependiendo del modelo o de la versión del software, es posible que algunas funciones estén restringidas. • El iPod/iPhone tiene licencia para reproducir material sin derechos de autor o materiales cuya reproducción está legalmente permitida. -
Page 58: Conexión De Un Ipod/Iphone
Reproducción del iPod/iPhone Cuando conecte el adaptador de la base de control universal, tenga cuidado y oriente Conexión de un iPod/iPhone correctamente las direcciones frontal-trasera de la base de control universal. Para Precaución conectarlo, primero ponga los apéndices del lado frontal del adaptador en los huecos del •... -
Page 59: Reproducción De Un Ipod/Iphone
Reproducción del iPod/iPhone • Vuelva a conectar el iPod/iPhone a la unidad. Si esto no funciona, pruebe a Reproducción de un iPod/iPhone reiniciar el iPod/iPhone. • Actualice el software del iPod/iPhone a la Precaución versión más reciente. • Cuando tenga el iPod/iPhone conectado a Si no puede operar el iPod/iPhone, compruebe esta unidad y desee operar el iPod/iPhone los puntos siguientes:... -
Page 60: Reproducción De Discos
Reproducción de discos Capítulo 5: Reproducción de discos • Sostenga el disco como se muestra en la ilustración, insértelo en el centro de la Reproducción de discos o archivos ranura de carga y empújelo con cuidado desde arriba. • El disco se introducirá automáticamente Nota en la ranura. -
Page 61: Reproducción En El Orden Deseado (Reproducción Programada)
Reproducción de discos Cuando se visualiza el menú de títulos o el Program menú (TITLE) Program Step Title 1-01 Chapter 1-015 Title 01 Chapter Chapter Chapter Chapter Chapter Cuando se visualiza o utiliza la GUI (GUI) Chapter Chapter Chapter • Para añadir archivos a un programa, seleccione primero el lugar en el programa Cuando el disco está... -
Page 62: Reproducción Usb
USB. Para conocer los detalles, consulte Cuando está conectado un dispositivo USB en la página 36. ADVERTENCIA • Pioneer no garantiza que todos los Guarde la cubierta del terminal USB fuera archivos grabados en todos los del alcance de los niños pequeños y bebés. -
Page 63: Grabación De Todas Las Pistas
• Cuando termina la grabación se crea detener la reproducción. La grabación sólo automáticamente una carpeta llamada puede iniciarse cuando el disco CD está en ”PIONEER“ en el dispositivo USB. Las el modo de parada. pistas grabadas se almacenan en esta Pulse HOME MENU. -
Page 64: Uso Del Sintonizador
Uso del sintonizador Capítulo 7: Uso del sintonizador • Esta unidad no puede transferir el sonido de • Guardar emisoras preajustadas manualmente la radio de FM desde el terminal HDMI OUT. Pulse FUNCTION para cambiar al Conecte la antena de FM sintonizador. -
Page 65: Otras Conexiones
Otras conexiones Capítulo 8: Otras conexiones • Antes de hacer o cambiar las conexiones, apague la unidad y desenchufe el cable de Reproductor alimentación de la toma de CA. de audio • Si la toma de miniclavija AUX IN está digital, etc. -
Page 66: Cambio De Los Ajustes
Cambio de los ajustes Capítulo 9: Cambio de los ajustes Los ajustes predeterminados en fábrica se indican en cursiva. Nota • Los ajustes siguientes están disponibles para el contenido de discos o de dispositivos de almacenamiento USB. No están disponibles para un iPod/iPhone, sintonizador, ni entrada externa (AUX). -
Page 67: Parámetros De Video Adjust
Cambio de los ajustes Nota • Los ajustes siguientes están disponibles para el contenido de discos o de dispositivos de almacenamiento USB. No están disponibles para un iPod/iPhone, sintonizador, ni entrada externa (AUX). • En el modo USB, sólo podrá cambiar el modo de reproducción (Play Mode) y los ajustes de audio (Audio Settings) en la pantalla del menú... -
Page 68: Parámetros De Initial Settings
Cambio de los ajustes Nota • Los ajustes siguientes están disponibles para el contenido de discos o de dispositivos de almacenamiento USB. No están disponibles para un iPod/iPhone, sintonizador, ni entrada externa (AUX). • En el modo USB, sólo podrá cambiar el modo de reproducción (Play Mode) y los ajustes de audio (Audio Settings) en la pantalla del menú... -
Page 69: Configuración De Display (Pantalla)
Cambio de los ajustes Nota • Los ajustes siguientes están disponibles para el contenido de discos o de dispositivos de almacenamiento USB. No están disponibles para un iPod/iPhone, sintonizador, ni entrada externa (AUX). • En el modo USB, sólo podrá cambiar el modo de reproducción (Play Mode) y los ajustes de audio (Audio Settings) en la pantalla del menú... -
Page 70: Ajustes Del Sonido
Ajustes del sonido Capítulo 10: Ajustes del sonido Uso del sonido envolvente Ajuste de los graves y agudos virtual (Virtual Surround) Utilice los controles de graves y agudos para ajustar el tono general. Podrá añadir efectos emocionantes a las fuentes de audio. Pulse SHIFT y SOUND para seleccionar ‘BASS’... -
Page 71: Uso Del Temporizador
Uso del temporizador Capítulo 11: Uso del temporizador Ajuste del reloj Uso del temporizador de conexión automática Para utilizar el temporizador, es necesario ajustar el reloj. Con el interruptor de la alimentación • Ajuste predeterminado: conectado, pulse TIMER/CLOCK. La hora actual se visualizará en la pantalla del Con el interruptor de la alimentación panel delantero. -
Page 72: Encendido Y Apagado Del Temporizador De Conexión Automática
Uso del temporizador Encendido y apagado del Nota temporizador de conexión • Si a la hora de conexión automática no hay automática conectado ningún iPod/iPhone ni Con el interruptor de la alimentación dispositivo de almacenamiento USB a esta conectado, pulse TIMER/CLOCK. -
Page 73: Discos Y Archivos De Discos O Dispositivos De Almacenamiento Usb Que Pueden Reproducirse
Discos y archivos de discos o dispositivos de almacenamiento USB que pueden reproducirse Capítulo 12: Discos y archivos de discos o dispositivos de almacenamiento USB que pueden reproducirse Discos que se pueden reproducir • Discos DVD-Video de venta en los establecimientos del ramo •... -
Page 74: Archivos Que Pueden Reproducirse
Discos y archivos de discos o dispositivos de almacenamiento USB que pueden reproducirse • La grabación multisesión/multiborde es un • En esta unidad se puede reproducir el lado método en el que los datos se graban en un DVD de los discos DualDisc (excluyendo solo disco en dos o más sesiones/bordes. - Page 75 Discos y archivos de discos o dispositivos de almacenamiento USB que pueden reproducirse Formatos de archivos de vídeo • Esta unidad admite los grupos de idiomas siguientes: soportados Grupo 1 Afrikaans (af), Vascuence (eu), DivX Catalán (ca), Danés (da), Holandés •...
- Page 76 Discos y archivos de discos o dispositivos de almacenamiento USB que pueden reproducirse • Esta unidad es compatible con JPEG de línea base. • Esta unida es compatible con Exif Ver.2,2. • Esta unida no es compatible con JPEG progresivo. Formatos de archivos de audio compatibles •...
-
Page 77: Información Adicional
Inspeccione los otros componentes y los aparatos eléctricos que esté utilizando. Si el problema no se puede solucionar después de comprobar los puntos indicados abajo, solicite al centro de servicio autorizado por Pioneer o a su distribuidor que le haga los trabajos de reparación necesarios. - Page 78 Información adicional Problema Verificación Solución La imagen está alargada o ¿Está bien puesta la relación de Consulte el manual de instrucciones del televisor y ajuste bien la relación de aspecto no aspecto del TV conectado? la relación de aspecto del mismo. se puede cambiar.
- Page 79 ¿Hay 300 carpetas o más en el No es posible grabar si el dispositivo USB contiene 300 dispositivo USB? carpetas o más. ¿Hay ya 99 carpetas PIONEER en La grabación es imposible si ya hay 99 carpetas PIONEER en el dispositivo USB? el dispositivo USB.
- Page 80 Información adicional Cuando se conecta a un aparato compatible con HDMI Problema Verificación Solución No se visualiza imagen. ¿Está bien ajustada la resolución? Ajuste HDMI Resolution adecuadamente para el dispositivo conectado (página 26). Reponga HDMI Resolution al ajuste predeterminado (720x480p) (página 27). ¿Está...
-
Page 81: Tabla De Códigos De Idioma Y Tabla De Países/Códigos De Área
Información adicional Nauru (na), 1401 Siswati (ss), 1919 Tabla de códigos de idioma y Nepali (ne), 1405 Sesotho (st), 1920 Norwegian (no), 1415 Sundanese (su), 1921 tabla de países/códigos de área Occitan (oc), 1503 Swahili (sw), 1923 Oromo (om), 1513 Tamil (ta), 2001 Tabla de códigos de idiomas Oriya (or), 1518... -
Page 82: Cuidados Para El Uso
Información adicional No la exponga al calor. Cuidados para el uso No ponga la unidad encima de un amplificador u otro componente que genere calor. Cuando la coloque en una estantería, para evitar el Cuando traslade esta unidad calor producido por el amplificador u otro Cuando traslade esta unidad, compruebe componente de audio, póngala en un estante primero que no haya ningún disco insertado y... -
Page 83: Manipulación De Discos
Pioneer más cercano. interior hacia el exterior. No use paños de Aunque se encuentran a la venta limpieza sucios. -
Page 84: Acerca Del Ipod/Iphone
Información adicional la cola de las etiquetas puede salir al exterior. Verifique que no haya cola Acerca del iPod/iPhone alrededor de los bordes de tales etiquetas antes de usar discos de alquiler. “Made for iPod” significa que un accesorio Acerca de los discos de formas electrónico ha sido diseñado para ser especiales conectado específicamente a un iPod y ha sido... -
Page 85: Especificaciones
Antena alambrica de FM....1 Manual de instrucciones (este manual) Nota • Las características técnicas y el diseño están sujetos a modificaciones sin previo aviso, debido a mejoras del producto. Publicado por Pioneer Corporation. Copyright © 2010 Pioneer Corporation. Todos los derechos reservados. - Page 86 Información adicional...
- Page 87 Información adicional...
- Page 88 Within 40 days of receiving your complaint, Pioneer will investigate the dispute and will either: (1) respond to your complaint in writing informing you what action Pioneer will take, and in what time period, to resolve the dispute; or (2) respond to your complaint in writing informing you why it will not take any action.
- Page 89 253 Alexandra Road, #04-01, Singapore 159936 TEL: 65-6472-7555 PIONEER ELECTRONICS AUSTRALIA PTY. LTD. 178-184 Boundary Road, Braeside, Victoria 3195, Australia, TEL: (03) 9586-6300 PIONEER ELECTRONICS DE MEXICO S.A. DE C.V. Blvd.Manuel Avila Camacho 138 10 piso Col.Lomas de Chapultepec, Mexico, D.F. 11000 TEL: 55-9178-4270 K002_B1_En...
Need help?
Do you have a question about the XW-NAV1-K and is the answer not in the manual?
Questions and answers