Advertisement
BRC7E530W
BRC7E531W
1. SAFETY CONSIDERATIONS ........................................................................................1
2. BEFORE INSTALLATION ..............................................................................................2
3. REMOTE CONTROLLER INSTALLATION ....................................................................2
4. RECEIVER INSTALLATION...........................................................................................3
5. FIELD SETTING.............................................................................................................6
6. TEST OPERATION ........................................................................................................8
1. SAFETY CONSIDERATIONS
Please read this "SAFETY CONSIDERATIONS" carefully before installing air conditioning equipment and be
sure to install it correctly. After completing the installation, make sure at start up operation that the unit oper-
ates properly. Please instruct the customer how to operate the unit and keep maintenance.
Meaning of caution symbols
CAUTION .............. If the caution is not observed, it may cause injury or damage to equipment.
NOTE
............. These instructions will ensure proper use of the equipment.
CAUTION
• Refer also to the installation manual attached to the indoor unit and the installation manual attached to the
decoration panel.
• Confirm that following conditions are satisfied prior to installation.
• Ensure that nothing interrupts the operation of the wireless remote controller. (Ensure that there is nei-
ther a source of light nor fluorescent lamp near the receiver. Also, ensure that the receiver is not
exposed of direct sunlight.)
• Ensure that the operation display lamp and other indicators are easy to see.
• The installation position of this kit is 1 position of the decoration panel. Therefore, confirm that its position
is set so that the single form the wireless remote controller can be easily transmitted and its display can be
easily seen.
1
Wireless Remote Controller Kit
CONTENTS
Installation manual
English
Advertisement
Table of Contents

Related Manuals for Daikin BRC7E530W


Summary of Contents for Daikin BRC7E530W
- Page 1 BRC7E530W Wireless Remote Controller Kit Installation manual BRC7E531W CONTENTS 1. SAFETY CONSIDERATIONS ..................1 2. BEFORE INSTALLATION ....................2 3. REMOTE CONTROLLER INSTALLATION ..............2 4. RECEIVER INSTALLATION...................3 5. FIELD SETTING......................6 6. TEST OPERATION ......................8 1. SAFETY CONSIDERATIONS Please read this “SAFETY CONSIDERATIONS” carefully before installing air conditioning equipment and be sure to install it correctly.
- Page 2 2. BEFORE INSTALLATION 2-1 ACCESSORIES Check if the following accessories are included with your unit. Tapping screw for Wireless remote Remote controller Name Receiver Transmitter board transmitter board controller holder Quan- 1 set. 1 pc. 2 pcs. 1 pc. 1 pc. tity Shape Screw for install-...
- Page 3 • How to insert the batteries 1. Open the back cover of the remote controller by sliding it in the direction of the arrow. 2. Insert the attached dry cell batteries. Properly insert, set the batteries by matching the (+) and (–) polarity marks as indi- cated.
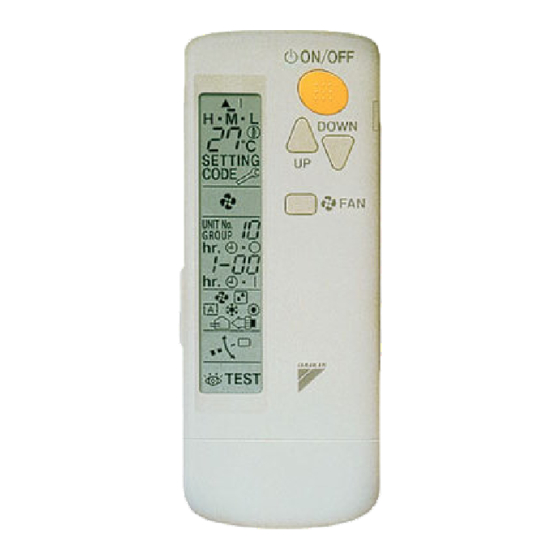
- Page 4 2. Setting the address of wireless remote controller (It is factory set to “ 1 ” ) 〈 Setting from the remote controller〉 1. Hold down the button and the button for at /TEST least 4 seconds to get the Field Set mode. Mode TEMP (Indicated in the display area in the figure at right.)
- Page 5 (3) Receiver installation 1. As shown at right, pass the harness from the receiver through the wiring hole of the decoration panel. Then, attach the receiver to the decoration panel. 2. Hook the harness from the receiver on the upper part of the panel temporary suspension of the decoration panel.
- Page 6 5. Use two tapping screws to attach the transmitter board to the indoor unit, as shown in the figure. 6. Connect the harness from the transmitter board to the connector X24 on the indoor unit PC board. Be sure to pass only the harness connecting to the indoor unit PC board under the tab.
- Page 7 (Example) If the time to clean air filter is set to “Filter Contamination-Heavy”, set Mode No. to “10”, FIRST CODE NO. to “0”, and SECOND CODE NO. to “02”. FIRST SECOND CODE NO. NOTE) MODE CODE DESCRIPTION OF SETTING Filter Contamination- Heavy/Light (Setting for spacing time of dis- play time to clean air...
- Page 8 6. TEST OPERATION • Perform test operation according to the instructions in the installation manual attached to the indoor unit. • After refrigerant piping, drain piping, and electric wiring, operate according to the table to protect the unit. [PRECAUTIONS] 1. Refer to malfunction code of installation manual attached to the indoor unit, if it does not operate. 2.
Need help?
Do you have a question about the BRC7E530W and is the answer not in the manual?
Questions and answers