
Subscribe to Our Youtube Channel
Related Manuals for Endress+Hauser iTEMP PCP TMT181


Summary of Contents for Endress+Hauser iTEMP PCP TMT181
- Page 1 Operating instructions ® iTEMP PCP TMT181 Temperature head transmitter BA100R/24/ae/06.05 51006521...
- Page 2 Preparing the communication with PC configuration software Page 13 Instrument configuration (including a description of the unit functions) A complete description of all the functions as well as a detailed overview of the functionality can be found in this chapter. Endress+Hauser...
-
Page 3: Table Of Contents
Technical Data ....20 Index ......26 Endress+Hauser... -
Page 4: Safety Notes
(-40 and 85 °C). Heat from the process is transferred from the thermowell to the transmitter housing. If the expected process temperature is near or beyond specification limits, consider the use of additional thermowell lagging, and extension nipple, or a remote mounting configuration to isolate the transmitter from the process. Endress+Hauser... -
Page 5: Operational Safety
– Devices that are used in hazardous areas or cables for such devices must have the corresponding type of protection. Safe area (non-hazardous areas)! This symbol identifies the non-hazardous area in the diagrams in these Operating Instructions. – Devices in non-hazardous areas must also be certified if connection cables run through a hazardous area. Endress+Hauser... -
Page 6: Identification
CE mark. â UL recognized component to UL 3111-1 CSA GP approved Ó GL German Lloyd marine approval GL Type Approval for temperature measurements in hazardous locations on GL Classed Vessels, Marine and Offshore Installations. Endress+Hauser... -
Page 7: Delivery Contents
® • iTEMP and ReadWin 2000 are registered trademarks of Endress+Hauser Wetzer GmbH + Co. KG, Nesselwang, Germany Installation Installation conditions • When installing and operating the unit, please take note of the allowable ambient temperature (see chapter 10 "Technical Data"). -
Page 8: Installation
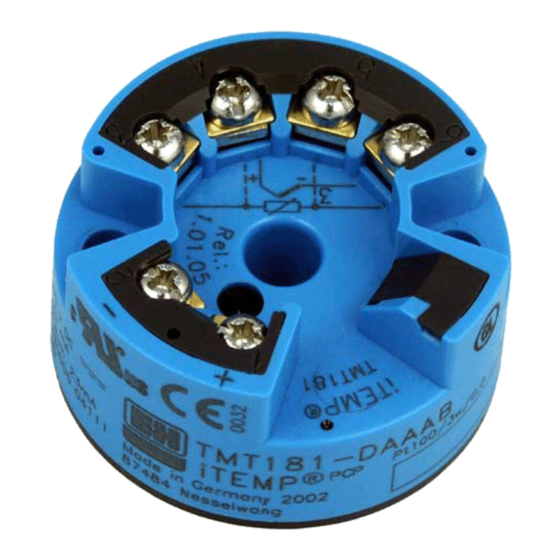
• Screw the head transmitter into the field housing using a screwdriver. " Caution! In order to avoid damaging the head transmitter, do not over-tighten the installation screws. Fig. 5: Installation of head transmitter into field housing. Fig. 4: Installation of head transmitter into a Form B sensor connection head. Endress+Hauser... - Page 9 Fig. 6: Installing the head transmitter - Head transmitter assembly Pos. 1: Thermowell Pos. 2: Measuring inset Pos. 3: Extension neck Pos. 4: Transmitter housing Pos. 5: Head transmitter assembly Pos. 6: Installation screws Pos. 7: Head transmitter Endress+Hauser...
-
Page 10: Wiring
1 and 2 according to the wiring diagram (see Fig. 7). • PC configuration (SETUP socket): Open the flap on the SETUP socket (see Fig. 7) and connect the SETUP connection cable. Fig. 8: Connection to PC for configuration Endress+Hauser... -
Page 11: Potential Grounding
The transmitter is galvanically isolated to 3.75 kV AC (from the sensor input to the output), so the input circuit may also be grounded at any single point. When using a grounded thermocouple, the grounded junction serves as this point. Endress+Hauser... -
Page 12: Operation
USB port on the PC. In order to achieve optimum connection, tighten the RS232C connector screws to the PC. Note! Configuration of the head transmitter can be done either under power, e.g. using a 9 Volt battery or in an installed condition during measurement operation. Endress+Hauser... -
Page 13: Commissioning
(BA137R/09/ae) contained in the PC operation and readout software (see folder ’Doc’). This software can be downloaded free of charge from the Internet at the following address: www.readwin2000.com Warning! Explosions could result in death or serious injury. Configuration of the transmitter is not permitted in a hazardous area! Endress+Hauser... - Page 14 Input: Limitation values see ’Sensor type’ 0 °C Measurement Input of 20 mA value. range end value Input: Limitation values see ’Sensor type’ 100 °C Coefficient X0 to On sensor type polynom RTD, see description ’Customer specific linearization’ Endress+Hauser...
- Page 15 Input of the simulation value (current). Input: 3.8 to 20.5 mA Customer-specific linearization Customer-specific linearization and sensor matching are activated after the POLYNOM RTD sensor type is selected. Please find detailed information about linearization in the PC configuration software. Endress+Hauser...
-
Page 16: Maintenance
PC SETUP program can be downloaded free of charge from the internet from the following address: www.readwin2000.com Please contact your supplier when ordering (e.g. spare parts)! When ordering accessories or spare parts, please state the serial number of the unit! Endress+Hauser... -
Page 17: Trouble-Shooting
Check current loop; the supply should be (≤ 3.6 mA or ≥ 21 mA) connection > 8 V Incorrect transmitter programming Change device function ’Connection (number of wires) mode’ (see chap. ’Commissioning’) Programming Thermocouple setup (see chap. ’Commissioning’). Change to RTD Defective device Replace device Endress+Hauser... -
Page 18: Spare Parts
(interference voltages incurred) wire is not welded Spare parts Head transmitter installation set • For European Style installation: (8 screws, 8 springs, 8 E- rings) • For U. S. Style installation: (8 machine screws M4x20) → Order No.: TMT 181A-KA Endress+Hauser... -
Page 19: Returns
® • ReadWin 2000 1.0.0 and higher 1.02.00 / 04.2003 Original firmware compatible with: ® • ReadWin 2000 1.12.0 and higher New: – By measuring °F, values are stored with higher precision – New GOST sensors implemented Endress+Hauser... -
Page 20: Technical Data
(0 to 20 Ω) • Sensor cable resistance max. 11 Ω per cable in the 3 and 4 wire system • Sensor current: ≤ 0.6 mA Resistance Ω 10 to 400 Ω 10 Ω Resistance transmitter 10 to 2000 Ω 100 Ω Endress+Hauser...
Need help?
Do you have a question about the iTEMP PCP TMT181 and is the answer not in the manual?
Questions and answers