Diesse MINI-CUBE User Manual
Automatic instrument for esr determination with modified westergren method
Hide thumbs
Also See for MINI-CUBE:
- Service manual (62 pages) ,
- User manual (59 pages) ,
- Quick start manual (3 pages)

Related Manuals for Diesse MINI-CUBE


Summary of Contents for Diesse MINI-CUBE
- Page 1 USER MANUAL Rev. 1.7 – May 2022 Automatic instrument for ESR determination with modified Westergren method Software version 1.xx FOR IN VITRO DIAGNOSTIC USE ONLY...
- Page 2 This page is intentionally left blank. Rev. 1.7 (05.2022) MINI-CUBE USER MANUAL...
- Page 3 MINI-CUBE models: This manual is applicable to the following MINI-CUBE instrument models: Catalog number Description 10392 MINI CUBE MINI-CUBE Accessories: Catalog number Description 10435 ESR CONTROL CUBE 4 x 9 ml (2 x Level I + 2 x Level II)
- Page 4 Update of the manual following the latest FW release (V. 1.26). Update of the screen with the new heading. 1.6 - 17/08/2021 Adding of APPENDIX MINI-CUBE PRINTER TOOL II – MPT II INSTALLATION GUIDE 1.7 – 05/2022 Update of the intended purpose Rev.
- Page 5 Manufacturer DIESSE DIAGNOSTICA SENESE SpA Strada dei Laghi 39, 53035 Monteriggioni (SI) Italy Tel. +39 0577 307109, Fax. + 39 0577 307106 www.diesse.it TECHNICAL SUPPORT Strada dei Laghi 39, 53035 Monteriggioni (SI) Italy Tel. +39 0577 307109, Fax. + 39 0577 307106...
- Page 6 N.B. important information. BIOHAZARD: risk of contamination with potentially infected substances. Instrument that complies with MET standards for the Canadian and US markets Rev. 1.7 (05.2022) MINI-CUBE USER MANUAL...
- Page 7 BIO-CONTAMINATION HAZARDS When an analysis system like the MINI-CUBE is used, all precautions must be taken regarding biological risks. The samples do not require preparation. The samples must be disposed of in accordance with laboratory instructions and with local laws.
-
Page 8: Table Of Contents
Setup ................................... 19 Installation procedure ..........................20 Limitations and warnings ........................20 Composition of the instrument ......................20 Disposal ................................21 USE ......................................22 Instructions for the operator ....................... 22 Compatible test tubes ..........................22 Rev. 1.7 (05.2022) MINI-CUBE USER MANUAL... - Page 9 Clinical significance of Rheumatoid Arthritis ................44 The importance of early diagnosis ....................44 Das 28 ................................46 CONNECTION TO A HOST COMPUTER ......................51 APPENDIX: MINI-CUBE PRINTER TOOL II – MPT II INSTALLATION GUIDE ......53 10 BIBLIOGRAPHY ................................54 Rev. 1.7 (05.2022) MINI-CUBE...
-
Page 10: Introduction
1 INTRODUCTION Intended purpose The MINI-CUBE is an automated instrument for the quantitative Erythrocyte Sedimentation Rate (ESR) determination, measured using modified Westergren method on venous and capillary whole blood anticoagulated with K2EDTA or K3EDTA. ESR is a non-specific parameter of an inflammatory status, used as an aid for the monitoring of the physiological or pathological state of the patient. -
Page 11: Clinical Significance Of Esr
Literature suggests the ESR is useful in diagnosing some diseases, such as polymyalgia rheumatica, temporal arteritis, rheumatoid arthritis and Hodgkin’s disease, and is useful as an effective marker of pharmacological treatment in some diseases including rheumatoid arthritis, vasculitis, collagenosis and septic arthritis. The ESR in usually Rev. 1.7 (05.2022) MINI-CUBE USER MANUAL... -
Page 12: Normal Esr Values (Westergren Citrated)
The manufacturer therefore declines all responsibility for damages deriving from inappropriate use. Precautions The MINI-CUBE system offers a closed tube system which provides less exposure to potentially infectious samples; however, all necessary precautions and personal protective equipment for handling biological material apply. Waste material should be disposed of in accordance with your local waste requirements. -
Page 13: Maintenance Procedure
Maintenance procedure The MINI-CUBE is designed to require minimal maintenance. For any type of maintenance activity: • Switch-off the instrument and disconnect from the power source. • Use all appropriate personal protective equipment (gloves) during operation. In the event of biological material leakage, wipe the outer surfaces of the instrument with 70% isopropyl alcohol and immediately contact Technical Services. -
Page 14: Technical Data
2 TECHNICAL DATA Technical description Figure 2.1 The MINI-CUBE module consists of a single body containing all the operating functions necessary for analyzing the sample. Reading unit The motor lifts the reading unit which utilizes four optical sensors (one per position) to verify the suitability of the sample and detect the level at baseline and level after 20 minutes of sedimentation. -
Page 15: External Connections Of The Instrument
ID code can also be manually entered using a stylus on the keypad display. External connections of the instrument The MINI-CUBE has a Bluetooth 4.0 connection for an external printer (optional accessory) or for connection to a mobile device. The power supply, serial/USB port for connection to the computer, a USB port for... -
Page 16: Technical Features
4 pairs of optical elements (photodiode + OPTICAL UNIT phototransistor) INTERFACES Unit of measure The units of measure are expressed according to the INTERNATIONAL MEASURING SYSTEM as indicated in the technical standard CEI EN ISO 80000-1:2013. Rev. 1.7 (05.2022) MINI-CUBE USER MANUAL... -
Page 17: Installation
3 INSTALLATION The MINI-CUBE is a precision instrument and must be handled with appropriate care and precautions. Inappropriate operations may damage the internal optoelectronic components and cause mechanical damage. Follow the instructions in this chapter in order to ensure proper operation of the instrument and safety of the operator. -
Page 18: Unpacking The Instrument
Packing list. Figure 3.1 3.4 Unpacking the instrument Open the box from the top (see the packing labels) and remove the accessories Figure 3.2 Remove the instrument and power supply unit from the box Rev. 1.7 (05.2022) MINI-CUBE USER MANUAL... -
Page 19: Setup
Figure 3.4 It is advisable to position the instrument to 1 meter from devices that generate electromagnetic waves (e.g. laboratory fridges, centrifuges) and instruments that do not have CE marking. Rev. 1.7 (05.2022) MINI-CUBE USER MANUAL... -
Page 20: Installation Procedure
Connect the power supply unit cable to the main power source. Optional - connect the barcode scanner and Bluetooth printer. Once the MINI-CUBE is powered on, a series of beeps will be heard indicating that the system recognized the scanner. Follow the printer installation steps in chapter 4 to enable the printer. -
Page 21: Disposal
3.9 Disposal The MINI-CUBE instrument relies on the use of an electrical power source and therefore, in compliance with the European Directive 2012/19/EU and later amendments by the European parliament, it is classified as Electrical-Electronic Equipment. Disposal of the instrument at the end of its life cycle, must be executed in accordance with local waste disposal regulations. -
Page 22: Use
Always mix pediatric samples thoroughly before starting the test! 4.5 Test tube labelling The MINI-CUBE can accept sample tubes with a maximum of 1 secondary label adhered as close to the lavender EDTA cap as possible and with a label-free Rev. -
Page 23: Map Test Tube Labeling
The secondary label must be applied below the bottom of the internal micro-tube (Figure 4.2). This allows a completely free view of the blood level and of the sedimentation in the tube. Figure 4.2 Rev. 1.7 (05.2022) MINI-CUBE USER MANUAL... -
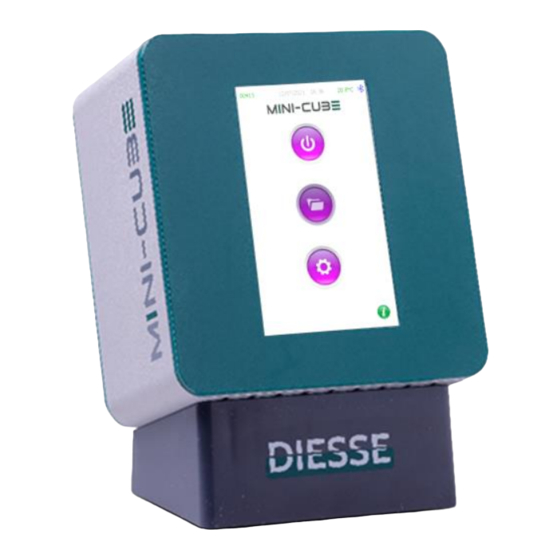
Page 24: Description Of The Mini-Cube Menu
4.7 Description of the MINI-CUBE menu Slide the power switch on the back of the instrument to turn on the MINI-CUBE. 4.7.1 Home Figure 4.3 It is recommended to use a stylus on the touch screen display. Once powered on, the... - Page 25 The instrument is ready to run a sample once the “INITIALIZATION” prompt disappears. The counter in the top left-hand corner of the screen shows the number of tests remaining in the MINI-CUBE. For each result produced, the instrument decreases the number of tests available by one. The counter font colour will change depending on the number of tests remaining;...
-
Page 26: Inserting The Test Tubes
Select the Bluetooth arrow and chose “print”; the system will search for all Bluetooth devices. Select “MPT-II” and wait the instrument status to change from “Searching” to “Connected” (for detailed information, see APPENDIX: MINI-CUBE PRINTER TOOL II – MPT II INSTALLATION GUIDE). - Page 27 When this setting is enabled, ALL tubes will be identified as MAP tubes. When inserting a MAP tube in any empty tube position, it will be displayed as a short (pediatric) tube with the letter M on the cap for MAP. Rev. 1.7 (05.2022) MINI-CUBE USER MANUAL...
-
Page 28: Starting The Analysis Cycle
To cancel a run, either remove the tube and an immediate “ERR” message will display or press the icon and a prompt will read, “There are X sample(s) in process. Are you sure you want to stop the analysis?”. Proceed accordingly. Rev. 1.7 (05.2022) MINI-CUBE USER MANUAL... -
Page 29: Archive
Settings menu as the “threshold value” parameter). Red indicates an ESR that has exceeded the set threshold value. The results are reported in mm/hr according to the Westergren method (default setting). 4.7.5 Archive Click Archive. Rev. 1.7 (05.2022) MINI-CUBE USER MANUAL... - Page 30 Archive if a patient name is manually associated with a sample. In the Results Archive (Figure 4.9), samples can be sorted by date (default), by name or by code (based on the selection made in the item ORGANIZE, in the settings menu). Rev. 1.7 (05.2022) MINI-CUBE USER MANUAL...
- Page 31 ESR value. Several samples can be selected from the Archive menu and, by clicking on the export button, it is possible to print them, permanently delete them or send them to host. Rev. 1.7 (05.2022) MINI-CUBE USER MANUAL...
- Page 32 < 40%) TEMPERATURE: The instrument’s internal working temperature. The temperature is displayed in green if the test is performed with temperature correction enabled. If temperature correction is disabled, the temperature is displayed in red Rev. 1.7 (05.2022) MINI-CUBE USER MANUAL...
- Page 33 It is always possible to print the results via the Bluetooth printer (accessory). It will first be necessary to connect the printer to the instrument from the Settings menu (see APPENDIX: MINI-CUBE PRINTER TOOL II – MPT II INSTALLATION GUIDE). Once connected, pressing the EXPORT key will allow to print the results (Figure 4.11).
-
Page 34: Settings
: Allows to search for all Bluetooth devices to which connection is possible (printers or app related). ORGANIZE: Edit how data will be saved and displayed in the archive (by name, surname, sample ID, patient ID). Rev. 1.7 (05.2022) MINI-CUBE USER MANUAL... - Page 35 QC archives to a USB drive. Archives are exported in Excel format as .CSV files. ARCHIVES BACKUP: Allows to backup or restore all the archives. Archives are backed up in .ARC files, which is the only file format that can be imported in the instrument for restoring them. Rev. 1.7 (05.2022) MINI-CUBE USER MANUAL...
- Page 36 (Figure 4.14). Figure 4.14 SERVICE: Service menu that can only be accessed by personnel authorized by DIESSE Diagnostica Senese S.p.A. Note: the reference scale to be used for test results is set by default on Westergren. If you want to change the reference scale to Panchenkov, please contact our Technical Support or Specialists, since the specific setting can only be accessed by authorized personnel in the Service menu.
-
Page 37: Quality Control
(ABN), the user can select the dedicated card through the "TYPE" setting and enter the specific data. If the QC barcode of DIESSE’s ESR MINI-CUBE CONTROL is scanned, the name, barcode, lot number, expiration date and control limits are automatically programmed. - Page 38 From this record, or the main list, press on the Chart icon to view the QC data in a Levey-Jennings chart (Figure 5.3). This screen displays the QC information including the number of measurements performed, the average, standard deviation and the CV%. The Levey-Jennings chart Rev. 1.7 (05.2022) MINI-CUBE USER MANUAL...
- Page 39 A control value exceeds the mean of three standard deviations. • Two consecutive values exceed the mean of two standard deviations on the same side of the mean. • The difference between two consecutive values exceeds the four standard deviations. Rev. 1.7 (05.2022) MINI-CUBE USER MANUAL...
-
Page 40: Performing Qc Analysis
4). To run a QC sample, scan the QC barcode (previously recorded in the Settings menu), and then load the tube in any free position. The MINI-CUBE will recognize a QC tube by the registered lot number and will display an image on the... -
Page 41: Troubleshooting
Try repositioning the tube as indicated in Chapter 4 Check for any lumps or clots and that the sample is not The ESR result is equal to 0 Err (9) abnormal (see paragraph 6.1). Run the test again Rev. 1.7 (05.2022) MINI-CUBE USER MANUAL... - Page 42 The transponder used is CHECK DEVICE Use a new transponder empty already used Remove and reinsert the The instrument does not transponder. CHECK DEVICE recognize the transponder not found used Use another transponder Rev. 1.7 (05.2022) MINI-CUBE USER MANUAL...
-
Page 43: Measuring Abnormal Samples
Manual and automated ESR measurements in samples without a clear interface are subject to a high degree of variability. In the MINI-CUBE, the sample may go undetected or yield variable results. Visually inspect the sample at the conclusion of the test to confirm the presence of a clear interface. -
Page 44: Calculating The Das 28
Rheumatism (EULAR) recommend the evaluation of 7 criteria to standardize the evaluation of the response to treatment in clinical studies (ACR/EULAR Core data Set). These criteria are: A. the number of painful joints B. the number of swollen joints C. measurement of the ESR Rev. 1.7 (05.2022) MINI-CUBE USER MANUAL... - Page 45 • Moderate disease activity ≥ 3.2 to ≤ 5.1 • Low disease activity ≥ 2.6 to ≤ 3.2 • Remission < 2.6 • evaluation of the modification of disease activity over time Ref (http://www.das-score.nl/das28/nl/uitleg-das28/de-das28-score.html). Rev. 1.7 (05.2022) MINI-CUBE USER MANUAL...
-
Page 46: Das 28
Besides measuring the ESR, the MINI-CUBE can also calculate the DAS28. This feature makes the MINI-CUBE even more functional for small laboratories and in rheumatology testing. The two parameters, which are assessed at the same time, can be extremely useful for evaluating the progress of the disease and monitoring treatment. The DAS should be calculated at least twice, on dates one month apart. - Page 47 Figure 7.2 An enlarged image is displayed to identify the points. Touch the right- or left-hand images for details of the joints, as shown in the Figure 7.3. Figure 7.3 Rev. 1.7 (05.2022) MINI-CUBE USER MANUAL...
- Page 48 DAS28 home screen (underlined purple) to display an enlarged image to identify painful areas. Figure 7.4 Touch the right or left hand for details of the joints, as shown in the Figure 7.5. Rev. 1.7 (05.2022) MINI-CUBE USER MANUAL...
- Page 49 When the DAS28 feature is enabled, the DAS28 calculation will appear below the ESR result on the instrument printout. From the DAS28 home page, click on the chart to go to the page with historical data on the sample (Figure 7.6). Rev. 1.7 (05.2022) MINI-CUBE USER MANUAL...
- Page 50 DAS28 values on the y axis. A vertical blue line indicates the corresponding point for the date selected in the list below, which lists all analyses for the patient. Click on export to print the entire page displayed. Rev. 1.7 (05.2022) MINI-CUBE USER MANUAL...
-
Page 51: Connection To A Host Computer
8 CONNECTION TO A HOST COMPUTER Foreword: Hardware data The Communication between the MINI-CUBE and an external PC may be done in two possible ways: Using the Direct USB Connection: In this case, connect a standard USB Cable A-B between the PC Host USB Port (Rectangular Type A Connector) and the Mini Cube Client USB Port (Square Type B Connector). - Page 52 Detailed specifics of the communication protocol are available for consultation on the web site at the following address: www.diesse.it. MINI-CUBE SPECIFICATION PROTOCOL Rev. 1.7 (05.2022) MINI-CUBE USER MANUAL...
-
Page 53: Appendix: Mini-Cube Printer Tool Ii - Mpt Ii Installation Guide
Turn ON the MINI-CUBE Printer Tool – (MPT-II) The instrument will search for Bluetooth devices. In this menu, the name of the MINI-CUBE Printer Tool – (MPT-II) must be shown 9. SELECT the name of the printer and TAP ON it 10. -
Page 54: Bibliography
пилляра // Врачебное дело. – 1924. – № 16-17. – . 695-697. (Definition of erythrocyte sedimentation using Micrococapillary tube) Domenico Galasso, Massimo L’Andolina, Norma M. Marigliano, Salvatore Galasso, Giovanni Forte. Clinimetric criteria of rheumatoid arthritis (2012). Rev. 1.7 (05.2022) MINI-CUBE USER MANUAL... - Page 55 Rev. 1.7 (05.2022) MINI-CUBE USER MANUAL...
Need help?
Do you have a question about the MINI-CUBE and is the answer not in the manual?
Questions and answers