
Related Manuals for Xblitz PARK VIEW ULTRA


Summary of Contents for Xblitz PARK VIEW ULTRA
- Page 1 [PARK VIEW ULTRA] Instrukcja obsługi w języku polskim - User’s manual in English language Bedienungsanleitung auf Deutsch -...
- Page 3 INSTRUKCJA OBSŁUGI [PARK VIEW ULTRA]...
-
Page 4: Przed Użyciem
7. Dźwięk: urządzenie posiada mikrofon pojemnościowy, który nagrywa wszelkie odgłosy otoczenia. Dźwięki mogą nakładać się na siebie powodując zniekształcenia. ZESTAW ZAWIERA 1 - Kamera samochodowa Xblitz Park View Ultra 2 - Ładowarka samochodowa 3 - Gumki mocujące x 2 4 - Kamera wsteczna 5 - Czytnik kart pamięci... -
Page 5: Montaż Kamery
MONTAŻ KAMERY 1. Włóż kartę pamięci do kamery. 2. Nałóż kamerę na lusterko wsteczne. 3. Przymocuj kamerę za pomocą gumek dołączonych z kamerą w zestawie. 4. Poprowadź kabel zasilający oraz kabel kamery cofania. 5. Podłącz kabel zasilający oraz kabel kamery cofania. 6. -
Page 6: Opis Produktu
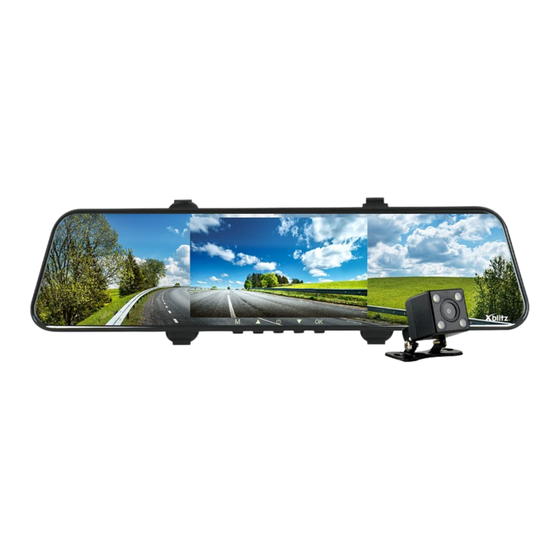
01. OPIS PRODUKTU 9 10 11 1 - Obiektyw 2 - Głośnik 3 - Miejsce montażu gumek mocujących 4 - Przycisk RESET 5 - Port karty microSD 6 - Miejsce wpięcia kabla kamery wstecznej 7 - Port mini USB (podpięcie zasilania) 8 - Wyświetlacz 9 - Przycisk MODE 10 - Przycisk W GÓRĘ... -
Page 7: Rozpoczęcie Pracyz Urządzeniem
02. ROZPOCZĘCIE PRACY Z URZĄDZENIEM 1. Zamontuj i podłącz kamerę do zasilania. (zgodnie ze wskazówkami w pkt. 4) 2. Włóż (sformatowaną do systemu plików FAT32) kartę pamięci micro SD. UWAGA: kartę pamięci proszę wkładać i wyjmować tylko gdy urządzenie jest wyłączone. 3. - Page 8 Przytrzymaj 3 sek. aby włączyć lub wyłączyć kamerę. POWER Krótkie wciśnięcie wygasza/wybudza ekran W menu i trybie odtwarzania odpowiada za nawigację po poszczególnych pozycjach. W trybie wideo dłuższe wciśnięcie włącza i wyłącza tryb parkingowy (tylko W DÓŁ jeśli kamera nie nagrywa). W trybie zdjęć dłuższe wciśnięcie włącza Zoom +.
-
Page 9: Tryb Odtwarzania
3. Efekt Ustawienie efektu wykonywanych zdjęć do wyboru: Normalny / Sepia / Czarno-biały / Negatyw. C. TRYB ODTWARZANIA 1. Głośność Ustawienia poziomu dźwięku w odtwarzanym wideo. 2. Usuń Usuwa wybrany plik. 3. Zabezpiecz Zabezpiecza wybrany plik przed nadpisaniem. D. MENU OGÓLNE 1. - Page 10 10. Tryb parkingowy Gdy ten tryb jest włączony, kamera pozostawiona w samochodzie i podłączona do źródła zasilania wychwytuje wstrząs samochodu (na przykład podczas stłuczki parkingowej), włącza się i zaczyna nagrywać. Tryb ten można szybko włączyć i wyłączyć w trybie wideo przytrzymując klawisz „w dół” (kiedy kamera nie nagrywa).
- Page 11 8. Czas nagrania (lub jeśli kamera nie nagrywa ilość miejsca na karcie pamięci wyrażona w czasie jaki może jeszcze nagrać) 9. Informacja o włożonej karcie pamięci 10. Informacja o podłączonym zasilaniu 11. Godzina 12. Data 13. Wartość ustawionej ekspozycji B. TRYB FOTO 1.
- Page 12 C. TRYB ODTWARZANIA 1. Normalne pliki wideo 2. Pliki wideo zabezpieczone przed nagraniem ręcznie 3. Pliki wideo zabezpieczone przez G-Sensor i Tryb parkingowy 4. Zdjęcia zrobione kamerą 5. Nazwa pliku 6. Data nagrania 7. Godzina nagrania 8. Czas nagrania 9. Powrót (krótkie wciśnięcie MENU)
- Page 13 ŚRODKI OSTROŻNOŚCI: 1. Nie należy samodzielnie rozbierać ani ingerować w kamerę. W razie wystąpienia awarii należy skonstatować się z serwisem. 2. Używaj wyłącznie oryginalnych akcesoriów. 3. Korzystaj wyłącznie z oryginalnej ładowarki dołączonej do zestawu. Użytkowanie innego zasilacza może źle wpływać na działanie baterii. 4.
-
Page 14: Specyfikacja Techniczna
07. SPECYFIKACJA TECHNICZNA Procesor M-stra8328P Rozdzielczość nagrywania Przód: Max. 1920x1080 Tył: 1280x720 Sensor Przód: PS5226 Tył: 9726 Obiektyw Kąt widzenia Przód 170 stopni; Tył 120 stopni Wymiary 96x307 x35mm Pamięć Karty micro SD do 256GB klasy 10 Format zapisu Ładowarka Do 2A Mini USB 2,0 Mikrofon/Głośnik... - Page 15 Reklamacje należy zgłaszać za pomocą formularza reklamacyjnego znajdującego się pod adresem: http://reklamacje.kgktrade.pl/ Szczegóły, kontakt oraz adres serwisu można znaleźć na stronie: www.xblitz.pl Specyfikacje i zawartość zestawu mogą ulec zmianie bez powiadomienia, przepraszamy za wszelkie niedogodności. Umieszczony symbol przekreślonego kosza na śmieci informuje, że nieprzydatnych urządzeń...
- Page 17 USER'S MANUAL [PARK VIEW ULTRA]...
-
Page 18: Before First Use
7. Sound: the device has a capacitive microphone, which records all the sounds from the surrounding. The sounds may overlap causing distortions. THE SET CONTAINS 1 - Car camera Xblitz Park View Ultra 2 - Car charger 3 - Mounting rubbers x 2... -
Page 19: Camera Installation
CAMERA INSTALLATION 1. Insert the memory card into the recorder. 2. Put the camera onto the rear mirror. 3. Mount the camera using the included rubbers. 4. Run the powering wire and the rear camera wire. 5. Connect the powering wire and the rear camera wire. 6. -
Page 20: Product Description
01. PRODUCT DESCRIPTION 9 10 11 1 - Lens 2 - Speaker 3 - Place for mounting rubbers 4 - RESET button 5 - microSD memory card slot 6 - Place for rear camera wire 7 - mini USB slot 8 - Screen 9 - MODE button 10 - UP button... -
Page 21: Getting Started
02. GETTING STARTED 1. Mount and connect the camera into the power adapter. 2. Insert (already formatted into the FAT32 file format) microSD memory card. NOTE: the memory card should be putted in /out only when the device is o . 3. -
Page 22: Video Mode
Hold for 3 seconds to turn on / o the camera. POWER Short press let us operate the screen saver function. In menu and playback mode it navigates us between individual positions. In video mode longer press turns on / o parking mode (unless the camera is recording DOWN at the moment). -
Page 23: Playback Mode
3. E ect Set the e ect of the pictures (normal / sepia / black&white / negative). C. PLAYBACK MODE 1. Volume Set the volume of the displayed video. 2. Delete Deletes the selected file. 3. Protect Protects the selected file from being overwritten. D. -
Page 24: Screen & Icons
11. Motion detection When this option is turned on and left in the standby mode connected to the power supply, camera after detecting a motion will record a short 8-seconds movie. 12. Default settings Restores the default settings of the camera. 13. - Page 25 8. Length of the recording or if the camera does not record the space left on the memory card expressed in the time left for recordings. 9. Info about inserted memory card. 10. Info about connected power supply. 11. Hour 12.
- Page 26 C. PLAYBACK MODE 1. Normal video files 2. Video files protected before the recording (manually). 3. Video files protected by G-sensor and Parking mode 4. Pictures taken by the camera 5. File name 6. Date of the recording 7. Hour of the recording 8.
- Page 27 SAFETY MEASURES: 1.Do not disassembly or interfere with the camera. If the device is faulty, contact the service point. 2. Only use the original accessories. 3. Use only the original charger, included in the set. Using a di erent power supply can a ect the battery negatively.
-
Page 28: Technical Specification
07. TECHNICAL SPECIFICATION Processor M-stra8328P Video resolution Front: max. 1920 x 1080p , back: 1280 x 720p Sensor Front: PS5226, back: 9726 Lens Lens: 6G View angle Front: 170°, back: 120° Dimensions 96mm x 307mm x 35mm Memory microSD memory card class 10th up to 256GB File format Charger Up to 2A... -
Page 29: Warranty Claims
08. WARRANTY / CLAIMS The product is covered by a 24-month warranty. Warranty conditions available on the website https://xblitz.pl/warranty/ Complaints should be reported using the form located at: http://reklamacje.kgktrade.pl/ Contact details and website address can be found on the website: www.xblitz.pl... - Page 31 BEDIENUNGSANLEITUNG [PARK VIEW ULTRA]...
- Page 32 7. Sound: Das Gerät verfügt über ein kapazitives Mikrofon, das alle Geräusche aus der Umgebung aufzeichnet. Die Töne können sich überlappen und Verzerrungen verursachen. DAS SET ENTHÄLT 1 - Autokamera Xblitz Park View Ultra 2 - Autoladegerät 3 - Montage Gummis x 2 4 - Rückfahrkamera...
- Page 33 KAMERA-INSTALLATION 1. Setzen Sie die Speicherkarte in den Recorder ein. 2. Setzen Sie die Kamera auf den Rückspiegel. 3. Montieren Sie die Kamera mit den mitgelieferten Gummis. 4. Führen Sie das Stromkabel und das Kabel der Rückfahrkamera aus. 5. Schließen Sie das Netzkabel und das Kabel der Rückfahrkamera an. 6.
- Page 34 01. PRODUKTBESCHREIBUNG 9 10 11 1 - Linse 2 - Lautsprecher 3 - Montageort für die Befestigung von Gummibändern 4 - RESET-Taste 5 - MicroSD-Kartenanschluss 6 - Position des Rückfahrkamera-Kabels 7 - Mini-USB-Anschluss (Stromanschluss) 8 - Anzeige 9 - MODE-Taste 10 - AUF-Taste 11 - POWER-Taste 12 - DOWN-Taste...
-
Page 35: Erste Schritte
02. ERSTE SCHRITTE 1. Montieren und verbinden Sie die Kamera mit dem Netzteil. 2. Legen Sie die (bereits im FAT32-Dateiformat formatierte) microSD-Speicherkarte ein. HINWEIS: Die Speicherkarte sollte nur bei ausgeschaltetem Gerät ein- und ausgeschaltet werden. 3. Stellen Sie im Menü ein: a. - Page 36 Halten Sie diese Taste 3 Sekunden lang gedrückt, um POWER die Kamera ein- / auszuschalten. Kurz drücken, um den Bildschirmschoner zu aktivieren. Im Menü- und Wiedergabemodus navigiert er zwischen uns individuelle Positionen. Im Videomodus länger drücken Ein- / Ausparkmodus (außer die Kamera NIEDER nimmt auf im Moment).
- Page 37 3. Wirkung Stellen Sie den E ekt der Bilder ein (normal / sepia / schwarz / weiß / negativ). C. WIEDERGABEMODUS 1. Volumen Stellen Sie die Lautstärke des angezeigten Videos ein. 2. Löschen Löscht die ausgewählte Datei. 3. Schützen Schützt die ausgewählte Datei davor, überschrieben zu werden. D.
- Page 38 10. Parkmodus Wenn der Parkmodus eingeschaltet ist, bleibt die Kamera im Auto und ist verbunden zur Stromversorgung erkennt ein Auto-Shake (z.B. während der Kollision auf dem Parkplatz viel) die Kamera schaltet sich ein und beginnt mit der Aufnahme. Dieser Modus kann schnell sein im Videomodus ein- / ausgeschaltet, indem Sie die Ab-Taste gedrückt halten (außer die Kamera nimmt gerade auf).
- Page 39 8. Länge der Aufnahme oder wenn die Kamera den verbleibenden Platz nicht aufzeichnet auf der Speicherkarte in der verbleibenden Zeit für die Aufnahmen ausgedrückt. 9. Info über eingelegte Speicherkarte. 10. Info über angeschlossene Stromversorgung. 11. Stunde 12. Datum 13. Informationen zur Exposition B.
- Page 40 C. WIEDERGABEMODUS 1. Normale Videodateien 2. Videodateien vor der Aufnahme geschützt (manuell). 3. Videodateien geschützt durch G-Sensor und Parkmodus 4. Bilder von der Kamera aufgenommen 5. Dateiname 6. Datum der Aufnahme 7. Stunde der Aufnahme 8. Länge der Aufnahme 9. Zurück (kurz auf die Menü-Taste drücken)
- Page 41 VORSICHTSMASSNAHMEN: 1. Nehmen Sie den Camcorder nicht auseinander und manipulieren Sie ihn nicht. Im Falle des Auftretens Fehler sollten an den Dienst gemacht werden. 2. Verwenden Sie nur Originalzubehör. 3. Verwenden Sie nur das im Kit enthaltene Original-Ladegerät. Verwendung Eine andere Stromversorgung kann den Betrieb des Akkus stark beeinträchtigen. 4.
-
Page 42: Technische Spezifikation
07. TECHNISCHE SPEZIFIKATION Prozessor M-stra8328P Video Auflösung Vorderseite: max. 1920 x 1080p, Rückseite: 1280 x 720p Sensor Vorderseite: PS5226, Rückseite: 9726 Linse Linse: 6G Blickwinkel Vorderseite: 170 °, Rückseite: 120 ° Maße 96 mm x 307 mm x 35 mm Erinnerung microSD-Speicherkarte Klasse 10. - Page 43 08. GARANTIE / ANSPRÜCHE Für das Produkt gilt eine 24-monatige Garantie. Garantiebedingungen verfügbar auf der Website https://xblitz.pl/gwarancja-de Beschwerden sollten mit dem Formular unter folgender Adresse gemeldet werden: http://reklamacje.kgktrade.pl/ Kontaktdaten und Website-Adresse finden Sie auf der Website: www.xblitz.pl Spezifikationen und Inhalt des Kits können ohne vorherige Ankündigung geändert werden, wir entschuldigen uns für etwaige Unannehmlichkeiten.
- Page 44 EXPLORE THE FUTURE...
Need help?
Do you have a question about the PARK VIEW ULTRA and is the answer not in the manual?
Questions and answers