
Related Manuals for Elvid STUDIOVISION SRM-7X2-4KH


Summary of Contents for Elvid STUDIOVISION SRM-7X2-4KH
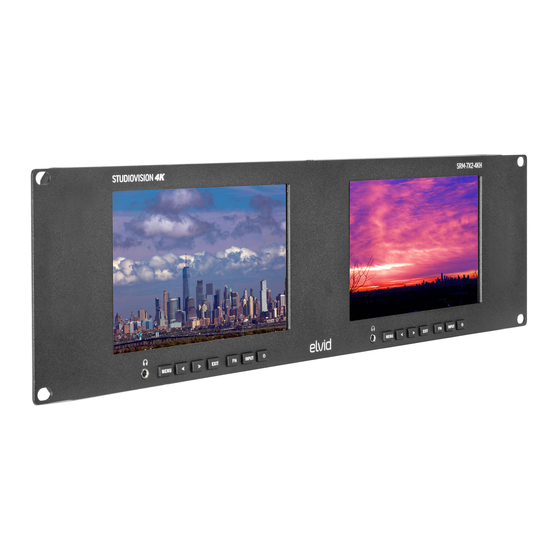
- Page 1 STUDIOVISION SRM-7X2-4KH Dual 7 in. Rackmount Monitors STUDIOVISION 4K SRM-7X2-4KH MENU INPUT MENU INPUT EXIT EXIT USER MANUAL...
- Page 2 THANK YOU FOR CHOOSING ELVID. The Elvid SRM-7X2-4KH rackmount monitoring system fits dual 7-inch, full HD monitors into a standard 19-inch machine rack. The LCD panels’ native 1920 × 1200 resolution provides a sharp image and facilitates precise color rendering. The monitors feature HDMI and SDI inputs with loop outputs, and their native aspect ratio of 16:10 fits most popular video formats.
-
Page 3: Table Of Contents
TABLE OF CONTENTS Overview ���������������������������������������������������������������������������������������������������������������������������������������������������������������������������������������������������������������������������������������������������������������4 Setting Up the StudioVision Rackmount Monitor ����������������������������������������������������������������������������������������������������������������������������������������������������������������������������������6 Using the StudioVision Rackmount Monitor��������������������������������������������������������������������������������������������������������������������������������������������������������������������������������������������7 Picture Menu �������������������������������������������������������������������������������������������������������������������������������������������������������������������������������������������������������������������������������������������������������9 Marker Menu �����������������������������������������������������������������������������������������������������������������������������������������������������������������������������������������������������������������������������������������������������10 Function Menu �������������������������������������������������������������������������������������������������������������������������������������������������������������������������������������������������������������������������������������������������10 Waveform Menu �����������������������������������������������������������������������������������������������������������������������������������������������������������������������������������������������������������������������������������������������11 Audio Menu ��������������������������������������������������������������������������������������������������������������������������������������������������������������������������������������������������������������������������������������������������������11 System Menu ����������������������������������������������������������������������������������������������������������������������������������������������������������������������������������������������������������������������������������������������������12 Supported Resolutions and Frame Rates ������������������������������������������������������������������������������������������������������������������������������������������������������������������������������������������������13 Specifications ����������������������������������������������������������������������������������������������������������������������������������������������������������������������������������������������������������������������������������������������������14 Troubleshooting ������������������������������������������������������������������������������������������������������������������������������������������������������������������������������������������������������������������������������������������������15... -
Page 4: Overview
OVERVIEW FRONT STUDIOVISION 4K SRM-7X2-4KH MENU INPUT MENU INPUT EXIT EXIT LCD screen LCD screen Headphone output Headphone output Menu button Menu button Navigation buttons Navigation buttons Exit button Exit button Function button Function button Input selector Input selector Power button Power button ALSO INCLUDED •... - Page 5 BACK TALLY DISPLAY 2 DISPLAY 1 HDMI HDMI 12V 2A Tally port LAN port USB port 12V 2A Power input HDMI 2.0 input 3G-SDI output HDM 2.0 output 3G-SDI input 3G-SDI input HDM 2.0 output 3G-SDI output HDMI 2.0 input...
-
Page 6: Setting Up The Studiovision Rackmount Monitor
Connect a computer to the USB port on the rear panel to apply both monitors. firmware updates from Elvid when available. Firmware updates are posted on the download page at www.elvidcinema.com. Connect the video source to an SDI or HDMI input. Once the monitor is powered on, the picture is immediately visible. -
Page 7: Using The Studiovision Rackmount Monitor
USING THE STUDIOVISION RACKMOUNT MONITOR POWERING ON QUICK ADJUSTMENTS Plug the power supply into an outlet and into the power input on the rear panel. MENU INPUT EXIT The monitors will turn on when power is connected. After power is connected, turn the monitors off and on using the front panel power buttons. - Page 8 FUNCTION BUTTON SETUP RESETTING THE STUDIOVISION RACKMOUNT MONITOR To change the functions assigned to the FUNCTION button, follow To erase all settings and return to the factory presets, follow these these steps: steps: 1. Press and hold the FUNCTION button until the function select 1.
-
Page 9: Picture Menu
PICTURE MENU BRIGHTNESS DEFAULT LUT Adjusts the monitor’s brightness value from 0 to 100. The default Available only when Default is selected in the Camera LUT menu. setting is 50. When Default is activated, select from the list of LUTs that are built into the monitor�... -
Page 10: Marker Menu
MARKER MENU CENTER MARKER ASPECT MAT Turning on the center marker places a crosshair at the center of the Available only when an aspect ratio is selected from the Aspect screen. The preset is set to off. Marker menu. Adjust the darkness of the area of the screen that’s outside the aspect marker. -
Page 11: Waveform Menu
WAVEFORM MENU FULL MODE PEAKING LEVEL Displays a waveform scope on the full screen. Select Y, YCbCr, RGB, Adjusts the peaking feature’s outline intensity from 1 to 100. The Vector, Histogram, Audio, or off (default). default value is set to 50. WAVEFORM FALSE COLOR Select from RGB (default), Multi, Y, YCbCr, and off. -
Page 12: System Menu
SYSTEM MENU LANGUAGE DHCP Sets the on-screen language display to English (default) or Chinese. The switcher automatically receives IP address information if a DHCP server is on the network. COLOR BAR Displays color bars on-screen. Set luminance to 100%, 75%, or off IP ADDRESS/SUB. -
Page 13: Supported Resolutions And Frame Rates
SUPPORTED RESOLUTIONS AND FRAME RATES HDMI 2.0 3G-SDI 480i (59.94) 59.94i 480i (60) 576i (50) 480p (59.94) 29.94p 480p (60) 576p (50) 23.98p (1280×720) 720p (23.98) 720p (24) 720p (25) 29.97p 720p (29.97) 720p (30) 1080 720p (50) 1080 59.94i 720p (59.94) 1080 720p (60) -
Page 14: Specifications
SPECIFICATIONS DISPLAY POWER Input Power 10 to 24 V DC Panel Type Dual IPS-Type LCD Battery Type None Display Size 7.0 in. (17.8 cm) Power Consumption ≤18 W Display Resolution 1920 × 1200 Aspect Ratio 16:10 MOUNTING Viewing Angle Horizontal: 160° Vertical: 160°... -
Page 15: Troubleshooting
TROUBLESHOOTING Problem Solution The StudioVision will not turn on. • Make sure the AC adapter is fully plugged in, and the AC power source is reliable. The StudioVision is turned on, but • Check whether the color saturation is properly configured. there is only a black and white •... - Page 16 ONE-YEAR LIMITED WARRANTY This Elvid product is warranted to the original purchaser to be free from defects in materials and workmanship under normal consumer use for a period of one (1) year from the original purchase date or thirty (30) days after replacement, whichever occurs later. The warranty provider’s responsibility with respect to this limited warranty shall be limited solely to repair or replacement, at the provider’s discretion, of any product that fails during normal use of this product in its...
Need help?
Do you have a question about the STUDIOVISION SRM-7X2-4KH and is the answer not in the manual?
Questions and answers