Table of Contents
Advertisement
Quick Links
Advertisement
Table of Contents

Related Manuals for Elvid FIELDVISION OCM-89-4KH


Summary of Contents for Elvid FIELDVISION OCM-89-4KH
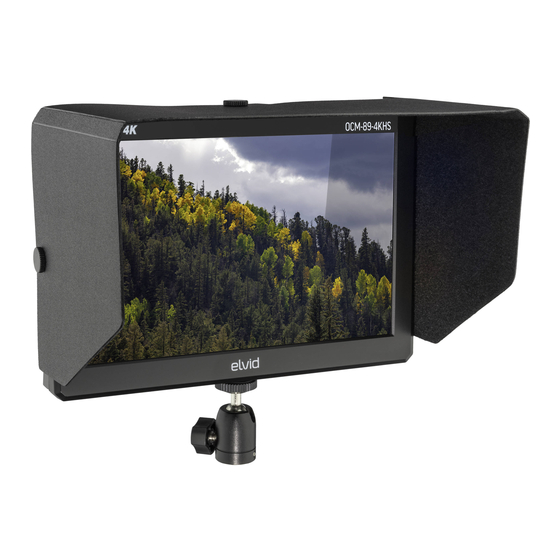
- Page 1 FIELDVISION OCM-89-4KH / 4KHS 8.9" Field Monitor QUICKSTART GUIDE...
- Page 2 PRECAUTIONS • Exposure to high sound levels • Handle this product with care. can cause permanent hearing Avoid any impacts to this loss. Avoid listening at high product. volumes for extended periods • Do not block the vents in this of time.
- Page 3 CONTENTS • Monitor • Shoe-mount ball head • Sun hood • V-mount battery sub plate • Sun-hood screws (×3) and mounting screws • 12 V DC power supply • Hex key and set screw • Mini HDMI to HDMI cable (C to A)
- Page 4 OVERVIEW Battery release button Battery slot BATTERY RELEASE DC 12V HDMI DC 12 V power input SDI input HDMI output (OCM-89-4KHS only) port HDMI input SDI output (OCM-89-4KHS only) Headphone output 1/4-20 threaded mounting sockets...
- Page 5 Menu button Right selection button Left selection button Exit button F2 button F1 button OCM-89-4KH Power button EXIT EXIT MENU MENU 1/4-20 socket Power indicator LED Menu button Right selection button Left selection button Exit / F2 button F1 button Input switch OCM-89-4KHS Power button...
-
Page 6: Getting Started
GETTING STARTED INSTALLING THE BATTERY 1. Place an NP-F battery into the battery slot, making sure the plate’s contacts align with the battery terminals. 2. Slide the battery toward the contacts until it locks into place. To remove the battery, press the battery release button and slide the battery away from the contacts. -
Page 7: Attaching The Sun Hood
ATTACHING THE SUN HOOD Use the sun hood to cut down on glare from sunlight or bright overhead lighting. 1. Lay the monitor down on a flat surface, with the screen facing up. 2. Unfold the sun hood, and attach it to the monitor’s top and side 1/4-20 sockets with the three sun-hood screws. -
Page 8: Connecting To A Camera
CONNECTING TO A CAMERA HDMI: Connect the monitor’s HDMI input to a camera with an HDMI output. SDI (OCM-89-4KHS only): Connect the monitor’s SDI input to a camcorder or camera with an SDI output. OUTPUTTING THE SIGNAL Use the appropriate HDMI and SDI Out ports to connect the FieldVision monitor to a recorder or external monitor. -
Page 9: User Interface
USER INTERFACE ACCESSING THE MENUS To get the most out of the monitor, make sure the its settings are properly configured. All the setting configurations are located in the six main menus: Image Adjust, Marker, Function, Monitoring Tools, Audio, and System. MENU NAVIGATION Use the menu button to call up the menu and make selections, and the and buttons to navigate the menu and adjust... -
Page 10: Function Buttons
While the volume menu is on-screen, press the menu button to cycle through other functions. When the desired function menu appears on-screen, use the and buttons to adjust the setting. OCM-89-4KHS: The input button toggles the input signal selector. Press the button to switch between HDMI and SDI input signals. - Page 11 FUNCTION BUTTON SETUP Menu options for the function buttons are Center Marker, Aspect Marker, Check Field, Underscan, Scan, Aspect, DSLR, Freeze, Peaking (F1 default), False Color, Exposure, Histogram, and Level Meter (F2 default). To change the functions assigned to the F1 and F2 buttons, follow these steps: 1.
-
Page 12: Resetting The Monitor
RESETTING THE MONITOR To erase all settings and return to the factory presets, follow these steps: 1. Press the menu button to open the main menu. 2. Select the System menu, and press the menu button. 3. Scroll down to Reset, and press the menu button. 4. -
Page 13: Image Adjust Menu
IMAGE ADJUST MENU BRIGHTNESS Adjusts the monitor’s brightness value from 0 to 100. The default setting is 50. CONTRAST Adjusts the contrast value of the on-screen image from 0 to 100. The default setting is 50. SATURATION Adjusts the value of screen color saturation from 0 to 100. The default setting is 50. -
Page 14: Camera Lut
CAMERA LUT Activates either the Default LUT, LUT menu, or Import User LUT. The default setting is off. DEFAULT LUT Available only when Default LUT is selected in the Camera LUT menu. When activated, select from the list of preloaded LUTs. -
Page 15: Color Temp
COLOR TEMP Adjusts the color temperature of the on-screen image. Presets are 6500 (default), 7500, 9300 K, and User. When User mode is on, additional menus for red, green, and blue offset and gain become active, and can be accessed by scrolling past the Color Temp menu. -
Page 16: Marker Menu
MARKER MENU CENTER MARKER Turning the center marker option on places a crosshair at the center of the screen. The preset is set to on. ASPECT MARKER Sets the aspect marker on-screen display. Select from 16:9, 1.85:1, 2.35:1, 4:3, 3:2, and off (default). SAFETY MARKER Displays an on-screen safety frame marker. -
Page 17: Marker Mat
GRID This turns off the other markers and replaces them with a 3×3 grid. The default setting is off. MARKER MAT Available only when an aspect ratio is selected from the Aspect Marker menu. Adjust the darkness of the area of the screen that’s outside the aspect marker. -
Page 18: Function Menu
FUNCTION MENU SCAN Determines how the image is displayed based on the settings in the Aspect and Zoom menus below. Selecting Aspect (default) or Zoom activates the Aspect or Zoom menus. Selecting Pixel-to-Pixel turns off scaling and displays the incoming video signal in its native resolution and aspect ratio with 1:1 pixel mapping. -
Page 19: Check Field
CHECK FIELD When Check Field is on, only the selected color information from the incoming video signal will appear on-screen. Check Field mode is useful for calibrating the monitor. Select mono, red, green, blue, or off (default). ZOOM Available only when Zoom is selected in the Scan menu. Scales the incoming video signal. -
Page 20: Peaking Color
MONITORING TOOLS MENU PEAKING Turning the peaking feature on adds a color outline to high- contrast areas of the image, highlighting areas that are in focus. The default is set to off. PEAKING COLOR Selects the color of the peaking feature’s outline. Choose red (default), green, blue, white, or black. -
Page 21: Exposure Level
EXPOSURE Turning on displays diagonal stripes through areas of the image that exceed the exposure level setting in the Exposure Level menu. EXPOSURE LEVEL Adjusts the exposure level intensity from 0 to 100. The default value is set to 85. HISTOGRAM Histogram places a meter in the lower right corner of the screen that indicates the overall level of exposure from light... -
Page 22: Audio Menu
AUDIO MENU VOLUME Adjusts the level of the audio output from 0 to 100. The default volume is set to 50. LEVEL METER Activating the level meter puts a meter on-screen that can monitor channels 1 and 2 of the audio source. The default setting is on. -
Page 23: System Menu
SYSTEM MENU LANGUAGE Sets the language of the on-screen display to English (default) or Chinese. OSD TIMER Set the length of time the on-screen menu is displayed. Select 10 (default), 20, or 30 seconds. IMAGE FLIP Controls the orientation of the on-screen image. Flip the screen horizontally (H), vertically (V), or both (H/V). - Page 24 F1 CONFIGURATION / F2 CONFIGURATION Assigns functions to the F1 and F2 buttons. Choose Center Marker, Aspect Marker, Check Field, Underscan, Scan, Aspect, DSLR, Freeze, Peaking (F1 default), False Color, Exposure, Histogram, and Level Meter (F2 default). When the function is assigned, repeatedly pressing the function button scrolls through the available options for that function.
-
Page 25: Specifications
SPECIFICATIONS Panel size 8.9 in. (22.6 cm) Panel type IPS LCD Backlight Resolution 1920 × 1200 Brightness 350 cd/m² Contrast ratio 800:1 Bit depth 8-bit Viewing angle L/R: 170° U/D: 170° Aspect ratio 16:10 Input HDMI, SDI (OCM-89-4KHS model only) Output HDMI, SDI (OCM-89-4KHS model only), headphone (3.5 mm stereo) -
Page 27: One-Year Limited Warranty
ONE-YEAR LIMITED WARRANTY This Elvid product is warranted to the original purchaser to be free from defects in materials and workmanship under normal consumer use for a period of one (1) year from the original purchase date or thirty (30) days after replacement, whichever occurs later. - Page 28 www.elvidcinema.com...
Need help?
Do you have a question about the FIELDVISION OCM-89-4KH and is the answer not in the manual?
Questions and answers