Table of Contents
Advertisement
Quick Links
Advertisement
Table of Contents

Related Manuals for Clarity Platinum


Summary of Contents for Clarity Platinum
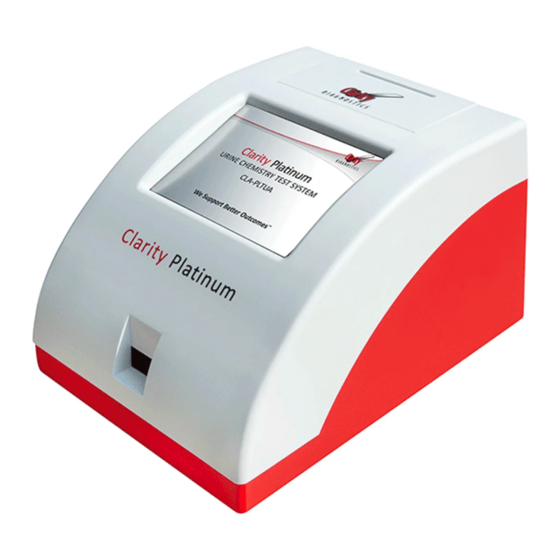
- Page 1 ® Clarity Platinum Urine Analyzer Operator’s Manual We Support Better Outcomes ™...
-
Page 2: Table Of Contents
Table of Contents 1. INTRODUCTION ....................1 Intended Use ........................1 Getting Started ........................2 Unpacking the Clarity Platinum Urine Analyzer ..............2 Clarity Platinum Urine Analyzer Hardware Overview ............2 Assembling the Clarity Platinum Urine Analyzer ..............3 Loading the Printer Roll ...................... 4 Powering On/Off ......................... 5 Accessing the Main Menu ....................6 Clarity Platinum Urine Analyzer User Interface ..............7 2. OPERATIONS ....................... 8 2.1 PERFORMING A URINALYSIS TEST ..............9 Preparing a Urinalysis Test .................... - Page 3 Cleaning the Analyzer Case ....................29 Cleaning the Touch Screen ....................29 APPENDIX A. Clarity Platinum Urine Analyzer Specifications ........30 APPENDIX B. Clarity Platinum Urine Analyzer Default Settings ....... 30 APPENDIX C. Clarity Platinum Urine Analyzer Unit Convention Table ..... 31 APPENDIX D. Symbols .................... 33 We Support Better Outcomes™...
-
Page 4: Introduction
Clarity Platinum Urine Analyzer OPERATOR’S MANUAL 1. Introduction The introduction explains how to unpack, install, and begin using the Clarity Platinum Urine Analyzer. The introduction also includes an overview of the analyzer and its key features. The Clarity Platinum Urine Analyzer Test System is for CLIA Waived Use and only to be used with Clarity Diagnostic’s Urine Reagent (CLA-10P) Strips. This test is waived under the CLIA ’88 regulations. This test is only waived for urine specimens, and failure to adhere to the instructions for use will result in the test being considered high complexity and subject to all CLIA requirements. A CLIA Certificate of Waiver is required to perform this test. A Certificate of Waiver can be obtained from the Centers for Medicare & Medicaid Services (CMS). Visit www.cms.gov to obtain an application (Form CMS-116). You must follow the manufacturer’s instructions to perform tests. You should read the complete test procedure before performing the test. Intended Use The Clarity Platinum analyzer is a benchtop analyzer designed to read Clarity’s proprietary urinalysis strips (CLA-10P). The instrument is intended to be used together with Clarity Diagnostics’ Urine Reagent Strips as a system for semi-quantitative detection of Glucose, Bilirubin, Ketone, Specific Gravity, Blood, pH, Protein, Urobilinogen, Nitrite and Leukocytes in urine. These measurements are used to aid in the diagnosis of metabolic disorders, kidney function anomalies, urinary tract infections, and liver function. Tests performed by the Clarity Platinum analyzer are intended for in vitro diagnostic use only. We Support Better Outcomes™ Page 1... -
Page 5: Getting Started
OPERATOR’S MANUAL Getting Started Unpacking the Clarity Platinum The Clarity Platinum analyzer is delivered in one box. To unpack the analyzer, carefully remove all components from the box and inspect for any signs of damage. If the analyzer appears to be damaged, immediately contact your shipping carrier and Clarity Diagnostics. Even if the box appears to be damaged, the device can be preserved due to the internal packaging. Verify that you have each of the following components: • Clarity Platinum Analyzer • Thermal Printer Paper (preloaded in analyzer) • Power Supply Adaptor with AC Power Cord • Clarity Platinum Manual • Quick Start Operator’s Manual • Barcode Reader If you are missing any components, please contact Clarity Diagnostics immediately at (877) 485-7877, Monday-Friday, 8am-6pm EST. Clarity Platinum Urine Analyzer Hardware Overview The Clarity Platinum consists of the following hardware components: • Touch Screen Display • Test Strip Bed • Printer • Power Cord • Connection Ports Page 2 We Support Better Outcomes™... -
Page 6: Assembling The Clarity Platinum Urine Analyzer
Clarity Platinum Urine Analyzer OPERATOR’S MANUAL Figure 1. Clarity Platinum Touch Screen Display Power Cord (DC IN) Test Strip Bed Power Switch USB-A Port, Barcode Reader Printer Cover USB-C Port, Data Transfer Assembling the Clarity Platinum Place the Clarity Platinum analyzer on a level surface away from sources of heat and liquids. The Clarity Platinum analyzer performs optimally between 59°- 86 °F (18 – 30 °C). Remove the barcode reader from the box and connect it to the USB-A Port on the back of your analyzer where it is labeled ‘Barcode Reader’. (Figure 1, number 3) -
Page 7: Loading The Printer Roll
Clarity Platinum Urine Analyzer OPERATOR’S MANUAL Figure 2. Printer Loading the Printer Roll Open the printer cover by gently lifting the external tab located at the back of the analyzer upward and lifting the front pins out of their slots in the front. Set aside the cover. Make sure the Clarity Platinum is plugged in for the automatic paper feed to function. Place the roll of thermal paper in the cradle at the back of the machine, with the shiny side of the paper facing the front of the machine. Feed the end of the thermal paper roll into the bottom of the black roller until it is caught by the auto-feed and pulled into the roller. Gently replace the printer cover by hooking the plastic front pins first, with the Clarity Diagnostics logo facing the front of the machine. Feed the paper from the black roller through the slot with the perforated edge on the cover, and then push the external tab down the back of the machine until the cover is back in place. Page 4 We Support Better Outcomes™... -
Page 8: Powering On/Off
Clarity Platinum Urine Analyzer OPERATOR’S MANUAL Powering On/Off To Power On the Clarity Platinum Analyzer: Press the power switch located on the back of the unit. (Figure 1, number 6) The Clarity Platinum will perform system diagnostics each time the unit is powered on, which checks that the optical, electronic, and mechanical systems are performing as expected. If the system diagnostics are successful, the printer will automatically print: ‘System Diagnostics OK. Ready to Use’, and the main menu screen will appear. If an error occurs during initialization, the analyzer will display a ‘System Calibration Failed’ error message and two options will appear on screen, ‘Recalibrate’ or ‘Technical Support.’ Press the recalibrate button to rerun system diagnostics. If the error persists, please contact Clarity Diagnostics Technical Support at (877) 485-7877, Monday-Friday, 8am-6pm EST. To Power Off the Clarity Platinum Analyzer: Ensure that the strip bed is empty and that no tests are in progress. Use warm water and a cotton swab to clean the strip bed. Press the power switch located on the back of the unit to turn off the analyzer. Pressing the power switch will also automatically retract the strip bed into the machine. (Figure 1, number 6) -
Page 9: Accessing The Main Menu
Note: The strip bed can be retracted from the Strip Bed Device Maintenance section of the settings menu. Retracting the strip bed can prevent Advanced damage to the Platinum while not in use. Full instructions can be found in Section 6: Removing/Replacing Strip Bed. Page 6 We Support Better Outcomes™... -
Page 10: Clarity Platinum Urine Analyzer User Interface
The Clarity Platinum analyzer uses a touch screen to display user options, results, settings, and diagnostics. The touch screen is used for all user input. The barcode reader attachment can also be used for inputting barcodes from the test strip or control bottles, as well as patient IDs. (See Section 4.2: Advanced Settings) Do not use any sharp or pointed objects on the screen, as they may damage the display. To Operate the Clarity Platinum Analyzer: • Press the Test Strip icon displayed on the screen to run a Urine Test Strip. • Scan or enter the barcode from the strip bottle and press enter. • Scan or enter the Patient ID, or skip it by pressing enter. • Follow the instructions in the Quick Start Guide to perform a test. -
Page 11: Operations
Note: Test known positive and negative specimens/controls at each of the following events in accordance with local, state, and/or federal regulations or accreditation requirements. For CLIA Waived settings, Clarity Urinalysis Quality Controls must be tested under the following conditions: •... -
Page 12: Performing A Urinalysis Test
Clarity Platinum Urine Analyzer OPERATOR’S MANUAL 2.1 Performing a Urinalysis Test Pressing the Test Strip button on the main menu screen will bring you directly to the main testing screen. Note: You will be prompted to scan or enter the barcode on the test strip bottle prior to reaching the test preparation screen. -
Page 13: Performing A Urinalysis Test
Clarity Platinum Urine Analyzer OPERATOR’S MANUAL Performing a Urinalysis Test Dip the strip into the urine sample and remove it immediately. Ensure that all pads on the strip are saturated with the urine sample. While you are doing this, press the Start button. After pressing the Start button, the analyzer begins 10 seconds of self-calibration. During this time, touch the long edge of the strip onto a paper towel to remove the excess urine, and place the strip on the strip bed with the test pads facing up. Ensure that the test strip is inserted fully into the back of the strip bed. The dipping step should not exceed 10 seconds. When calibration is complete, the analyzer retracts the strip bed with the strip, and it will begin analysis. A timer on screen will count down the time remaining in the strip analysis process. Note: You cannot cancel a test before the analyzer finishes the test. Caution: DO NOT push or pull the strip bed or move the analyzer during the test. It might cause the analyzer to fail calibration. Viewing the Urinalysis Test Result After the countdown ends, the analyzer displays the test result on the screen. -
Page 14: Printing The Urinalysis Test Result
Clarity Platinum Urine Analyzer OPERATOR’S MANUAL Printing the Urinalysis Test Result Once the test is completed, the test result is printed automatically if the machine is in the default setting. The test results printout could include any of the following information, depending on the settings: • Operator ID • Patient ID • Test ID You can change the printer setting to manual or the print options in the Printer Setting menu, as described in Section 4.1: Basic Settings. Completing the Urinalysis Test Remove the test strip from the strip bed and dispose the strip according to your local, state, and federal guidelines. Clean the strip bed using a solution of sodium hypochlorite 525-615 ppm (dilution 1:100 of 5.25-6.15% sodium hypochlorite) or 70% isopropyl alcohol with a cotton swab. 3. Select Results to view the stored results, or select Next Test perform the next test. 4. You may return to the main menu by pressing the button. -
Page 15: Test Results Management
Clarity Platinum Urine Analyzer OPERATOR’S MANUAL 3. Test Result Management Press the Results button on the main menu screen to access up to 2,000 previously stored results. You may search results by ID or test date, or delete all results. Note: When the results list reaches 2,000 tests, the analyzer deletes the oldest test from the list. You cannot recall the deleted test. Recall All Results 1. -
Page 16: Search Results By Date
Clarity Platinum Urine Analyzer OPERATOR’S MANUAL Search Results by Date 1. On the result screen, select Search by Date to search the stored test results based on the test date. Enter the date using the keypad on the screen and press ENTER. All the matching results will be listed. Select the desired test result to review on the screen. Delete Results You may want to delete all the test results under the following circumstances: • A complete download of all the stored results to a host computer has occurred. • To protect patient confidentiality and comply with HIPAA regulations when the analyzer is moved to another clinical site. • To repair or discard the analyzer. On the result screen, select Delete to delete all the stored test results. A prompt will say “Delete All Results?” Press to delete all results. You can select to return to the result main menu. Caution: Selecting the delete function will delete all the stored test results. The system does not allow the deletion of a specific test result for data security reasons. Once results are deleted, you can no longer recall them from the database. If you want to keep all the data from your analyzer, please transfer the data to a host computer before you proceed with this function. We Support Better Outcomes™ Page 13... -
Page 17: System Configuration
You can configure the analyzer’s settings and review the system information with the settings and advanced menus. 4.1 Settings Press the Settings button on the main menu screen to access the settings menu. From this menu, you may review the current settings and select the type of strip to be used, the display language, date & time, enable or disable the automatic printing function, and view system information for the Clarity Platinum. The Restore Default Setting and Units Displayed options are intended for Clarity Diagnostics administrators only and require a valid administrator password to login. Strip Type Note: The device will set by default for testing Clarity Diagnostics’ CLA-10P strips. 1. On the settings menu, press the Strip Type button to review the current setting. The Clarity Platinum is only compatible with Clarity Diagnostics’ proprietary strips. Press to return to the settings menu. Language On the settings menu, press the Language button to review the current setting. The Clarity Platinum uses English as the default language. The user may choose Spanish for the operation language. Select the desired language to change the display language. -
Page 18: Unit Setting
Clarity Platinum Urine Analyzer OPERATOR’S MANUAL Unit Setting The Clarity Platinum urine analyzer uses C1 (conventional units) as the default unit setting. Unit Setting function is intended for Clarity Diagnostics administrators only and requires a valid administrator password to login. Printer Setting 1. On the settings screen, press the Printer Setting button to review the current setting. Select Automatic or Manual for the analyzer to print the result automatically or manually after each test. Modify the printing format by selecting the following information to be included in the result printout: • Operator ID • Patient ID • Test ID Press to return to the settings menu. System Information 1. On the settings screen, press the System Information button to view the serial number of the analyzer, the current Clarity Platinum software version installed, and technical support contact information. Press to return to the settings menu. Restore Default Setting Restore Default Setting function is intended for Clarity Diagnostics administrators only and requires a valid administrator password to login. -
Page 19: Advanced Settings
Note: The Clarity Platinum analyzer will automatically lock the test strip function after 30 days or 100 tests have been performed to ensure the integrity of the urinalysis strips. In order to use the Clarity Platinum analyzer, CLIA Waived users are required to perform a successful QC test. - Page 20 • Ensure the controls are not past their expiration date. • Repeat the test to ensure no errors were made during the test. • If QC testing still does not provide the expected results, call Clarity Diagnostics Technical Support: (877) 485-7877, Monday- Friday, 8am-6pm EST. Note: For CLIA Waived settings, only the QC controls produced by Clarity Diagnostics (CLA-UHCRL25) should be used, as the QC pass/fail criteria have been optimized for the Clarity Platinum analyzer. We Support Better Outcomes™ Page 17...
-
Page 21: Perform A Quality Control Test
Clarity Platinum Urine Analyzer OPERATOR’S MANUAL Perform QC Test On the main menu, select Advanced. Then select Quality Control. 2. On the quality control screen, select Perform QC Test. 3. Scan or enter the barcode from the urine reagent strip bottle. 4. Scan or enter the barcode from Clarity’s Urine Control Level I Bottle. 5. Follow the instructions on the screen for performing QC with Level I Control. Place one drop of Level I Control on each reagent pad, and press the Start button. After pressing the Start button, the Clarity Platinum begins 10 seconds of self-calibration. During this time, touch the long edge of the strip to a paper towel to remove the excess quality control sample and place the strip on the strip bed with the test pads facing up. Ensure that the test strip is fully inserted into the back of the strip bed. When calibration is complete, the Clarity Platinum retracts the strip bed and starts analyzing the strip. 8. A timer on the screen counts down the time remaining in the strip analysis process. Once the test is complete, the screen will display and print the QC test result for Control Level I. Once the QC test for Level I passes, perform a QC test with the Control Level II Solution. A QC pass/fail message will be displayed with the test result on the display screen. 10. Press Next to perform QC with the Urine Control Level II Solution. - Page 22 Clarity Platinum Urine Analyzer OPERATOR’S MANUAL 12. After pressing the Start button, the Clarity Platinum begins 10 seconds of self-calibration. During this time, touch the long edge of the strip to a paper towel to remove the excess quality control sample and place the strip on the strip bed with the test pads facing up. Ensure that the test strip is fully inserted into the back of the strip bed. 13. When calibration is complete, the analyzer retracts the strip bed and starts analyzing the strip. 14. A timer on the screen counts down the time remaining in the strip analysis process. 15. Once the test is completed, the screen will display and print the QC test result for Control Level II. The QC Pass/Fail message will be displayed with the test result on the display screen. 16. Press to return to the QC main menu. Note: Water should not be used as a QC Level I low/negative control solution. Note: Once the QC test is successfully performed, the test system will display the results on the screen.
-
Page 23: Device Diagnostics
Clarity Platinum Urine Analyzer OPERATOR’S MANUAL 4.3 Device Diagnostics For use in CLIA Waived settings only when directed by Clarity Diagnostics’ technical support team. 1. On the Advanced screen, select Device Diagnostics. Select the individual options to perform diagnostic test: Display • After selecting Display, a screen will appear showing red, green, and blue panels. This allows you to verify the performance of the RGB LCD screen. • Touch Screen After selecting Touch Screen, a blue screen will appear. You can touch any part of the screen any number of times. Red spots will appear to verify that the touch screen is performing as expected. Press Exit return to the previous screen. Printer • Selecting Printer runs internal diagnostics on the built-in printer. If the printer is performing as expected, ‘Printer works OK’ will be printed. • Strip Bed Selecting Strip Bed allows you to verify that the strip bed mechanics are working correctly by ejecting and retracting the strip bed once. Light Source •... -
Page 24: Troubleshooting
Clarity Platinum Urine Analyzer OPERATOR’S MANUAL 5. Troubleshooting Your Clarity Platinum analyzer will function properly if you follow the instructions provided in this manual and maintain the instrument. If the Clarity Platinum analyzer detects a problem or an issue, error messages will be displayed on the LCD screen to alert the user. There are two types of errors that could occur with the Clarity Platinum analyzer: Errors That Disable the Instrument If the error prevents the user from using the analyzer, the keypad will be disabled and the machine must be turned off. In the event of a disabling error, please contact Clarity Diagnostics Technical Support immediately at (877) 485-7877, Monday-Friday, 8am-6pm EST, or email us at techsupport@claritydiagnostics.com Errors That Do Not Disable the Instrument There are specific errors that need to be corrected prior to testing another sample, but the user is still allowed to operate the analyzer. We Support Better Outcomes™ Page 21... -
Page 25: Failure Mode Error Message And Corrective Action
Clarity Platinum Urine Analyzer OPERATOR’S MANUAL List of potential sources of error and various fail-safe and failure alert mechanisms designed to prevent the user from receiving an incorrect or false result: POTENTIAL SOURCES VALIDATION RESULTS OF ERROR System failure The system preforms hardware checks for (Includes software... - Page 26 Clarity Platinum Urine Analyzer OPERATOR’S MANUAL POTENTIAL SOURCES VALIDATION RESULTS OF ERROR Incorrect strips The user is alerted with an ‘Incorrect Strip Type’ used error message and is prompted to use the correct strip type. The Clarity Platinum Urine Analyzer must be used with Clarity branded strips. Incorrect timing The strip bed is retracted once the ‘Start’ button of test procedure is pressed. This is implemented to prevent users or delayed test from delaying the test time or delaying placing the time strip on the strip bed. The user is alerted with a ‘Misplaced Strip’ error message due to no strip being detected. Limited time is available for placing strips on the strip bed. Use of improperly The user is alerted with a ‘Strip Quality Issue’ stored strips/ error message and instructed to use a new strip humidity from an unexpired bottle. compromised If QC tests are performed with humidity strips compromised strips, then the user is alerted with a ‘QC Fail’ message generated after the Quality Control Test. Once the QC test fails, the system...
- Page 27 Clarity Platinum Urine Analyzer OPERATOR’S MANUAL POTENTIAL SOURCES VALIDATION RESULTS OF ERROR Interference with Results are flagged when blood analyte has a high urine specimen concentration block, which can create false positive testing due to readings for other reagent pads. The failure alert presence of mechanism is employed to notify the user by blood flagging the test result with the warning message, ‘Possible false positive results due to blood interference may occur for glucose, protein, bilirubin, urobilinogen, nitrite, leukocytes, ketones.’ The message is displayed on screen, printed on the test results, and included in the data packet which is sent electronically (if applicable). Use of expired The product barcode feature will alert the user with strips a ‘Barcode Error’ message generated due to expired strip bottles. The system will lock out and will not allow users to perform tests until a new barcode is scanned. Failure of device The Clarity Platinum Urine Analyzer performs a calibration hardware check for mechanical, electrical, and optical components when the device is switched ON. The user is alerted with an ‘Optical System Fail’...
- Page 28 Clarity Platinum Urine Analyzer OPERATOR’S MANUAL POTENTIAL SOURCES VALIDATION RESULTS OF ERROR Use of incorrect Users will receive a ‘Barcode Error’ message if they QC controls/ use the incorrect control level, or if they are using expired controls an expired bottle of controls. or improperly The system will not proceed to the Quality Control stored and test, and the user will need to use an unexpired handled controls bottle of controls or the correct control level to get to the quality control test function. The user will be alerted with a ‘QC Fail’ error message if they select an improperly stored control that was compromised due to incorrect storage conditions. The system is locked out and the user cannot perform any patient testing until the Quality Control testing is completed successfully. Unauthorized The user will be alerted with an ‘Operator Login operator Invalid’ error message if the username or password is incorrect. We Support Better Outcomes™ Page 25...
- Page 29 Clarity Platinum Urine Analyzer OPERATOR’S MANUAL The following table provides the Failure Mode, Error Messages, and Corrective Action plan for the user to implement FAILURE ERROR MESSAGE CORRECTIVE MODE DISPLAYED ON THE SCREEN ACTIONS Software system ‘System Calibration fails Failed’ Error Restart the analyzer. If the Optics fail ‘Optical System Fail’...
- Page 30 Clarity Platinum Urine Analyzer OPERATOR’S MANUAL FAILURE ERROR MESSAGE CORRECTIVE MODE DISPLAYED ON THE SCREEN ACTIONS Usage of improperly ‘Strip Quality Issue’ stored strips or Error Repeat the test with reusing an already a new strip from an dipped test strip unexpired bottle. Usage of Expired ‘Strip Quality Issue’ strips Error Expired strip ‘Barcode Error’ Repeat the test with bottle used a new strip from an unexpired bottle. Incorrect ‘Barcode Error’ Restart the analyzer. calibration (White If the problem persists,...
-
Page 31: Maintenance
Note: Positive and negative controls should be tested after performing maintenance or service on the Clarity Platinum analyzer; with every new shipment and new lot of CLA-10P strips; when opening a new CLA-10P bottle; whenever test results appear to be inaccurate; with each new operator training;... -
Page 32: Daily/Routine Cleaning Of The Strip Bed
Clarity Platinum Urine Analyzer OPERATOR’S MANUAL Daily/Routine Cleaning of Strip Bed Wet a cotton-tipped swab with warm water and carefully clean the strip bed. 2. Dry the strip bed with a clean cotton swab. Weekly Cleaning of the Strip Bed 1. Select the Advanced option from the main menu. Select Strip Bed Maintenance and press the top arrow to unload the strip bed and remove it for cleaning. 2. Wait until the bed has been fully ejected from the analyzer and gently lift it away from the machine. 3. Clean the strip bed with a 70% alcohol solution, or bleach at a dilution of 1:100 of 5% sodium hypochlorite. Avoid wiping the white color block on the top right side of the strip bed, and avoid cleaning the groves on the left side of the strip bed. Dry the strip bed completely with a lint free tissue or clean cotton swab. 5. Return the strip bed into the device by seating it back into the groove until you feel pressure and it stays in the machine by itself. Press the bottom arrow on the screen and the strip bed will be retracted. Cleaning the Analyzer Case Power off the analyzer. -
Page 33: Appendix A. Clarity Platinum Urine Analyzer Specifications
USB- C Interface Ports User Interface Touch Screen Color LCD Printer Fixed head built-in printer using a roll of thermal paper Power Source 100-240 VAC ±20%, 50/60 HzOutput +9V Ambient Operating 59°F to 86°F (15°C to 30°C) Temperature Weight 5.21 lbs. Dimensions 10.5 (depth) x 7 (width) x 6.5 (height) inches Appendix B. Clarity Platinum Urine Analyzer Default Settings Date Format YYYY-MM-DD Strip Barcode Enable Urine Color Disable Authorized Operator Disable Disable Operator Access Urine Clarity Enable to Strip Test Automatic Operator Access Strip Selection... -
Page 34: Appendix C. Clarity Platinum Urine Analyzer Unit Convention Table
Clarity Platinum Urine Analyzer OPERATOR’S MANUAL Appendix C. Clarity Platinum Urine Analyzer Unit Convention Table Parameter Value (C1) Value(C2) Value (S1) Value (S2) Negative Negative Negative Negative Trace Trace Ca 15 Leu/uL Trace Leukocytes * Small * 1+ Ca 70 Leu/uL * 1+ * Moderate * 2 Ca 125 Leu/uL * 2+... - Page 35 Clarity Platinum Urine Analyzer OPERATOR’S MANUAL Appendix C. Clarity Platinum Urine Analyzer Unit Convention Table Parameter Value (C1) Value(C2) Value (S1) Value (S2) Negative Negative Negative Negative Trace Trace Trace Trace Blood * Small * 1+ * Ca 25Ery/uL * 1+ * Moderate * 2+ * Ca 80Ery/uL * 2+...
- Page 36 Clarity Platinum Urine Analyzer OPERATOR’S MANUAL Appendix D. Clarity Platinum Urine Analyzer Unit Convention Table This section indicates the symbols that appear on the exterior packaging of the Clarity Platinum urine analyzer, the analyzer itself, the power adapter, and the urine reagent strips. Manufacturer European authorized representative Serial Number In vitro diagnostic device Consult instructions for use Caution Biohazard Indicates a power on/off button Temperature Requirements for Ambient Operation (59°F - 86°F / 15°C - 30°C) Quantity Expiration Date: YYYY-MM-DD Lot Number This equipment is classified as Waste Electrical and Electronic Equipment under the European WEEE Directive. It must be recycled or disposed of in accordance with applicable local requirements. Catalog number We Support Better Outcomes™ Page 33...
- Page 37 ® Clarity Diagnostics, LLC 1080 Holland Drive, Suite 1 Boca Raton, Florida 33487 Tech Support: 1-877-485-7877 or email techsupport@claritydiagnostics.com www.claritydiagnostics.com We Support Better Outcomes ™...
Need help?
Do you have a question about the Platinum and is the answer not in the manual?
Questions and answers