Table of Contents
Advertisement
Quick Links
Advertisement
Table of Contents

Related Manuals for NetComm NB5580


Summary of Contents for NetComm NB5580
-
Page 2: Table Of Contents
Quick Start Section ... 4 Product naming conventions ... 4 Package Contents ... 5 Default Settings & Facts for the NB5580 & NB5580W ... 6 Resetting ... 6 Power ... 6 One page setup for most ADSL services ... 7 Introduction ... - Page 3 Appendix C: Macintosh Setup ... 100 Appendix D: Technical Specifications ... 102 Specifications for Wireless Model only (NB5580W) ... 102 General Specifications for both NB5580 & NB5580W ... 102 Appendix E: Cable Connections ... 104 RJ-45 Network ports ... 104 Twisted pair cables ...
-
Page 4: Quick Start Section
NetComm NB5580/W is set to factory defaults (See Resetting if required). The NB5580 is available in either standard or wireless versions. If you have purchased the NB5580W, refer to 4.10 Wireless or Chapter 7 - Security for information on setting up the wireless component of your Router. -
Page 5: Package Contents
Package Contents After carefully unpacking the shipping carton, check the contents listed below: ■ NB5580 ADSL Integrated Gateway ■ NB5580W ADSL Integrated Gateway with Wireless with Removable Omni directional 2dBi Antenna ■ Package Contents Note and this User Guide ■... -
Page 6: Default Settings & Facts For The Nb5580 & Nb5580W
Password: WAN port MDI: Resetting While using or installing your NetComm NB5580/W you may need to utilise the reset feature. There are two types of reset: Soft A soft reset will restart the unit and reconnect to the internet using the settings stored previously, none of your settings are deleted. -
Page 7: One Page Setup For Most Adsl Services
One page setup for most ADSL services 1. Connect your computer to one of the four LAN ports on the NetComm NB5580/W and ensure you have a link. Connect your ADSL enabled line to the ADSL port of the NetComm NB5580/W using the RJ11 cable supplied. -
Page 8: Introduction
The router will share your internet connection with up to 253 users. Configured as a DHCP server, the NetComm NB5580/W assigns an IP Address to every computer connected on the LAN automatically. Also, a DHCP client helps the WAN port to acquire an IP address dynamically from your ISP. -
Page 9: About This Guide
About this Guide This guide contains information about installing and configuring your NetComm NB5580/W. It is designed to guide users through the correct setup procedures for both hardware installation and basic configuration. Later, it shows how to complete advanced configuration to get the best operating performance from the NetComm NB5580/W. -
Page 10: Chapter 1: Getting To Know Your Netcomm Nb5580/W
This chapter describes the package contents and provides a list of features of the NetComm NB5580/W. About NetComm NB5580/W The NetComm NB5580/W combines an ADSL Modem with a Router, including an Active Firewall and VPN security. There are two versions of this product; ■... -
Page 11: Features Of The Netcomm Nb5580/W
Features of the NetComm NB5580/W Standard Features of the NB5580 & NB5580W ■ Integrated ADSL Modem supports - Auto, G.DMT, G.LITE, ANSI T1.413 ■ Supports PPPoE, PPPoA, Static & Dynamic IP, Classical IP & Bridge using LLC Encapsulation. ■ Active Firewall featuring Stateful Packet Inspection (SPI) and prevention of DoS attack ■... -
Page 12: Do I Need A Micro Filter
Microfilters. The following diagram gives an example of connecting your ADSL Modem/Router using a Microfilter. A suitable Microfilter can be purchased from NetComm or your Service Provider, if required. If installing a POTS Splitter, refer to Appendix F: EM1180 ADSL POTS Splitter Installation Guide for more information. -
Page 13: Chapter 2: Hardware Installation & Setup
If using the NB5580 as a desktop unit, fix the Rubber Feet provided. Plug the Power pack into a power point and into the power socket of the NB5580. Connect your ADSL line (Telephone line) into the ADSL socket of the NB5580. -
Page 14: Connecting The Antenna
Note: Please note that you may have to rotate the complete antenna assembly to do this and have the antenna pointing vertically. If using the NB5580W as a desktop unit, fix the Rubber Feet provided. www.netcomm.com.au Page 14 NB5580W to your LAN Antenna nut cover angle. - Page 15 Ethernet sockets used have their respective LAN link lights on. Note: Auto MDI is available on all four ports. A special cross over cable or "uplink" port to join the router to another hub or switch is not required as the NB5580W ports are self adjusting.
-
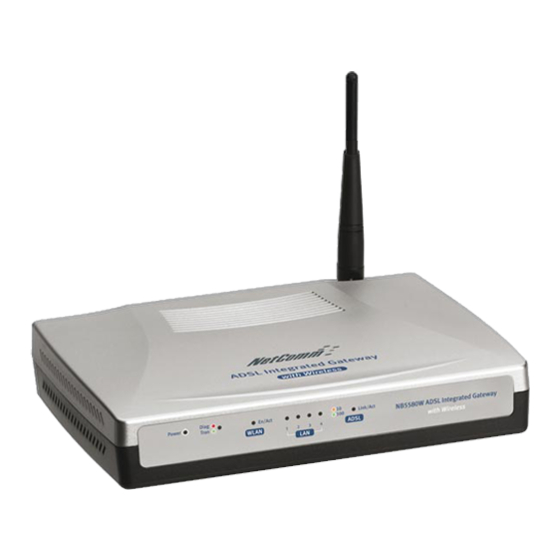
Page 16: Front Panel Leds For The Nb5580
Front Panel LEDs for the The following figure shows the front view of the NetComm NB5580. The LEDs on the front panel indicate the status of the unit. Power: Green Diag: For WAN port & LAN ports (x4) Link/Act & 10/100:... -
Page 17: Front Panel Leds For The Nb5580W
Front Panel LEDs for the The following figure shows the front view of the NetComm NB5580W. The LEDs on the front panel indicate the status of the unit. Power: Green Diag: For WLAN Enable /Activity: Green For WAN port & LAN ports (x4) Link/Act &... -
Page 18: Chapter 3: Internet Access
Internet via your NetComm NB5580/W. Prepare your network information In order to allow a quick reference point when setting up your NetComm NB5580/W, it is suggested you complete the table below with the necessary information, which should be supplied by your ISP: ✓... -
Page 19: Web-Based User Interface
Web-based User Interface The NetComm NB5580/W uses a Web based User Interface for configuration, when you have made your changes to a particular page of the configuration you must click "APPLY" at the bottom of that page to save your changes before you go to configuration another page. -
Page 20: Initial Configuration - Setup
The One-page setup screen is used to configure the most common settings to get your NB5580/W connected to the internet and sharing that connection with your LAN / WLAN. Below is quick list of only the settings which are critical and where you should find the information to correctly configure theses settings: Note: When making changes to the settings, click on the “Apply”... - Page 21 Private IP address / Device IP address - This is the IP address that will be used to configure the NB5580/W and it is also the IP address that your Computers will use as there Gateway IP address to access the Internet through the NB5580/W. Your Network Administrator can advise if this IP address should be changed (i.e.
- Page 22 SSID will automatically match the Channel that you set in your NB5580W. To decide which channel to use in your NB5580 it is recommended that you choose a channel that is not the same or numerically close to any existing or neighboring WLAN channel.
- Page 23 It not only allows LAN users to share a single IP Address, but also protects your LAN network from outside intruders. If the NetComm NB5580/W is set to the Router mode or the Modem mode, all the computers in the LAN will have to be assigned fixed public IP Addresses.
- Page 24 ISP site may need a little time to restore. You may need to check your ISP to get the information that how much time it need to wait before the router start to re-build the PPPoE session and fill it in the “Redial Period”.
- Page 25 Gateway using LLC Encaps. (Dynamic IP) This connection type is the default setting of the NetComm NB5580/W. Choose this setting if: 1. You want to employ NAT to share Internet access for all of your computers, as well as protect them for outside intruders.
- Page 26 PPPoA or PPPoE connection modes. When you have properly configured the Setup page, click “Apply”. Your Router will then attempt to connect to the Internet. If you experience problems, please refer to the trouble shooting section before contacting NetComm Technical Support.
-
Page 27: Chapter 4: Advanced Applications
Chapter 4: Advanced Applications This chapter provides information on how to set up and use the advanced features of your NetComm NB5580/W. Firewall The Firewall setting page allows you to configure advanced Firewall functions to provide superior security for your network environment. You must click “Apply” to make any changes active. - Page 28 Setting a web proxy can save accessing time but may create a security issue by bypassing any URL filters or IP blocking you have configured. For example, if you configure the NB5580/W to block the access of 216.115.102.76 that is the IP address of www.yahoo.com, it will fail to block successfully if your browser is using a proxy because the router only sees the connection to the proxy and then the proxy connects to yahoo.
-
Page 29: Dhcp Configuration
A DHCP (Dynamic Host Configuration Protocol) Server can automatically assign IP Addresses and other information to each computer in your network. Unless you already have a DHCP Service on your LAN, it is highly recommended that you set your router to act as a DHCP server. -
Page 30: Url Filter
Exception IP Address Enter the IP Address of LAN PC that will not be restricted by the URL Filter. Click the "Apply" button after making any changes, or click the "Cancel" button to exit the screen without saving any changes. www.netcomm.com.au Page 30 Rev.1 - YML686 NP5580/W User Guide... -
Page 31: Time Control
Define Schedule Set a period of time with beginning and ending from the drop down list. Click the "Apply" button after making any changes, or click the "Cancel" button to exit the screen without saving any changes. Rev.1 - YML686 NB5580/W User Guide www.netcomm.com.au Page 31... -
Page 32: Access Control
"Source IP" fields to access certain applications on the Internet. Select "WAN" if you want to block WAN side users/PCs set in the following "MAC" and "Source IP" fields to access certain PCs on your LAN side. www.netcomm.com.au Page 32 Rev.1 - YML686... - Page 33 Click the "Apply" button after making any changes, or click the "Cancel" button to exit the screen without saving any changes. Note: To allow or deny access by URL, refer to the section on URL Filter. Rev.1 - YML686 NB5580/W User Guide www.netcomm.com.au Page 33...
-
Page 34: Port Forwarding / Upnp Settings
LAN IP Address. Although the internal service addresses are not directly accessible to the external user, the NetComm NB5580/W is able to redirect requests to the appropriate internal IP Address/server. To use this application, it is recommended you use a fixed Public IP Address from your ISP and that your internal servers do not use a DHCP client. - Page 35 FTP Server Half Life MSN Messenger PC Anywhere host Quake 2 Quake III Telnet Server Web Server Rev.1 - YML686 NB5580/W User Guide Protocol Port Range 4661, 4662, 4663 4665 6003, 7002, 27010, 27015, 27025 6891-6900 (File-send) 1863 1863 5190...
-
Page 36: Special Application (Port Triggering)
Outgoing Port Range Enter the port number or range of numbers this application uses when it sends packets outbound. The Outgoing Control port numbers act as the trigger. When the NetComm NB5580/W detects the outgoing packets with these port numbers, it will allow the inbound packets with the Incoming Port Numbers that you set in the next column to pass through the NetComm NB5580/W. -
Page 37: Dynamic Routing
LAN segment which are connected to the NetComm NB5580/W through another router (destination LAN). Up to 20 route entries may be entered into the NetComm NB5580/W. The diagram below gives an example of the physical connections required to use Static Routing. - Page 38 In the above diagram, PC2 in LAN#2 is connected to the NetComm NB5580/W via another router while PC1 in LAN#1 is connected to the NetComm NB5580/W directly. Without configuring the Static Routing function, the two computers would not be able to communicate with each other.
-
Page 39: Wireless (Only Applicable For The Nb5580W)
Wireless Station Status The "Active MAC Table" shows the MAC addresses of wireless clients, which have the same ESSID and WEP key with Broadband Wireless Router. When the "MAC Filter" function is disabled, the background color is gray. Click the "Active MAC Table" button will display all MAC addresses of wireless nodes on your WLAN. - Page 40 ■ Authentication Type Select either Open System or Share Key as authentication type. If you are not sure, select both. Click “Apply” after making any changes. www.netcomm.com.au Page 40 Rev.1 - YML686 NP5580/W User Guide...
-
Page 41: Administration Settings Nb5580/W
Password and SNMP communities so that only authorized persons are able to manage your NetComm NB5580/W. If the “Password” is left blank, all users on your LAN/ WLAN can access the router simply by entering the unit’s IP Address into their web browser’s location window. - Page 42 MTU Check “Enable” if you want to limit the incoming and outgoing packet size for the router. Enter the maximum packet size you wish to set in the “Size” column. This can assist with the transmission of emails with attachments, etc.
-
Page 43: Status Monitor
Mask” of the router, as seen by users of your internal network. ■ DHCP Clients Table If the router is setup to act as a DHCP server, the LAN side IP Address distribution table will appear when this button is selected. -
Page 44: Dmz Host
To use this application, you must first obtain a fixed Public IP Address from your ISP. Note that in order to provide unrestricted access, the Firewall provided by the Broadband Security Router to protect this port is disabled, thus creating a potentially serious security risk. -
Page 45: Multi Dmz
Send Log To Enter the IP address of the computer that you want to send the Log information to. This computer must run a suitable “syslog” application (a copy of such an application can be downloaded from the NetComm website). ■... -
Page 46: Vpn Passthrough
Virtual Private Networking (VPN) is a system which allows remote networks to privately exchange data over an existing public network (usually the WAN/Internet). The NetComm NB5580/W supports up to fifty PPTP or IPSec VPN Passthrough sessions depending throughput available and tunnel load. -
Page 47: Dynamic Dns (Ddns)
DynDNS.org. Before you begin using this function, you will need to apply to DynDNS.org to be able to use the service. Please visit www.dyndns.org for further information. Rev.1 - YML686 NB5580/W User Guide www.netcomm.com.au Page 47... - Page 48 (if VPN, Port forward or DMZ settings are made) via your domain name without the need to know your Public IP address. The router is designed to use the Web site www.dyndns.org which offers up to 5 free Dynamic domain names per user.
-
Page 49: Universal Plug And Play
Universal Plug and Play is a system designed to make computers, computer equipment and home appliances work together seamlessly. Currently the biggest advantage of having UPnP integrated into your router is that this will assist your router in allowing complex Internet applications such as MSN Messenger© work over Network Address Translation (NAT) without the need to setup Port forwards or DMZ. - Page 50 Hint: Look for the red circles denoting where to click. 1. Open Control Panel and select Add or Remove Programs 2. Choose the Add/Remove Windows Components icon on the left hand side. www.netcomm.com.au Page 50 Rev.1 - YML686 NP5580/W User Guide...
- Page 51 3. When the Windows Components wizard open scroll down to find and select Networking services. Then click Details. 4. Ensure that Universal Plug and Play is ticked and then click OK. Rev.1 - YML686 NB5580/W User Guide www.netcomm.com.au Page 51...
- Page 52 5. Wait for Windows to copy files and make changes. 6. Click Finish to close the Wizard. www.netcomm.com.au Page 52 Rev.1 - YML686 NP5580/W User Guide...
-
Page 53: Back Up And Restore
4-18 Back Up and Restore The NB5580/W has the ability to store the current configuration to a file. This information can then be restored to the router at a later date. Note: Your router's configuration should be kept secret and in a secure location to prevent unwanted access to password or network topology information. - Page 54 3. If required when the download is complete click the Close button. To Restore your Router's configuration; 1. Log into the router and click the Backup and Restore menu item from the left hand menu. 2. Click the Browse button to open a Choose file window, search and select your previously backed up file.
-
Page 55: Upgrade Firmware
4-19 Upgrade Firmware This setting page allows you to upgrade the latest version firmware to keep your router up-to-date. Before you upgrade the firmware, you have to get the latest firmware and save it on the PC you use to configure the router. -
Page 56: Diagnostics (Ping & Tracert)
Ping - Operates in a similar way to most Ping utilities, It will send a ping via the ICMP protocol and receive a response from the target if it is configured to respond. You can choose if the ping originates from the LAN (Private) side of the router or from the WAN (Public) side of the router. - Page 57 Ping example 1 - Testing Router connectivity to a local computer. 1. Leave the source IP to be the LAN IP address of the router. 2. Enter the last number set of the IP address of your local target computer (eg 192.168.1.100).
-
Page 58: Chapter 5: Configuring Ipsec/Vpn Tunnels
Chapter 5: Configuring IPSec/VPN Tunnels VPN/IPSec Introduction The VPN Router creates secure communications between sites without the expense of leased site-to-site lines. A VPN tunnel is a combination of authentication, encryption, tunneling and access control technologies used to transport traffic over the Internet or any insecure network. -
Page 59: Key Management
IKE manages the process of refreshing keys; however, a user can control the key strength and the refresh frequency. Refreshing keys on a regular basis ensures data confidentiality between sender and receiver. Rev.1 - YML686 NB5580/W User Guide www.netcomm.com.au Page 59... -
Page 60: Vpn Application Types
VPNs address the following applications: ■ Provide telecommuting workers with access to central office resources. ■ Interconnect branch offices to enable corporate intranets. ■ Connect business partners over the Internet with significant cost savings. www.netcomm.com.au Page 60 Rev.1 - YML686 NP5580/W User Guide... -
Page 61: Vpn / Ipsec Setup
All Remote Secure Group computers with IP Addresses 192.168.2.xxx will be able to access the tunnel. When using the Subnet setting, the default value of 0 should remain in the last octet of the IP and Mask fields. Rev.1 - YML686 NB5580/W User Guide www.netcomm.com.au Page 61... - Page 62 VPN device. When connecting between two routers the remote security gateway will be the public (WAN) IP address of the remote router as given on the status page or by the remote ISP.
- Page 63 The example shown below displays some sample entries for both the Encryption and Authentication Key fields. Again, up to 23 alphanumeric characters are allowed to create this key. Rev.1 - YML686 NB5580/W User Guide www.netcomm.com.au Page 63...
- Page 64 ■ Check the status page of both the local router and the remote device and ensure the public IP addresses are the same as entered for the remote security gateway. If, for any reason, you experience a temporary disconnection, the connection will be re-established as long as the settings on both ends of the tunnel stay the same.
-
Page 65: Example1: Tunnel Between Two Vpn Routers
Example1: Tunnel between Two VPN Routers Example2: Tunnel between VPN Router-and-VPN Client with Fix IP Rev.1 - YML686 NB5580/W User Guide www.netcomm.com.au Page 65... -
Page 66: Example3: Tunnel Between Vpn Router-And-Vpn Client With Dynamic Ip
Example3: Tunnel between VPN Router-and-VPN Client with dynamic IP www.netcomm.com.au Page 66 Rev.1 - YML686 NP5580/W User Guide... -
Page 67: Chapter 6: Configuring Ipsec On Windows 2000/Xp
Chapter 6: Configuring IPSec on Windows 2000/XP This chapter illustrates the steps of Microsoft Windows 2000/XP computer to establish a secure IPsec tunnel with the NB5580/W. You can find detailed information on configuring the Microsoft Windows 2000 server at the Microsoft website: Microsoft KB Q252735 - How to Configure IPSec Tunneling in Windows 2000 http://support.microsoft.com/support/kb/articles/Q252/7/35.asp... -
Page 68: Steps In Windows 2000/Xp
4. Deselect the Activate the default response rule check box, and then click Next button. 5. Click the Finish button, making sure the Edit check box is checked. 6-2.2 Build 2 Filter Lists: “WinXP VPN Router” and “VPN Router WinXP”. [Filter List 1] WinXP 1. - Page 69 2. From the IP Filter List tab, click the Add button. 3. Type an appropriate name “XP Broadband VPN Router” for the filter list, deselect the Use Add Wizard check box, and then click Add button. 4. In the Source address area, click My IP Address.
- Page 70 [Filter List 2] Broadband VPN Router WinXP 8. On the IP Filter List tab, click the Add button. 9. Type an appropriate name “Broadband VPN Router XP” for the filter list, click to clear the Use Add Wizard check box, and then click Add.
- Page 71 12. If you want to type a description for your filter, click the Description tab. 13. Click OK, and then click OK. Rev.1 - YML686 NB5580/W User Guide www.netcomm.com.au Page 71...
- Page 72 6-2.3 Configure Individual Rule of 2 Tunnels [Tunnel 1] WinXP Broadband VPN Router 1. From the IP Filter List tab, click the filter list “XP Broadband VPN Router”. 2. From the Filter Action tab, click the filter action “Require Security”, and click the Edit button.
- Page 73 4. Select the Session key Perfect Forward Secrecy (PFS) and remember to check the PFS option on the ADSL Integrated Gateway, and then click the OK button. 5. From the Authentication Methods tab, click the Edit button. Rev.1 - YML686 NB5580/W User Guide www.netcomm.com.au Page 73...
- Page 74 6. Change the authentication method to “Use this string (preshared key)”, enter the string “Test”, and then click the OK button. This new Preshared key will be displayed in Authentication method preference order. Click the OK button to continue. www.netcomm.com.au Page 74 Rev.1 - YML686 NP5580/W User Guide...
- Page 75 ISP provided IP Address; this is only an example.) of ADSL Integrated Gateway. 8. From the Connection Type tab, select All network connections, and then click the OK or Close button to finish this rule. Rev.1 - YML686 NB5580/W User Guide www.netcomm.com.au Page 75...
- Page 76 9. In the to_VPNRouter Properties, deselect the Use Add Wizard check box, and then click the Add button to create the second IP Filter. 10. On the IP Filter List tab, click the filter list “Broadband VPN Router XP”. www.netcomm.com.au...
- Page 77 11. From the Filter Action tab, click the filter action “Require Security”. 12. From the Authentication Methods tab, click the Edit button. Rev.1 - YML686 NB5580/W User Guide www.netcomm.com.au Page 77...
- Page 78 Click the OK button to continue. 14. From the Tunnel Setting tab, click The tunnel endpoint is specified by this IP Address box, and then type the Windows 2000/XP IP Address “140.111.1.2”. www.netcomm.com.au Page 78 Rev.1 - YML686 NP5580/W User Guide...
- Page 79 15. From the Connection Type tab, select All network connections, and then click the OK(for WinXP) or Close(for Win2000) button to finish. 16. From the Rules tab, click the OK button to back to the secpol screen. Rev.1 - YML686 NB5580/W User Guide www.netcomm.com.au Page 79...
-
Page 80: Steps In Adsl Integrated Gateway
2. When the User Name and Password field appears, skip the user name and enter the default password admin and press the Enter key. 3. Click the OnePage Setup tab to set the configuration as shown below. www.netcomm.com.au Page 80 Rev.1 - YML686... - Page 81 6-3.2 VPN Screen The following Figure is a sample configuration for the Router’s VPN tab. Once all these have been entered, click the Connect button to establish a VPN connection. The Status should indicate that the Router is Connected. Rev.1 - YML686 NB5580/W User Guide www.netcomm.com.au...
-
Page 82: Chapter 7: Security
NB5580/W is as secure as your network and interoperability settings will allow. Below is a list of the areas that need your attention to secure your NB5580/W from unauthorised access - these areas or features are;... -
Page 83: Administration Password
Remote Configuration via HTTP The HTTP server built into the NB5580/W is used to allow you to view and edit configuration pages via a web browser from anywhere on the Internet. You can set the NB5580/W to allow this information to be viewed or changed via the WAN (Internet). -
Page 84: Port Forwarding
Dynamic Routing (RIP) RIP is disabled by default, you should only enable RIP if you want your NB5580/W to accept routing information from other LAN routers or if you want it to share it's routing information with other router's. As always the less information a 'Hacker' can find out about your system the less chance the hacker has of finding an exploit for your system. -
Page 85: Remote Security Gateway
(e.g. ‘Road Warrior’ type VPN tunnels). However if the VPN router / Client at the remote end is on a fixed IP address it is strongly recommended that you specify the IP address here as this will prevent hackers on other IP addresses being able to create a VPN tunnel to your Router even if the know your Preshared Key and other private settings. - Page 86 VPN client can not be used by a different client on a different tunnel. Access Control The NB5580/W has Access Control functions that allow you to restrict which Network Interface Cards (NICs) or IP addresses can use the Internet and or use other NetWork services.
- Page 87 To maintain a secure network it is important to adapt to changes in your network environment. The best way to do this is to view the logging in your router, particularly look for items in red text as these indicate data that has been blocked by the firewall or by your Access Control filters.
-
Page 88: Chapter 8: Trouble Shooting
First, check whether the NetComm NB5580/W is properly installed, including the LAN and WAN connections, and all devices’ power. Check the NB5580/W and the computer are on the same network segment. If you are not sure, initiate the DHCP function (Section 4-2) and set your computer to obtain an IP address automatically (Appendix B). -
Page 89: Client Side (Computers)
Ping the Router’s IP address (Default: 192.168.1.1) to check for IP connectivity between your computer and the Router. Note: If you are not able to get to the web configuration screen for the NetComm NB5580/W, make sure that you disable the proxy setting within your Internet browser and set your browser to access the Internet via the LAN. -
Page 90: Appendix A: Frequently Asked Questions
Appendix A: Frequently Asked Questions What is the maximum number of IP Addresses the NetComm NB5580/W can support? The NetComm NB5580/W can support up to 253 IP Addresses usually in the range of 192.168.1.2~192.168.1.254. Where should the NetComm NB5580/W be installed on the network? In a typical environment, the NetComm NB5580/W should be installed between the ADSL/Cable modem and your LAN. -
Page 91: Wireless Questions
The NetComm NB5580/W uses NAT to route all in/out band packets. All external users can only see the IP of the NetComm NB5580/W but cannot access LAN computers. The LAN computers are well protected with the NetComm NB5580/W’s natural firewall (NAT). - Page 92 2.4 GHz, in particular, is being made available worldwide. This presents a truly revolutionary opportunity to place convenient high speed wireless capabilities in the hands of users around the globe. www.netcomm.com.au Page 92 Rev.1 - YML686 NP5580/W User Guide...
- Page 93 Unlike IP addresses, which can change every time a computer logs on to the network, the MAC address of a device stays the same, making it a valuable identifier for the network. Rev.1 - YML686 NB5580/W User Guide www.netcomm.com.au Page 93...
- Page 94 How many channels/frequencies are available? Using 802.11b or 802.11g, there are thirteen available channels in the Australian domain. Some channels may not be selectable depending on your product and regional regulations. www.netcomm.com.au Page 94 Rev.1 - YML686 NP5580/W User Guide...
-
Page 95: Appendix B: Setting Up Tcp/Ip Protocol
Note: For Windows 2000 & Windows XP the settings can be reached by clicking the “Local Area Connection” icon on the right bottom side of your desktop screen. In the “Local Area Connection Status” window, click “Properties” button then your Network window will appear. Rev.1 - YML686 NB5580/W User Guide www.netcomm.com.au Page 95... - Page 96 2. Check whether the TCP/IP Protocol has already been installed and bound to your Network Interface Card. If yes, go to step 6. If no, click the “Add” button. 3. Double-click “Protocol” on the Select Network Component Type or highlight “Protocol” then click “Add”. www.netcomm.com.au Page 96 Rev.1 - YML686 NP5580/W User Guide...
- Page 97 6. Click the “Properties” button. The TCP/IP Properties window consists of several tabs. Choose the “IP Address” tab. 7. Select “Obtain an IP address automatically”. Click “OK”. Restart your computer to complete the TCP/IP installation. Rev.1 - YML686 NB5580/W User Guide www.netcomm.com.au Page 97...
-
Page 98: Fixed Ip Addresses Configuration
Properties” window as shown above. 1. Select “Specify an IP address” and enter “192.168.1.***” in the “IP Address” location (where *** is a number between 2 and 254 used by the NetComm NB5580 to identify each computer), and the default “Subnet Mask” “255.255.255.0”. - Page 99 3. Click “Gateway” tab and enter the NetComm NB5580/W’s default gateway value 192.168.1.1 in the “New gateway” field, then click “Add” Button. Click “OK”. Restart your computer to complete the TCP/IP installation. Rev.1 - YML686 NB5580/W User Guide www.netcomm.com.au Page 99...
-
Page 100: Appendix C: Macintosh Setup
TCP/IP Protocol preloaded and supports DHCP Addressing. Hardware Connections Connect your Macintosh computer to your NetComm NB5580/W. If you have a newer computer, there will be a 10Base-T Ethernet port on the back. Older computers will need to have an Ethernet card installed. Refer to your computer’s User Manual for instructions on Ethernet card installation. - Page 101 Chapter 4: Advanced Configuration. Adding NetComm NB5580/W to Existing Network If the NetComm NB5580/W is to be added to an existing Macintosh computer network, the computers will have to be configured to connect to the Internet via the NetComm NB5580/W.
-
Page 102: Appendix D: Technical Specifications
Appendix D: Technical Specifications Specifications for Wireless Model only (NB5580W) Standards Antenna Operating Channels Modulation Access Mode Roaming Security General Specifications for both NB5580 & NB5580W Standards Ports Protocol Maximum Users Cabling Type Frequency Range Data Transmission Rate IPSetting VPN Endpoints-IPSec VPN Pass-through (NATtraversal) Firewall &... - Page 103 Power Operating Temp Certifications System Requirements Rev.1 - YML686 NB5580/W User Guide External, 12VDC, 1.0 Amps 0 ~ 45°C A-Tick, N367 Operating system independent – ideal for Windows, Macintosh, Linux & TCP/IPsystems www.netcomm.com.au Page 103...
-
Page 104: Appendix E: Cable Connections
If you are unsure about which cable to use or which socket to connect it to, please refer to the hardware installation section in this manual. If you are still not sure about cable connections, please contact a professional computer technician or NetComm for further advice. -
Page 105: Straight And Crossover Cable Configuration
An RJ-11 connector is the small, modular plug used for most analog telephones. It has six pin slots in the head, but usually only two or four of them are used. RJ-11 Connector Pin Assignment Rev.1 - YML686 NB5580/W User Guide Figure 3 Figure 4 Normal Assignment Signal Ground... -
Page 106: To Rj-11 Adapter
If it is a new device, the operating system auto-detects it and asks for the driver disk. If the device has already been installed, the computer activates it and starts talking to it. USB devices can be connected and disconnected at any time. www.netcomm.com.au Page 106 “B” Connection Rev.1 - YML686... -
Page 107: Appendix F: Em1100 Adsl Microfilter
Telephones and/or facsimiles in other rooms that are using the same extension will also require Microfilters. The following diagram gives an example of connecting your ADSL Modem/Router using a Microfilter. Rev.1 - YML686 NB5580/W User Guide www.netcomm.com.au Page 107... -
Page 108: Appendix G: Em1180 Adsl Pots Splitter Installation Guide
If the product does not operate correctly, i.e. If the telephone or ADSL service is disrupted by the installation of the filter. ■ If the product has been dropped or the housing has been damaged. ■ If the product exhibits a distinct change in performance. www.netcomm.com.au Page 108 Rev.1 - YML686 NP5580/W User Guide... -
Page 109: Wiring Instructions
6. Connect cable from in-house telephone wiring to the connector marked telephone. 7. Connect the incoming subscriber line to the connector marked LINE. 8. Secure cables with cable ties. 9. Put connector cover back in place and relocate onto the wall. Rev.1 - YML686 NB5580/W User Guide www.netcomm.com.au Page 109... -
Page 110: Wall Mounting Instructions
4. Position the wall mounting plate over the holes and insert the screws. 5. Position the filter over the wall mounting plate and push firmly into position until it is secured. Connector Function Line ADSL Modem Local Phone www.netcomm.com.au Page 110 Style RJ12/IDC Pin3 RJ45/IDC Pin4 RJ123/IDC... -
Page 111: Appendix H: Glossary
Web pages. Examples include Netscape Navigator and Microsoft Internet Explorer. Rev.1 - YML686 NB5580/W User Guide B S S BSS is the acronym of Basic Service Set that consists of a wireless access point and a group of wireless client computers. - Page 112 Internet A global network connecting millions of computers for the exchange of data, news and opinions. www.netcomm.com.au Page 112 Intranet A network based on TCP/IP Protocol belonging to an organization, and accessible only by that organization’s members, employees, or others with authorization.
- Page 113 If your ISP doesn’t support these two protocols, contact them for an authentication script. Rev.1 - YML686 NB5580/W User Guide Short for Point-to-Point Protocol, a communications protocol for transmitting information over standard telephone lines between devices from different manufacturers.
- Page 114 64-bit/128-bit keys to encrypt data that is transmitted between all points in a wireless network to ensure data security. It is described in the IEEE 802.11 standard. www.netcomm.com.au Page 114 Rev.1 - YML686 NP5580/W User Guide...
-
Page 115: Appendix I: Registering Your Netcomm Product
NetComm web site for quick and easy registration of your product at Alternatively, you can complete the following copy of the Warranty Registration Form and mail it to NetComm Limited, PO Box 1200, Lane Cove NSW 2066. Contact Information If you have any technical difficulties with your product, please do not hesitate to contact NetComm’s Customer Support Department. -
Page 116: Customer Information
Do not use this power supply with any other product or do not use any other power supply that is not approved for use with this product by NetComm. Failure to do so may cause damage to this product, fire or result in personal injury. -
Page 117: Warranty Registration Form
Warranty Registration Form Date of Purchase ……...………………...………... Name ……...………………...………... Company ……...………………...………... Address ……...………………...………... ……………………...……... Tel No ( ) ...………...……. Fax No ( E-mail ……...………………...………... The following information is vital for your warranty Please make sure it’s correct and complete. Serial No ……...………………...………... -
Page 119: Product Warranty
4. The cost of transporting product to and from NetComm's nominated premises is your responsibility; and, 5. NetComm does not have any liability or responsibility under this warranty where any cost, loss, injury or damage of any kind, whether direct, indirect,...
Need help?
Do you have a question about the NB5580 and is the answer not in the manual?
Questions and answers