Davey ChloroMatic MCS16C Installation & Operating Instructions Manual
Salt water pool system
Hide thumbs
Also See for ChloroMatic MCS16C:
- Installation & operating instructions manual (20 pages)
Table of Contents
Advertisement
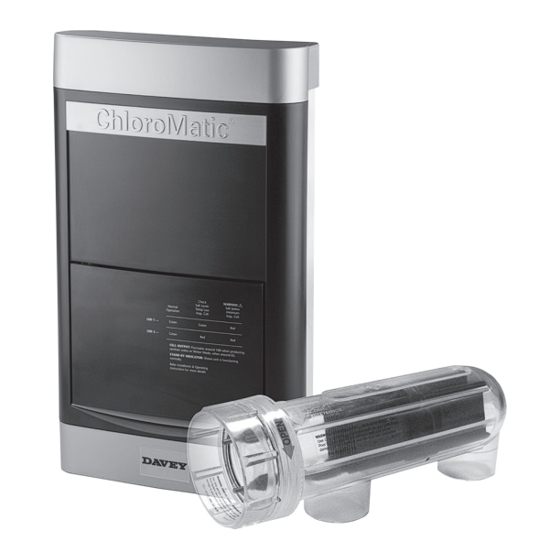
ChloroMatic
Salt Water Pool System
Optional pH Pump
Operating Instructions
ESC Self Cleaning
(12 Volt Light Output included)
(12 Volt Light Output included)
Please pass these instructions on to the operator of this equipment.
Installation &
MCS16C
MCS24C
MCS36C
MCS40C
MCS50C
MCS16CT
MCS24CT
ESR Self Regulating
MC16C
MC20C
MC30C
MC16CT
(12 Volt Light Output included)
MC20CT
(12 Volt Light Output included)
®
Advertisement
Table of Contents

Subscribe to Our Youtube Channel
Related Manuals for Davey ChloroMatic MCS16C


Summary of Contents for Davey ChloroMatic MCS16C
- Page 1 ChloroMatic ® Salt Water Pool System Optional pH Pump Installation & Operating Instructions ESC Self Cleaning ESR Self Regulating MCS16C MC16C MCS24C MC20C MCS36C MC30C MC16CT MCS40C (12 Volt Light Output included) MC20CT MCS50C (12 Volt Light Output included) MCS16CT (12 Volt Light Output included) MCS24CT (12 Volt Light Output included)
-
Page 2: Table Of Contents
ChloroMatic ® Salt Water Pool System Congratulations! You are now the proud owner of the renowned ChloroMatic Salt Water Chlorinator. Please read all information in this manual carefully before installing or operating your ChloroMatic Salt Water Pool Chlorinator. Table of Contents Packing List ................................ -
Page 3: Important Notice
IMPORTANT NOTICE FACTORS THAT WILL IMPROVE THE PERFORMANCE AND LIFE OF YOUR SALT WATER CHLORINATOR PLEASE READ THIS BEFORE OPERATING YOUR CHLORINATOR POOL BUILDERS: Please cover this information with your customer during the new pool “Hand over Session” Salt Water Chlorinators are a valuable piece of pool sanitising equipment and must be cared for to get the best performance and life span from it. -
Page 4: Installation Instructions
Note: The Chlorinator is not intended for use by young children or infirm persons without supervision. Please ensure that young children are supervised to ensure that they do not play with the Chlorinator. Power connections and wiring must be carried out by an authorised electrician. INSTALLATION INSTRUCTIONS FOR CHLOROMATIC (ESR and ESC) Note: For ESCpH models, please read all instructions then refer to page 15-17 for more information. -
Page 5: Pre Start Up Procedure
PRE JUNE 2015 ESR Series Gas sensor: WHITE Black sleeved terminal on lead to THREADED BLACK BOLT Black terminal on cell. WHITE BLACK White sleeved terminal on lead to ESR CELL LEADS White terminal on cell. POST JUNE 2015 Gas sensor: Red sleeved terminal WHITE on lead to threaded... -
Page 6: Operation Of Your Chloromatic System
• STABILISER - It is essential that pool stabiliser be added and maintained at the rate of 30 - 50 ppm at all times. Do not exceed 100 ppm. (Refer Day to Day Operation page 12 for further information). OPERATION OF YOUR ChloroMatic SYSTEM: Cell Output on the digital LED display is expressed as a percentage. -
Page 7: Esr, Esc Series With Optional Ph System Features
ChloroMatic MODEL ESR, ESC and ESCpH SERIES FEATURES: STAND- BY: The Stand - By indicator will be On when the Unit is preparing to produce chlorine. This will be either during the systems initial start up or when the Cell has been turned Off during the filtration cycle. FLOW: If there is a problem with water flow or chlorine gas is detected in the Cell Housing the fIow indicator will be On. -
Page 8: Automatic Time Clock Operation
There are other factors that can cause the Unit not to work correctly: 1. Heavy Rain - can cause very diluted pool water to pass over the Cell due to surface skimming. 2. Scaled Cell - a scaled Cell will not draw as much electrical current as a clean Cell when first started. 3. - Page 9 Selector Function Switch Functions and Instructions Description Position Set the current time on the digital clock. Select the Set Clock position on the selector switch to enable the time of day to be input. A number ‘1’ will appear at the left of the screen. Set Clock (a) The display will flash on and off as long as the selector switch remains at this position.
-
Page 10: Optional Pool Light Transformer
If your Davey ChloroMatic is fitted with a pool light transformer, connect as described below:- Please Note: Only one light can be connected to each light transformer. (Max power: 150W at 12VAC) If more than one light is required please refer to your ChloroMatic Davey dealer or the Davey Customer Service Centre. -
Page 11: Maintenance Of Power Supply And Electrolytic Cell
MAINTENANCE OF ELECTROLYTIC CELL: The cell is composed of precious materials, and although proper maintenance can prolong its life to the maximum, eventually the process of electrolysis will wear away its delicate coating, at which time it gradually ceases to produce chlorine. -
Page 12: Day To Day Operation
Do not add Hydrogen Peroxide to pool water or through swimming pool hydraulic or sanitiser system. Use of Hydrogen Peroxide will void warranty on Davey products.. Salt is NOT used up in the process of producing chlorine or by evaporation. Salt is only lost through back - washing, splash - out, overflow or by leakage from the pool or plumbing. -
Page 13: Chlorine Production
CHLORINE PRODUCTION: The ChloroMatic must be run daily to generate sufficient chlorine to sanitise the pool. During Summer this is approximately eight hours per day, preferably in two periods - between 6.00 and 8.00am and between 5.00 and 11.00pm. Night time is preferable because chlorine dissipates rapidly in direct sunlight. If these running times are observed, and the Cell is functioning correctly, your pool will have sufficient chlorine when tested in the morning. -
Page 14: General Information: Recommended Pool Water Chemistry
Please note that chlorinator cell life can be increased with shorter running times during winter and lower output settings. Davey recommends that a chlorinator is run for between 6 - 8 hours a day during summer, and 4 hours during winter. -
Page 15: Important Notes
ChloroMatic ESC with optional pH Dosing SYSTEM The ESC unit is a combination of the ESC ChloroMatic sanitiser and a pH monitoring, auto-dosing peristaltic pump. Please refer to the “Davey Peristaltic Pump AS Series” Installation and Operating Instructions for full installation details. -
Page 16: Installing The Ph Peristalic Pump Module
• Fit all the saddle clamps to the pipe work as shown in the “Davey Peristaltic Pump AS Series”, Installation and Operating Instructions and then attach the remaining clear tube (trim to length if required) to the discharge port of the peristaltic pump (on right side of inverted “U”... - Page 17 CHLOROMATIC CONTROLLER WITH pH CONNECTOR (BASE) Socket for IEC Female Pool Pump Socket for pH Dosing Pump Model: M5135 CONNECTION DIAGRAM FOR THE ESC pH SYSTEM The ESC pH system should ideally be plumbed and connected up as shown in the diagram below. Example of ESC50 Flow...
-
Page 18: Guarantee And Terms & Conditions
Customer Service line on 1300 232 839 in Australia, or 0800 654 333 in New Zealand, or send a written letter to Davey at the address listed below. On receipt of your claim, Davey will seek to resolve your difficulties or, if the product is faulty or defective, advise you on how to have your Davey product repaired, obtain a replacement or a refund. - Page 20 Website: davey.com.au Website: daveyeurope.eu Website: daveyuae.com ® Davey is a trademark of Davey Water Products Pty Ltd. © Davey Water Products Pty Ltd 2017. P/N MMAN008-12 * Installation and operating instructions are included with the product when purchased new. They may also be found on our website.
Need help?
Do you have a question about the ChloroMatic MCS16C and is the answer not in the manual?
Questions and answers
sanatiser will only output up to 80 max cannot get any higher
The Davey ChloroMatic MCS16C sanitizer outputs up to 80 because it is operating in Winter Mode, where the display fluctuates around 85. This mode is used to adapt to low water temperatures during colder seasons.
This answer is automatically generated