Table of Contents
Advertisement
Quick Links
Advertisement
Table of Contents

Related Manuals for Kargo Master PRO-IV


Summary of Contents for Kargo Master PRO-IV
- Page 2 III & IV RO - 1/2", 9/16", & 3/4"...
- Page 3 (2 ea.) (2 ea.) (8 ea.) (8 ea.) (4 ea.) (2 ea.) (4 ea.) 1/2" x 2 1/4" 5/16" x 3/4" 1/2" x 3 1/2" 5/16" x 3/4" 5/16" x 2 1/4" 3/8" x 2 1/4" 3/8" x 1 3/4" Button Head Bolt Hex Bolt Carriage Bolt...
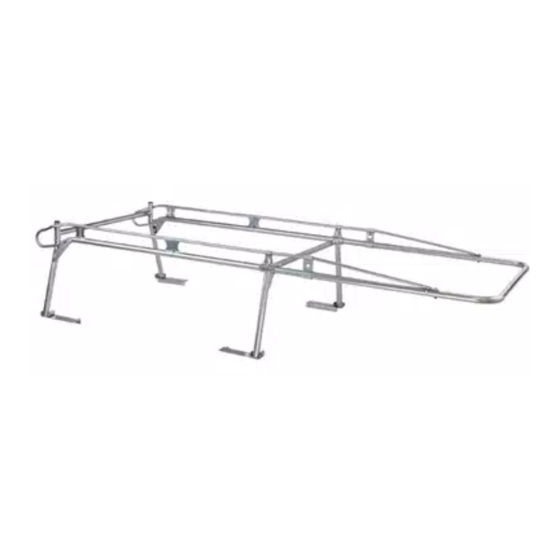
- Page 4 STEP 1 #1 = Cover entire swedge joints with silicone sealant and join FRONT and REAR side channels together, there is a LEFT & RIGHT FRONT, with the Right marked with a GREEN dot on the overlapping plate. There is a RIGHT & LEFT REAR.
- Page 5 STEP 4 #1 = Cover entire swedge joints with silicone sealant and insert the CENTER CROSS BAR into the SIDE RAIL CUPS and attach with bolts E, washers K and lock nuts N. STEP 5 #1 = Insert PLASTIC CAPS onto the rear crossbar uprights, (the tall side of the tube).
- Page 6 STEP 7 #1 = Position the Front Mount Plates on the truck bed rail so that they are as far forward as possible, but make sure inserted bolt A is at least 1” clear of the cab of the truck.Position the Rear Mount Plates on the truck bed rail so that the rear of the Mount Plate is even with the inside of the truck tail gate.
- Page 7 STEP 8 #1 = Make final adjustments and attach front leg with bolts A, washers H, and nut L. Center rack on truck bed. Tighten up the bolts on the crossbar and clamp plates as well as the set screws P. STEP 9 #1 = Attach the front SUPPORT UPRIGHT where the 1”...
- Page 8 Footplate Pre-Drilled Holes 3" Rack Mounting Bracket Drill 1st hole in truck bedrail, through pre-drilled hole in the footplate, as shown. Optional T-nut TRUCKs’ BEDRAIL Optional Clamp-On Mount Follow instruction that come with your Stake Pocket T- Bolt Mounting Kit #31560 NO DRILL clamp-on mounting OPTION...
Need help?
Do you have a question about the PRO-IV and is the answer not in the manual?
Questions and answers