Table of Contents
Advertisement
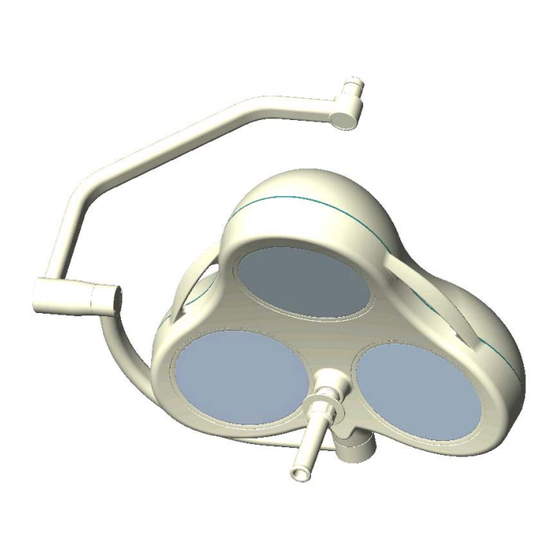
Mach M3
Mach M3 stand lamp, F- / F/H / DF- / DF/H-model
Mach M3 emergency stand lamp, F- / F/H /DF- / DF/H-model
Mach M3, wall lamp, F- / F/H / DF- / DF/H-model
Mach M3 ceiling lamp for room heights up to 2,8m, F- / F/H / DF- / DF/H-model
Mach M3 ceiling lamp for room heights between 2,8m – 3m, F- / F/H / DF- / DF/H-model
Dr. Mach
59200001
Operating instructions
MACH M3
GmbH u. Co., Floßmannstrasse 28, D-85560 Ebersberg
Tel.: +49 (0)8092 2093 0, Fax +49 (0)8092 2093 50
Internet: www.dr-mach.com, E-mail:
Edition 06
Dr. Mach
Lamps and Engineering
info@dr-mach.de
28.11.2002 / Bak page 1/22
Advertisement
Table of Contents

Related Manuals for Dr. Mach M3


Summary of Contents for Dr. Mach M3
- Page 1 Mach M3, wall lamp, F- / F/H / DF- / DF/H-model Mach M3 ceiling lamp for room heights up to 2,8m, F- / F/H / DF- / DF/H-model Mach M3 ceiling lamp for room heights between 2,8m – 3m, F- / F/H / DF- / DF/H-model Dr. Mach GmbH u.
-
Page 2: Table Of Contents
Mach M3 Lamps and Engineering List of contents 1. Safety instructions ..................page 4 2. Operating the lamp MACH M3..............page 5 2.1 Brief description of the lamp ...............page 5 2.1.1 Merging of light fields (F-model)..........page 5 2.1.2 Focusing (DF-model) ..............page 5 2.1.3 Light intensity control (/H-model)..........page 5... - Page 3 Mach M3 Lamps and Engineering Dear customer! Congratulations for achieving our new OT-lamp MACH M3. The MachVISION optical system provides an illuminated field with improved contrast and excellent homogeneity. Combined with the Duo-Focus feature this offers a unique possibility for adaptation to the wound area.
-
Page 4: Safety Instructions
The external transformer (Order No. 6701 0208) must be tested and validated according to IEC 60601-1. If the external transformer is not tested and validated according to IEC 60601-1, it is not allowed to use it with Dr. Mach OT-lamps. 59200001 Edition 06... -
Page 5: Operating The Lamp Mach M3
Lamps and Engineering 2. Operating the lamp MACH M3 2.1 Brief description of the lamp The OT-lamp MACH M3 is available in following versions: Standard OT-lamp (F) with merging of light fields Duo-Focus OT-lamp (DF) with merging of light fields and focusing F- or DF- lamps with light intensity control (/H) 2.1.1 Merging of light fields... -
Page 6: Adjusting The Illuminated Area By
Dr. Mach Mach M3 Lamps and Engineering 2.2 Adjusting the illuminated area by merging the light fields (for F and F/H-models) All F and F/H lamp models offer the feature of “merging the light fields”. This feature is activated by turning the sterilisable handle 1. -
Page 7: Merging Of Light Fields And Focusing
Dr. Mach Mach M3 Lamps and Engineering 2.4 Overview of the lamp functions Merging of light fields and focusing MERGING OF LIGHT FIELDS Ring (2) Merging the individual light fields of each reflector is done by swivelling the reflectors. The light fields overlap. -
Page 8: Adjusting The Light Intensity
Dr. Mach Mach M3 Lamps and Engineering 2.5 Adjusting the light intensity Key pad (for F/H and DF/H models only) Select the desired light intensity before the operation. At these models the adjustment is done by the keypad at the cardan bow. The intensity can be infinitely adjusted between 50% and 100%. -
Page 9: Positioning
Dr. Mach Mach M3 Lamps and Engineering 2.6 Positioning Use the sterile handle 2 or the handle rails 1 to position the lamps. Use the handle rail to position the lights before the operation. Use the sterile handle for positioning during the operation. -
Page 10: Cleaning
Dr. Mach Mach M3 Lamps and Engineering 3. Cleaning 3.1 Sterilisable handle At delivery the lamp is equipped with the handle sleeve 1. The handle sleeve is removable and sterilisable. Before using the first time and before every use the handle sleeve must be cleaned, disinfected and sterilised. - Page 11 Dr. Mach Mach M3 Lamps and Engineering When cleaning / disinfecting, the following procedures must be followed: Process Time (sec.) Zone 1 Pre-rinse, external, cold, 10 – 15°C Washing, acidic, external 35°C Draining time Re-rinse, external approx. 80°C Draining time Re-rinse, external approx.
-
Page 12: Lamp Housing, Dispersing Lens And Support System
Mach M3 Lamps and Engineering 3.2 Lamp housing, dispersing lens and support system The OT-lamp MACH M3 has a high-quality surface, which can be cleaned with conventional cleaning agents. The lens system 2 is made of a high-quality plastic. Pay attention to the following during cleaning: Never wipe over the lens system 2 with a dry cloth (always clean with a wet cloth). -
Page 13: Removing The Upper Housing Part
Dr. Mach Mach M3 Lamps and Engineering 4.2 Removing the upper housing part The upper housing part can be removed by turning the turn-lock fastener 8. The upper housing part has two markings, 6 (Lock) and 5 (Up). The notch 7 at the turn-lock fastener 8 shows the open or close status of the upper housing part. -
Page 14: Changing Of Spare Parts
Lamps and Engineering 4.3 Changing of spare parts 4.3.1 Changing the halogen bulbs Dr. Mach uses special halogen bulbs as illuminants. Only original Dr. Mach replacement bulbs may be used. The use of other bulbs can lead to a considerable reduction of the light power and increase in the thermal load. -
Page 15: Changing The Dispersing Lens
Dr. Mach Mach M3 Lamps and Engineering 4.3.2 Changing the dispersing lens The dispersing lens is made of a high-quality plastic. In case the dispersing lens looses its optical characteristics, this can reduce the luminous intensity and the light quality, which can be provided. -
Page 16: Data
700 hPa 1060 hPa 6. CE-mark The products Mach M3 comply with the standards 93/42/EEC for medical products of the European Community’s Council. Dr. Mach GmbH is certified according to DIN EN 46001:1996 and DIN EN ISO 9001:1994 by TÜV München. -
Page 17: Spare Parts
Dr. Mach Mach M3 Lamps and Engineering 8. Spare parts 59200001 Edition 06 28.11.2002 / Bak page 17/22... - Page 18 Dr. Mach Mach M3 Lamps and Engineering 8. Spare parts - continuation Bowden control Detail A Detail A 59200001 Edition 06 28.11.2002 / Bak page 18/22...
-
Page 19: Spare Parts List
Socket for halogen bulb 67320007 Knurled screw 28060213 Fuse 0,63 AT 5x20 67370003 Dimmer module OPDIM V3.0 24080001 Check version and number PCB board OPDX-M3 V0.10 67250101 Check version and number Gear motor 67030105 Filter disk 23250201 Spring holder 20086001... -
Page 20: Appendix: Setting The Primary Voltage At The Block Transformer
Dr. Mach Mach M3 Lamps and Engineering 10. Appendix Setting the primary voltage at the block transformer 300VA (extra) Clamps on the transformer Pos.1 earthing connection at the transformer Pos.2 primary side Pos.3 secondary side • Connect the transformer to earth. Use the provided clamps pos.1 at the transformer, respectively at the transformer plate. - Page 21 Dr. Mach Mach M3 Lamps and Engineering Setting for 230V Setting for 247V 59200001 Edition 06 28.11.2002 / Bak page 21/22...
- Page 22 Dr. Mach Mach M3 Lamps and Engineering 59200001 Edition 06 28.11.2002 / Bak page 22/22...
Need help?
Do you have a question about the M3 and is the answer not in the manual?
Questions and answers