Table of Contents
Advertisement
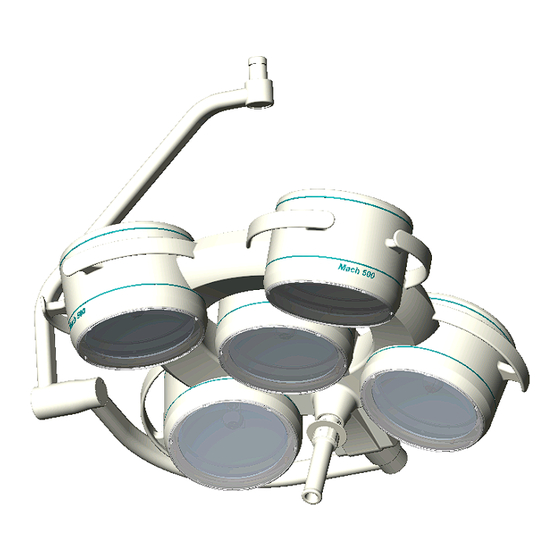
Mach 380 400 500 700
M
o
u
n
M
o
u
n
Mach 380 wall lamp, F-model
Mach 380 wall lamp, DF-model
Mach 380 ceiling lamp up to room heights of 2,8m, F-model
Mach 380 ceiling lamp for room heights 2,8m – 3m, F-model
Mach 380 ceiling lamp up to room heights of 2,8m, DF-model
Mach 380 ceiling lamp for room heights 2,8m – 3m, DF-model
Mach 400 ceiling lamp, F-model
Mach 400 ceiling lamp, DF-model
Mach 500 ceiling lamp, F-model
Mach 500 ceiling lamp, DF-model
Mach 700 ceiling lamp, F-model
Mach 700 ceiling lamp, DF-model
Dr. Mach
59210001
t
i
n
g
i
n
s
t
r
u
c
t
t
i
n
g
i
n
s
t
r
u
c
t
M
A
C
H
3
8
M
A
C
H
3
8
GmbH u. Co., Flossmannstrasse 28, D-85560 Ebersberg
Tel.: +49 (0)8092 2093 0, Fax +49 (0)8092 2093 50
Internet: www.dr-mach.com, E-mail:
i
o
n
s
D
i
r
e
c
t
i
o
i
o
n
s
D
i
r
e
c
t
i
0
4
0
0
5
0
0
0
4
0
0
5
0
0
info@dr-mach.de
Edition 04
Dr. Mach
Lamps and Engineering
n
s
f
o
r
u
s
e
o
n
s
f
o
r
u
s
e
7
0
0
7
0
0
3805 3021 00
3806 3021 00
3805 3031 27
3805 3031 30
3806 3031 27
3806 3031 30
4005 3031 30
4006 3031 30
5005 3031 30
5006 3031 30
7005 3031 30
7006 3031 30
10.12.2001 / Bak Page 1/30
Advertisement
Table of Contents

Related Manuals for Dr. Mach Mach 400


Summary of Contents for Dr. Mach Mach 400
- Page 1 Mach 380 ceiling lamp up to room heights of 2,8m, DF-model 3806 3031 27 Mach 380 ceiling lamp for room heights 2,8m – 3m, DF-model 3806 3031 30 Mach 400 ceiling lamp, F-model 4005 3031 30 Mach 400 ceiling lamp, DF-model 4006 3031 30...
- Page 2 Dr. Mach Mach 380 400 500 700 Lamps and Engineering Operating Light System Mach 700/500/400/380 Pos. Component Ceiling anchorage ring Ceiling trim Flange tube Horizontal arm Spring arm Cardan Sterilisable handle Mach 380 Handle rail Mach 700 Adapter for Mach 700...
-
Page 3: Table Of Contents
Dr. Mach Mach 380 400 500 700 Lamps and Engineering List of contents 1. Safety instructions ..................Page 5 2. Operating the MACH-lamps..............Page 6 2.1 Brief description of the light-models ...........Page 6 2.1.1 Merging of light fields (F- model)..........Page 6 2.1.2 Focusing (DF- model) ..............Page 6 2.1.3 Auto-Focus (AF- model) ..............Page 7... - Page 4 Dr. Mach Mach 380 400 500 700 Lamps and Engineering Dear customer! You have just bought a product from the New Generation of MACH lamps. The new MachVISION optical system provides an illuminated field with improved contrast and excellent homogeneity. Combined with the Duo-Focus feature this offers a unique possibility for adaptation to the wound area.
-
Page 5: Safety Instructions
Dr. Mach Mach 380 400 500 700 Lamps and Engineering 1. Safety instructions Pay attention to the instructions for use when handling the lamp. Warning: This device has not been designed for use in potentially explosive areas. The lamp is classified as Group 1 according to the Medical Device Regulation. -
Page 6: Operating The Mach-Lamps
Dr. Mach Mach 380 400 500 700 Lamps and Engineering 2. Operating the lamps Mach 380 / 400 / 500 / 700 Make sure that the lamp is in perfect working order before every use. 2.1 Brief description of the lamp models You can choose between the following OT-lamp models of our New Generation: •... -
Page 7: Auto-Focus (Af- Model)
Mach 380 400 500 700 Lamps and Engineering 2.1.3 Auto-Focus (AF- model) For our New Generation OT- lamps Mach 400, Mach 500 and Mach 700 we offer besides the man- ual adjustment of the size of the illuminated field an optional automatic facility, the MACH Auto-Focus System. -
Page 8: Adjusting The Illuminated Field, Duo-Focus System
Dr. Mach Mach 380 400 500 700 Lamps and Engineering 2.2 Adjusting the illuminated field Duo - Focus system The illuminated field is adjusted with the sterilisable handle and the keypad on the cardan of the lamp. There are two possibilities to fit the light field to the wound area: By merging the light fields (see point 2.1.1) -
Page 9: Auto-Focus (Af)
Dr. Mach Mach 380 400 500 700 Lamps and Engineering 2.3 Auto-Focus (AF) In case of OT-lamps equipped with Auto-Focus system, the adjusting of the lamp after a change of work- ing distance is done automatically, that means, merging of light fields (not focusing!!!) is done automati- cally. -
Page 10: Adjusting The Light Intensity
Dr. Mach Mach 380 400 500 700 Lamps and Engineering 2.4 Light intensity control Before using the OT-lamps a voltage measurement and, if necessary, a voltage setting has to be done. Only in this way a perfect functioning can be ensured. -
Page 11: Voltage Setting At The Halogen Bulbs
Dr. Mach Mach 380 400 500 700 Lamps and Engineering 2.4.2 Voltage setting at the halogen bulbs If the voltage measured is too high or too low, the value must be adjusted at the power supply. The setting at the transformer is made by reconnecting the wires on the secondary side. -
Page 12: Possible Settings Of The Diameter
Dr. Mach Mach 380 400 500 700 Lamps and Engineering • Turn off the lamp. • Remove one jumper. • Turn the removed jumper 90° and put in back on its pin, so not to loose this jumper (see jumper settings). -
Page 13: Adjusting The Light Intensity
Dr. Mach Mach 380 400 500 700 Lamps and Engineering 2.4.6 Adjusting the light intensity Select the desired light intensity before the operation according to the requirements of the operation and to prevent an early tiredness of the eyes. At models in the /H-series the adjustment is done at the keypad at the cardan. -
Page 14: Sterilisable Handle
Dr. Mach Mach 380 400 500 700 Lamps and Engineering 2.5 Sterilisable handle At delivery the lamp is equipped wth the handle sleeve 1. The handle sleeve is removable and ster- ilisable. Before using the first time and before every use the handle sleeve must be cleaned, desinfected and sterilised. - Page 15 Dr. Mach Mach 380 400 500 700 Lamps and Engineering When cleaning/disinfecting, the following procedures must be followed: Process Time (sec.) Zone 1 Pre-rinse, external, cold, 10 – 15°C Washing, acidic, external, 35°C Draining time Re-rinse, external, ca. 80°C Draining time Re-rinse, external, ca.
-
Page 16: Positioning
Dr. Mach Mach 380 400 500 700 Lamps and Engineering 2.6 Positioning Use the sterile handle 2 or the handle rails 1 to posi- tion the lamps. Use the handle rail to position the lights before the operation. Use the sterile handle for positioning during the op- eration. -
Page 17: Cleaning
Dr. Mach Mach 380 400 500 700 Lamps and Engineering 3. Cleaning 3.1 Handle The sterilizable handle 1 can be removed and steril- ised at temperatures up to a max. of 134°C. No other parts may touch the handle during sterilisa- tion. -
Page 18: Maintenance
Dr. Mach Mach 380 400 500 700 Lamps and Engineering 4. Maintenance MACH lights have a brake on the suspension fixture and on the lamp housing. Adjust these brakes as necessary after installation. If a lamp is difficult to move or if it does not stay in position the brake forces should be adjusted. -
Page 19: Changing Of Spare Parts
4.4.1 Changing the halogen bulbs Dr. Mach uses special halogen bulbs as illuminants. Only original Dr. Mach replacement bulbs may be used. The use of other bulbs can lead to a considerable reduction of the light power and increase in the thermal load. -
Page 20: Changing The Dispersing Lens
Dr. Mach Mach 380 400 500 700 Lamps and Engineering 4.4.2 Changing the dispersing lens The dispersing lens is made of a high-quality plastic. In case the dispersing lens looses its optical charac- teristics, this can reduce the luminous intensity and the light quality, which can be provided. -
Page 21: Data
700 hPa 1060 hPa 6. CE-mark The products Mach 380, Mach 400, Mach 500 and Mach 700 comply with the standards 93/42/EEC for medical products of the European Community’s Council. 7. Disposal The OT- light doesn’t contain any danger goods. -
Page 22: Spare Parts
Dr. Mach Mach 380 400 500 700 Lamps and Engineering 8. Spare parts MACH 700 28 26 27 06 05 09 38(39) 08 18 bzw. 20 40(41) MACH 500 38(39) 08 18 bzw. 20 40(41) 59210001 Edition 04 10.12.2001 / Bak Page 22/30... - Page 23 Dr. Mach Mach 380 400 500 700 Lamps and Engineering MACH 400 28 26 27 06 38(39) 08 18 bzw. 20 40(41) MACH 380 38(39) 18 bzw. 20 40(41) 59210001 Edition 04 10.12.2001 / Bak Page 23/30...
- Page 24 Dr. Mach Mach 380 400 500 700 Lamps and Engineering MACH 380 400 500 700 18,20,21 59210001 Edition 04 10.12.2001 / Bak Page 24/30...
- Page 25 Dr. Mach Mach 380 400 500 700 Lamps and Engineering Reflector units External reflector unit, DF-model Lateral reflector unit, F-model Lateral reflector unit, DF- and F-model (Mach 400, 500, 700) 59210001 Edition 04 10.12.2001 / Bak Page 25/30...
-
Page 26: Spare Parts List
Item Spare part EDVNO Remarks Cover 21011001 Covering plate for Mach 380 21090202 Covering plate for Mach 400 28090202 Covering plate for Mach 500 28090202 Covering plate for Mach 700 29090202 Fixing screw for covering plate 65112022 M2,5x6 DIN 966... - Page 27 Dr. Mach Mach 380 400 500 700 Lamps and Engineering Quantity Item Spare part EDVNO Remarks Housing lower part Filter disk 23250201 7x3 Spring 21012204 7x6 Screw M3x10 DIN 912 65052078 with lock washer 7x6 Washer 65512017 7x6 Distance washer...
-
Page 28: Appendix: Setting The Primary Voltage At The Block Transformer
Dr. Mach Mach 380 400 500 700 Lamps and Engineering 10. Appendix Setting the primary voltage at the block transformer 300VA (extra) Clamps on the transformer Pos.1 earthing connection at the trans- former Pos.2 primary side Pos.3 secondary side •... - Page 29 Dr. Mach Mach 380 400 500 700 Lamps and Engineering Setting for 230V Setting for 247V 59210001 Edition 04 10.12.2001 / Bak Page 29/30...
- Page 30 Dr. Mach Mach 380 400 500 700 Lamps and Engineering 59210001 Edition 04 10.12.2001 / Bak Page 30/30...
Need help?
Do you have a question about the Mach 400 and is the answer not in the manual?
Questions and answers