Table of Contents
Advertisement
Quick Links
Advertisement
Table of Contents

Related Manuals for Christie ChristieNet Wireless Presentation Portal


Summary of Contents for Christie ChristieNet Wireless Presentation Portal
- Page 1 Wireless Presentation Portal Technical Manual V 1.0 www.christiedigital.com...
-
Page 2: Table Of Contents
Table of Contents Chapter 1: INTRODUCTION ..................1 Key Features........................... 2 Specifications.......................... 2 Chapter 2: WPP SYSTEM INSTALLATION ............... 3 Safety Statements ......................3 Hardware Installation ..................... 3 2.2.1 Power ......................... 3 2.2.2 VGA Connection ......................3 2.2.3 Status LED’s ......................3 2.2.4 Hardware Reset Button.................... -
Page 3: Chapter 1: Introduction
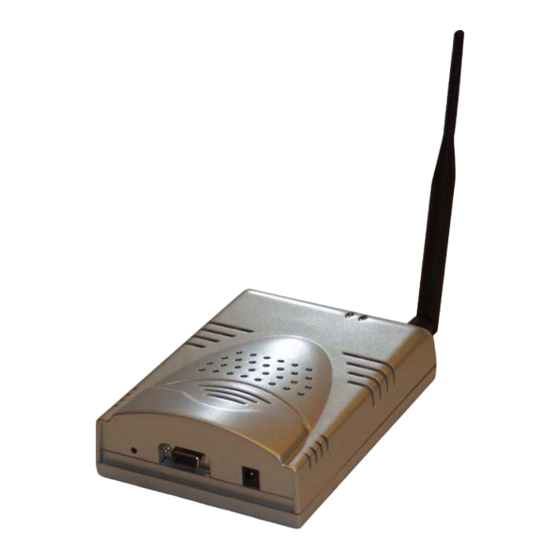
Chapter 1: INTRODUCTION The ChristieNet Wireless Presentation Portal, WPP is an IEEE 802.11g compliant product designed specifically for wirelessly connecting projectors and monitors to computers. It connects to the existing VGA connector of the projector/monitor and offers 802.11g connectivity up to 54 Mbps. -
Page 4: Key Features
Web browser based administration utility for upgrading firmware and setting encryption keys Standard VGA connector to allow the use with any presentation projector Specifications Model ChristieNet Wireless Presentation Portal Standard 802.11g Projector/Monitor Interface Standard 15-pin VGA connector Display resolution &... -
Page 5: Chapter 2: Wpp System Installation
Chapter 2: WPP SYSTEM INSTALLATION 2.1 Safety Statements Use only the power adapter provided with this product or the manufacturer's authorized replacement power supply. Connect the power adapter to a properly grounded electrical outlet that is near the product and easily accessible. Refer service or repairs, other than those described in the user documentation, to a professional service person. -
Page 6: Software Installation
3. You can use either hardware reset button or power cycle to reboot the unit before the timer ends, and that will cause the unit reverting back to factory default settings. 4. Observe that, during the next boot-up screen after above steps, a message of Reset to Factory Default should appear next to the Timer message. -
Page 7: System Requirements For Web-Based Administration Utility
Administration Manager, please see Chapter 4: – Using the Web-Based Administration Manager. 2.4 System Requirements for Web-based Administration Utility WPP has a Web-based Administration Utility that can be used to configure the settings of the product. The Web-based Administration utility can be accessed through WPP Administration Manager. -
Page 8: Chapter 3: Using The Wpp
Chapter 3: USING the WPP 3.1 Using the WPP in a Meeting In addition to the obvious convenience with wireless connection, the most important benefit of eliminating the VGA cable in using presentation projectors or monitors is to enable fast handover of the projector or monitor control among multiple meeting participants. - Page 9 Figure 3.1 WPP Banner Page The messages will be displayed on the top of this image and consist of two lines. The top line displays the SSID and the channel number of the unit while the second line reports on the channels currently in use by other 802.11g equipment around the unit. An example of the messages is given below: SSID=ChristieNET0001 Channel=1 RF activities detected on other channels (none).
-
Page 10: Configuring Computer To Control Wpp
Existing 802.11g/b channels detected in use, but there is no interference. Your connection to the unit should be smooth and error free. RF activities detected on other channels (1, 5, 8, 11). WARNING: Interference. Existing channels detected and interference found. The unit is in a RF noisy environment, you may have trouble connecting and maintaining connections to the unit even if a connection can be made. - Page 11 Figure 3.2 Location of installed WPP When the PSM starts, it displays the note below about configuring your wireless NIC to link with the WPP unit: Figure 3.3 Radio Linking Message Once you have acknowledged the above message, the main PSM dialog displays as below, as well as start out a WPP tray icon.
-
Page 12: Configuring The Wireless Adapter To Connect With Wpp
Figure 3.4 WPP PSM There are three action buttons in the PSM: “Establish a Session”, “Release the Session”, and “Exit”. Clicking “Exit” will quit the PSM program. The functions of three other action buttons are described in the following sections. 3.5 Configuring the Wireless Adapter to Connect with WPP 3.5.1 Configure the Wireless Network Adapter Look at the banner page on the projector/monitor screen in your meeting room to... -
Page 13: Configure The Wireless Adapter For Windows Xp
3.5.2 Configure the Wireless Adapter for Windows XP To configure your Wireless Network Adapter for Windows XP, you must first know if your Wireless Adapter is natively supported under Windows XP. The easiest way to know this is to see if an icon is in your system tray as in Figure 3.5. Figure 3.5 Network Adapter with native support under Windows XP If your system tray looks like the figure shown in Figure 3.5, your wireless card is natively supported under Windows XP and you should read the rest of this section. - Page 14 Figure 3.7 Wireless Network Connection Figure 3.8 Network Properties Click on the “Wireless Networks” tab and you should see a figure like Figure 3.9. Figure 3.9 Wireless Networks tab. Here you will find the various networks that your wireless card has been able to detect. Highlight the desired wireless network for WPP from the “Available networks”...
-
Page 15: Start Or Resume Your Presentation Session
Figure 3.10 Preferred networks changed to Ad Hoc networks only If there is more than one network, you must use the “Move up” and “Move down” buttons to move the WPP you wish to have connected to the top. When you are done, press the “OK”... -
Page 16: Wpp In Session" Message
Various abnormal conditions, such as RF interference or network time-out, however rare in occurrence, can cause the communication between the unit and the PSM to be interrupted. If an interruption of session is detected, the product will automatically try to reconnect and keep the user in session. -
Page 17: Chapter 4: Web-Based Administration Utility
Chapter 4: WEB-BASED ADMINISTRATION UTILITY 4.1 Introduction to the Web-Based Administration Utility Along with the software-based PSM available on the install CD, the WPP also has a Web-Based Utility that allows you to configure other aspects of the product. This includes change of the banner page, the wireless security/ encryption settings of the WPP, and upgrade of its firmware. -
Page 18: Configure The Wpp Using Administration Manager
4.3 Configure the WPP Using Administration Manager To access the web-based administration manager, simply click on the “Launch Admin Web Interface button” in the Administration utility. When you successfully reach the web site, a logon window will be prompted as shown in Figure 4.3. Figure 4.2: Login Screen The Default User Name is admin and the password is public. -
Page 19: Wpp Firmware Version
4.3.1 WPP Firmware Version This is the current WPP firmware version. It is important to know which firmware version you have before calling or emailing technical support. 4.3.2 Configuration When you click on the Configuration hyperlink, you should see the following screen as in Figure 4.5. -
Page 20: Administration
802.11 standard, not the mapped key scheme. A set of four keys needs to be created in the default-key scheme. WEP key length: The 64-bit encryption is currently the 802.11 standard. The 128-bit encryption is supported by equipment from a limited number of vendors. Note that the “user-controlled”... -
Page 21: Firmware And Banner
Figure 4.6: Administration Screen Page User Name: you can change the default user name of “Admin” to something else you desire. The character limit is 16 characters for this field. Enter New Password: This allows you to change the password of the unit. The default is “public”, but you can change it to anything you like. - Page 22 Figure 4.7 Firmware and Banner Page Upload Upload Options: To select a “Firmware upload” or a “Banner page upload” function. File path/name: If you click the browse button to the right of the field, you will get a file selection box. For Firmware file, you will want to get the file with the extension of .tar.gz.
-
Page 23: Chapter 5: Troubleshooting
Chapter 5: TROUBLESHOOTING 5.1 Unable to Connect or Establish a Session with Unit If you see the screen as in Figure 5.1 while trying to establish a session with WPP, the possible causes are listed below. Figure 5.1: Target Not Found 1) The SSID of the PC wireless adapter is not set up to be the same as the unit. -
Page 24: The Wpp Session Is Interrupted During A Presentation
terminate the reconnection waiting state and display the banner page indicating that a fresh presentation session is ready for being established. The default duration for a link-loss is 8 seconds. WPP will retry 3 periods of this duration. If no re-connection is established before the reconnection time running out, the product returns itself to the banner page. -
Page 25: Technical Support
5.5 Technical Support North & South America 519-744-8005 1-866-880-4462 Cinema: 1-800-407-7727 Fax: 519-749-3302 Europe, Middle East & Africa +44 118 977 8111 Fax: +44 118 977 8112 Asia Pacific +65 877 8737 Fax: +65 877 8747 People's Republic of China +86 21 6278 7708 Fax: +86 21 6278 7707 WPP Technical Manual v 1.0... -
Page 26: Appendix A: Limited Warranty
Appendix A: LIMITED WARRANTY Wireless LAN Hardware The seller warrants to the end user (“Customer”) that this product will be free from defects in workmanship and materials, under normal use and service, for one (1) year from the date of purchase. The seller’s sole obligation under this express warranty shall be, at the seller’s option and expense, to repair the defective product or part, deliver to Customer an equivalent product or part to replace the defective item. -
Page 27: Appendix B: Regulatory Compliance
Appendix B: REGULATORY COMPLIANCE FCC Part 15 Declaration of Conformity (DoC) The Referenced equipment: is herewith confirmed to comply with the requirements of FCC Part 15 rules. The operation is subject to the following two conditions: This device may not cause harmful interference, and This device must accept any interference received, including interference that may cause undesired operation. - Page 28 European Community (EC) Directives Conformity and Restrictions This product is in conformity with the protection requirements of EC Council directives 89/336/EEC, 73/23/EEC, and 1999/5/EC on the approximation and harmonization of the laws of the Member States relating to electromagnetic compatibility, safety of electrical equipment designed for use within certain voltage limits and on radio equipment and telecommunications terminal equipment.
Need help?
Do you have a question about the ChristieNet Wireless Presentation Portal and is the answer not in the manual?
Questions and answers