
Related Manuals for Victron energy Phoenix Multi 12/1600/70


Summary of Contents for Victron energy Phoenix Multi 12/1600/70
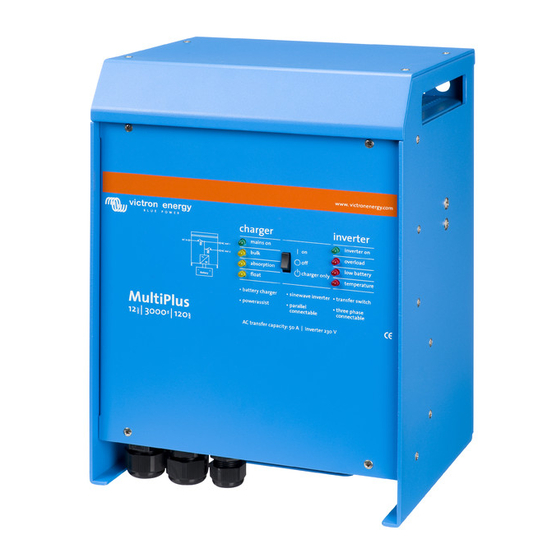
- Page 1 INSTALLATION MANUAL Phoenix Multi 120Vac 12/1600/70 12/2500/120 24/1600/40 24/3000/70 Phoenix MultiPlus 120Vac 12/2500/120 24/3000/70 Phoenix Inverter 120Vac 12/1600 12/2500 24/1600 24/3000...
- Page 2 THE FORM OF ACTION, SHALL NOT EXCEED THE PURCHASE PRICE OF THE VICTRON ENERGY PRODUCTS DESCRIBED HEREIN. Victron Energy B.V. reserves the right to revise and improve its products as it sees fit. This publication describes the state of this product at the time of its publication and may not...
-
Page 3: Installation
1. INSTALLATION This product should be installed by a qualified electrician 1.1 Box Contents • Phoenix Multi, MultiPlus, or Inverter • User manual. • Installation manual. • Bag containing connection items, i.e.: • Temperature sensor. • Fuse (Mega fuse). • Four M8 nuts. - Page 4 1.3 Requirements • Philips screwdriver (PH2) for removing the front. • Flat screwdriver (0.6x3.5) for connecting the AC leads. • Insulated box spanner (13 mm) for securing the terminal nuts and the fuse. • Two battery cables (maximum length 6 meters) including battery terminals and cable ends.
- Page 5 1.5 Connection of the AC cabling The enclosure must be grounded for safety purposes. An earth screw has been fitted at the bottom side of the enclosure. The terminal block can be found on the printed circuit board, see Appendix A. The shore or mains cable must be connected to the Multi with the aid of a three-wire cable.
- Page 6 1.6 Optional Connections A number of optional connections are possible: 1.6.1 Second Battery The Phoenix Multi/ MultiPlus has a connection for charging a starter battery. For connection see Appendix A. 1.6.2 Voltage Sense (Phoenix Multi/ MultiPlus) Two sense wires may be connected to compensate possible battery cable losses during charging.
- Page 7 multiplus 1.6.7 3-phase operation The Phoenix MultiPlus can also be used in a 3-phase system, see Appendix 0. The batteries must be connected in accordance with Appendix E or F. The following conditions should be complied with in the case of 3-phase operation: •...
- Page 8 2. SETTINGS • Settings may only be changed by a qualified engineer • Carefully read the instructions before changes are made. • When setting the charger, all connections to the battery must be disconnected from the Phoenix Multi or MultiPlus. •...
- Page 9 2.1.2 Reading LEDs – setting values (Multi/ MultiPlus only) The value of a setting can be determined on the basis of the following formula: Value set = setting number * scale + offset The ‘offset’ and the ‘scale’ are specified for each setting. The setting number is indicated as follows via the LEDs: The LEDs are divided into 2 columns of 4 LEDs each.
- Page 10 2.1.3 Reading LEDs – on-off (Multi/ MultiPlus only) In addition to the facility of setting a value, there is an on- off facility. This allows for switching on/ off a particular setting, or for activating/ deactivating it. The left-hand column offers possibility A and the right-hand column offers possibility B in the case of a dual choice setting.
- Page 11 2.2 System Frequency The product can operate at 50Hz as well as at 60Hz. Set the DS 3-7 Specify the frequency Example Specify the required frequency. Required: frequency is 60Hz. DS-8 The default setting is 60Hz. LED indication = DS-7 The left row of LEDs is for 50Hz.
- Page 12 2.4 Setting the Charger (Multi/ MultiPlus only) When setting the charger, all connections between the battery and the Phoenix Multi must be disconnected. Please read our book “electricity on board” (downloadable from our website www. victronenergy.com) for details and suggestions about charging batteries.
- Page 13 Set the DS 3-7 Set the charging characteristic Example Determine the required charging Required: charging characteristic DS-8 characteristic: is Fixed. DS-7 Fixed Setting number = 1. DS-6 on Adaptive LED indication = DS-5 on Adaptive with BatterySafe DS-4 on mode (default) DS-3 DS-2 Press the pushbuttons until the...
- Page 14 Battery Type Presets A number of battery type presets simplify the process of setting the absorption/ float voltage and maximum absorption time: Battery type Absorption Float voltage Maximum voltage absorption time User-specified Sonnenschein Dryfit A200 Gel 14.4 V 28.8 V 13.8 27.6 4 hours...
- Page 15 Absorption Voltage The absorption voltage can be set at 12-16/ 24-32V. Battery, the T-sense and V-sense must be disconnected during setting. Set the DS 3-7 Set the absorption voltage Example Determine the required absorption Required: absorption voltage is DS-8 voltage Vq. 28.5V.
- Page 16 Float Voltage The float voltage can be set at 12-16/ 24-32V. Battery, the T-sense and V-sense must be disconnected during setting. Set the DS 3-7 Set the float voltage Example Determine the required float voltage Required: float voltage is 28.5V. DS-8 Setting number= (28.5-24)/0.1 = DS-7 on...
- Page 17 Repeated Absorption Interval The repeated absorption interval, can be set at 1 – 45 days. Set the DS 3-7 Set the repeated absorption interval Example Determine the required reduced Required: reduced float time is 1 DS-8 float time Tq. week. DS-7 Determine the setting number.
- Page 18 2.5 Special Settings Bulk Protection On/ Off If the charger has not reached the absorption voltage after 10 hours' charging in the bulk phase, the battery may be defective. In order to prevent further damage, the charger will automatically cut out after 10 hours' bulk. The “bulk” LED will start to flash. This safety cut out can be switched off.
- Page 19 PowerControl – Dealing with limited generator or shore side power The Multi is a very powerful battery charger. It will therefore draw a lot of current from the generator or shore side supply (nearly 10 A per Multi at 230 VAC). With the Phoenix Multi Control Panel (PMC) a maximum generator or shore current can be set.
- Page 20 MultiPlus 3-phase Setting Three identical units can t be interconnected for a 3-phase system, in accordance with Appendix 0. The batteries must be connected in accordance with Appendix E or F. A number of settings are then required for each unit. Firstly, all units must be set for 3-phase operation.
Need help?
Do you have a question about the Phoenix Multi 12/1600/70 and is the answer not in the manual?
Questions and answers