
Related Manuals for Victron energy MultiPlus Series


Summary of Contents for Victron energy MultiPlus Series
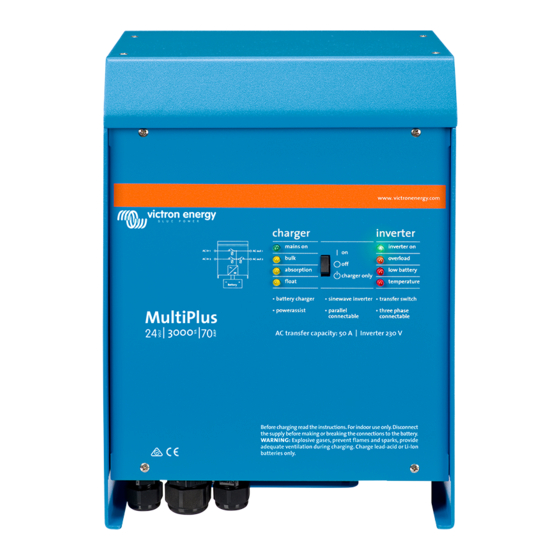
- Page 1 Service Manual Manual de servicio MultiPlus (with firmware xxxx400 or higher) MultiPlus (con firmware xxxx400 o superior) 12 | 3000 | 120 - 50 | 120V 24 | 3000 | 70 - 50 | 120V...
- Page 3 1. IMPORTANT SAFETY INSTRUCTIONS - SAVE THESE INSTRUCTIONS! In general Please read the documentation supplied with this product first, so that you are familiar with the safety signs en directions before using the product. This product is designed and tested in accordance with international standards. The equipment should be used for the designated application only.
- Page 4 2. Installation This product may only be installed by a qualified electrical engineer. 2.1 Location The product must be installed in a dry and well-ventilated area, as close as possible to the batteries. There should be a clear space of at least 10cm around the appliance for cooling.
- Page 5 Use a torque wrench with insulated box spanner in order to avoid shorting the battery. Maximum torque: 11 Nm Avoid shorting the battery cables. • Undo the four screws at the front of the enclosure and remove the front panel. •...
- Page 6 With its PowerAssist feature the Multi can add up to 3kVA (that is 3000 / 120 = 25A) to the output during periods of peak power requirement. Together with a maximum input current of 50A this means that the output can supply up to 50 + 25 = 75A. An earth leakage circuit breaker and a fuse or circuit breaker rated to support the expected load must be included in series with the output, and cable cross-section must be sized accordingly.
- Page 7 2.4.9 Three-phase operation The MultiPlus can also be used in 3-phase wye (Y) configuration. To this end, a connection between the devices is made by means of standard RJ45 UTP cables (the same as for parallel operation). The system (Multis plus an optional control panel) will require subsequently configuration (see Section 3).
- Page 8 3. Configuration • Settings may only be changed by a qualified electrical engineer. • Read the instructions thoroughly before implementing changes. • During setting of the charger, the AC input must be removed. 3.1 Standard settings: ready for use On delivery, the MultiPlus is set to standard factory values. In general, these settings are suitable for single-unit operation. Warning: Possibly, the standard battery charging voltage is not suitable for your batteries! Refer to the manufacturer's documentation, or to your battery supplier!
- Page 9 Inverter voltage Output voltage of the MultiPlus in battery operation. Adjustability: 95 – 128V Stand-alone / parallel operation / 2-3 phase setting Using several devices, it is possible to: • increase total inverter power (several devices in parallel) • create a split-phase system by stacking (only for MultiPlus units with 120V output voltage) •...
- Page 10 Note: when WeakAC is on, the maximum charge current is reduced by approximately 20%. Not adjustable with DIP switches. BoostFactor Change this setting only after consulting with Victron Energy or with an engineer trained by Victron Energy! Not adjustable with DIP switches. Three programmable relays The MultiPlus is equipped with 3 programmable relays.
- Page 11 3.3 Configuration by computer All settings can be changed by means of a computer or with a VE.Net panel (except for the multi-functional relay and the VirtualSwitch when using VE.Net). The most common settings can be changed by means of DIP switches (see Section 3.5). NOTE: This manual is intended for products with firmware xxxx400 or higher (with x any number) The firmware number can be found on the microprocessor, after removing the front panel.
- Page 12 3.5 Configuration with DIP switches A number of settings can be changed using DIP switches (see appendix A, position M). A number of settings can be changed using DIP switches (see appendix A, position M). Note: When changing settings with DIP switches in a parallel or split-phase/3-phase system one should be aware that not all settings are relevant on all Multis.
- Page 13 Procedure The AC input current limit can be set using DIP switches ds8, ds7 and ds6 (default setting: 50A). Procedure: set the DIP switches to the required value: ds8 ds7 ds6 off = 6,3A on = 10A off = 12A on = 16A off = 20A on = 25A...
- Page 14 3.5.1.5 Examples examples of settings: DS-8 AC input DS-8 DS-8 DS-8 DS-7 AC input DS-7 DS-7 DS-7 DS-6 AC input DS-6 DS-6 DS-6 DS-5 AES DS-5 DS-5 DS-5 DS-4 Ch. current DS-4 DS-4 DS-4 DS-3 Ch. current DS-3 DS-3 DS-3 DS-2 St.-alone mode DS-2 DS-2...
- Page 15 Step 2: Exemplary settings Example 1 is the factory setting (since factory settings are entered by computer, all DIP switches of a new product are set to ‘off’ and do not reflect the actual settings in the microprocessor.). DS-8 Ch. voltage DS-8 DS-8 DS-8...
-
Page 16: Technical Specifications
4. Technical specifications MultiPlus 12/3000/120-50 120V 24/3000/70-50 120V PowerControl / PowerAssist AC input Input voltage range: 95-140VAC; Input frequency: 45 – 65Hz; Power factor: 1 Maximum feed through current Minimum AC supply current capacity for PowerAssist (A) INVERTER Input voltage range (V DC) 9,5 –... - Page 17 1. INSTRUCCIONES DE SEGURIDAD IMPORTANTES - ¡GUÁRDELAS! En general Lea en primer lugar la documentación que acompaña al producto para familiarizarse con las indicaciones de seguridad y las instrucciones antes de utilizarlo. Este producto se ha diseñado y comprobado de acuerdo con los estándares internacionales. El equipo debe utilizarse exclusivamente para la aplicación prevista.
- Page 18 2. Instalación Este producto debe instalarlo exclusivamente un ingeniero eléctrico cualificado. 2.1 Ubicación El producto debe instalarse en una zona seca y bien ventilada, tan cerca como sea posible de las baterías. Debe dejarse un espacio de al menos 10cm. alrededor del aparato para refrigeración. Una temperatura ambiente demasiado alta tendrá...
- Page 19 Utilice una llave dinamométrica aislada para no cortocircuitar la batería. Torsión máxima: 11 Nm. Evite que los cables de la batería entren en contacto. • Quite los cuatro tornillos de la parte frontal de la carcasa y retire el panel frontal. •...
- Page 20 demanda de potencia. Junto con una corriente de entrada máxima de 50A, significa que la salida puede suministrar hasta 50 + 25 = 75A. Debe incluirse un disyuntor para las fugas a tierra y un fusible o disyuntor capaz de soportar la carga esperada, en serie con la salida, y con una sección de cable adecuada.
- Page 21 3. Configuración • Este producto debe modificarlo exclusivamente un ingeniero eléctrico cualificado. • Lea las instrucciones atentamente antes de implementar los cambios. • Durante la configuración del cargador, debe retirarse la entrada CA. 3.1 Valores estándar: listo para usar El MultiPlus se entrega con los valores estándar de fábrica. Por lo general, estos valores son adecuados para el funcionamiento de una sola unidad.
- Page 22 Tensión del inversor Tensión de salida de MultiPlus funcionando con batería. Ajustabilidad: 95 – 128V Funcionamiento autónomo/paralelo/ajuste bi-trifásico Con varios dispositivos se puede: • aumentar la potencia total del inversor (varios dispositivos en paralelo) • crear un sistema de fase dividida por superposición (sólo para unidades MultiPlus con tensión de salida de 120 V) •...
- Page 23 Nota: cuando WeakAC está activado, la corriente de carga máxima se reduce aproximadamente un 20%. No ajustable con conmutadores DIP. BoostFactor ¡Cambie este ajuste sólo después de consultar a Victron Energy o a un ingeniero cualificado por Victron Energy! No ajustable con conmutadores DIP. Tres relés programables El MultiPLus dispone de 3 relés programables.
- Page 24 3.3 Configuración por ordenador Todos los valores pueden cambiarse con un ordenador o un panel VE.Net (excepto el relé multifuncional y el VirtualSwitch cuando se utiliza VE.Net). Los ajustes más habituales pueden cambiarse mediante conmutadores DIP (ver Sección 3.5). NOTA: Este manual es para productos con firmware xxxx400 o superior (siendo x cualquier número) El firmware puede encontrarse en el microprocesador, una vez retirado el panel frontal.
- Page 25 3.5 Configuración con conmutadores DIP Mediante conmutadores DIP se puede modificar una serie de ajustes (ver Apéndice A, punto M). Mediante conmutadores DIP se puede modificar una serie de ajustes (ver Apéndice A, punto M). Nota: Al modificar ajustes con conmutadores DIP en un sistema conectado en paralelo o de fase dividida/trifásico se debe tener en cuenta que no todos los ajustes son relevantes en todos los Multis.
- Page 26 Procedimiento El límite actual de corriente CA de entrada puede fijarse con los conmutadores DIP ds8, ds7 y ds6 (valor predeterminado: 50A) Procedimiento: ajustar los conmutadores DIP al valor requerido: ds8 ds7 ds6 off = 6,3A on = 10A off = 12A on = 16A off = 20A on = 25A...
- Page 27 5.1.5 Ejemplos ejemplos de ajustes: DS-8 entrada CA DS-8 DS-8 DS-8 DS-7 entrada CA DS-7 DS-7 DS-7 DS-6 entrada CA DS-6 DS-6 DS-6 DS-5 AES DS-5 DS-5 DS-5 DS-4 Corr. carga DS-4 DS-4 DS-4 DS-3 Corr. carga DS-3 DS-3 DS-3 DS-2Modo autónomo DS-2 DS-2...
- Page 28 Paso 2: Ejemplos de ajustes El ejemplo 1 muestra los valores de fábrica (puesto que estos valores se introducen por ordenador, todos los conmutadores DIP de un producto nuevo están desactivados ("off") y no reflejan los ajustes reales del microprocesador). DS-8 Tens.
- Page 29 4. Especificaciones técnicas MultiPlus 12/3000/120-50 120V 24/3000/70-50 120V PowerControl / PowerAssist Sí Entrada de CA Rango de tensión de entrada: 95-140VCA; Frecuencia de entrada: 45 – 65Hz-; Factor de potencia: 1 Corriente máxima de alimentación Corriente de alimentación CA mín. para PowerAssist (A) INVERSOR Rango de tensión de entrada (VCC)
- Page 31 APPENDIX A: Overview connections APÉNDICE A: Conexiones generales...
- Page 32 AC input (generator input) AC-in-1. Left to right: GROUND (earth), L (phase), N (neutral). 2x RJ45 connector for remote panel and/or parallel and 3-phase operation. AC output AC-out-1. Left to right: L (phase), N (neutral), GROUND (earth). AC output AC-out-2. Left to right: L (phase), N (neutral).
- Page 33 APPENDIX B: Block diagram APÉNDICE B: Diagrama de bloques See table in Chapter 4.2 “Recommended DC fuse”. * Ver tabla en Capítulo 4.2 “Fusible CC recomendado”.
- Page 34 APPENDIX C: Parallelconnection APÉNDICE C: Conexión en paralelo SLAVE Unit 3 SLAVE Unit 2 MASTER Unit 1 Panel BAT- BAT- BAT- BAT+ BAT+ BAT+ PE OUT To load AC OUT 1 N AC OUT 1 L To load AC OUT 2 N AC OUT 2 L To load PE IN...
- Page 35 APPENDIX D: Three-phase connection APÉNDICE D: Conexión trifásica SLAVE Unit 3 SLAVE Unit 2 MASTER Unit 1 Panel BAT- BAT- BAT- BAT+ BAT+ PE OUT To load AC OUT 1 AC OUT 1 L3 AC OUT 1 L2 AC OUT 1 L1 To load AC OUT 2 AC OUT 2 L3...
- Page 36 APPENDIX E: Charge characteristic APÉNDICE E: Características de carga Charge current 120% 100% Amps Time Volts Charge voltage Time 4-stage charging: Bulk Entered when charger is started. Constant current is applied until nominal battery voltage is reached, depending on temperature and input voltage, after which constant power is applied up to the point where excessive gassing is starting (14.4V resp.
- Page 37 APPENDIX F: Temperature compensation APÉNDICE F: Compensación de temperatura 15.0 14.5 14.0 13.5 13.0 Volts Volts 12.5 12.0 11.5 11.0 10.5 10.0 10 15 20 25 30 35 40 45 50 55 60 Battery temperature Default output voltages for Float and Absorption are at 25°C. Reduced Float voltage follows Float voltage and Raised Absorption voltage follows Absorption voltage.
- Page 38 APPENDIX G: Dimensions APÉNDICE G: Dimensiones...
- Page 42 Serial number: Version : 00 Date : September 6 , 2018 Victron Energy B.V. De Paal 35 | 1351 JG Almere PO Box 50016 | 1305 AA Almere | The Netherlands General phone +31 (0)36 535 97 00 E-mail sales@victronenergy.com...
Need help?
Do you have a question about the MultiPlus Series and is the answer not in the manual?
Questions and answers
I have a 24 volt 3000 VA 70 amp unit . Its been working fine but since GFI circuit breakers were added to our Marina the 40-amp breaker on the boat trips. Any suggestions what to look for ?
The 40-amp breaker could be tripping because the addition of GFI (Ground Fault Interrupter) circuit breakers at the marina may be detecting ground faults or leakage currents caused by the Victron Energy unit. GFIs are sensitive to small imbalances between the hot and neutral wires, and inverter systems like the Victron MultiPlus can create such imbalances or leakage currents, especially if not properly configured with shore power grounding. This mismatch can cause the GFI to trip, which may then lead to the upstream 40-amp breaker also tripping.
This answer is automatically generated