Table of Contents
Advertisement
Quick Links
Advertisement
Table of Contents

Related Manuals for ICHIBOT ULTIMATE 4S

Summary of Contents for ICHIBOT ULTIMATE 4S
- Page 1 USER GUIDE ICHIBOT ULTIMATE 4S 2019 Rev 2.1...
- Page 2 ICHIBOT products. ICHIBOT makes no representations or guarantees in connection with this guide or in connection with the products described herein. ICHIBOT is not responsible for any damage, loss, cost or expense, direct, indirect or incidental, consequential or special, arising from or related to the use of this material or the product described herein.
-
Page 3: Table Of Contents
TABLE OF CONTENTS SAFETY INFORMATION ..........ERROR! BOOKMARK NOT DEFINED. WARNING ........................4 GENERAL INTRODUCTION ....................5 A PARTS OF ICHIBOT ULTIMATE 4S..................6 POWER SUPPLY ........................ 7 TERMS THAT ARE IN ICHIBOT .................... 7 HOME SCREEN ........................9 BATTERY SETTINGS ......................9 AUTOMATIC CALIBRATION OF SENSORS ................. -
Page 4: Safety Information
3. Pay attention to the battery voltage when playing ichibot, making sure to play at voltage 11.8 - 12.6 volt to get maximum results and the ichibot setting to be more accurate. Battery voltage observations can use a lippo checker 4. -
Page 5: General Introduction
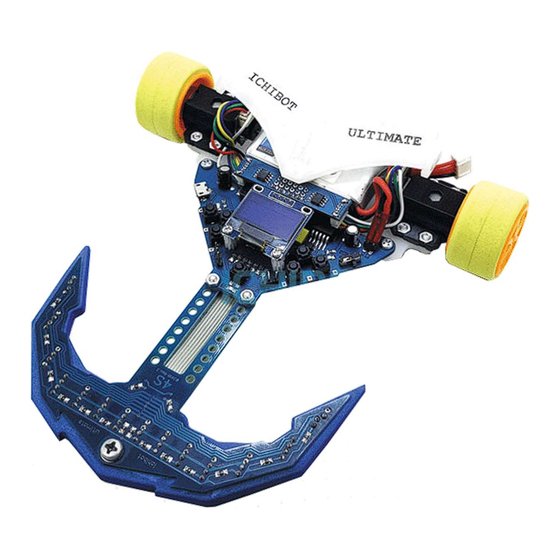
GENERAL INTRODUCTION Ichibot Ultimate 4s is a line follower robot that is equipped with an operating system so users can adjust the robot's path to the robot directly. Specifications of Ichibot Ultimate 4s Chips ATmega 1284p SMD Packages CPU Speed... -
Page 6: A Parts Of Ichibot Ultimate 4S
A PARTS OF ICHIBOT ULTIMATE 4S Here are the parts of ichibot ultimate 4s and their functions: Number Name Function Restart Button Restarting the robot. UP Left Button Moving the Menu Cursor. DOWN Left Button Moving the Menu Cursor. OK Left/Enter/OK Button Enter the submenu and the OK button. -
Page 7: Power Supply
POWER SUPPLY Ichibot ultimate 4s uses a lithium Polymer (Lipo) 3 cell type battery. The safe limit of the battery voltage used is 11.1 - 12.6 volts. TERMS THAT ARE IN ICHIBOT In playing ichibot there are several terms that need to be considered by users, namely:... - Page 8 Pasting the index that was copied. INSERT Add an index to a specific index number. REMOVE Deleting certain indexes. INVERS Reversing a certain logic index. INVERSE PLAN Reversing the logic of each index referred to in a particular Plan. Page 8 www.ichibot.id USER GUIDE...
-
Page 9: Home Screen
LIMIT : select 11.1 for the 3 Cell battery or 7.2 for 2 Cell CALIB : add or subtract if the battery voltage reading is not in accordance with the appointment of the measuring instrument. Page 9 www.ichibot.id USER GUIDE... -
Page 10: Automatic Calibration Of Sensors
(don't lift it). Then Press OK Left (enter). 3. Make the robot move forward and backward at least five times until all sensors pass the black line. Then Press OK Left (enter). Page 10 www.ichibot.id USER GUIDE... - Page 11 Then Press OK Left (enter). 5. Select the memory calibration location for the sensor scan results. Ichibot has 3 memory calibration sensors. The memory calibration sensor can be used in a particular index (in the step "I"...
-
Page 12: Plan Settings
The PLAN is likened to a strategy folder that stores all the logic of the action of the robot to be executed in the order of the index number. In ichibot ultimate 4s there are a maximum of 8 plans that can be used. Plan is symbolized by the letter P followed by its sequence number. - Page 13 AFTER SA SPEED Timer B (TB) Duration of SB Speed B (SB) MODE ROBOT WHEN DOING ACTION SA CONTROL MODE OF ROBOT WHEN THIS INDEX POSITION PID = PID CONTROL CAL = CALIBRATION SENSOR MEMORY Page 13 www.ichibot.id USER GUIDE...
-
Page 14: Log In To The Sub Menu
: Insert a new index in the selected index position. REMOVE : Delete or eliminate the selected index position. SAVE AS DFT : Save settings in the action sub menu selected as the default value. Page 14 www.ichibot.id USER GUIDE... -
Page 15: Index Determination
When the index position is fulfilled, the action will be immediately executed without seeing any conditions. Line Sensor Trigger robot action uses line sensor conditions when the selected line sensor conditions are met, the robot will take action. Page 15 www.ichibot.id USER GUIDE... - Page 16 In the START or i: 00 position the default is Forward, we can add the D value to a few milliSecond so that the robot moves a few moments out of the START position black box. At i: 00 trigger settings and actions cannot be changed. Page 16 www.ichibot.id USER GUIDE...
- Page 17 INDEX 1 TURN RIGHT – BLACK LINE INDEX 2 TURN RIGHT – BLACK LINE INDEX 3 TURN RIGHT – BLACK LINE INDEX 4 TURN RIGHT – BLACK LINE INDEX 5 TURN LEFT – BLACK LINE Page 17 www.ichibot.id USER GUIDE...
- Page 18 INDEX 7 TURN LEFT – BLACK LINE In concept, Ichibot can turn automatically without index on a track with an angle of more than from the direction of the arrival of the robot. The robot will follow the line & walk straight when the center sensor still detects the line.
- Page 19 If the robot passes through the intersection like in the image below without setting the index, the robot will run following the line according to the normal algorithm. Page 19 www.ichibot.id USER GUIDE...
-
Page 20: Concept Of Managing Ichibot Movements
CONCEPT OF MANAGING ICHIBOT MOVEMENTS Example of the First Track For ease understanding to running the ichibot, here is an example of the path will try to finish. 1. START POSITION ( INDEX 0) At the start position there is a black box,... - Page 21 Action from step A to step I will be executed sequentially. D (Duration) 02 = sequence number line sensor mode XR (XOR) = if one of sensor A blocks and one sensor B blocks is selected. For Action, we select Turn Right. Page 21 www.ichibot.id USER GUIDE...
- Page 22 If we choose Trigger with OR mode, it will be easier to detect the line, the risk is if there is a stain on the track, the Trigger will be fulfilled and the robot will take action at a point that we don't want. Page 22 www.ichibot.id USER GUIDE...
- Page 23 5 after taking action STEP A to E. We can change the stop position after doing ACTION or after doing SA (SPEED A) or after doing SB (SPEED B) by pressing the enter key (OK-L). Page 23 www.ichibot.id USER GUIDE...
- Page 24 Robot control settings for lines. There are 5 PID models that we can customize as desired. : Proportional constant : Integral constant : Derivative constant : Delta time (time sampling) MAX : Maximum speed : Minimum speed Page 24 www.ichibot.id USER GUIDE...
- Page 25 Menu to adjust the gripper position when holding objects. When holding objects the position is set to clamp and lift up. GRIP : position of clamping servo LIFT : position of lifter servo DELAY : time interval between GRIP and LIFT Page 25 www.ichibot.id USER GUIDE...
- Page 26 DELAY : time interval between GRIP and LIFT Menu for setting fire extinguisher fan SPEED : fan speed when on MODE : fan mode Menu to save settings as default. Menu to restore settings to default. Information about robot systems. Page 26 www.ichibot.id USER GUIDE...
- Page 27 At the position of each index setting, there is a choice of actions to turn on or turn off the fan. When the position of the robot in front of the fire point, we can be selected the PAUSE action menu and select Set Fan = ON. Page 27 www.ichibot.id USER GUIDE...
- Page 28 GRIPPER INSTALLATION COMING SOON At the position of each index setting there is a choice of actions to take or place objects with gripper. DROP = place objects PICK = take objects Page 28 www.ichibot.id USER GUIDE...
- Page 29 Shop Information and purchase of spare parts and components: www.store.ichibot.id www.tokopedia.com/teamichibot www.bukalapak.com/teamichibot Our website WWW.ICHIBOT.ID Don't miss the latest information by following our social media account team.ichibot 087763484384 Team Ichibot Page 29 www.ichibot.id USER GUIDE...
Need help?
Do you have a question about the ULTIMATE 4S and is the answer not in the manual?
Questions and answers