
Related Manuals for Oasis I Series


Summary of Contents for Oasis I Series
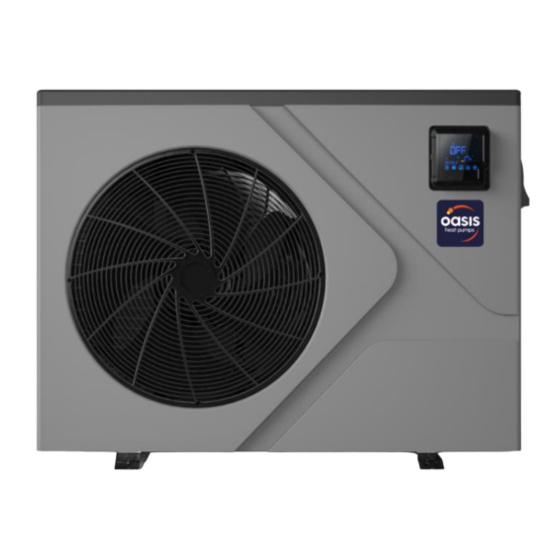
- Page 1 Inverter Pool Heat Pump Installation & Operation Manual oasisheatpumps.com...
- Page 3 Contents...
- Page 4 The Oasis heat pump is the ideal choice for recreational pool & spa owners looking to extend their swim season with minimal running costs. Designed with the latest technology including stepless full DC inverter compressors, fans, and control systems –...
- Page 5 2.1 Performance data of Swimming Pool Heat Pump Unit *** REFRIGERANT : R32 UNIT Oasis I12 Oasis I9 Nominal Heating Capacity 9.00 12.00 Btu/h By 50Hz 30600 40800 Range 2.20 9.00 2.90 12.00 Btu/h 7480 30600 9860 40800 Nominal Heating PowerInput 1.60...
- Page 6 2.1 Performance data of Swimming Pool Heat Pump Unit *** REFRIGERANT : R32 UNIT Oasis I17 Oasis I19 Nominal Heating Capacity 17.00 19.50 Btu/h By 50Hz 57800 66300 Range 3.80 17.0 4.60 19.50 Btu/h 12920 57800 15640 66300 Nominal Heating PowerInput 3.02...
- Page 7 2.1 Performance data of Swimming Pool Heat Pump Unit *** REFRIGERANT : R32 Oasis I29T UNIT Oasis I25 28.6 Nominal Heating Capacity 24.60 97587 Btu/h By 50Hz 83930 28.6 Range 8.70 24.60 33439 97587 Btu/h 29680 83930 4.17 Nominal Heating PowerInput 3.89...
-
Page 8: Unit Dimensions
2. Unit Dimensions Unit: mm Oasis I9 & I12 1000... - Page 9 Oasis I17 1046 Oasis I19 1160 Water outlet Water inlet...
- Page 10 Oasis I25&Oasis I29T 1160 Water outlet Water inlet...
-
Page 11: Pre-Installation
PLUMBING INSTALLATION PLEASE NOTE: Oasis heat pumps standard plumbing fitting size can accept 40mm NB PVC pipe for connection to the pool or spa filtration plumbing. 1. Attach the supplied barrel unions to the cold inlet and hot outlet (hand tighten). -
Page 12: Electrical Connection
1. Turn on your water filter pump and check for water leaks and verify flow to and from the pool. 2. Turn on the electrical power supply to the Oasis unit. 3. Press the ON/OFF button of the controller for half a second, the heat pump will start within 60seconds 4. -
Page 13: Safety Instructions
4. Safety Instructions Installation, repair or relocations must be done by a fully qualified person and not by the customer. If done incorrectly it may cause fire, electric shock, water leakage and other hazards. A circuit breaker must be installed for the unit. To avoid risk of electrical shock, the unit must have a good power connection and earthing. -
Page 14: System Installation
The schematic diagram is for reference only. Please check the water inlet/outlet label on the heat pump while plumbing the unit. IMPORTANT: Oasis heat pumps MUST be connected by a licensed electrician. Under no circumstances should an unlicensed person attempt to install or repair an Oasis heat pump themselves. Heater electrical installation undertaken by an unlicensed installer will void the warranty. - Page 15 Oasis recommend the heat pump should ONLY be installed in a loca on with appropriate ven a on. The Oasis pool heat pump should be installed with a minimum clearance of at least 3.5m to the water’s edge. Furthermore, Oasis recommend installing the heat pump no greater than 7.5 meters away from the water’s edge due to heat loss from the piping.
- Page 16 It is CRITICAL that there is sufficient water flow to the unit. Incorrect water flow can cause a loss of efficiency and possible damage to the unit. Optimal water flow rates are listed in the Oasis manual. It is imperative that water flow is kept as close as possible to these flow rates.
-
Page 17: Initial Start-Up
5.9 Plumbing The Swimming Pool Heat Pumps exclusive rated flow titanium heat exchanger requires no special plumbing arrangements except bypass (please set the flow rate according to the nameplate). The water pressure drop is less than 10kPa at max. Flow rate: Since there is no residual heat or flame Temperatures, the unit does not need copper heat sink piping. PVC pipe can be run straight into the unit. -
Page 18: Operation
6. Operation 6.1 Main Controller Interface Icon Name Function MUTE Under heating or auto mode, the mute operation can be applied or removed. MODE Switch unit mode, temperature setting and parameter setting. ON/OFF Start-up/shutdown unit OR Cancel current operation and return to last level of operation Scroll page up OR increase variable value DOWN Scroll page down OR decrease variable value... - Page 19 6.2 Functions of the Controller 6.2.1 Start-up & Shutdown Only from the main screen, the unit can be turned on of off. If the half or full-off screen appears, press any key to go back to the main interface. When the unit is started using the controller, if the emergency switch was used to shut it down the controller will display as follows;...
- Page 20 Oasis i Series Manual 6.2.4 System Time Settings Hold the CLOCK button for 2 seconds to enter the system time setting interface. Press the CLOCK again to adjust the time. After the first press, the hour parameter will be flashing which means it can be changed, use the UP & DOWN arrow accordingly.
- Page 21 Cancelling a Timer 6.2.5.2 Select ON1, OFF1, ON2 or OFF2 to cancel the corresponding timer. To cancel a timer, while the hour value is selected and flashing, press the ON/OFF button to clear it. Then press the ON/OFF button again to save and return to the main button. Example: Cancelling ON1 Timer To cancel first-stage timing switch, cancel both ON1 and OFF1 To cancel the second-stage timing switch cancel both ON2 and OFF2...
- Page 22 When the MUTE icon is lit, the timing silent has been set but is not yet under silent status. When the MUTE icon is flashing, it is under silent status. When there is no MUTE icon, the timing silent has not been set. To cancel the Timing Silent Function, follow the process in 6.2.5.2 Cancelling a Timer.
-
Page 23: Troubleshooting
7. Troubleshooting 7.1 Electronic Control Fault Table Protect/fault Fault Reason Elimination Methods display Inlet Temp. Sensor Fault The temp. Sensor is broken or short circuit Check or change the temp. sensor Outlet Temp. Sensor Fault The temp. Sensor is broken or short circuit Check or change the temp. - Page 25 7.3 Parameter List Meaning Default Remarks Refrigeration target temperature set point 27°C Adjustable Heating the target temperature set point 27°C Adjustable Automatic target temperature set point 27°C Adjustable 7.4 Cable Specifications Cable sizes must be selected by the electrician according to the specification of the heat pump.
- Page 26 7.6 Interface Drawing (1) Main Board...
- Page 27 Main board of the input and output interface instructions below Sign Number Meaning Compressor P10-1/2/3(U/V/W) Compressor signal CN66 CN97 DC motor CN11 4-way valve Water pump CN18 reserved CN13 Live wire Neutral wire P1 P2 Program download interface CN10 Color line controller communication RS485 The port for centralized control RS485-2...
-
Page 28: Wire Control Interface Diagram And Definition
Wire control interface diagram and definition Sign Meaning 12V(power +) 485A 485B GND ( power - ) Controller interface diagram and definition AC-L AC-N OUT3 OUT2 OUT1 OUT5 OUT4 CN12 FUSE PC1004-G 485_B1 485_A1 AIN12 AIN10 AIN8 AIN6 AIN4 AIN2 485_B2 485_A2 AIN11... - Page 29 Main board of the input and output interface instructions below Meaning Number Sign Coil temperature (input) Mode switch (input) Frequency conversion board communications Color line controller communication Wifi module DC fan module...
-
Page 30: Maintenance
Do I need to get my unit serviced? It is recommended that you get your Oasis unit serviced once a year by your local certified air conditioning or refrigeration technician. If your unit is located in a coastal area, more frequent maintenance may be necessary. - Page 31 CHECKS TO THE AREA Prior to beginning work on systems containing flammable refrigerants, safety checks are necessary to ensure that the risk of ignition is minimised. For repair to the refrigerating system, the following precautions shall be complied with prior to conducting work on the system. prolonged period of no usage. WORK PROCEDURE Work shall be undertaken under a controlled procedure to minimise the risk of a flammable gas or vapour being present while the work is being performed.
- Page 32 CHECKS TO ELECTRICAL DEVICES Repair and maintenance to electrical components shall include initial safety checks and component inspection procedures. If a fault exists that could compromise safety, then no electrical supply shall be connected to the circuit until it is satisfactorily dealt with. If the fault cannot be corrected immediately but it is necessary to continue operation, an adequate temporary solution shall be used.
- Page 33 LEAK DETECTION METHODS The following leak detection methods are deemed acceptable for systems containing flammable refrigerants. Electronic leak detectors shall be used to detect flammable refrigerants, but the sensitivity may not be adequate, or may need re-calibration. (Detection equipment shall be calibrated in a refrigerant-free area.) Ensure that the detector is not a potential source of ignition and is suitable for the refrigerant used.
-
Page 34: Charging Procedures
The recovery equipment shall be in good working order with a set of instructions concerning the equipment that is at hand and shall be suitable for the recovery of flammable refrigerants. In addition, a set of calibrated weighing scales shall be available and in good working order. Hoses shall be complete with leak-free disconnect couplings and in good condition. -
Page 35: Warranty Registration
Costs associated with delivery, handling, freighting, or damage to the product in transit. 4. If warranty service is required you should: a. contact Oasis in NZ or Sunlover in Australia via our Contact page on our web site b. provide a copy of your receipt as proof of purchase c. - Page 36 Head Office Victoria Oasis Technologies 62 Parkhurst Dr Phone: 09 535 8891 Knoxfield VIC 3180 T: 03 9887 2131 oasisheatpumps.com South Australia New South Wales Queensland Sahara Pools & Solar Unit 1, 20-22 Foundry Rd Seven Unit 4, 8 Reichert Dr Molendinar QLD...
Need help?
Do you have a question about the I Series and is the answer not in the manual?
Questions and answers