Table of Contents
Advertisement
Advertisement
Table of Contents

Subscribe to Our Youtube Channel
Related Manuals for Oasis ELITE AC9


Summary of Contents for Oasis ELITE AC9
- Page 1 SWIMMING POOL HEAT PUMP UNIT Installation & Instruction Manual...
-
Page 2: Table Of Contents
CONTENTS 1. Preface 2. Specifications 2.1 Performance Data of Swimming Pool Heat Pump Unit 2.2 Dimensions for Swimming Pool Heat Pump Unit 2.3 How to disassemble the units How the power cord go 3. Installation and Connection 3.1 Installation of System 3.2 Swimming Pool Heat Pumps Location 3.3 How Close to Your Pool? 3.4 Swimming Pool Heat Pumps Plumbing... -
Page 3: Preface
1. PREFACE In order to provide our customers with quality, reliability and versatility, this product has been made to strict production standards. This manual includes all the necessary information about installation, debugging, discharging and maintenance. Please read this manual carefully before you open or maintain the unit. The manufacture of this product will not be held responsible if someone is injured or the unit is damaged, as a result of improper installation, debugging, or unnecessary maintenance. -
Page 4: Specifications
2.SPECIFICATION 2.1 Performance data of Swimming Pool Heat Pump Unit *** REFRIGERANT : R410A UNIT Oasis ELITE AC14 Oasis ELITE AC9 Heating capacity 13.8 Btu/h 47000 31400 Heating Power Input Running Current 10.4 Power Supply 230V /50Hz 230V /50Hz Compressor Quantity... - Page 5 2.SPECIFICATION 2.1 Performance data of Swimming Pool Heat Pump Unit *** REFRIGERANT : R410A UNIT Oasis ELITE AH14 Oasis ELITE AH9 Heating capacity 13.8 Btu/h 47000 31400 Heating Power Input Running Current 10.4 Power Supply 230V /50Hz 230V /50Hz Compressor Quantity...
-
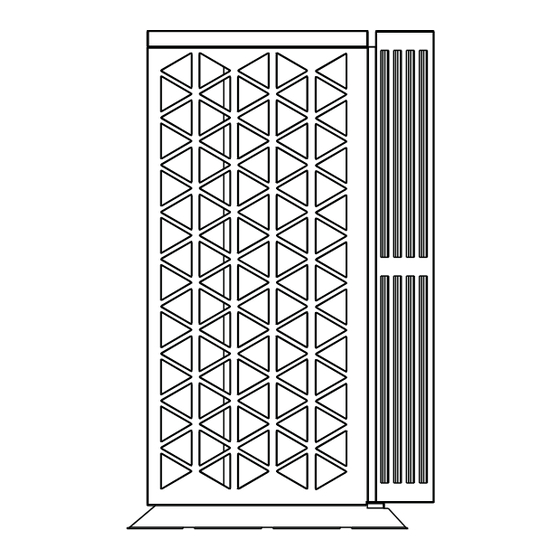
Page 6: Dimensions For Swimming Pool Heat Pump Unit
2.SPECIFICATION 2.2 The dimensions for Swimming Pool Heat Pump Unit Oasis ELITE AH9/Oasis ELITEAH14 Oasis ELITE AC9/Oasis ELITEAC14/ Water outlet Water inlet... - Page 7 2.SPECIFICATION / Oasis ELITEAH18 Oasis ELITEAC18 1116 Water outlet Water inlet...
-
Page 8: How To Disassemble The Units
2.SPECIFICATION 2.3How to disassemble the units. Pull up the front plate Move forward the front plate Take it of Attention: 1. Please be careful when handle with the front plate in case of damage; 2. During this process, please attention to protect the wire between the button on the front plate and electrical box. -
Page 9: How The Power Cord Go
2.SPECIFICATION 2.4 How the power cord go Power cord Power cord 1. Pull out power cord from the electrical box, and fix it at the place "A" as showed in the first image below; After fixing it at "A", draw it out from the bottom of the heat pump as showed in the second image. -
Page 10: Installation And Connection
3.INSTALLATION AND CONNECTION 3.1 Installation illustration Valve Chlorinator cell Water outlet Water supply Pool Water inlet Sand filter Water pump (or other type filter) Installation items: The factory only provides the main unit and the water unit; the other items in the illustration are necessary spare parts for the water system ,that provided by users or the installer. -
Page 11: Swimming Pool Heat Pumps Location
3.INSTALLATION AND CONNECTION 3.2 Swimming Pool Heat Pumps Location The unit will perform well in any outdoor location provided that the following three factors are presented: 1. Fresh Air - 2. Electricity - 3. Pool filter piping The unit may be installed virtually anywhere outdoors. For indoor pools please consult the supplier. -
Page 12: Swimming Pool Heat Pumps Plumbing
3.INSTALLATION AND CONNECTION 3.4 Swimming Pool Heat Pumps Plumbing The Swimming Pool Heat Pumps exclusive rated flow titanium heat exchanger requires no special plumbing arrangements except bypass(please set the flow rate according to the nameplate). The water pressure drop is less than 10kPa at max. Flow rate. Since there is no residual heat or flame Temperatures, The unit does not need copper heat sink piping. -
Page 13: Swimming Pool Heat Pumps Electrical Wiring
3.INSTALLATION AND CONNECTION 3.5 Swimming Pool Heat Pumps Electrical Wiring NOTE: Although the unit heat exchanger is electrically isolated from the rest of the unit, it simply prevents the flow of electricity to or from the pool water. Grounding the unit is still required to protect you against short circuits inside the unit. -
Page 14: Usage And Operation
4. USAGE AND OPERATION 1.Function of controller Main display area TEMP MODE TEMP Aux. Display area 1 Button function NO Symbol Name Function Press this button can start up or shut down the unit, cancel the current operation or back to the upper On/off interface Press this button can switch modes or save... - Page 15 4. USAGE AND OPERATION Symbol Meaning Function Cooling It is showed when the unit in cooling mode. It is showed when the unit in heating mode and flashed Heating in defrosting. Automatic It is showed when the unit in automatic mode. It is showed when the unit in electric-heating mode.
-
Page 16: Usage Of The Controller
4. USAGE AND OPERATION 2.The controller usage Starting up and shutting down In the off interface, press" " for 0.5s can start up the unit, and aux. display-area shows water outlet temperature; In the running interface, press" " for 0.5s can shut down the unit and aux. - Page 17 4. USAGE AND OPERATION Temperature setting In the main interface press and the current mode target-temperature flashes, then press to increase the temp.value, or press to decrease it. Press MODE can save setting parameter and back to the main interface Press can not save setting parameter but back to the main interface Attention If there is no operation for 5s system would remember parameter setting and...
- Page 18 4. USAGE AND OPERATION Hour minute Flashing TEMP TEMP Press MODE MODE TEMP TEMP Press Flashing Flashing Press TEMP TEMP MODE MODE TEMP TEMP Press to save hour Flashing Flashing value setting Press TEMP TEMP MODE MODE TEMP TEMP Press to save minute value setting TEMP MODE...
- Page 19 4. USAGE AND OPERATION 2.5 Timer setting In the main interface press hold on 2 seconds and "on" is flashing, at this time, you can set the timer on means the unit timer is on then press again and hold on 2 seconds and "off"...
- Page 20 4. USAGE AND OPERATION Flashing Flashing Flashing TEMP Press TEMP MODE MODE TEMP TEMP Press Flashing Flashing Flashing Flashing TEMP TEMP MODE MODE Press TEMP TEMP Press The timer on and off has been set Flashing Flashing TEMP TEMP Press MODE MODE TEMP...
- Page 21 4. USAGE AND OPERATION 2.6 Cancel the timer setting Press for 2s and "ON" is flashing at this time, press to cancel the setting of timer on; It is the same way to cancel the setting of timer off . For example The timer on/off has been set "ON"...
- Page 22 4. USAGE AND OPERATION 2.4 Keyboard lock To avoid mis-operation, please lock the controller after parameter setting. At the main interface, press for 5 seconds, the keyboard will be locked. When the keyboard is locked, press for 5 seconds, the keyboard will be unlocked.
-
Page 23: Parameter Table
4. USAGE AND OPERATION 3. Parameter table Default Remark Meaning Heating inlet target temp. Adjustable Cooling inlet target temp. Adjustable Auto inlet target temp. Adjustable... -
Page 24: Power Button Operating Instructions
USAGE AND OPERATION Power button operating instructions 4.1 When the power button is lighted, it shows that the unit is at work. You can press the power button to turn it off, then the light will also be off. 4.2 When the light of power button is out, it shows that the unit is stand by. You can press the power button to turn it on, then the light will also be on. -
Page 25: Maintenance And Inspection
5. MAINTENANCE AND INSPECTION 5.1 Maintenance Check the water supply device and the release often. You should avoid the condition of no water or air entering into system, as this will influence unit's performance and reliability. You should clear the pool/spa filter regularly to avoid damage to the unit as a result of the dirty of clogged filter. -
Page 26: Trouble Shooting Guide
5. MAINTENANCE AND INSPECTION 5.2 Trouble Shooting Guide Display Malfunction Canse Solution The water inlet temp. Sensor Check or change the water Water inlet temp. Sensor failure is open or short circuit inlet temp. Sensor Check or change the water The water outlet temp. -
Page 27: Appendix
6.APPENDIX 1.Connection of PCB illustration OUT1 OUT2 CN19 AI06 OUT3 AI05 OUT4 PC1001 PC1001 AI04 OUT5 AI03 AC-N AI02 AI01 CN16 Connections explanation Meaning Symbol OUT1 Compressor of system1 220-230VAC OUT2 Water pump 220-230VAC OUT3 4way valve 220-230VAC OUT4 High speed of fan motor 220-230VAC OUT5 Low speed of fan motor 220-230VAC AC-N... - Page 28 6.APPENDIX Caution & Warning 1. The unit can only be repaired by qualified installer centre personnel or an authorised dealer. for Europe market 2. This appliance is not intended for use by persons (including children) with reduced physical sensory or mental capabilities, or lack of experience and knowledge, unless they have been given supervision or instruction concerning use of the appliance by a person responsible for their safety.
- Page 29 6.APPENDIX (2) Cable specification Single phase unit Nameplate Creepage protector Signal line maximum Phase line Earth line current No more 2 1.5mm 1.5mm 30mA less than 0.1 sec than 10A 2 2.5mm 2.5mm 30mA less than 0.1 sec 10~16A 2 4mm 30mA less than 0.1 sec 16 ~25A 2 6mm...
- Page 30 6.APPENDIX Oasis ELITEAC9...
- Page 31 6.APPENDIX Part name Part name Code Note Code Note pressure switch 4-way valve 2001-3605 2004-1437 front panel needle valve 32012-210303 20000-140150 Button switch filter 40000-320033 2004-1445 32012-210288 control box needle valve 20000-140150 32012-210297 Electrical cover plate pressure switch 2000-3603 3500-2701 fan blade filter 2004-1445...
- Page 32 6.APPENDIX OasisELITE AC14...
- Page 33 6.APPENDIX Part name Part name Code Note Code Note pressure switch 4-way valve 2001-3605 2004-1437 front panel needle valve 32012-210303 20000-140150 Button switch filter 40000-320033 2004-1445 32012-210288 control box needle valve 20000-140150 32012-210297 Electrical cover plate pressure switch 2000-3603 3500-2701 fan blade filter 2004-1445...
- Page 34 6.APPENDIX OasisELITE AC18...
- Page 35 6.APPENDIX Part name Code Note Part name Code Note front panel 32012-210307 20000-140150 needle valve Button switch 40000-320033 2004-1444 filter Wind deflector assembly 32012-210322 2000-3603 pressure switch fan blade 20000-270004 20000-140179 Electronic expansion valve fan motor 20000-330134 2001-3605 pressure switch fan motor bracket 35019-210052 Clapboard...
- Page 36 6.APPENDIX Oasis ELITEAH9...
- Page 37 6.APPENDIX Part name Note Part name Code Code Note pressure switch needle valve 2001-3605 20000-140150 front panel filter 32012-210303 2004-1445 Button switch needle valve 40000-320033 20000-140150 32012-210288 control box pressure switch 2000-3603 32012-210297 Electrical cover plate compressor capacitor 2000-3505 3500-2701 fan blade 2000-3909 2-terminal...
- Page 38 6.APPENDIX OasisELITEAH14...
- Page 39 6.APPENDIX Part name Code Code Part name Note Note 2001-3605 pressure switch 20000-140150 needle valve 32012-210303 front panel 2004-1445 filter 40000-320033 needle valve Button switch 20000-140150 32012-210288 pressure switch control box 2000-3603 32012-210297 compressor capacitor Electrical cover plate 2000-3505 3500-2701 2-terminal fan blade 2000-3909...
- Page 40 6.APPENDIX OasisELITEAH18...
- Page 41 6.APPENDIX Code Part name Note Part name Code Note 32012-210307 front panel filter 2004-1444 40000-320033 Button switch pressure switch 2000-3603 32012-210322 Wind deflector assembly Electronic expansion valve 20000-140179 20000-270004 fan blade pressure switch 2001-3605 20000-330134 fan motor Clapboard 32009-210285 35019-210052 fan motor bracket Compressor 20000-110208...
- Page 42 NOTE...
- Page 44 Code 20150616-0001...
Need help?
Do you have a question about the ELITE AC9 and is the answer not in the manual?
Questions and answers