Advertisement
INSTALLATION MANUAL
Level of Difficulty
Easy
Installation difficulty levels are based on time
and effort involved and may vary depending on
the installer level of expertise, condition of the
vehicle and proper tools and equipment.
Weight Carrying Capacity
With 2" ActiveLink
™
shank (#18402)
With 1-1/4" ActiveLink
™
shank (#18401)
Parts List
Item Qty Description
1
1
Cargo carrier frame
2
1
ActiveLink
shank assembly
™
3
1
Mounting tube
4
2
Support bracket, driver side
5
2
Support bracket, passenger side
6
4
Eye bolt, M10
7
6
Lock nut, M10
8
2
Hex bolt, M10 x 70mm
Tools Required
Open wrench, 17mm
Torque wrench
Socket, 17mm
--
CURTMFG.COM
•
PRODUCT SUPPORT: 877.287.8634
WARNING
Never exceed the vehicle manufacturer's recommended towing capacity.
Do not exceed maximum weight capacity of 500 lbs. when using 2" receiver tube.
Distribute the weight evenly on platform when hauling a load.
Do not carry loads taller, wider or deeper than the cargo carrier. Do not carry flammable items
on carrier or allow exhaust fumes to blow directly on your cargo. This is a fire hazard.
Always use caution when in reverse (R) to help avoid personal injury.
Loads must be evenly distributed.
Never use as a step or platform - injury may result.
500 lbs. /
Do not use to carry flammable items or allow exhaust
227 kg
fumes to blow directly on items in the carrier – fire hazard.
350 lbs. /
Do not use to transport people.
159 kg
Do not block brake lights or turn signals.
A support strap is required when bike racks or cargo carriers are used with
an 1-1/4" receiver hitch. Failure to use a support strap could result in injury
and / or property damage and will void the warranty of the cargo carrier.
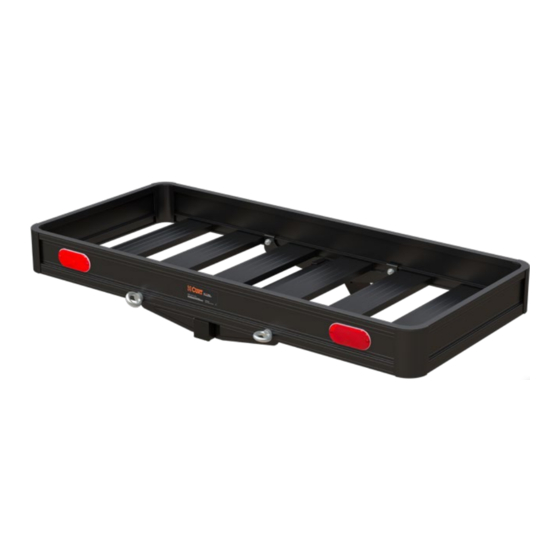
Product Photo
NOTICE
Visit www.curtmfg.com for a full-color copy of this
instruction manual, as well as helpful videos, guides and much more!
Before you begin installation, read all instructions thoroughly.
Proper tools will improve the quality of installation and reduce the time required.
Do not carry loads wider or deeper than the carrier.
Periodic inspection of your product should be performed
to ensure all hardware and / or components remain secure.
Mild automotive detergent may be used to clean the product. Do not use dish detergent, abrasive
cleaners, abrasive pads, wire brushes or other similar products that may damage the finish.
To help prevent damage to the product or vehicle, refer to the specified
torque specifications when securing hardware during the installation process.
Product Registration and Warranty
CURT stands behind our products with industry-leading warranties. To get copies of the product
warranties, register your purchase or provide feedback, visit: warranty.curtgroup.com/surveys
•
18415-INS-RA
•
08/23/2022
•
ECN9627
•
PAGE 1
18415
Advertisement
Table of Contents

Related Manuals for Lippert Curt 18415


Summary of Contents for Lippert Curt 18415
- Page 1 INSTALLATION MANUAL 18415 Level of Difficulty WARNING Easy Never exceed the vehicle manufacturer's recommended towing capacity. Installation difficulty levels are based on time Do not exceed maximum weight capacity of 500 lbs. when using 2" receiver tube. and effort involved and may vary depending on Distribute the weight evenly on platform when hauling a load.
- Page 2 ASSEMBLY Parts List Item Qty Description Cargo carrier frame ActiveLink shank assembly ™ Mounting tube Support bracket, driver side Support bracket, passenger side Eye bolt, M10 Lock nut, M10 Hex bolt, M10 x 70mm CURTMFG.COM • PRODUCT SUPPORT: 877.287.8634 • 18415-INS-RA •...
- Page 3 Step 1 - Carrier Assembly Align the mounting holes in the support brackets and the mounting tube. Place an M10 hex bolt (#8) through the support bracket (#4, #5) and mounting tube (#3) and secure using an M10 lock nut (#7). Place the cargo carrier frame (#1) on a flat surface facing down.
Need help?
Do you have a question about the Curt 18415 and is the answer not in the manual?
Questions and answers