Table of Contents
Advertisement
Advertisement
Table of Contents

Summary of Contents for Emotiva UMC-1
-
Page 3: Table Of Contents
CONNECTING TO A SACD PLAYER CONNECTING TO A CABLE BOX 5. UMC-1 FRONT PANEL LAYOUT 6. UMC-1 REAR PANEL LAYOUT 7. REMOTE CONTROL CONTROLS GETTING THE MOST OUT OF YOUR UMC-1 REMOTE BATTERY NOTES 8. OPERATING THE UMC-1 USING THE OSD MAIN MENU Input... - Page 4 BASS MANAGEMENT SPEAKER SETUP EMO-Q/EQ SYSTEM AM/FM TUNER OPERATION 10. TROUBLESHOOTING GUIDE NO POWER – UMC-1 WILL NOT TURN ON NO SOUND POOR AM RECEPTION POOR FM RECEPTION NO PICTURE NO TONE CONTROL OR FUNCTIONS NO ON-SCREEN DISPLAY ZONE 2 DOES NOT PLAY DIGITAL INPUTS EXTERNAL AMPLIFIER(S) SHUT DOWN (OFTEN OR PREMATURELY) UMC-1 “LOCKS UP”...
-
Page 5: Thank You
It is important to save all the packing materials and the boxes in case your UMC-1 ever needs to be moved or shipped back to the factory for service. -
Page 6: Safety Precautions
The UMC-1 should be situated away from heat sources such as radiators, or any other devices which produce heat. The UMC-1 should be connected to a power supply only of the type described in this User’s Guide and what is labeled on the UMC-component. -
Page 7: Standby Power
STANDBY POWER The UMC-1 can be switched into standby mode by pressing the POWER SWITCH on the front of the unit or pressing the OFF button on the REMOTE CONTROL. When in standby mode the power switch will glow amber. Power consumption... -
Page 8: Nec Standards
• NEC STANDARDS (NATIONAL ELECTRICAL CODE) A Note for the Cable Television (CATV) Installer This reminder is to call the CATV system installer’s attention to Article 820-40 of the NEC that provides guidelines for proper grounding and in particular, specifies that the cable ground shall be connected to the grounding system of the building as close to the point of cable entry as practical. -
Page 9: Installation Considerations
Most DVD players and other source components are fairly low current items. The Emotiva UMC-1 requires a minimum of 2 amperes @ 120 volts. It should be sufficient to allow the UMC-1 to share a wall socket with other video source units, but power amplifiers and a video display (big screen TV or video projector) should each be provided a SEPARATE electrical connection on a SEPARATE circuit. -
Page 10: Features And Specifications
FEATURES and SPECIFICATIONS Twin Cirrus® 32 bit dual core DSP’s Decoding support for Dolby Digital, Dolby Digital EX, Dolby Digital Plus, Dolby Digital True HD, Dolby PLIIx, DTS, DTSES, DTS HD, DTS Master Audio, DTS Neo 6, SPDIF, PCM 8 channel (note: some audio formats are only supported via HDMI) Multi-channel Dolby Volume (Read ‘How Dolby Volume Works’... -
Page 11: Connectivity
• CONNECTIVITY 5 - HDMI inputs and 1 HDMI output. 3- composite video inputs (RCA) 3 - S-video inputs (S-video mini DIN) 3 - component video inputs (RCA) 1 - component video output (RCA) 4 - stereo analog audio inputs (RCA) ... -
Page 12: Connection Types
3| CONNECTION TYPES The Emotiva UMC-1 has four types of video connections on board (3 Analog and 1 Digital) and 4 types of audio connections on board HDMI, RCA, Optical, Balanced (Subwoofer Only): • VIDEO CONNECTIONS Composite Video Analog composite video signals are connected between products with a single 75-ohm coax cable with yellow RCA connectors on each end. -
Page 13: Audio Connections
AUDIO CONNECTIONS There are two ways to transmit audio signals to and from the UMC-1: Digital and Analog. The analog signal is an electrical waveform representation of sound and it requires a cable for each channel. The digital signal uses a sequence of numbers that represents the sound and requires only one cable for all channels. -
Page 14: Connection Diagrams
(Optional) Player This diagram shows several methods you can use to hook up a DVD and/or BluRay player to your UMC-1. The preferred video hookup is HDMI, although excellent video quality can be achieved with Component. Installation considerations: HDMI 1.3a will send both audio and video through the HDMI cable. When using any other video cables a separate cable will be needed to carry the audio to the UMC-1. - Page 15 UMC-1. When connecting to the UMC-1 using this method, you will have to use a separate cable to carry the audio to the UMC-1. This can be done with RCA cables to carry an analog signal, a Toslink cable to carry a digital optical signal or a digital coaxial cable.
-
Page 16: Connecting To A Multi-Channel Amplifier
Amplifier Use good quality RCA cables to connect the 7.1 channels of output from the UMC-1 to the inputs on your multi-channel amplifier. You can use multiple amplifiers in place of a single multi-channel amplifier. They basically wire up in the same way. -
Page 17: Connecting To A Digital Tv
(Preferred) Processor Connect a high quality HDMI cable to the HDMI output of the UMC-1 and then run it to the HDMI input on your digital TV or projector. Please note: the UMC-1 can easily drive long HDMI cables for projectors mounted remotely. For the best quality it is... -
Page 18: Connecting To An Analog Tv
These are marked with three different color bands (Red, Green and Blue). Be sure to connect the proper color cable to each output (of the UMC-1) and to the inputs of your TV (they will all be marked with the proper colors). -
Page 19: Connecting To A Cd Player
Connect the right and left audio outputs of your CD player to the right and left audio inputs labeled CD on the back of the UMC-1. There are alternative ways to connect a CD player which are not pictured here. You can use a Toslink cable or digital... -
Page 20: Connecting To A Sacd Player
CONNECTING TO AN SACD PLAYER - Analog Processor SACD Player Using high quality RCA cables connect the 5.1 (pictured) or 7.1 Channel outputs from your player to the 7.1 Channel inputs on the UMC-1. Take care to to accurately connect the proper channel to channel. -
Page 21: Connecting To A Cable Box
You can also connect your cable box via component video (not shown, use Connecting a DVD player or Blu-ray for reference) if your cable box does not have an HDMI connection. When using this method you must also connect the audio outputs, either digital coaxial RCA (yellow) or Optical (blue) from the cable box to the UMC-1. -
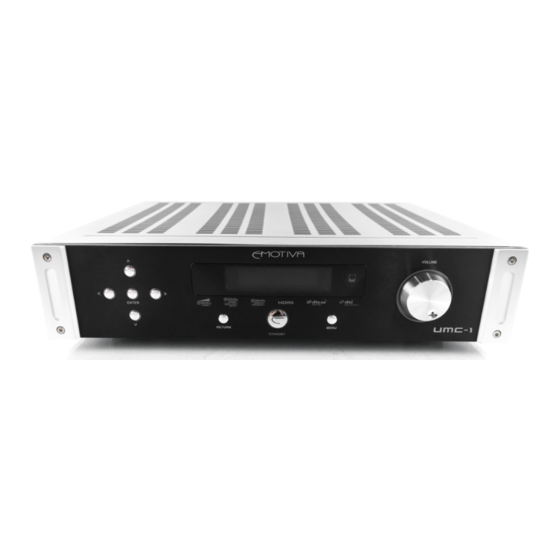
Page 22: Umc-1 Front Panel Layout
3. Power Button This turns the UMC-1 on or off. It is a non-latching momentary button. When the power button (it is glowing amber when in standby mode) is pressed, LOADING will appear in the display window for approximately 3 seconds. -
Page 23: Umc-1 Rear Panel Layout
SACD or a DVD player with its own surround decoder. You can assign this as an audio input from the front panel or remote control in the input setup menu. The seven channels of analog audio will then pass through the UMC-1 as a pure analog path. - Page 24 IR Input: The IR Input uses a 3.5mm stereo jack and will accept the IR input from any IR repeater. One thing to note about this is that the UMC-1 itself can be used as an ‘IR blaster.’ There are two IR emitters in the front display of the UMC-1.
- Page 25 IEC Line Cord Socket The UMC-1 comes with a detachable IEC line cord which connects here. Plug the line cord into an AC wall socket or power strip which is correctly configured with the voltage and current supply specified for the UMC-1.
-
Page 26: Remote Control
UMC-1 itself will show “Power Off.” It will display this for approximately 5 seconds, then the VFD will shut off and the Standby button will begin to blink violet for a few seconds. During this time, the UMC-1 is saving all of your settings to memory before it powers down. - Page 27 1. POWER The POWER button turns Zone 2 on and off. (If Zone-2 is on when you put the UMC-1 in Standby, the UMC-1 will enter a low-power state (the lights and the display window will dim). The display will then show you the display source and volume setting.
-
Page 28: Getting The Most Out Of Your Umc-1 Remote
If at all possible make sure there is no direct sunlight or fluorescent light shining on the remote sensor of the UMC-1. Make sure there are no obstacles between the remote control and remote sensor on the UMC-1. The remote is capable of operating up to 40-feet. -
Page 29: Operating The Umc-1
DTS, but the output format can be selected to be Dolby PLIIx and output 7.1. The MODE menu allows you to change the output format on the fly. If you want to preset the UMC-1 to automatically... -
Page 30: Parameter
UMC-1 into Standby mode the front panel halo lighting and VFD will go to a very low level. The VFD will then display what source is selected for Zone 2 and the volume level. The UMC-1 does not have be on for Zone 2 to work. You can turn on/off Zone 2 at any time by pressing the Zone 2 power button on the remote control. -
Page 31: Understanding Umc-1 Input Structure
Notice that there are sixteen configurable inputs plus the Tuner. Any of the sixteen sources can be re-named and configured to access any of the audio of video inputs. The chart below may help you understand, configure and log the inputs on your UMC-1. You can also access our Input Setup tutorial on our website. - Page 32 • UNDERSTANDING UMC-1 INPUT STRUCTURE … CONT’D After renaming your inputs, you can configure them on the following screens: Select "Menu, "Setup", and “Input Setup" to configure your inputs. Select DVD, Source 1 default name, or your re-named input to configure the displayed list of parameter: Visibility, Audio source, Video source, Input level, Lip Sync, Trigger settings, and EQ mode.
- Page 33 • UNDERSTANDING UMC-1 INPUT STRUCTURE … CONT’D Here are the rest of the input configuration screens and their related settings. Carefully work through each of your inputs and select the appropriate input assignments and settings. Log your settings on the input configuration sheet.
- Page 34 • The UMC-1 has 3) EQs (these are setup in the Emo-Q/ EQ menu) and for each input you can choose to apply any of these EQs to each input. The choices you can select are NONE, MANUAL EQ1, MANUAL EQ2 or MANUAL EQ3. As an example, when Emo-Q is run it will setup EQ’s to correct for room acoustics and you can assign that to MANUAL EQ1.
- Page 35 (meaning they neither boost or cut) as default from the factory. If the UMC-1 is set to Pass Through you cannot adjust the OSD depth. The UMC-1 will use the OSD Depth that you set before you set it to Pass Through *The OSD Depth control allows you to adjust the transparency of the OSD Menu.
- Page 36 DOLBY PLIIx Music Movie DTS Neo: 6 Cinema 3CH Cinema 6CH Music 5CH Music 6CH ANALOG Stereo, Direct, DSP, PLIIx, NEO:6 Stereo, Direct, DSP, PLIIx, NEO:6 MultiPCM Stereo, Direct, DSP, PLIIx DIGITAL 2/0 Stereo, Direct, PLIIx, NEO:6, Digital ...
-
Page 37: Speaker Placement/Setup/Calibration
Ultimately, this will give a much better result when you are enjoying your system and your new Emotiva UMC-1. Overall, the best placement for front speakers is where the sound is directed at ear level. This means that the speakers themselves can be in positions lower (like small floor standing speakers) or higher (like in-wall or in-ceiling speakers) as long as the sound is “pointed”... - Page 38 Dolby TrueHD, DTS HD Master Audio, Dolby Digital EX, Dolby Pro Logic IIx, and DTS ES. The UMC-1 can be configured for one or two surround back speakers. Ideally, all the surround speakers should be of the same make and model, and fitted at similar heights to produce a smooth continuous sound field.
- Page 39 • The UMC-1 has two subwoofer outputs, the unbalanced RCA output and the balanced sub output. A subwoofer typically sounds best in a corner with at least 5 feet of wall to either side. Due to the short wavelengths of high-frequency sounds, they don’t interact strongly with the size and shape of a room.
-
Page 40: Bass Management
BASS MANAGEMENT Unlike higher frequencies, it is difficult to discern exactly which direction lower bass is coming. The UMC-1 has a bass management system which takes advantage of this effect. It allows you to choose whether your speakers will play the full frequency range or if the bass will be redirected to the subwoofer. -
Page 41: Emo-Q/Eq System
(TV only) The HDMI Audio Output can be set to off and Auto. You would set this to off if you did not want the UMC-1 to send audio to your TV. The Audio sent to the TV is PCM 2.0 at 48k •... -
Page 42: Am/Fm Tuner Operation
• You can return all of your UMC-1’s settings to the original factory default. If you get into a real bind and feel like you have messed it all up, fear not. By loading defaults it will erase all user settings and start anew. - Page 43 Zone2 Power - This can be set to either ON or OFF Input Select - Lets you choose the inputs for your Zone 2 operation. You have the following choices. Tuner Aux 2 to Aux 11 Sync (This tracks what is on in the main theater.) ...
-
Page 44: Troubleshooting Guide
If the bass is weak during Dolby Digital or DTS playback, check the correct audio output is selected in your DVD menu, otherwise it may just play stereo into your UMC-1 and you won’t get the true LFE signal to the subwoofer. -
Page 45: Picture
• NO PICTURE Make sure that the video input of your TV monitor is connected to the Main monitor output on the UMC-1 rear panel. Check that your Monitor is selecting its correct video input. Check the video connection from your selected source component into the UMC-1. -
Page 46: Zone 2 Does Not Play Digital Inputs
Make sure that they are disconnected where they first enter the room, so they are making no connection to the UMC-1 or the TV, or any other component. If the hum is caused by the cable TV line, then you will need a “ground loop isolator.”... -
Page 47: Other Probable Causes Of Noise
Try connecting your system to another AC socket on a separate line. If the hum is heard from within the UMC-1 and not through the speakers, this may also be caused by interference on the AC or DC lines. The power transformers may turn this interference into an audible noise. -
Page 48: Limited Warranty
Emotiva offers the following warranty to owners of the UMC-1. Emotiva Audio warrants the UMC-1 to be free of defects in materials and workmanship for a period of FIVE YEARS from the original date of purchase. The following items are excluded from, or will void this warranty: 1) Damage to the UMC-1 caused during shipment and handling. -
Page 49: License And Trademark Disclosures
It will take a few seconds for all this to happen. This is a characteristic of HDMI and its HDCP license. When the UMC-1 recognizes an HDMI source the processor first “talks to the source to determine if the source has an HDCP license and determines its audio and video capabilities. - Page 50 UMC-1 REMOTE CONTROL SAFETY (The UMC-1 Remote Control complies with Part 15 of the FCC rules. The UMC-1 Remote Control has been tested and found to comply with the limits for a class B digital device, pursuant to part 15 of the FCC rules. These limits are designed to provide a reasonable protection against harmful interference in a residential installation.
Need help?
Do you have a question about the UMC-1 and is the answer not in the manual?
Questions and answers