Infineon XMC72 KIT EVK XMC7200 Manual
Evaluation kit
Hide thumbs
Also See for XMC72 KIT EVK XMC7200:
- Quick start manual (4 pages) ,
- Using manual (33 pages) ,
- Quick start manual (4 pages)
Table of Contents
Advertisement
Quick Links
KIT_XMC72_EVK XMC7200 evaluation kit guide
About this document
Scope and purpose
This document serves as a guide for using the KIT_XMC72_EVK XMC7200 evaluation kit. The document explains
about the kit operation, describes the out-of-the-box example and its operation, and hardware details of the
board.
Intended audience
This evaluation board is intended for all technical specialists who are familiar with connectivity and this board
is intended to be used under laboratory conditions.
Reference documents
This user guide should be read in conjunction with the following documents:
AN234334 - Getting started with XMC7000 MCU on ModusToolbox™ software
•
XMC7100, XMC7200 datasheet
•
User Guide
www.infineon.com
Please read the Important Notice and Warnings at the end of this document
page 1 of 59
002-34389 Rev. **
<2022-03>
Advertisement
Table of Contents

Related Manuals for Infineon XMC72 KIT EVK XMC7200


Summary of Contents for Infineon XMC72 KIT EVK XMC7200
-
Page 1: About This Document
This user guide should be read in conjunction with the following documents: AN234334 - Getting started with XMC7000 MCU on ModusToolbox™ software • XMC7100, XMC7200 datasheet • User Guide Please read the Important Notice and Warnings at the end of this document 002-34389 Rev. ** www.infineon.com page 1 of 59 <2022-03>... -
Page 2: Table Of Contents
KIT_XMC72_EVK XMC7200 evaluation kit guide Table of contents Table of contents About this document ........................1 Table of contents ..........................2 Safety and regulatory compliance information .................. 4 General safety instructions ............................4 ESD protection ................................4 Handling boards ................................4 Introduction .......................... - Page 3 KIT_XMC72_EVK XMC7200 evaluation kit guide Table of contents 4.2.16 Reverse voltage protection ......................51 Kit rework ............................... 52 4.3.1 Digilent dual Pmod SMIF header Interface ..................52 4.3.2 VDDIO2 supply voltage selection ..................... 53 4.3.3 UART interface on headers compatible with Arduino ..............53 4.3.4 WLAN UART interface ........................
-
Page 4: Safety And Regulatory Compliance Information
General safety instructions ESD protection ESD can damage boards and associated components. Infineon recommends that you perform procedures only at an ESD workstation. If an ESD workstation is unavailable, use appropriate ESD protection by wearing an anti-static wrist strap attached to the chassis ground (any unpainted metal surface) on your board when handling parts. -
Page 5: Introduction
There are wide range of code examples to evaluate the XMC7200 evaluation board. These examples help you • familiarize XMC7200D and create your own design. These examples can be accessed through ModusToolbox™ Project Creator tool. Alternatively, you can also visit Infineon’s code example page to access these examples: Code examples for ModusToolbox™ software −... -
Page 6: Additional Learning Resources
KIT_XMC72_EVK XMC7200 evaluation kit guide Introduction Additional learning resources Infineon provides a wealth of data at www.infineon.com/cms/en/product/microcontroller/32-bit- industrial-microcontroller-based-on-arm-cortex-m to help you to select the right XMC™ MCU for your design and to help you to quickly and effectively integrate the device into your design. - Page 7 KIT_XMC72_EVK XMC7200 evaluation kit guide Introduction Abbreviation Definition Inter-IC Sound JTAG Joint Test Action Group Light-emitting Diode Low Power Oscillator Medium Access Control Personal Computer Peripheral Driver Library Potentiometer QSPI Quad Serial Peripheral Interface RGMII Reduced Gigabit Media Independent Interface SDHC Secure Digital Host Controller SDIO...
-
Page 8: Kit Details
• Six jumper wires (five inches each) • Quick start guide • Figure 1 Kit contents Inspect the contents of the kit; if you find any part missing, go to www.infineon.com/support. User Guide 8 of 59 002-34389 Rev. ** <2022-03>... -
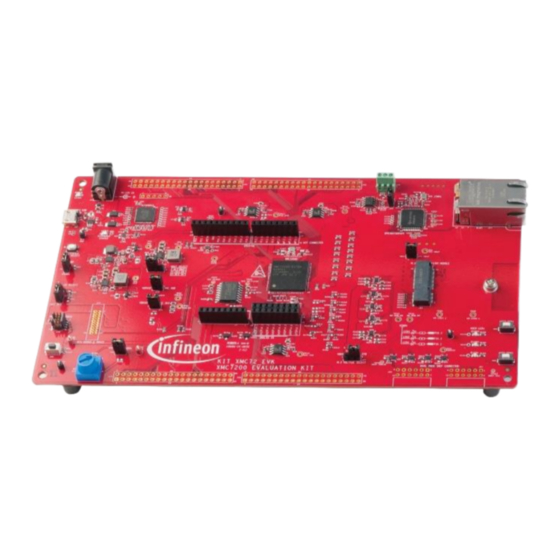
Page 9: Board Details
KIT_XMC72_EVK XMC7200 evaluation kit guide Kit details Board details The XMC7200 evaluation board has the following features: XMC7200D – XMC7200D-E272K8384. See the device datasheet • M.2 interface connector to connect radio modules based on AIROC™ Wi-Fi & Bluetooth® combos (currently •... - Page 10 KIT_XMC72_EVK XMC7200 evaluation kit guide Kit details External power supply VIN connector (J6) Power LED (LED5) KitProg3 USB connector (J7) KitProg3 status LED (LED4) 512-Mbit serial NOR flash memory (S25FL512S, U9) KitProg3 programming mode selection button (SW3) VBAT power selection jumper (J8) XMC7200D VTARG current measurement jumper (J15) XMC7200D VDDIO2 current measurement jumper (J12) System power (VTARG) selection jumper (J10)
- Page 11 KIT_XMC72_EVK XMC7200 evaluation kit guide Kit details Digital I/O headers compatible with Arduino Uno R3 (J3, J4) KitProg3 programmer and debugger based on PSoC™ 5LP (CY8C5868LTI-LP039 – U2) * Footprint only, not populated on the board. ** Component is located at the bottom side of the board. Figure 3 XMC7200 evaluation board pinout User Guide...
- Page 12 KIT_XMC72_EVK XMC7200 evaluation kit guide Kit details Table 3 XMC7200 evaluation board pinout Primary onboard function Secondary onboard Connection details function XMC7200D pins XRES Hardware reset – Remove R183 to disconnect it from KitProg3 reset. P0[2] CAN transmit CAN_TX – Connected to TxD of CAN FD transceiver TLE9251VSJ.
- Page 13 KIT_XMC72_EVK XMC7200 evaluation kit guide Kit details Primary onboard function Secondary onboard Connection details function P12[0] A8 – header compatible with – Arduino (J2.2) P12[1] A9 – header compatible with – Arduino (J2.4) P12[2] A10 – header compatible – with Arduino (J2.6) P12[3] A11 –...
- Page 14 KIT_XMC72_EVK XMC7200 evaluation kit guide Kit details Primary onboard function Secondary onboard Connection details function P13[6] Pin D6 of connector J4.7 – compatible with Arduino P13[7] Pin D7 of connector J4.8 – compatible with Arduino P14[0] A0 – header compatible with –...
- Page 15 KIT_XMC72_EVK XMC7200 evaluation kit guide Kit details Primary onboard function Secondary onboard Connection details function – P21[3] ECO OUT (Y1) 16-MHz external crystal oscillator output – P21[4] User button (USER_BTN1) (Also used for hibernate wakeup function) Generic GPIO header (J31.22) XMC™ MCU 20-pin ETM P21[5] TRACEDATA [0] header J17.
- Page 16 KIT_XMC72_EVK XMC7200 evaluation kit guide Kit details Primary onboard function Secondary onboard Connection details function Serial Memory Interface P24[3] SDIO_CMD_LT Connected to M.2 WL SMIF_CS_L_LT signal SDIO_CMD signal via U25 level translator. Remove R300 resistor and install R152 resistor to connect to Serial Memory Interface (SMIF) CS signal.
- Page 17 KIT_XMC72_EVK XMC7200 evaluation kit guide Kit details Primary onboard function Secondary onboard Connection details function Serial Memory Interface P25[5] WL_DEV_WAKE_LT Connected to M.2 DATA5 signal WL_DEV_WAKE signal via SMIF_DATA5_LT U28 level translator. Remove R173 resistor and install R176 to connect to Serial Memory Interface (SMIF) DATA5 signal.
- Page 18 KIT_XMC72_EVK XMC7200 evaluation kit guide Kit details Primary onboard function Secondary onboard Connection details function – P32[2] BT_UART_RTS_LT Connected to M.2 radio module connector pin BT_UART_CTS via level translator U30. – Connected to M.2 radio P32[3] BT_UART_CTS_LT module connector pin BT_UART_RTS via level translator U30.
- Page 19 KIT_XMC72_EVK XMC7200 evaluation kit guide Kit details Primary onboard function Secondary onboard Connection details function Populate R73 to connect to KitProg3 Secondary UART CTS. BT_I2S_SCK I2S serial clock – BT_I2S_WS I2S serial word select – BT_I2S_OUT I2S serial data out –...
-
Page 20: Kit Operation
KIT_XMC72_EVK XMC7200 evaluation kit guide Kit operation Kit operation Theory of operation The XMC7200 evaluation board is built around XMC7200D. For details of device features, see the device datasheet. CPU Subsystem ITCM DTCM 16 KB 16 KB ITCM DTCM XMC7200 SWJ/ETM/ITM/CTI 16 KB 16 KB... - Page 21 KIT_XMC72_EVK XMC7200 evaluation kit guide Kit operation KIT_XMC72_EVK XMC7200 Evaluation Kit Functional Block Diagram Infineon Parts Loaded Parts No Load Parts 20-pin 10-pin Mode Reset JTAG/ETM Status LED SWD/JTAG Switch Button Header Header (16 MHz) (32.768 KHz) P5LP_VDD Potentiometer UART TX, RX...
- Page 22 KIT_XMC72_EVK XMC7200 evaluation kit guide Kit operation Figure 6 XMC7200 evaluation board – top view Figure 7 XMC7200 evaluation board – bottom view User Guide 22 of 59 002-34389 Rev. ** <2022-03>...
- Page 23 KIT_XMC72_EVK XMC7200 evaluation kit guide Kit operation The XMC7200 evaluation board has the following peripherals. Table 4 Peripheral details Sl. No. Peripheral Description External power supply VIN Connect to external 12V/3A DC power adapter. connector (J6) Power LED (LED5) Power supply ON/OFF LED status indicator. KitProg3 USB connector (J7) Connect to a PC to use the KitProg3 on-board programmer and debugger and to provide power to the...
- Page 24 KIT_XMC72_EVK XMC7200 evaluation kit guide Kit operation Sl. No. Peripheral Description Potentiometer connection jumper Connects the XMC7200D VDDA supply to the (J18) potentiometer. XMC7200D extended I/O headers These headers provide connectivity to XMC7200D GPIOs (J29, J30, J31, J32) that are not connected to the headers compatible with Arduino.
- Page 25 KIT_XMC72_EVK XMC7200 evaluation kit guide Kit operation Sl. No. Peripheral Description 125-MHz crystal for Ethernet Oscillator for Ethernet PHY transceiver (Y4) CAN FD resistor termination Install a jumper to enable the termination resistor for another CAN FD transceiver IFX1051SJ in place of U8. jumper (J20) Along with the jumper, C187 and R199 components must be installed and two resistors R196 and R315 removed.
-
Page 26: Wireless Connectivity Module
KIT_XMC72_EVK XMC7200 evaluation kit guide Kit operation M.2 wireless connectivity module Note: Supporting software and code examples will be available in future. The XMC7200 evaluation kit provides the option to connect AIROC™ Wi-Fi & Bluetooth® combo radio modules to the M.2 interface connector on the board. The combination of XMC7000 host MCU and radio module enables you to evaluate Wi-Fi/Bluetooth®... - Page 27 KIT_XMC72_EVK XMC7200 evaluation kit guide Kit operation Figure 8 Connect USB cable to USB connector on the board In the Eclipse IDE for ModusToolbox™ software, import the desired code example (application) into a new workspace. Click on New Application from Quick Panel. Figure 9 Create new application User Guide...
- Page 28 KIT_XMC72_EVK XMC7200 evaluation kit guide Kit operation Select the BSP in the “Choose Board Support Package” window and click Next. Figure 10 Creating a new application: Choose Board Support Package Select the application in the “Select Application” window and click Create. Figure 11 Creating a new application: Select application User Guide...
- Page 29 KIT_XMC72_EVK XMC7200 evaluation kit guide Kit operation To build and program a XMC7200D application, in the Project Explorer, select <App_Name> project. In the Quick Panel, scroll to the Launches section and click the <App_Name> Program (KitProg3_MiniProg4) configuration as shown in Figure Figure 12 Programming in ModusToolbox™...
-
Page 30: Using The Oob Example - Xmc7200D
KIT_XMC72_EVK XMC7200 evaluation kit guide Kit operation 3.4.1.1 Using the OOB example – XMC7200D The XMC7200 evaluation board is by default programmed with the code example: XMC7200D: OOB demo. The steps below describe on how to use the example. For a detailed description of the project, refer to the example’s README.md file in the GitHub repository. -
Page 31: Usb-Uart Bridge
KIT_XMC72_EVK XMC7200 evaluation kit guide Kit operation 3.4.2 USB-UART bridge KitProg3 on the XMC7200 evaluation board can act as a USB-UART bridge. The UART Rx and Tx pins of KitProg3 are connected to the XMC7200D UART pins as follows: KitProg3 XMC7200D device KP_UART_1_TX P13[0]... -
Page 32: Usb-I2C Bridge
KIT_XMC72_EVK XMC7200 evaluation kit guide Kit operation 3.4.3 USB-I2C bridge The KitProg3 can function as a USB-I2C bridge and communicate with an I2C master such as Bridge Control Panel (BCP). The I2C lines on the XMC7200D are hard-wired on the board to the I2C lines of the KitProg3, with onboard pull-up resistors. -
Page 33: Hardware
These devices contain embedded peripherals supporting Controller Area Network with Flexible Data rate (CAN FD) and Gigabit Ethernet. XMC7200 devices are manufactured on an advanced 40-nm process. XMC7200 incorporates Infineon’s low-power flash memory, multiple high-performance analog and digital peripherals, and enables the creation of a secured computing platform. - Page 34 KIT_XMC72_EVK XMC7200 evaluation kit guide Hardware XMC_MCU Power VDDD TP48 VDDD1 VSSD1 VDDD2 VSSD2 VDDD3 VSSD3 VDDD4 VSSD4 VDDD5 VSSD5 VDDD6 VSSD6 VDDA VSSD7 TP49 VDDA VSSD8 VSSD9 VDDIO1 VDDIO_1_1 VSSD10 VDDIO_1_2 VSSD11 VDDIO_1_3 VSSD12 VDDIO2 VSSD13 VDDIO_2 VSSD14 VSSD15 VDDIO3 VDDIO_3_1 VSSD16...
-
Page 35: Interface Connector (J25)
The M.2 E-key connector adds radio connectivity to XMC7200D as required. Any M.2 E-key radio module, compatible with Infineon M.2 connector pin mapping, can be interfaced to the XMC7200 evaluation kit. The WLAN interface to the XMC7200D is SDIO. The Bluetooth® interface to XMC7200D is UART. The VBAT supply for the module is provided from the XMC7200 evaluation kit, which is 3.3 V/3.6 V selectable depending on the M.2... - Page 36 KIT_XMC72_EVK XMC7200 evaluation kit guide Hardware There are additional optional signals which may not be present in all modules. See schematics for more details. VCC_M2 M.2 Interface Connector SDIO_DATA0 R243 SDIO_DATA1 R244 R248 SDIO_DATA2 SDIO_DATA3 R245 BT_UART_TXD SDIO_DATA0 WL_SDIO_DATA0 BT_UART_TXD SDIO_CMD R249 BT_UART_RXD...
-
Page 37: Psoc™ 5Lp-Based Kitprog3 (U2)
KIT_XMC72_EVK XMC7200 evaluation kit guide Hardware 4.2.3 PSoC™ 5LP-based KitProg3 (U2) An onboard PSoC™ 5LP (CY8C5868LTI-LP039) is used as KitProg3 to program and debug XMC7200D. The PSoC™ 5LP device connects to the USB port of a PC through a USB connector and to the SWD and other communication interfaces of the XMC7200D. -
Page 38: Serial Interconnection Between Psoc™ 5Lp And Xmc7200D
KIT_XMC72_EVK XMC7200 evaluation kit guide Hardware 4.2.4 Serial interconnection between PSoC™ 5LP and XMC7200D In addition of use as an onboard programmer, the PSoC™ 5LP device functions as an interface for USB-UART and USB-I2C bridges, as shown in Figure 21. The USB-Serial pins of the PSoC™ 5LP device are hard-wired to the I2C/UART pins of the XMC7200D device. -
Page 39: Serial Interconnection Between Psoc™ 5Lp And M.2 Interface
KIT_XMC72_EVK XMC7200 evaluation kit guide Hardware 4.2.5 Serial interconnection between PSoC™ 5LP and M.2 interface The PSoC™ 5LP device also has a secondary UART that is connected to BT_UART of the M.2 interface. KitProg3 Level Translator for Secondary UART and GPIO P5LP_VDD VCC_M2 UART_2_TX... -
Page 40: Power Supply System
KIT_XMC72_EVK XMC7200 evaluation kit guide Hardware 4.2.6 Power supply system The power supply system on this board is versatile, allowing the input supply to come from the following sources: 5 V from the onboard USB Micro-B connectors (J7) • 7 V–12 V from the external power supply through the VIN barrel jack (J6) or from a shield compatible with •... - Page 41 KIT_XMC72_EVK XMC7200 evaluation kit guide Hardware 5V Buck-Boost Regulator VCC_IN VOUT_5V0 5V, 2A 0 OHM 10uF 10uF 10uF 0.1uF 1.5uH 0.1uF 10uF 22uF 22uF 22uF VIN1 VOUT1 VCC_IN VIN2 VOUT2 TP59 BLACK PS/SY NC 100K VAUX 681K 22pF VSEL 0.1uF PGND TPS63070RNMT 130K...
- Page 42 KIT_XMC72_EVK XMC7200 evaluation kit guide Hardware 2.5V Voltage Regulator TP11 VOUT_3V3 VCC_2V5 4.99K TP12 2.5V, 800mA 10uF 0.22uF 100K 2.2nF 7.5K 0.1uF ADJ/FB TPAD RADJ TLS208D1EJVXUMA1 TP13 1.1V Voltage Regulator VOUT_3V3 VCC_1V1 4.99K TP14 1.1V, 800mA 10uF 0.22uF 4.99K 10nF 0.1uF RADJ TPAD...
-
Page 43: Voltage Selection
KIT_XMC72_EVK XMC7200 evaluation kit guide Hardware 4.2.6.2 Voltage selection VBAT has a dedicated regulator that changes voltage by varying the feedback voltage through the resistor network at J8. VTARG has a 3-pin voltage selection header J10 to select between VCC_3V3 or VCC_5V0 voltages. VDDIO2 has a dedicated 2-pin voltage selection header J12 that connects to XMC_VDD which is outcome from J10 (VCC_3V3 or VCC_5V0). -
Page 44: Current Measurement Headers
KIT_XMC72_EVK XMC7200 evaluation kit guide Hardware The I/O voltages for XMC7200 can be selected for VDDD, VDDA, and VDDIO2 I/O domains; this can be switched between VCC_3V3 or VCC_5V0 voltage levels. Voltage levels for VDDIO1, VDDIO3, and VDDIO4 are dedicated to work on 3.3-V supply voltage. -
Page 45: I/O Headers
KIT_XMC72_EVK XMC7200 evaluation kit guide Hardware 4.2.7 I/O headers 4.2.7.1 Headers compatible with Arduino Uno R3 (J1, J2, J3, J4) The board has four headers compatible with Arduino Uno R3: J1, J2, J3, and J4. You can connect 3.3 V or 5 V shields compatible with Arduino Uno R3 to develop applications based on the shield’s hardware. -
Page 46: Can Fd Transceiver
KIT_XMC72_EVK XMC7200 evaluation kit guide Hardware 4.2.8 CAN FD Transceiver The TLE9251V is a high-speed CAN transceiver, operating as an interface between the CAN controller and the physical bus medium. A high-speed CAN network is a two wire, differential network which allows data transmission rates up to 5 Mbit/s. -
Page 47: Leds
KIT_XMC72_EVK XMC7200 evaluation kit guide Hardware 4.2.10 LEDs LED4 (amber) indicates the status of KitProg3 (See the KitProg3 user guide for details). LED5 (amber) power LED indicates the status of power supplied to the board. The board also has three user-controllable LEDs (LED1, LED2, and LED3) connected to XMC7200D pins for user applications. -
Page 48: Crystals And Oscillators
KIT_XMC72_EVK XMC7200 evaluation kit guide Hardware 4.2.12 Crystals and oscillators The board has three crystals: A 32.768-kHz crystal connected to P21[0] and P21[1] as a watch crystal oscillator • A 16-MHz crystal connected to P21[2] and P21[3] of the XMC7200D as the external crystal oscillator •... -
Page 49: Digilent Dual Pmod Smif Header
KIT_XMC72_EVK XMC7200 evaluation kit guide Hardware Decoupling Capacitors VCC_IO_ETH VCC_2V5 C138 C139 C140 C141 C142 C143 C144 C145 C146 C147 Ethernet PHY Power 0.1uF 0.1uF 0.1uF 0.1uF 0.1uF VCC_IO_ETH VCC_1V1 U22B VDDIO_1 VDD1P1_1 VDDIO_2 VDD1P1_2 VCC_1V1 VCC_ETH_1V8 VDDIO_3 VDD1P1_3 VCC_1V8 VCC_2V5 VDD1P1_4 VDDA2P5_1... -
Page 50: Potentiometer
KIT_XMC72_EVK XMC7200 evaluation kit guide Hardware SMIF IO Voltage Level Translator VDDIO3 SMIF_VDDIO VDDIO3 SMIF_VDDIO C130 1uF C131 1uF C132 1uF C133 1uF SMIF_VDDIO SMIF_VDDIO SMIF_DATA0_LT SMIF_DATA0 SMIF_DATA4_LT SMIF_DATA4 I/O VCC4 I/O VL4 I/O VCC4 I/O VL4 SMIF_DATA1_LT SMIF_DATA1 SMIF_DATA5_LT SMIF_DATA5 I/O VCC3 I/O VL3... -
Page 51: Reverse Voltage Protection
KIT_XMC72_EVK XMC7200 evaluation kit guide Hardware 4.2.16 Reverse voltage protection Necessary reverse voltage protection circuit has been provided on the kit to avoid the damage due to reverse supply to the board. Any accidental supply coming as input to the board will be prevented by the circuit protecting the specific regulators and XMC7200 MCU. -
Page 52: Kit Rework
KIT_XMC72_EVK XMC7200 evaluation kit guide Hardware Kit rework 4.3.1 Digilent dual Pmod SMIF header Interface The kit is provisioned with dual Pmod SMIF header (J21, J22) which are by default not loaded on the kit. SMIF memory interface I/Os are shared between SMIF and M.2 (WLAN/Bluetooth®) connector interface. You should perform the necessary rework on the board by removing or adding corresponding connectors and 0-ohm resistors to work with external SMIF memory modules. -
Page 53: Vddio2 Supply Voltage Selection
KIT_XMC72_EVK XMC7200 evaluation kit guide Hardware 4.3.2 VDDIO2 supply voltage selection VDDIO2 is by default connected to the XMC_VDD (VTARG) interface; voltage selection depends on the VTARG selection between 3.3 V and 5 V. To select separate voltage domains for VDDIO2, use the resistor rework option provisioned on the board. -
Page 54: Wlan Uart Interface
KIT_XMC72_EVK XMC7200 evaluation kit guide Hardware 4.3.4 WLAN UART interface The secondary UART from PSoC™ 5LP device is connected to WLAN UART lines of the M.2 connector. You need to perform board rework to use these lines for Bluetooth® UART. Remove 0-ohm resistors R65, R69 and populate R64, R66, R71, R73 for Bluetooth®... -
Page 55: Wlan Sdio Interface
KIT_XMC72_EVK XMC7200 evaluation kit guide Hardware 4.3.7 WLAN SDIO interface On the kit, default connection is made for WLAN SDIO interface which is connected to an M.2 connector. Whenever SMIF (PMOD) memory module is functionally enabled by specific rework, the series resistors connected to the M.2 connector must be removed. -
Page 56: Frequently Asked Questions
KIT_XMC72_EVK XMC7200 evaluation kit guide Hardware Frequently asked questions How does XMC7200 evaluation kit handle voltage connection when multiple power sources are plugged in? There are two different options to power the kit: KitProg3 Micro-B USB connector (J7) − External DC supply via VIN connector (J6) −... - Page 57 KIT_XMC72_EVK XMC7200 evaluation kit guide Hardware Why is the voltage of the kit restricted to 3.3 V? Can’t it drive external 1.8 V interfaces? XMC7200D is not meant to be operated at voltages lower than 2.7 V. Powering the XMC7200D to lower than 2.7 V will stop the chip being powered.
-
Page 58: Revision History
KIT_XMC72_EVK XMC7200 evaluation kit guide Revision history Revision history Major changes since the last revision Date Version Description 2022-03-02 Initial release. User Guide 58 of 59 002-34389 Rev. ** <2022-03>... - Page 59 With respect to any examples, hints or any typical WARNINGS values stated herein and/or any information 81726 Munich, Germany regarding the application of the product, Infineon Due to technical requirements products may contain Technologies hereby disclaims any and all dangerous substances. For information on the types...
Need help?
Do you have a question about the XMC72 KIT EVK XMC7200 and is the answer not in the manual?
Questions and answers