Advertisement
Introduction
Before using this product, please read Important safety instructions.
This manual has instructions on how to set up and pair your new baby unit. For complete instructions on using the baby unit, see the user's manual that comes with your video and audio monitor.
For support, shopping, and everything new at VTech, visit our website at www.vtechphones.com.
Register online to get an additional 3-month warranty!
Visit www.vtechphones.com.

Registration
Register your product online for enhanced warranty support.

Product news
Learn about the latest VTech products.
What's in the box

Connect the baby unit
 NOTES
NOTES

- Use only the power adapter supplied with this product.
- Make sure the electrical outlet is not controlled by a wall switch.
- The power adapter is intended to be correctly oriented in a vertical or floor mount position. The prongs are not designed to hold the plug in place if they are plugged into a ceiling, under-the-table or cabinet outlet.
- Make sure the baby unit and the power adapter cord are out of reach of children.
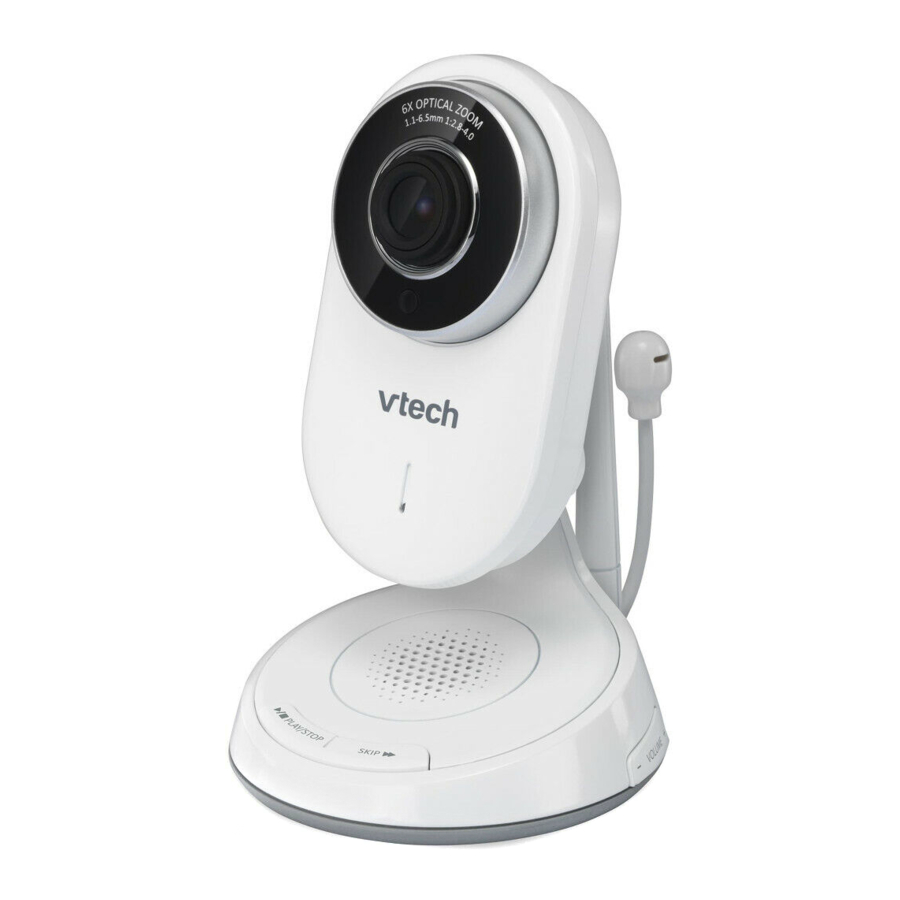
Overview

| 1 | Motorized lens with 6x optical zoom |
| 2 | Light sensor |
| 3 | Microphone |
| 4 | Speaker |
| 5 |
Skip 
|
| 6 |
 Play/Stop Play/Stop
|
| 7 |
- VOLUME +
|
| 8 |
POWER light
|
| 9 | Antenna |
| 10 | Temperature sensor |
| 11 | Power jack |
| 12 |
ON/OFF switch
|
| 13 |
PAIR
|
| 14 |
Threaded socket
|
Before use
Pair new baby unit
Each newly purchased baby unit (VM5231) must be paired to your video and audio monitor system (VM5271 / VM5271-2).
 NOTES
NOTES
- You can pair a maximum of four baby units to your parent unit. Each new baby unit must be paired to the parent unit before use.
- Make sure you power on the parent unit before pairing.
- Press MENU when the parent unit is idle.
- Press
![]() or
or ![]() to choose Pair/Unpair CAM, then press SELECT.
to choose Pair/Unpair CAM, then press SELECT. - Press SELECT again to choose Pair CAM.
- Press
![]() or
or ![]() to choose an empty baby unit slot, then press SELECT.
to choose an empty baby unit slot, then press SELECT. - The parent unit screen displays Press and hold the pair button at the CAM for 5 seconds until the power indicator flashes.. Immediately press and hold PAIR on the bottom of the baby unit. The LED light flashes quickly.
 or
or  to choose Pair/Unpair CAM,
 When pairing is successful, the screen displays the view of newly paired baby unit in SINGLE-CAM mode. The LED light on the new baby unit remains on.
NOTES
- If pairing fails, the screen displays Pairing failed. Try the pairing process again.
- Only one baby unit can be paired at a time.
Positioning the baby monitor

- Keep the baby units out of the reach of your baby. Never place or mount the baby units inside the baby's crib or playpen.
NOTE
- To avoid interference from other electronic devices, place your baby monitor far away from devices such as wireless routers, microwaves, cell phones and computers.
- Place the baby units more than 1 meter (3 feet) away from your baby.

- Adjust the angle of the baby unit camera to aim at your baby.

- Place the parent unit more than 1 meter (3 feet) away from the baby units.


- This baby monitoring system includes a special lens which is capable of optical zoom and requires delicate treatment. Please avoid disassembling, dropping, or any other rough handling.
- The default volume of your parent unit is level 4. If you experience high-pitched screeching noise from your baby monitor while positioning:
- Make sure your baby units and parent unit are more than 1 meter (3 feet) apart, OR
- Turn down the volume of your parent unit.
Mount the baby monitor (optional)
NOTE
- Check for reception strength and camera angle before drilling the holes.
- Place the wall mount bracket on a wall and then use a pencil to mark the top and the bottom holes as shown. Remove the wall mount bracket and drill two holes in the wall (7/32 inch drill bit).

- If you drill the holes into a stud, go to step 3.
-OR-
If you drill the holes into an object other than a stud, insert the wall anchors into the holes. Tap gently on the ends with a hammer until the wall anchors are flush with the wall.
![]()
- Align the wall mount bracket and screws with the holes in the wall as shown. Tighten the screw in the middle hole first, so that the wall mount bracket position is fixed. You can tighten the other screw in the top hole.
Place the baby unit on the wall mount bracket. Tighten the screw into the threaded socket at the bottom to secure the baby unit.

-OR-
Insert the screws into the holes and tighten the screws until only 1/4 inch of the screws are exposed.
Place the baby unit on the wall mount bracket. Tighten the screw into the threaded socket at the bottom to secure the baby unit. Align the holes on the wall mount bracket with the screws on the wall, and slide the wall mount bracket down until it locks into place.

- The default angle of the wall mount bracket is 90 degrees. You can maximize your baby unit's viewing angles by tilting the wall mount bracket.
Hold the baby unit, and then rotate the knob in anticlockwise direction. This will loosen the joint of the wall mount bracket. Tilt your baby unit up or down to adjust to your preferred angle. Then, rotate the knob in clockwise direction to tighten the joint and secure the angle.


Operating range
The operating range of the baby monitor is up to 300 meters (1,000 feet) outdoors or 50 meters (160 feet) indoors. The actual operating range may vary depending on the environmental conditions and other interferences such as walls, doors and other obstructions.
Unpair a baby unit
 NOTE
NOTE
Make sure you power on the baby unit and the parent unit before unpairing the baby unit.
- Press MENU when the parent unit is idle.
- Press
![]() or
or ![]() to choose Pair/Unpair CAM, then press SELECT.
to choose Pair/Unpair CAM, then press SELECT. - Press
![]() or
or ![]() to choose Unpair CAM, then press SELECT.
to choose Unpair CAM, then press SELECT. - Press
![]() or
or ![]() to choose a desired baby unit, then press SELECT.
to choose a desired baby unit, then press SELECT. - The screen displays To unpair CAM X, press the [ZOOM] key at the Parent Unit.. Press
![]() on the parent unit.
on the parent unit. - The screen displays Then, press the [MENU/SELECT] key to confirm.. Press SELECT to continue.
- When unpairing is successful, the screen displays CAM X is unpaired and returns to previous menu. If there is no paired baby unit, the screen displays No CAM is paired./No link to CAM 1?.The LED light on the selected baby unit flashes slowly.
 or
or  to choose Pair/Unpair CAM,
  on the parent unit.
General product care
To keep this product working well and looking good, follow these guidelines:
- Avoid putting it near heating appliances and devices that generate electrical noise (for example, motors or fluorescent lamps).
- DO NOT expose it to direct sunlight or moisture.
- Avoid dropping the product or treating it roughly.
- Clean with a soft cloth.
- DO NOT immerse the baby unit in water and do not clean them under the tap.
- DO NOT use cleaning spray or liquid cleaners.
- Make sure the baby unit is dry before you connect them to the mains again.
- This baby monitoring system includes a special lens which is capable of optical zoom and requires delicate treatment. Please avoid disassembling, dropping, or any other rough handling.
Important safety instructions
When using your equipment, basic safety precautions should always be followed to reduce the risk of fire, electric shock and injury, including the following:
- Follow all warnings and instructions marked on the product.
- Adult setup is required.
- This product is intended as an aid. It is not a substitute for responsible and proper adult supervision and should not be used as such.
- This product is not intended for use as a medical monitor.
- Do not use this product near water. For example, do not use it next to a bath tub, wash bowl, kitchen sink, laundry tub or swimming pool, or in a wet basement or shower.
- Use only the adapters included with this product. Incorrect adapter polarity or voltage can seriously damage the product. Baby unit power adapter: Output: 6V DC 600mA
- The power adapters are intended to be correctly oriented in a vertical or floor mount position. The prongs are not designed to hold the plug in place if it is plugged into a ceiling, under-the-table or cabinet outlet.
- For pluggable equipment, the socket-outlet shall be installed near the equipment and shall be easily accessible.
- Unplug this product from the wall outlet before cleaning. Do not use liquid or aerosol cleaners. Use a damp cloth for cleaning.
- Do not cut off the power adapters to replace them with other plugs, as this causes a hazardous situation.
- Do not allow anything to rest on the power cords. Do not install this product where the cords may be walked on or crimped.
- This product should be operated only from the type of power source indicated on the marking label. If you are not sure of the type of power supply in your home, consult your dealer or local power company.
- Do not overload wall outlets or use an extension cord.
- Do not place this product on an unstable table, shelf, stand or other unstable surfaces.
- This product should not be placed in any area where proper ventilation is not provided. Slots and openings in the back or bottom of this product are provided for ventilation. To protect them from overheating, these openings must not be blocked by placing the product on a soft surface such as a bed, sofa or rug. This product should never be placed near or over a radiator or heat register.
- Never push objects of any kind into this product through the slots because they may touch dangerous voltage points or create a short circuit. Never spill liquid of any kind on the product.
- To reduce the risk of electric shock, do not disassemble this product, but take it to an authorized service facility. Opening or removing parts of the product other than specified access doors may expose you to dangerous voltages or other risks. Incorrect reassembling can cause electric shock when the product is subsequently used.
- You should test the sound reception every time you turn on the units or move one of the components.
- Periodically examine all components for damage.
- Be aware of possible loss of privacy while using public airwaves. Conversations may be picked up by other nursery monitors, cordless phones, scanners, etc.
- Children should be supervised to ensure that they do not play with the product.
- The product is not intended for use by persons (including children) with reduced physical, sensory or mental capabilities, or lack of experience and knowledge, unless they have been given supervision or instruction concerning use of the appliance by a person responsible for their safety.
SAVE THESE INSTRUCTIONS
- Use and store the product at a temperature between 32o F and 104o F
- Do not expose the product to extreme cold, heat or direct sunlight. Do not put the product close to a heating source.
- Make sure the baby unit(s) and the adapter cord(s) are always out of reach of the baby, at least 3 feet away from the baby or crib, to avoid a possible strangulation hazard.
- Never place the baby unit(s) inside the baby's crib or playpen. Never cover the baby unit(s) with anything such as a towel or a blanket.
- Other electronic products may cause interference with your baby monitor. Try installing your baby monitor as far away from these electronic devices as possible: wireless routers, radios, cellular telephones, intercoms, room monitors, televisions, personal computers, kitchen appliances and cordless telephones.
Precautions for users of implanted cardiac pacemakers
Cardiac pacemakers (applies only to digital cordless devices):
Wireless Technology Research, LLC (WTR), an independent research entity, led a multidisciplinary evaluation of the interference between portable wireless devices and implanted cardiac pacemakers. Supported by the U.S. Food and Drug Administration, WTR recommends to physicians that:
Pacemaker patients
- Should keep wireless devices at least six inches from the pacemaker.
- Should NOT place wireless devices directly over the pacemaker, such as in a breast pocket, when it is turned ON.
WTR's evaluation did not identify any risk to bystanders with pacemakers from other persons using wireless devices.
Electromagnetic fields (EMF)
This VTech product complies with all standards regarding electromagnetic fields (EMF). If handled properly and according to the instructions in this user's manual, the product is safe to be used based on scientific evidence available today.
The RBRC® seal
The RBRC® seal on the lithium-ion battery indicates that VTech Communications, Inc. is voluntarily participating in an industry program to collect and recycle these batteries at the end of their useful lives, when taken out of service within the United States and Canada.
The RBRC® program provides a convenient alternative to placing used lithium-ion batteries into the trash or municipal waste, which may be illegal in your area.
VTech's participation in RBRC® makes it easy for you to drop off the spent battery at local retailers participating in the RBRC® program or at authorized
VTech product service centers. Please call 1 (800) 8 BATTERY® for information on Li-ion battery recycling and disposal bans/restrictions in your area. VTech's involvement in this program is part of its commitment to protecting our environment and conserving natural resources.

RBRC® and 1 (800) 8 BATTERY® are registered trademarks of the Rechargeable Battery Recycling Corporation.
FCC and IC regulations
FCC Part 15
This equipment has been tested and found to comply with the requirements for a Class B digital device under Part 15 of the Federal Communications Commission (FCC) rules. These requirements are intended to provide reasonable protection against harmful interference in a residential installation. This equipment generates, uses and can radiate radio frequency energy and, if not installed and used in accordance with the instructions, may cause harmful interference to radio communications. However, there is no guarantee that interference will not occur in a particular installation. If this equipment does cause harmful interference to radio or television reception, which can be determined by turning the equipment off and on, the user is encouraged to try to correct the interference by one or more of the following measures:
- Reorient or relocate the receiving antenna.
- Increase the separation between the equipment and receiver.
- Connect the equipment into an outlet on a circuit different from that to which the receiver is connected.
- Consult the dealer or an experienced radio/TV technician for help.

Changes or modifications to this equipment not expressly approved by the party responsible for compliance could void the user's authority to operate the equipment.
This device complies with Part 15 of the FCC rules.
Operation is subject to the following two conditions:
- this device may not cause harmful interference, and
- this device must accept any interference received, including interference that may cause undesired operation.
To ensure safety of users, the FCC has established criteria for the amount of radio frequency energy that can be safely absorbed by a user or bystander according to the intended usage of the product. This product has been tested and found to comply with the FCC criteria. The baby unit shall be installed and used such that parts of all persons' body are maintained at a distance of approximately 8 in (20 cm) or more.
This Class B digital apparatus complies with Canadian requirement:
CAN ICES-3 (B)/NMB-3(B)
Industry Canada
This device complies with Industry Canada licenceexempt RSS standard(s).
Operation is subject to the following two conditions:
- this device may not cause harmful interference, and
- this device must accept any interference, including interference that may cause undesired operation.
The term ''IC:'' before the certification/registration number only signifies that the Industry Canada technical specifications were met.
This product meets the applicable Innovation, Science and Economic Development Canada technical specifications.
RF radiation exposure statement
The baby unit complies with FCC RF radiation exposure limits set forth for an uncontrolled environment. The baby unit should be installed and operated with a minimum distance of 8 in (20 cm) between the baby unit and all persons' body. Use of other accessories may not ensure compliance with FCC RF exposure guidelines. This transmitter must not be co-located or operating in conjunction with any other antenna or transmitter. This equipment complies also with Industry Canada RSS-102 with respect to Canada's Health Code 6 for Exposure of Humans to RF Fields.
Limited warranty
How long is the limited warranty period?
The limited warranty period for the Product extends for ONE (1) YEAR from the date of purchase. If VTech repairs or replaces a Materially Defective Product under the terms of this limited warranty, this limited warranty also applies to the repaired or replacement Product for a period of either
- 90 days from the date the repaired or replacement Product is shipped to you or
- the time remaining on the original one-year warranty; whichever is longer.
How do you get warranty service?
To obtain warranty service in the USA, please visit our website at www.vtechphones.com or call 1 (800) 595-9511. In Canada, go to www.vtechcanada.com or call 1 (800) 267-7377.
NOTE: Before calling for service, please review the user's manual - a check of the Product's controls and features may save you a service call.
Technical specifications
| Frequency control | Crystal controlled PLL synthesizer |
| Transmit frequency | 2406 - 2475 MHz |
| Channels | 24 |
| Nominal effective range | Maximum power allowed by FCC and IC. Actual operating range may vary according to environmental conditions at the time of use. |
| Power requirements | Output: 6V DC @ 600mA |
Credits:
The Background Noise sound file was created by Caroline Ford, and is used under the Creative Commons license.
The Stream Noise sound file was created by Caroline Ford, and is used under the Creative Commons license.
The Crickets At Night sound file was created by Mike Koenig, and is used under the Creative Commons license.
The Heart Beat sound file was created by Zarabadeu, and is used under the Creative Commons license.

Documents / Resources
References
![www.vtechphones.com]() VTech Cordless Phones Official Site | Best Home Office & Business Phones
VTech Cordless Phones Official Site | Best Home Office & Business Phones![www.vtechcanada.com]() VTech Canada Official Site | Best Home Office & Business Phones
VTech Canada Official Site | Best Home Office & Business Phones
Download manual
Here you can download full pdf version of manual, it may contain additional safety instructions, warranty information, FCC rules, etc.
Advertisement


Need help?
Do you have a question about the VM5231 and is the answer not in the manual?
Questions and answers