Table of Contents
Advertisement
Available languages
Available languages
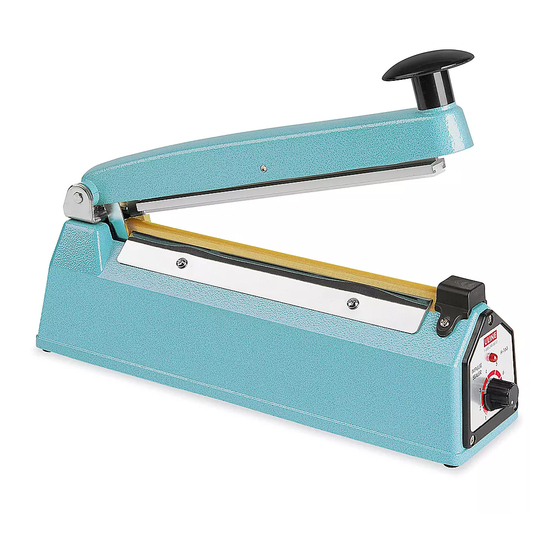
IMPULSE POLY BAG
SEALERS
NOTE: Uline model #s H-161, H-293, H-963 and
H-1252 have cutting blade.
NOTE: Cutter may have a clear, wax coating
that needs to be removed before first use. Use
caution when removing.
NOTE: Uline model #s H-458, H-163, H-190, H-306
and H-1029 do not have cutting blade.
NOTE: Once plugged in, sealer is live. Heat is
only conducted once arm is closed.
CAUTION! To provide continued protection
against risk of electric shock, connect to
properly grounded outlets only.
WARNING! Potential risk of fire or injury. Risk of
electric shock if unit is overturned, overfilled or
if power is not disconnected to clean the unit
or to replace its heating element. Disconnect
the plug from the power source while cleaning
the item or changing its heating element. Keep
children away from this product.
1. Plug the power cord into the outlet and set the timer
knob to the recommended setting based on mil
thickness. (See Recommended Settings Table on
page 3)
2. Put poly bag on the sealing platform and push down
the sealing arm. The sealer will automatically control
the seal time.
PAGE 1 OF 18
BEFORE USE
OPERATING INSTRUCTIONS
3. Once seal is complete, slide the cutter to trim the
4. Release the sealing arm.
Pour le français, consulter les pages 13-18.
NOTE: Check for calibration:
• Vibrations during shipping may have caused
sealer to fall out of calibration. Must check
heating element and microswitch integrity
before using.
• Heating element must be securely attached
at both ends. Check to ensure looped
around tension rod located near center
hinge.
• If microswitch is properly engaged, user will
hear a "click" after pressing arm down. If no
"click", see troubleshooting guide for more
details.
NOTE: The higher the number on the dial,
the longer the heat sealing time. Sealing is
complete when the light turns off.
bag (only on H-161, H-293, H-963 and H-1252).
Para Español, vea páginas 7-12.
1022 IH-161
Advertisement
Table of Contents

Related Manuals for U-Line H-161


Summary of Contents for U-Line H-161
- Page 1 Pour le français, consulter les pages 13-18. IMPULSE POLY BAG SEALERS BEFORE USE NOTE: Uline model #s H-161, H-293, H-963 and NOTE: Check for calibration: H-1252 have cutting blade. • Vibrations during shipping may have caused NOTE: Cutter may have a clear, wax coating sealer to fall out of calibration.
-
Page 2: Replacement Parts
Adhesive remover is recommended. (See Figure 2) SIDE VIEW TOP VIEW Figure 1 Figure 2 REPLACEMENT PARTS MODEL H-161 H-163 H-190 H-293 H-306 H-458 H-963 H-1029 H-1252... -
Page 3: Specifications
PARTS BOTTOM VIEW SEALING ARM Pressure Plate Assembly (H-161, H-293, H-963 and H-1252 only) Pressure Plate Cutting Blade Spring Bracket Assembly Timer Assembly (H-161, H-293, H-963 Timer Connector and H-1252 only) Cutting Blade Plug Sealing Arm Hinge Pin Spring Handle Knob... -
Page 4: Troubleshooting
DIMENSIONS POWER LENGTH THICKNESS H-458 120 V 160 W 4" 8 Mil 3.7 lbs. 2.8 x 8.3 x 5.9" H-161 120 V 410 W 8" 8 Mil 7.7 lbs. 3.2 x 15 x 6.3" H-163 120 V 410 W 8"... - Page 5 TROUBLESHOOTING CONTINUED OPERATING ISSUE RECOMMENDATIONS Sealer stops sealing, but the sealing light still The heating element may need to be adjusted or comes on. replaced. Unplug unit. Remove metal plates and teflon strip to reveal heating element (see photo). Check to ensure element is attached at both ends.
- Page 6 TROUBLESHOOTING CONTINUED OPERATING ISSUE RECOMMENDATIONS If the sealer is not sealing after being plugged in the The timer knob may be set too low. first time. 1. Check setting on timer knob at end of sealer. 2. With the unit plugged in, turn timer clockwise to raise setting and test.
-
Page 7: Antes De Utilizarlo
1. Enchufe el cable al tomacorriente y configure 3. Una vez sellada, deslice la navaja para cortar la el temporizador de acuerdo a la configuración bolsa (solo para H-161, H-293, H-963 y H-1252). recomendada basada en el grosor mil. (Vea Tabla 4. Libere el brazo de sellado. -
Page 8: Partes De Repuesto
Se recomienda utilizar un removedor de adhesivo. (Vea Diagrama 2) VISTA LATERAL VISTA SUPERIOR Diagrama 1 Diagrama 2 PARTES DE REPUESTO MODELO H-161 H-163 H-190 H-293 H-306 H-458 H-963 H-1029 H-1252 KIT DE REPARACIÓN... -
Page 9: Especificaciones
H-963 y H-1252) Resorte de Placa Ensamble del Soporte Presión Ensamble del Temporizador de la Navaja de Corte Navaja de Enchufe del ((solo H-161, H-293, H-963 y H-1252) Corte Temporizador Brazo de Sellado Perno de Ensamble del Bisagra Perilla del Asa Resorte... -
Page 10: Solución De Problemas
IMPULSO SELLADO DE SELLADO H-458 120 V 160 W 4" 8 Mil 3.7 lbs. 2.8 x 8.3 x 5.9" H-161 120 V 410 W 8" 8 Mil 7.7 lbs. 3.2 x 15 x 6.3" H-163 120 V 410 W 8"... - Page 11 CONTINUACIÓN DE SOLUCIÓN DE PROBLEMAS PROBLEMA DE OPERACIÓN RECOMENDACIONES La selladora deja de sellar, pero la luz de sellado La resistencia podría necesitar ajustarse o sigue encendida. reemplazarse. Desconecte la unidad. Retire las placas de metal y la tira de teflón para mostrar la resistencia (vea la foto).
- Page 12 CONTINUACIÓN DE SOLUCIÓN DE PROBLEMAS PROBLEMA DE OPERACIÓN RECOMENDACIONES Si la selladora no sella después de conectarla por La perilla de temporizador podría estar configurada a primera vez. un nivel muy bajo. 1. Verifique la configuración de la perilla de temporizador en el extremo del sellador.
-
Page 13: Avant L'utilisation
SCELLEUSES PAR IMPULSION POUR SACS EN POLYÉTHYLÈNE AVANT L'UTILISATION REMARQUE : Les modèles Uline n° H-161, H-293, H-963 REMARQUE : Vérification de l'étalonnage : et H-1252 comportent une lame de coupe intégrée. • Les vibrations durant l'expédition peuvent REMARQUE : L'outil de coupe peut avoir un avoir déréglé... -
Page 14: Pièces De Remplacement
L'utilisation d'un dissolvant pour adhésif est recommandée. (Voir Figure 2) VUE LATÉRALE VUE DE DESSUS Figure 1 Figure 2 PIÈCES DE REMPLACEMENT MODÈLE H-161 H-163 H-190 H-293 H-306 H-458 H-963 H-1029 H-1252 NÉCESSAIRE DE RÉPARATION... -
Page 15: Spécifications
PIÈCES VUE DE DESSOUS BRAS DE SCELLAGE Plaque de (uniquement sur les modèles pression H-161, H-293, H-963 et Ressort H-1252) plaque Support de lame de coupe pression (uniquement sur les Minuterie modèles H-161, H-293, H-963 et H-1252) Lame de Fiche de connexion... -
Page 16: Dépannage
DE SCELLAGE SCELLAGE H-458 120 V 160 W 4 po 8 mil 3,7 lb 2,8 x 8,3 x 5,9 po H-161 120 V 410 W 8 po 8 mil 7,7 lb 3,2 x 15 x 6,3 po H-163 120 V... - Page 17 DÉPANNAGE SUITE PROBLÈME RECOMMANDATIONS La scelleuse cesse de sceller, mais le voyant continue Il se peut que l'élément chauffant a besoin d'être à s'allumer. ajusté ou remplacé. Débranchez l'appareil. Retirez les plaques en métal et la bande en téflon pour découvrir l'élément chauffant (voir la photo). Vérifiez que l'élément chauffant est fixé...
- Page 18 DÉPANNAGE SUITE PROBLÈME RECOMMANDATIONS Si la scelleuse ne scelle pas après avoir été branchée Le bouton de minuterie est sur un réglage trop faible. pour la première fois. 1. Vérifiez le réglage du bouton de minuterie à l'extrémité de la scelleuse. 2.
Need help?
Do you have a question about the H-161 and is the answer not in the manual?
Questions and answers